Introduction
Thank you for choosing the INUS Dual Nozzle Non-Electric Bidet Attachment. This manual provides essential information for the safe and efficient installation, operation, and maintenance of your new bidet attachment. Please read these instructions thoroughly before installation and retain them for future reference.
Safety Information
- Ensure all connections are tight to prevent leaks. Do not overtighten.
- Use only cold water supply.
- Do not use abrasive cleaners or harsh chemicals on the bidet attachment.
- Turn off the water supply to the toilet before beginning installation or performing maintenance.
- This product is designed for household use only.
What's Included
Verify that all components are present before beginning installation:
- Bidet Main Unit
- T-valve with O-ring
- 1/2 inch bidet hose with O-ring
- Handle
- Mounting plates
- Installation Guide (this manual)

Figure 1: Included Components
Fitting Guide
Before installation, ensure the bidet attachment is compatible with your toilet. Measure your toilet according to the diagram below:
- A: Center of Toilet to Wall: Minimum 11.5 inches
- B: Center of Toilet to Edge of Toilet: Maximum 7.9 inches
- C: Distance Between Toilet Screws: 3.8 to 8.9 inches
- D: Screw to Edge of Toilet Bowl: 1.7 to 4.3 inches

Figure 2: Toilet Measurement Guide
Installation
Follow these steps for a quick and easy installation:
- Turn off Water Supply: Locate the water supply valve behind your toilet and turn it clockwise until the water flow stops. Flush the toilet to drain the tank.
- Remove Toilet Seat: Unscrew the bolts holding your current toilet seat to the toilet bowl. Remove the toilet seat.
- Install Bidet Attachment: Place the INUS bidet attachment on the toilet bowl, aligning the holes with the toilet seat bolt holes. Place the mounting plates over the bidet attachment and reattach your toilet seat. Tighten the bolts to secure the bidet and seat.
- Connect T-Valve: Disconnect the existing water supply hose from the toilet tank. Connect the provided T-valve to the toilet tank's fill valve.
- Connect Bidet Hose: Connect one end of the bidet hose to the T-valve and the other end to the bidet attachment's water inlet. Ensure all connections are hand-tight, then use a wrench for a quarter-turn to secure them without overtightening.
- Restore Water Supply: Slowly turn the water supply valve counter-clockwise to restore water flow. Check for any leaks. If leaks occur, tighten the connections slightly.
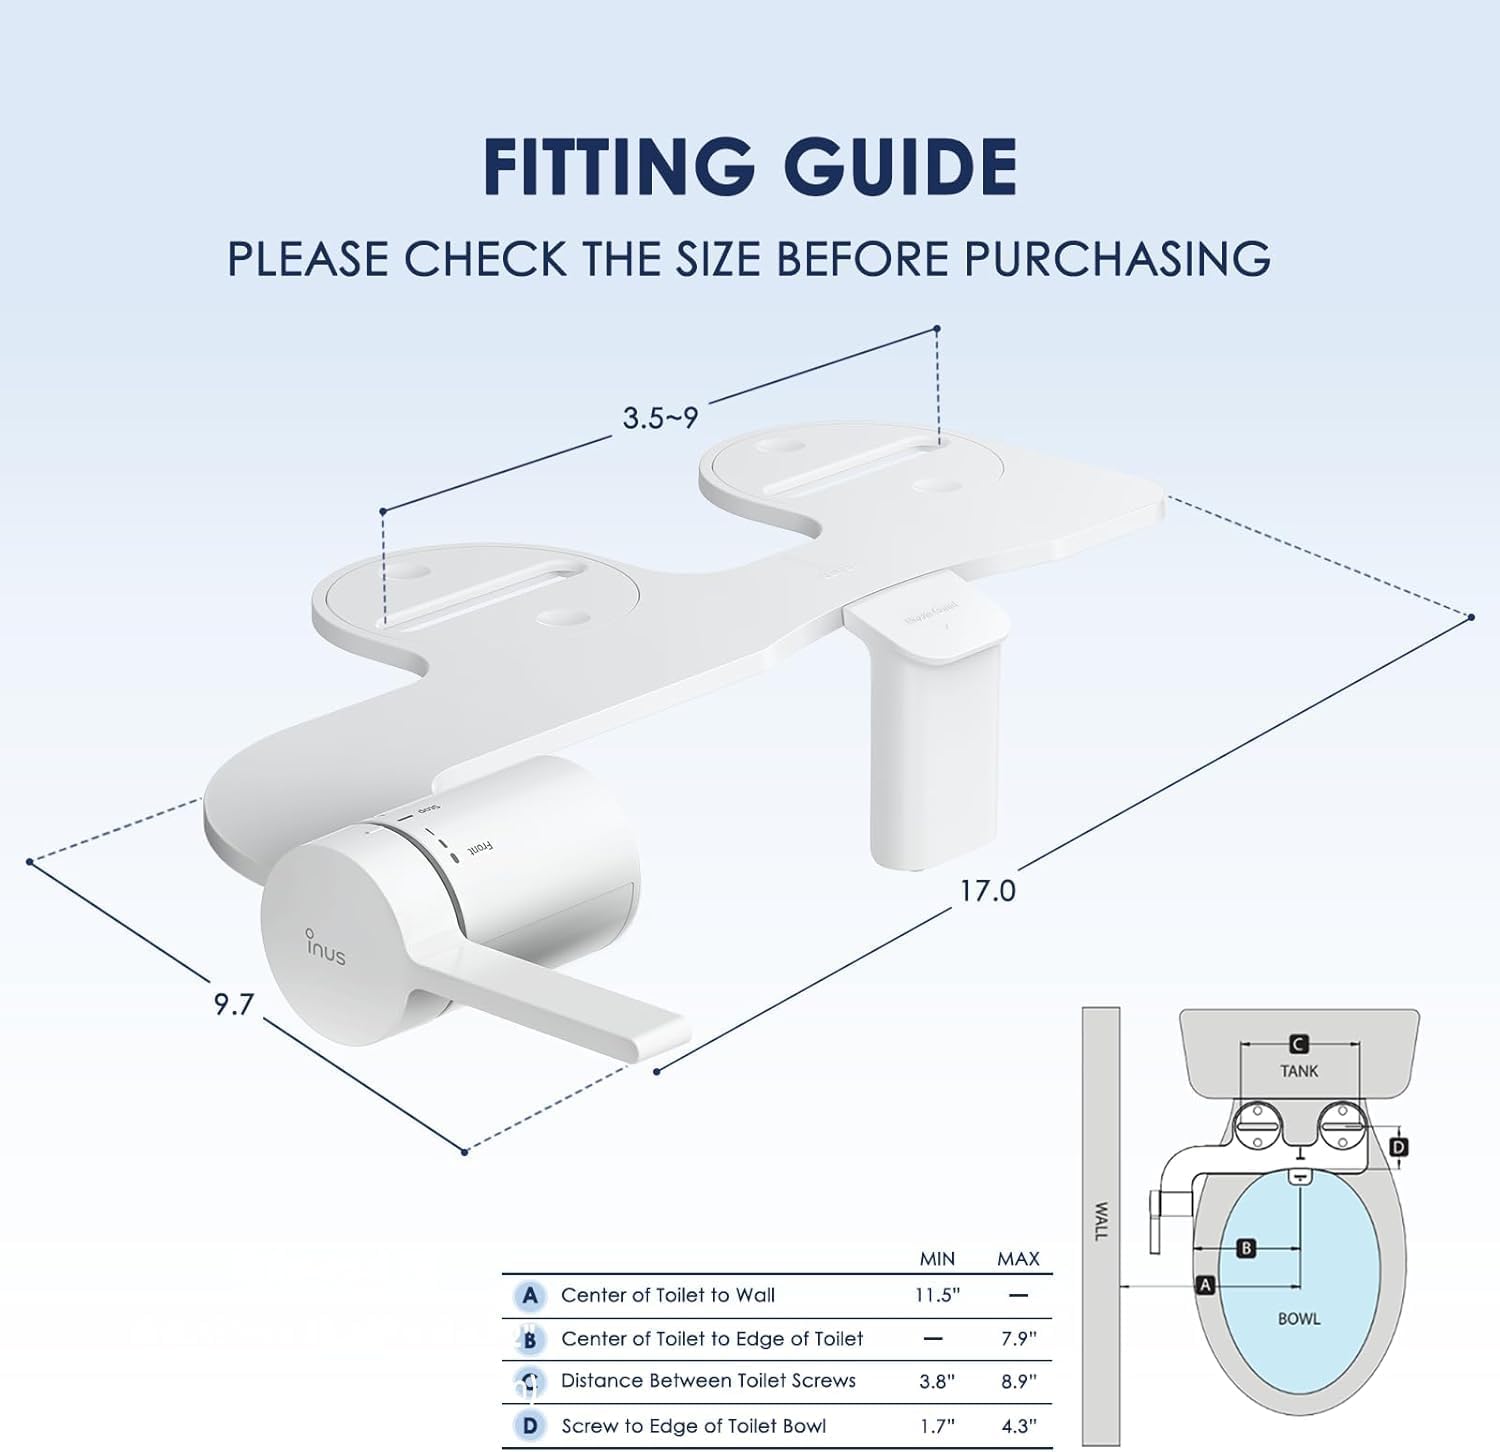
Figure 3: Easy Installation Steps
Installation Videos:
Video 1: This video demonstrates the easy installation process of the INUS Dual Nozzle Bidet Attachment, showing how to connect it to your toilet's water supply.
Video 2: A detailed unboxing and installation guide for the INUS Dual Nozzle Bidet Attachment, highlighting each step from opening the box to final setup.
Video 3: This video showcases the slim, non-electric bidet attachment and its straightforward installation process, emphasizing its design and functionality.
Operation
The INUS bidet attachment features an intuitive control handle for easy operation:

Figure 4: Control Handle Overview
- Rear Wash: Push the handle towards the "Rear" setting for a stronger water flow, specifically angled for posterior cleansing.
- Frontal Wash: Push the handle towards the "Front" setting for a gentle water flow, designed for feminine cleansing.
- Stop: Return the handle to the "Stop" position to cease water flow.
- Adjust Water Pressure: The water pressure can be adjusted by how far you push the handle. A slight push provides lower pressure, while a full push provides maximum pressure.
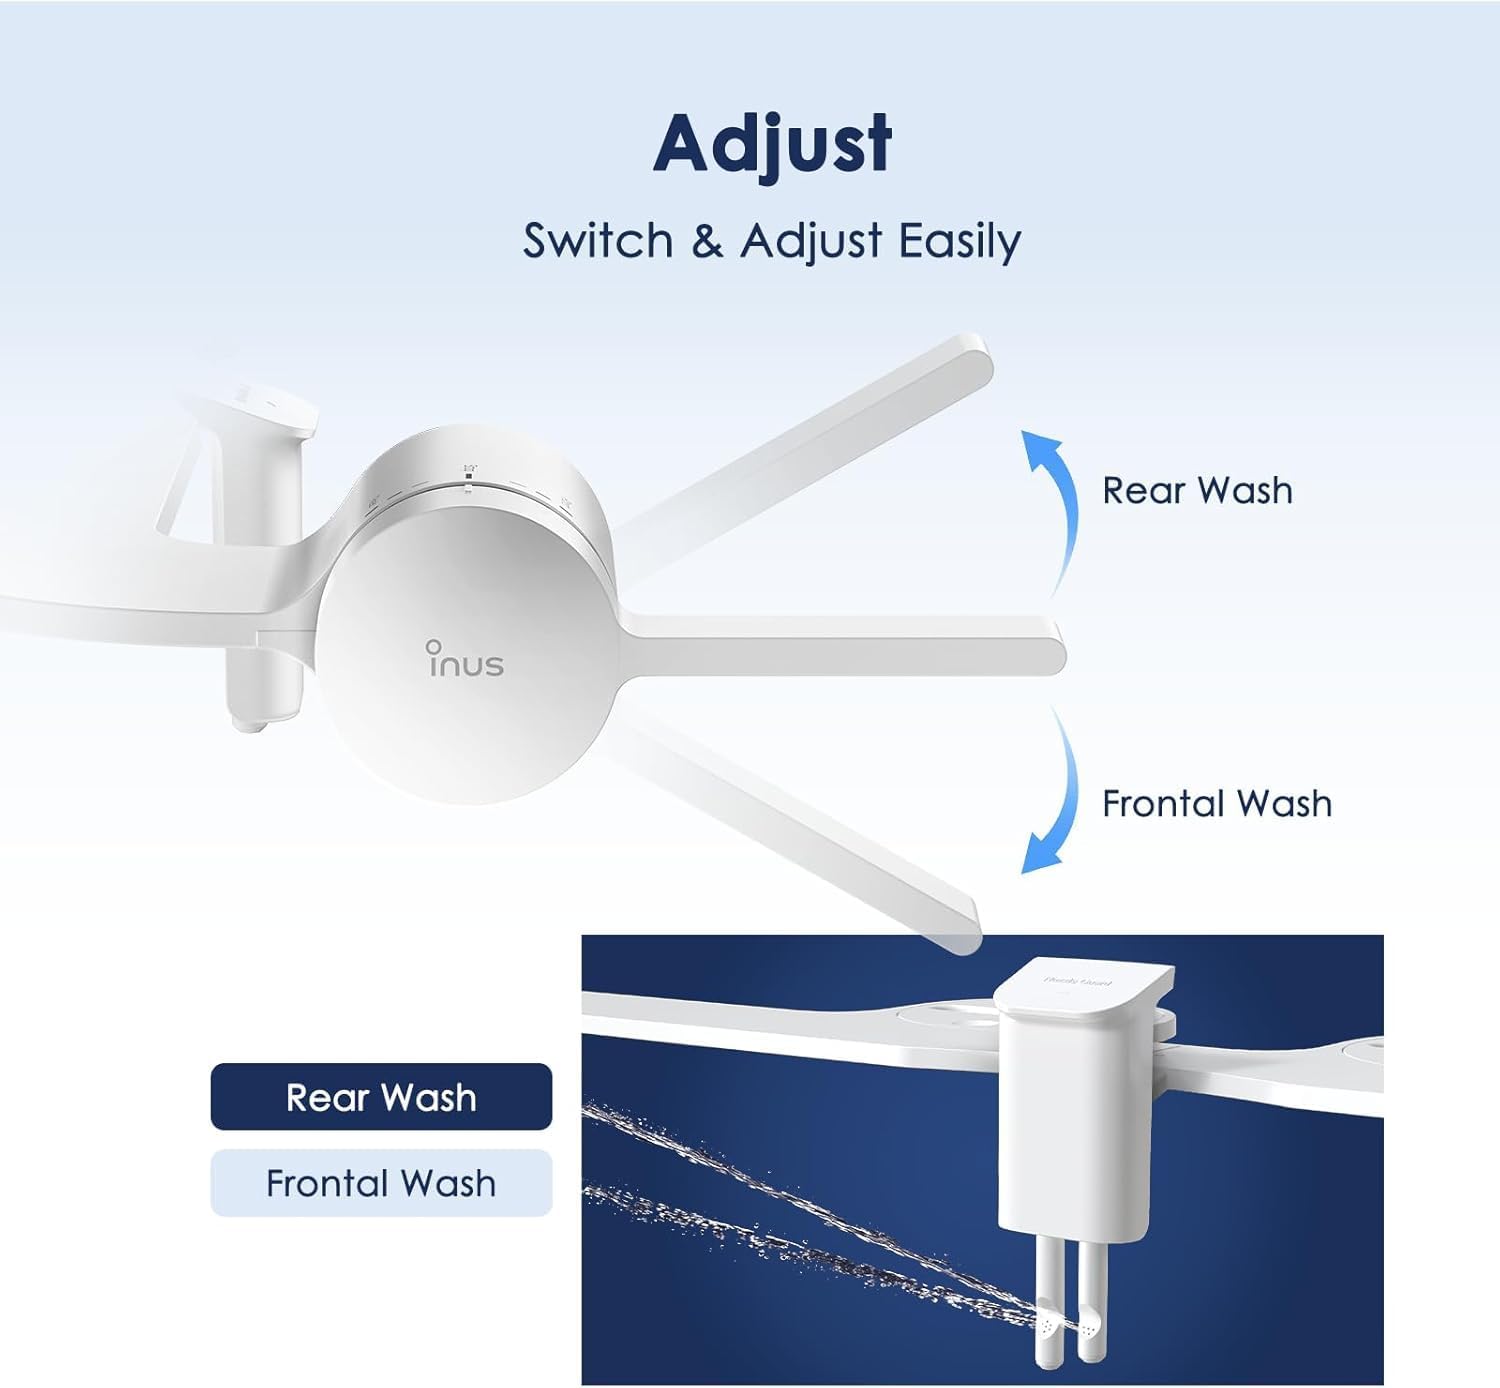
Figure 5: Wash Function Adjustment
Operation Videos:
Video 4: This video highlights the ergonomic design and ease of use of the bidet attachment's control handle for selecting wash modes and adjusting water pressure.
Video 5: A brief demonstration of the INUS Dual Nozzle Bidet Attachment in use, showcasing its functionality for both rear and frontal washes.
Maintenance
Regular cleaning ensures optimal performance and hygiene:
- Nozzle Cleaning: The bidet features a self-cleaning nozzle. To activate, simply turn the handle to the desired wash setting while not seated, allowing water to rinse the nozzles.
- Exterior Cleaning: Wipe the exterior of the bidet attachment with a soft, damp cloth and a mild, non-abrasive cleaner. Do not use harsh chemicals, bleach, or abrasive pads, as these can damage the finish.
- Deep Cleaning: For a more thorough cleaning, you can temporarily remove the bidet attachment by reversing the installation steps. Clean all surfaces and reattach.
Troubleshooting
| Problem | Possible Cause | Solution |
|---|---|---|
| Water Leakage | Loose connections, worn O-rings. | Ensure all connections (T-valve, bidet hose) are securely tightened. Check O-rings for proper seating and damage. Replace if necessary. |
| No Water Flow | Water supply valve closed, clogged nozzle. | Verify the toilet's water supply valve is fully open. Check nozzles for blockages and clean if necessary. |
| Weak Water Pressure | Partially closed water supply, low household water pressure. | Ensure the toilet's water supply valve is fully open. If household water pressure is generally low, a water pressure booster may be needed (not included). |
| Toilet Seat Not Flat | Bidet attachment not properly seated or incompatible toilet seat. | Ensure the bidet attachment is correctly aligned and secured. Some toilet seats may require spacers (not included) to sit flat over the bidet. |
Specifications
- Brand: INUS
- Model: INUS
- Type: Non-Electric Bidet Attachment
- Nozzles: Dual Nozzle (Rear & Frontal Wash)
- Weight: 1.74 pounds
- Package Dimensions: 16.97 x 9.72 x 4.37 inches
- Included Components: Bidet attachment, T-valve, bidet hose, mounting plates.
- Power Source: No batteries or electricity required.
Warranty and Support
For warranty information or technical support, please refer to the manufacturer's official website or contact their customer service directly. Contact details are typically provided on the product packaging or the manufacturer's website.