Introduction
This manual provides detailed instructions for the installation, operation, and maintenance of the eMylo RF Wireless Relay Module. This device is designed to provide wireless control for various electrical appliances, such as lights, fans, and other common household devices, using 433MHz radio frequency technology. Please read this manual thoroughly before installation and use to ensure safe and correct operation.
Safety Information
- Electrical Hazard: Installation should only be performed by qualified personnel or individuals with a thorough understanding of electrical wiring. Always disconnect power at the main circuit breaker before performing any wiring.
- Voltage Compatibility: This module operates with AC 220-240V. Ensure your power supply matches this requirement.
- Maximum Load: Do not exceed the maximum load of 1000W. Overloading can cause damage to the module and create a fire hazard.
- Indoor Use: This device is primarily designed for indoor use. Ensure it is protected from moisture and extreme temperatures.
- Interference: While designed to be interference-free, keep the module away from strong electromagnetic fields.
Product Overview
The eMylo RF Wireless Relay Module consists of a receiver module and one or more remote controls. The receiver module is compact and designed for easy integration into existing electrical systems.
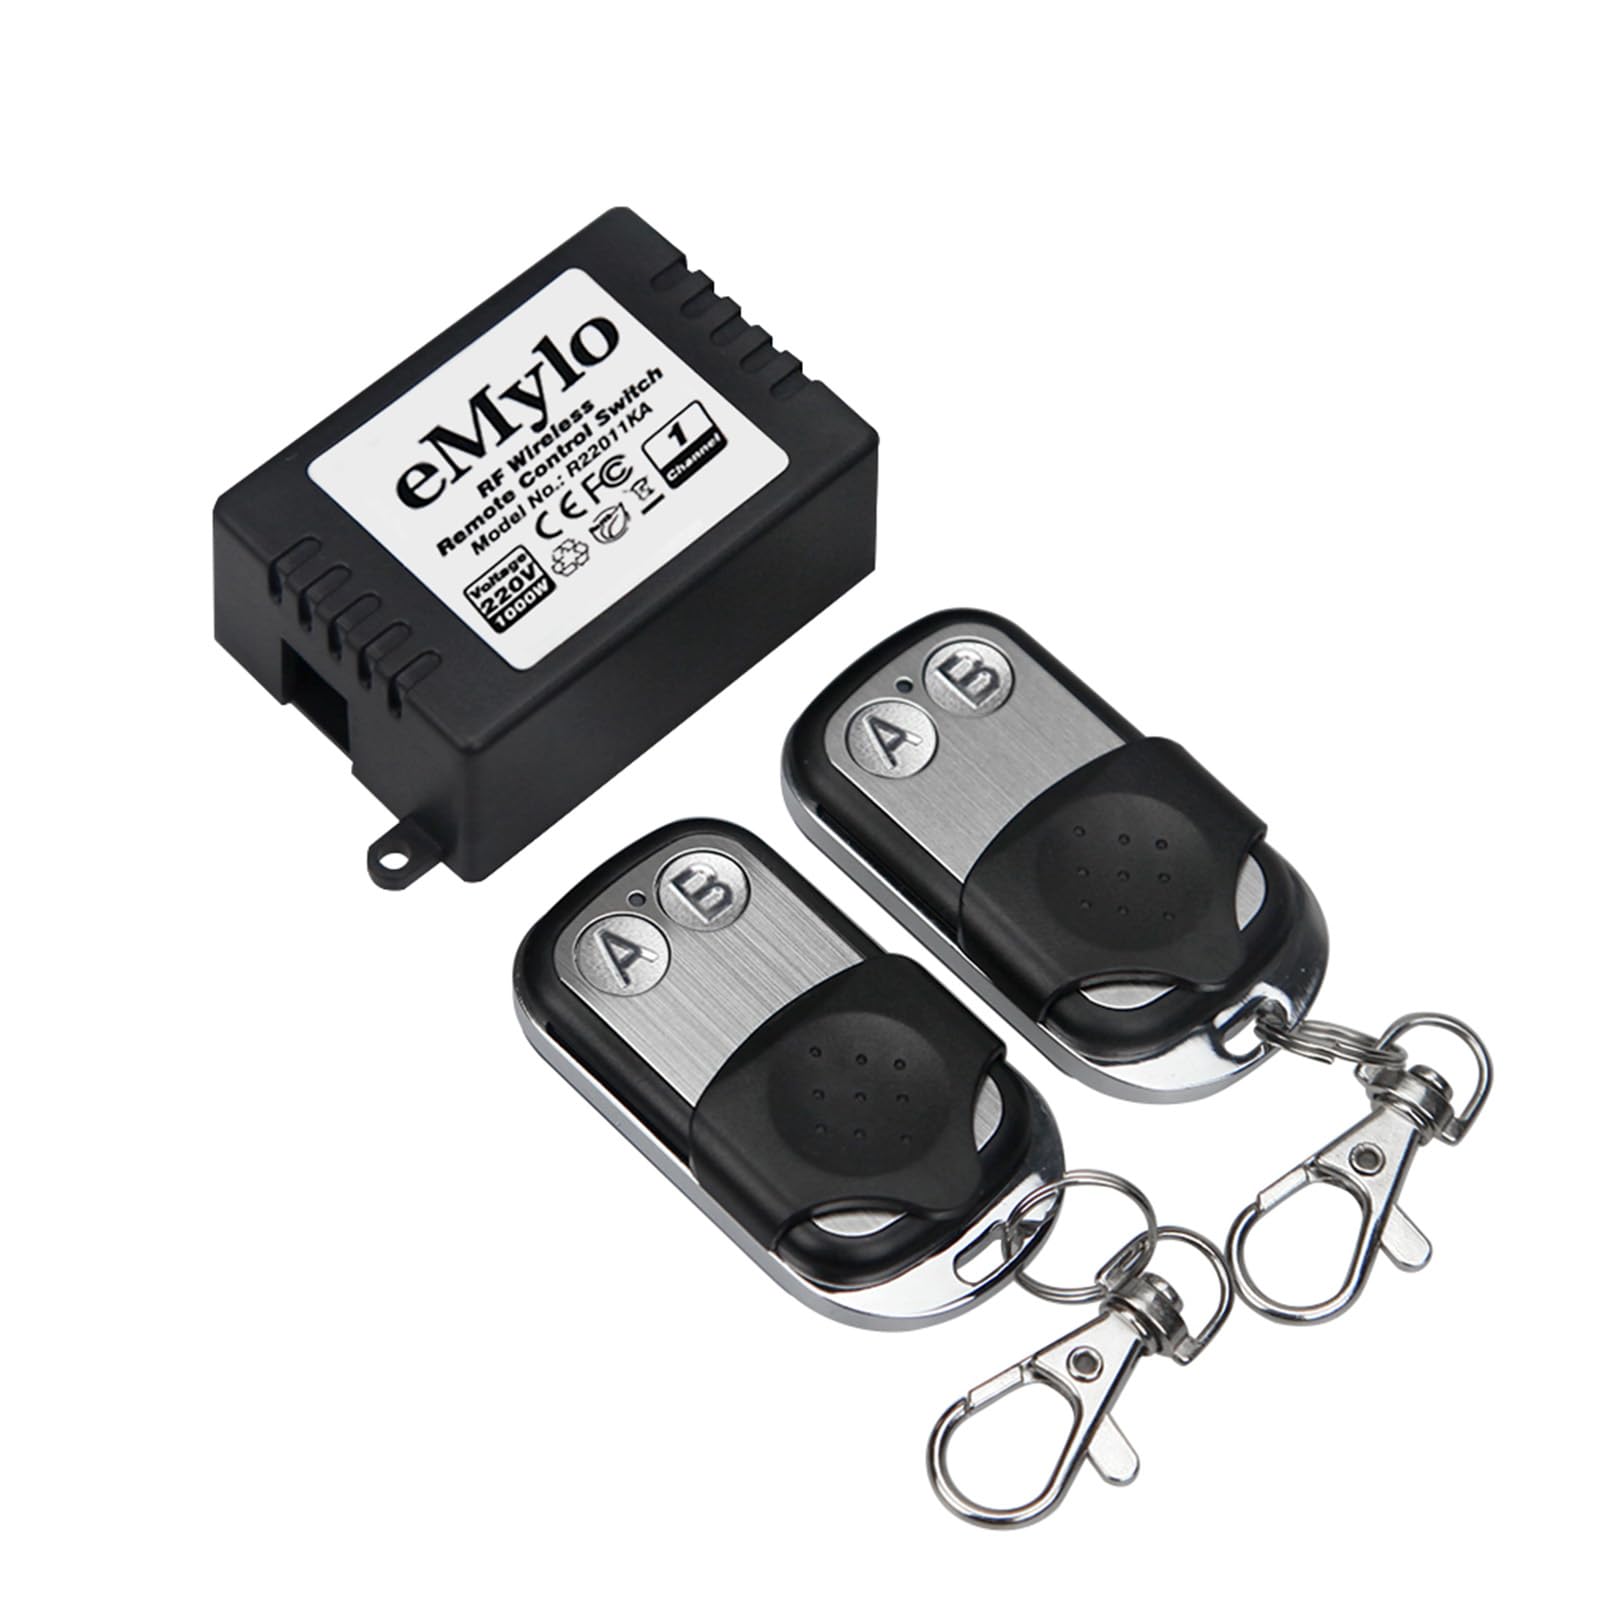
Image: The eMylo RF Wireless Relay Module and its accompanying remote control, showing approximate dimensions of 23mm (0.91in) in height and 35mm (1.46in) in width for the module.

Image: The eMylo RF Wireless Relay Module shown with two remote controls, highlighting the compact design of both components.
Specifications
| Feature | Specification |
|---|---|
| Brand | Yasorn (eMylo) |
| Model | YSAA155 |
| Operating Voltage | AC 220-240V |
| Maximum Wattage | 1000W |
| RF Frequency | 433MHz |
| Control Distance | Up to 30 meters (open area) |
| Operating Modes | Momentary, Latched, Toggle |
| Material | ABS and Metal (Contact Material: Silver) |
| Number of Terminals | 2 |
| Certifications | CE |
Setup and Installation
The eMylo RF Wireless Relay Module is designed for DIY installation. Follow these steps carefully. If you are unsure about any step, consult a qualified electrician.
- Power Disconnection: Before starting any wiring, ensure the main power supply to the circuit you are working on is completely disconnected at the circuit breaker.
- Wiring the Module:
- Connect the AC 220-240V input wires to the designated input terminals on the relay module.
- Connect the load (e.g., light fixture, fan) to the output terminals of the relay module. Ensure the load's wattage does not exceed 1000W.
- Ensure all connections are secure and properly insulated.
- Mounting: Mount the module in a suitable, protected location, such as inside a junction box or electrical enclosure. The module supports DIN rail mounting.
- Power Reconnection: Once all wiring is complete and secure, restore power to the circuit.

Image: Illustration of typical applications for the eMylo RF Wireless Relay Module, including lights, fans, refrigeration, wireless doorbells, and security alarms.
Operating Modes and Pairing
The module supports three operating modes: Momentary, Latched, and Toggle. Each mode offers a different control behavior. The pairing process involves setting the desired mode and linking the remote control to the receiver.

Image: Visual guide demonstrating the setup and behavior of Momentary, Latched, and Toggle operating modes for the relay module and remote control.
1. Momentary Mode
In Momentary mode, the relay activates only while the remote button is pressed. Releasing the button deactivates the relay.
- Press the learning button on the receiver module one time. The LED indicator will flash 3 times.
- Press the desired button (e.g., 'A') on the remote control. The receiver's LED will flash to confirm successful pairing.
2. Latched Mode
In Latched mode, pressing one button (e.g., 'A') on the remote activates the relay, and it remains active until another button (e.g., 'B') is pressed to deactivate it.
- Press the learning button on the receiver module two times continuously. The LED indicator will flash 3 times.
- Press button 'A' on the remote control. The receiver's LED will flash.
- Press button 'B' on the remote control. The receiver's LED will flash again to confirm successful pairing.
3. Toggle Mode
In Toggle mode, each press of the same remote button alternates the relay's state (ON/OFF).
- Press the learning button on the receiver module three times continuously. The LED indicator will flash 3 times.
- Press the desired button (e.g., 'A') on the remote control. The receiver's LED will flash to confirm successful pairing.
Clearing Paired Remotes
To clear all paired remote controls from the receiver module:
- Press and hold the learning button on the receiver module for approximately 8 seconds until the LED indicator flashes rapidly and then turns off. This indicates all paired remotes have been cleared.
Operation
Once paired, the remote control can operate the relay module from a distance. The 433MHz RF technology allows the signal to penetrate walls, doors, and floors, providing a control range of up to 30 meters in open areas.

Image: A visual representation of the remote control's effective range of 30 meters, demonstrating its ability to transmit signals through common household obstacles like walls and doors for both indoor and outdoor use.
The system supports flexible control configurations:
- Multiple Remotes to One Receiver: A single receiver module can be controlled by multiple remote controls. This is useful for controlling a single device from different locations.
- One Remote to Multiple Receivers: A single remote control can be paired with and control multiple receiver modules. This allows for centralized control of several devices.
- Independent Control: The independent coding technology ensures that different modules and remotes do not interfere with each other, allowing for reliable operation in multi-device environments.

Image: An architectural diagram illustrating how multiple eMylo RF Wireless Relay Modules can be independently controlled within different rooms of a house, emphasizing no mutual interference.
Maintenance
- Cleaning: Use a soft, dry cloth to clean the module and remote control. Do not use liquid cleaners or solvents.
- Battery Replacement (Remote Control): If the remote control's range decreases or it becomes unresponsive, the battery may need replacement. Refer to the remote control's specific instructions for battery type and replacement procedure.
- Durability: The module is constructed from high-quality ABS and metal for long-term reliability. Avoid physical impact or exposure to harsh conditions.
Troubleshooting
| Problem | Possible Cause | Solution |
|---|---|---|
| Module does not respond to remote. | No power to module; Remote battery low/dead; Remote not paired; Incorrect operating mode set. | Check power connections; Replace remote battery; Re-pair the remote control following the "Operating Modes and Pairing" section; Verify the correct operating mode is set. |
| Reduced remote control range. | Obstacles (thick walls, metal structures); Interference from other RF devices; Low remote battery. | Minimize obstacles between remote and module; Move module or remote away from sources of interference; Replace remote battery. |
| Module behaves unexpectedly (e.g., turns off instead of on). | Incorrect operating mode set during pairing. | Clear all paired remotes and re-pair the remote control, ensuring the desired operating mode is selected. |
Warranty and Support
Warranty: Specific warranty details for the eMylo RF Wireless Relay Module are not provided in this manual. Please refer to the seller or manufacturer's official website for current warranty information and terms.
Technical Support: For technical assistance, troubleshooting beyond this manual, or inquiries regarding product functionality, please contact your retailer or the manufacturer directly. Contact information can typically be found on the product packaging or the manufacturer's official website.
