1. Introduction
This manual provides detailed instructions for the installation, operation, and maintenance of your Clouree Wireless Home Security System Solar Alarm System. Please read this manual thoroughly before using the product to ensure proper function and safety. This system is designed to enhance security with its 433MHz radio interface, solar-powered siren, PIR motion sensors, and door/window sensors.
2. Package Contents
Verify that all components are present in your package:
- Alarm Siren x1
- PIR Motion Sensor x2
- Door/Window Sensor x3
- Remote Control x2
- User Manual x1
3. Safety Information
Observe the following safety precautions to prevent damage to the product or injury to yourself:
- Do not attempt to disassemble or repair the device yourself. Refer to qualified service personnel.
- Keep the device away from extreme temperatures, direct sunlight, and moisture.
- Ensure the solar panel is clean and unobstructed for optimal charging.
- Use only specified power sources and accessories.
- Dispose of batteries and electronic components according to local regulations.
4. Setup
4.1. Initial Siren Activation
Before first use, activate the siren by turning on its internal switch. This is typically located under a cover on the back of the unit.

Image: The main Clouree Solar Alarm Siren unit, showing its solar panel and red strobe light. This image illustrates the primary component of the security system.
4.2. Pairing Remote Controls
To pair a remote control with the siren:
- Press and hold the 'Settings' key on the siren until it beeps once and the indicator light flashes once.
- Release the 'Settings' key.
- Press any key on the remote control. The siren will confirm successful pairing with a beep and flash.
Refer to the video below for a visual guide on pairing the remote control.
Video: This video demonstrates the process of pairing the remote control with the outdoor solar siren, showing the steps to activate pairing mode and confirm connection.
4.3. Pairing Wireless Detectors (PIR Motion Sensor, Door/Window Sensor)
To pair a wireless detector:
- Press and hold the 'Settings' key on the siren until it rings twice and the indicator light flashes twice.
- Release the 'Settings' key.
- Trigger the detector (e.g., open a door with the door sensor, or move in front of the PIR sensor). The siren will confirm successful pairing.

Image: A PIR motion sensor mounted on a wall, illustrating its 32ft (10m) range and 110-degree field of view for detecting movement.

Image: Multiple door/window sensors installed on different entry points like doors and drawers, demonstrating their versatility in securing various parts of a home.
4.4. Connecting to an Alarm Panel (Host Computer)
The solar siren can be connected to a compatible 433MHz alarm panel. There are two methods for connection:
Method 1:
- Short press the S3 button on the siren. The siren's red light will blink and it will beep.
- On your alarm panel, press any key. The panel will confirm successful connection.
Method 2:
- Navigate to 'Menu' -> 'Parts' -> 'Siren' on your alarm panel.
- Short press the S3 button on the siren. The siren's red light will blink and it will beep.
- Select 'Siren' on the alarm panel to confirm connection.
For a visual demonstration of connecting the siren to a host alarm panel, please watch the video below.
Video: This video illustrates how to connect the outdoor siren to a main alarm panel, detailing two different methods for successful integration.

Image: A compatibility chart showing various host alarm panel models (PG-103, PG-105, PG-107, PG-108, PG-109, PG-106) and their applicability with the entry sensor, indicating that the entry sensor only works for 433MHz home security systems.
5. Operating Instructions
5.1. Arming the System
Press the Arm button on your remote control or alarm panel to activate the security system. The siren will emit a confirmation sound and flash, indicating that the system is armed.
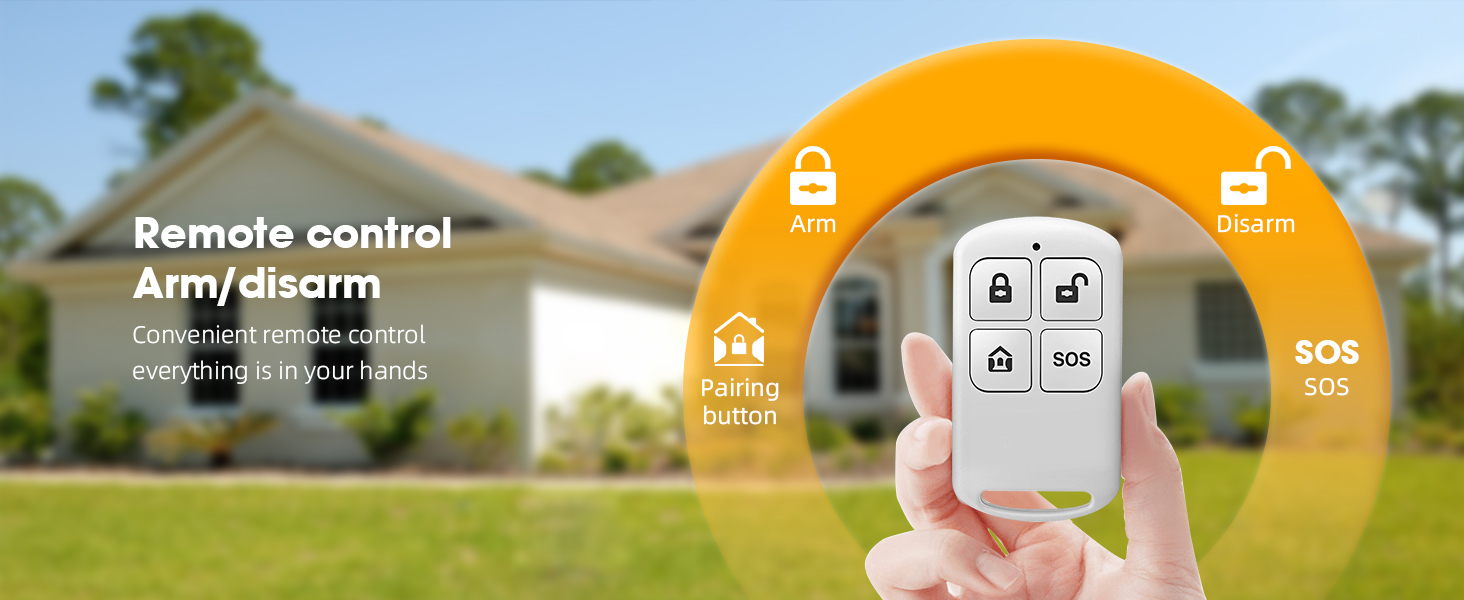
Image: A remote control with buttons for Arm, Disarm, SOS, and a Pairing button, demonstrating convenient control over the security system.
5.2. Disarming the System
Press the Disarm button on your remote control or alarm panel to deactivate the security system. The siren will emit a confirmation sound and flash, indicating that the system is disarmed.
5.3. Emergency (SOS) Function
In an emergency, press the SOS button on your remote control. The siren will activate immediately, emitting a loud alarm and flashing lights to alert others.
5.4. Alarm Trigger
When a paired sensor (PIR motion sensor or door/window sensor) is triggered while the system is armed, the solar alarm siren will activate. It will emit a 110-decibel sound and flash red LED lights to deter intruders and alert nearby individuals.

Image: A sound level meter measuring 100dB next to the solar alarm siren, emphasizing its high-pitched alarm with a strong deterrent effect.
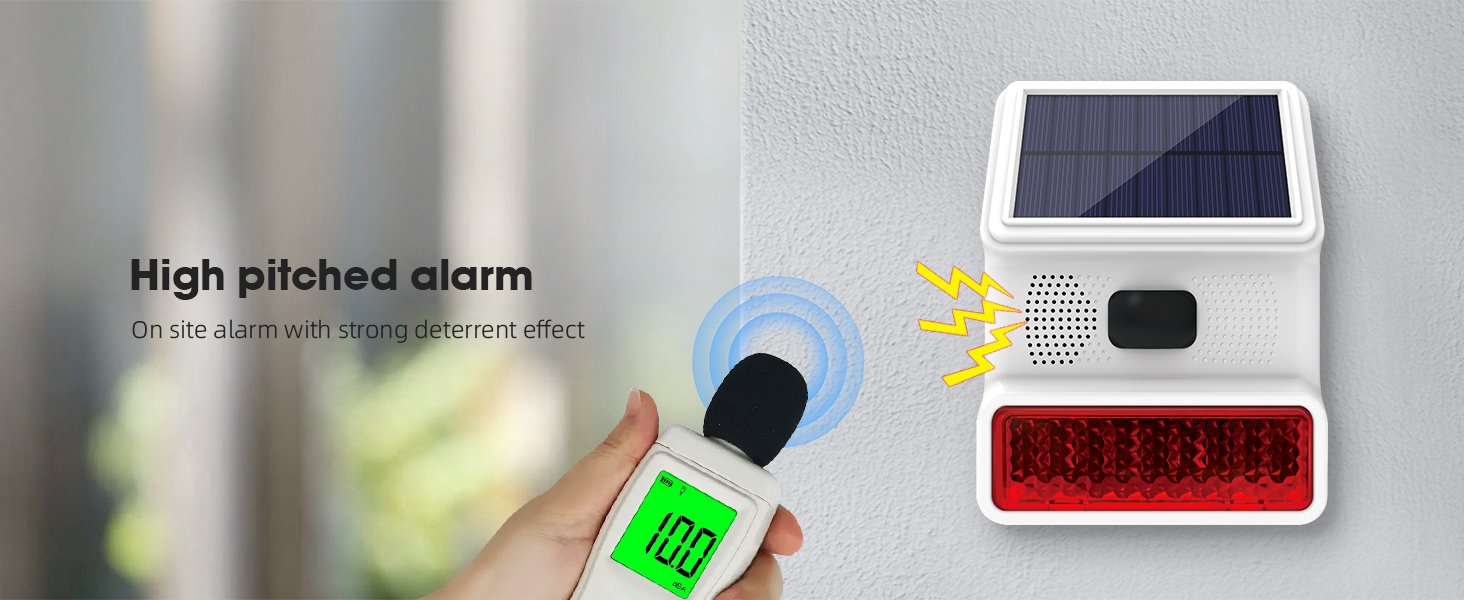
Image: A visual representation of the high-pitched alarm from the siren, highlighting its strong deterrent effect.
6. Maintenance
To ensure the longevity and optimal performance of your security system:
- Solar Panel: Regularly clean the solar panel on the siren to remove dust, dirt, or debris that may obstruct sunlight and reduce charging efficiency.
- Battery: The siren has a built-in 1000mAh battery. Ensure it receives adequate sunlight for charging. If the battery level is low, the system may indicate a low voltage alarm.
- Sensors: Periodically check all PIR motion sensors and door/window sensors for proper placement and functionality. Ensure they are free from obstructions.
- Weatherproofing: The siren has an IP65 rating, making it durable in various weather conditions. However, avoid direct high-pressure water jets.

Image: A diagram illustrating the built-in 1000mAh battery within the solar alarm siren, emphasizing its capacity for long-lasting endurance.
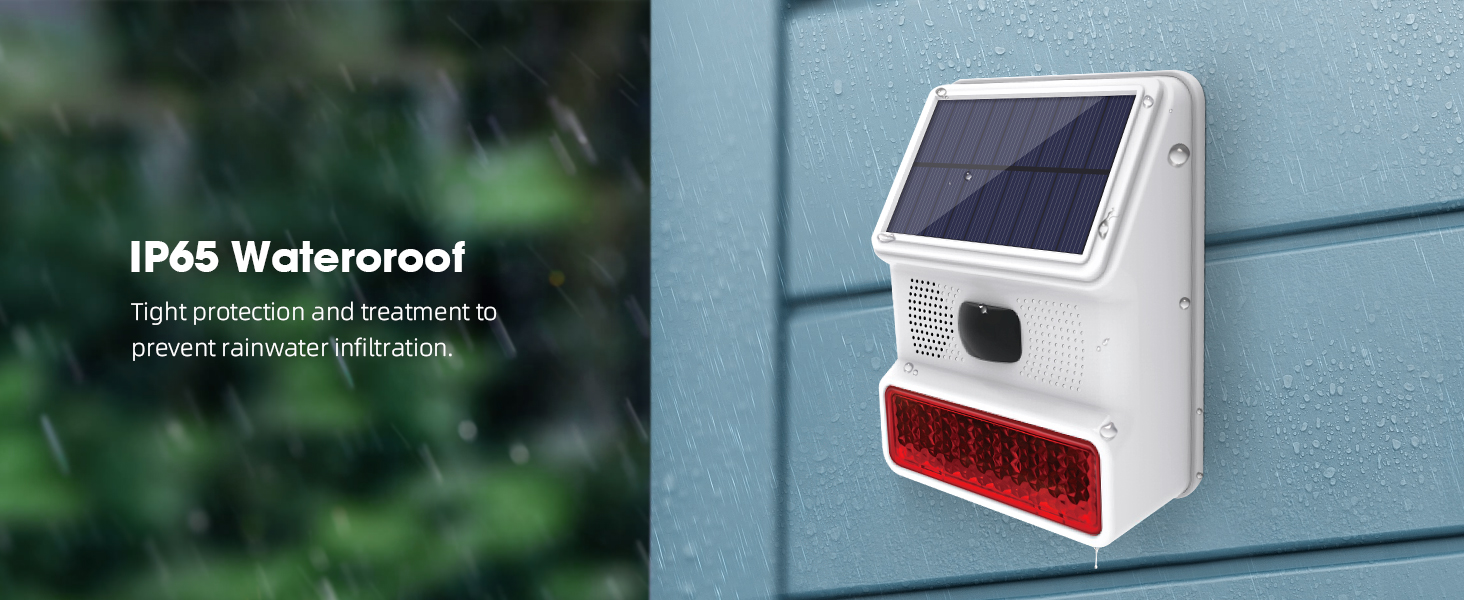
Image: The solar alarm siren mounted outdoors during rainfall, highlighting its IP65 waterproof rating and tight protection against rainwater infiltration.
7. Troubleshooting
If you encounter issues with your Clouree Wireless Home Security System, refer to the following common problems and solutions:
- Siren not activating:
- Ensure the internal switch is turned ON.
- Check if the siren battery is charged (allow sufficient sunlight exposure).
- Verify that sensors and remote controls are correctly paired.
- Sensors not triggering alarm:
- Confirm the system is armed.
- Check battery levels of the sensors.
- Ensure sensors are within the wireless range (up to 30m) of the siren.
- Verify proper installation and alignment of door/window sensors.
- Ensure PIR motion sensors are not obstructed and are placed correctly for detection.
- Pairing issues:
- Follow the pairing steps precisely as described in Section 4.
- Ensure you are pressing the correct 'Settings' key for the required number of beeps/flashes.
- If issues persist, contact customer support.
- False alarms:
- Adjust the sensitivity of PIR motion sensors if available.
- Ensure PIR sensors are not facing direct sunlight, heat sources, or moving objects (e.g., curtains near a vent).
- Verify door/window sensors are securely mounted and not accidentally triggered by vibrations.
8. Specifications
| Feature | Specification |
|---|---|
| Brand | Clouree |
| Model Number | CL523-US-B-2 |
| Power Source | Solar Powered |
| Connectivity Technology | Wireless (433MHz) |
| Siren Loudness | 110dB |
| Weatherproof Rating | IP65 |
| PIR Motion Sensor Range | Up to 30 meters (32ft) |
| PIR Motion Sensor Field of View | 110 degrees |
| Siren Battery | 1000mAh (Built-in) |
| Control Method | Remote Control |
| Item Weight | 0.61 Kilograms (1.34 pounds) |
| Product Dimensions (L x W x H) | 1 x 1 x 1 inches (Approximate) |
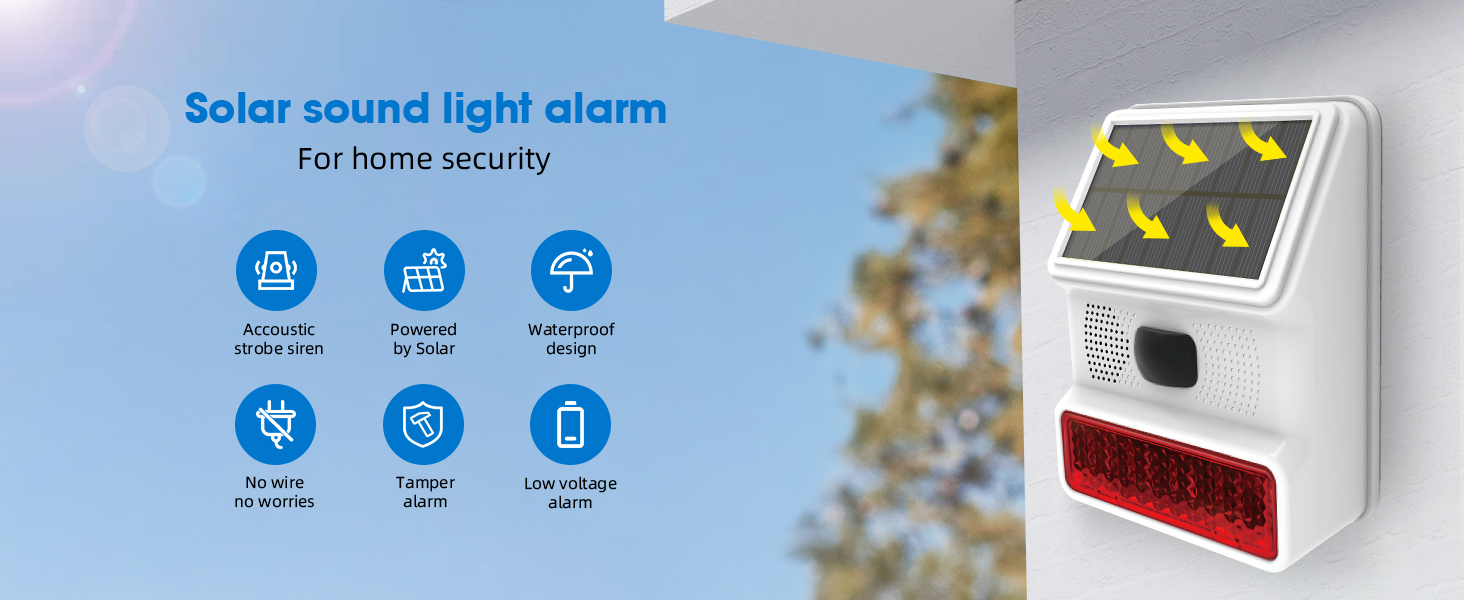
Image: An overview of the solar sound strobe light alarm, highlighting key features such as acoustic strobe siren, solar power, waterproof design, wireless operation, tamper alarm, and low voltage alarm.

Image: Various application scenarios for the security system, including courtyard, outdoors, warehouse, school, and garage, demonstrating its versatility.

Image: An illustration of the panoramic coverage and wide detection range of the system, showing a 100-degree detection angle and a distance of 6-8 meters.
9. Warranty and Support
For warranty information or technical support, please refer to the contact details provided with your purchase or visit the official Clouree website. If you have pairing issues or any other concerns, do not hesitate to contact customer service.


