1. Introduction
The ROQIOO DC01 Digital Camera is designed for young users, offering a user-friendly experience to capture high-quality photos and videos. This compact camera features a high-performance CMOS sensor, 48MP photo resolution, 1080P FHD video recording, and innovative autofocus. It is equipped with a 16x digital zoom, various creative filters, and anti-shake technology to ensure clear and stable images. This manual provides detailed instructions for setting up, operating, maintaining, and troubleshooting your camera.
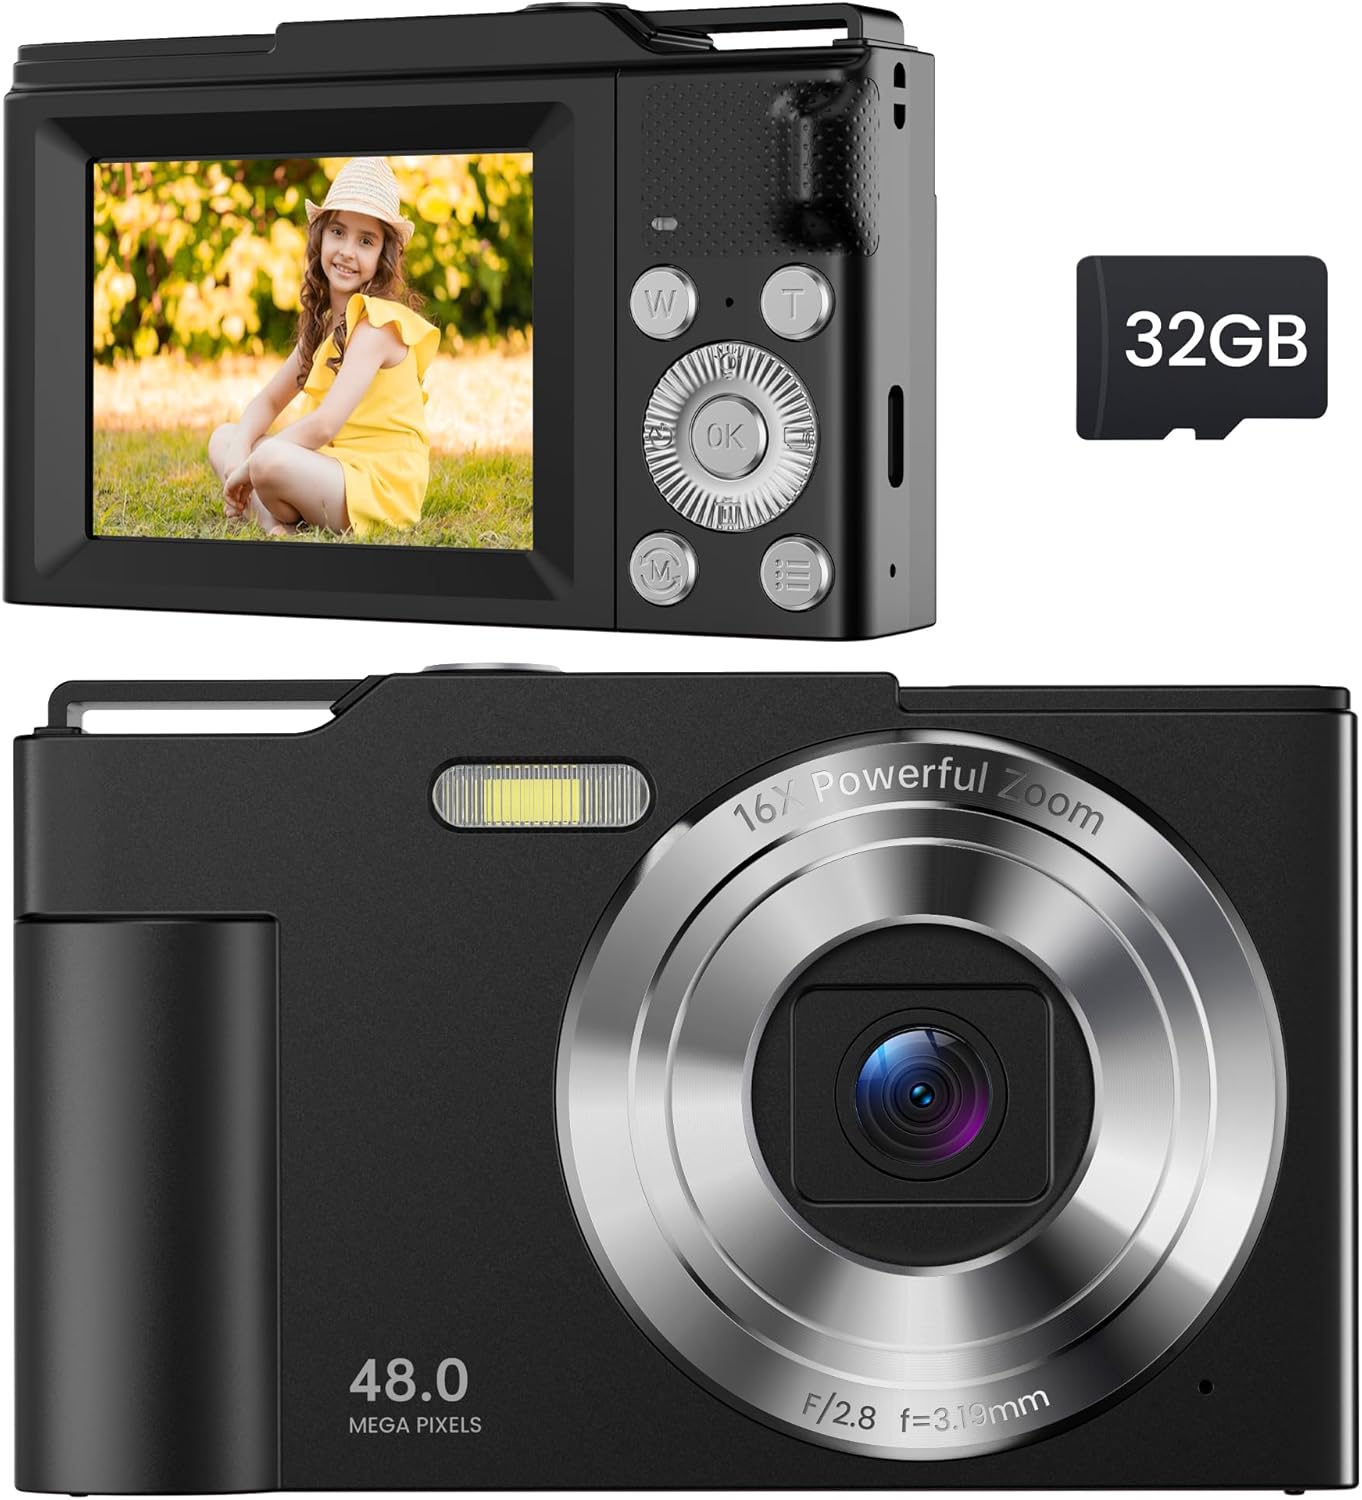
Image: The ROQIOO DC01 Digital Camera in black, showcasing its front lens, flash, and a view of the back screen with a child's photo, alongside a 32GB SD card.
2. Package Contents
Please verify that all items listed below are included in your package:
- ROQIOO DC01 Digital Camera Body
- USB Charging Cable
- Camera Lanyard
- Portable Storage Bag
- User Manual (this document)
- 32GB MicroSD Card (pre-installed or separate)
- Cleaning Cloth

Image: An overview of the ROQIOO Digital Camera package contents, showing the camera, user manual, cleaning cloth, storage bag, camera lanyard, and USB charging cable.
3. Product Features
- High-Performance CMOS Sensor: Captures high-quality 48MP photos and 1080P FHD videos.
- Innovative Autofocus: Half-press the shutter button for automatic focusing, ensuring clear and vivid images.
- 16X Digital Zoom: Adjust the zoom using the W/T button to capture distant subjects.
- Compact and Portable Design: Lightweight and easy to carry, suitable for children.
- Long Battery Life: Equipped with a high-efficiency battery for extended shooting sessions.
- Anti-Shake Technology: Minimizes blur for stable shots, even when handheld or in motion.
- Webcam Functionality: Can be used as a webcam when connected to a computer.
- Creative Special Effects: Includes various fun filters like black and white, warm, and cold, along with smile detection.
- Self-Timer and Continuous Shooting: Features for timed shots and capturing sequences of images.

Image: Illustration of the camera's multi-functional capabilities, highlighting Beautiful Face, Auto Face Focus, and Auto Smile Photograph features.
4. Getting Started
4.1 Charging the Battery
The camera comes with a built-in rechargeable battery. Before first use, fully charge the camera.
- Connect the small end of the included USB cable to the camera's USB-C port.
- Connect the larger end of the USB cable to a USB power adapter (not included) or a computer's USB port.
- The charging indicator light will illuminate. Once charging is complete, the light will turn off or change color.
4.2 Inserting the MicroSD Card
A 32GB MicroSD card is included for storing photos and videos. Ensure it is properly inserted before use.
- Locate the MicroSD card slot on the side or bottom of the camera.
- Gently insert the MicroSD card with the gold contacts facing down (or as indicated by the camera's diagram) until it clicks into place.
- To remove the card, push it in gently until it clicks, then release, and it will spring out.

Image: An illustration showing the camera's screen displaying a photo, with a 32GB SD card icon and text indicating storage capacity for over 500 minutes of video and 20,000 photos.
5. Operating Instructions
5.1 Powering On/Off
Press and hold the Power button (usually marked with a power symbol) for a few seconds to turn the camera on or off.
5.2 Taking Photos
- Turn on the camera.
- Frame your shot using the LCD screen.
- Half-press the Shutter button (usually on top of the camera) to activate autofocus. The focus frame will turn green when focused.
- Fully press the Shutter button to take the photo.
5.3 Recording Videos
- Turn on the camera.
- Switch to video mode (refer to the camera's on-screen icons or a dedicated mode button).
- Press the Shutter button to start recording. A timer or recording indicator will appear on the screen.
- Press the Shutter button again to stop recording.
5.4 Using Digital Zoom
The camera features a 16X digital zoom.
- While in photo or video mode, press the 'W' button to zoom out (wide angle).
- Press the 'T' button to zoom in (telephoto).

Image: An example demonstrating the 16X Digital Zoom feature, showing how the image changes from a wide shot to a close-up at 2x, 4x, 8x, and 16x magnification.
5.5 Applying Filters
Enhance your photos with various built-in filters.
- Navigate to the camera's menu or settings.
- Look for an option like 'Filters', 'Effects', or 'Scene Modes'.
- Select your desired filter (e.g., Normal, Black/White, Warm Filter, Cold Filter).
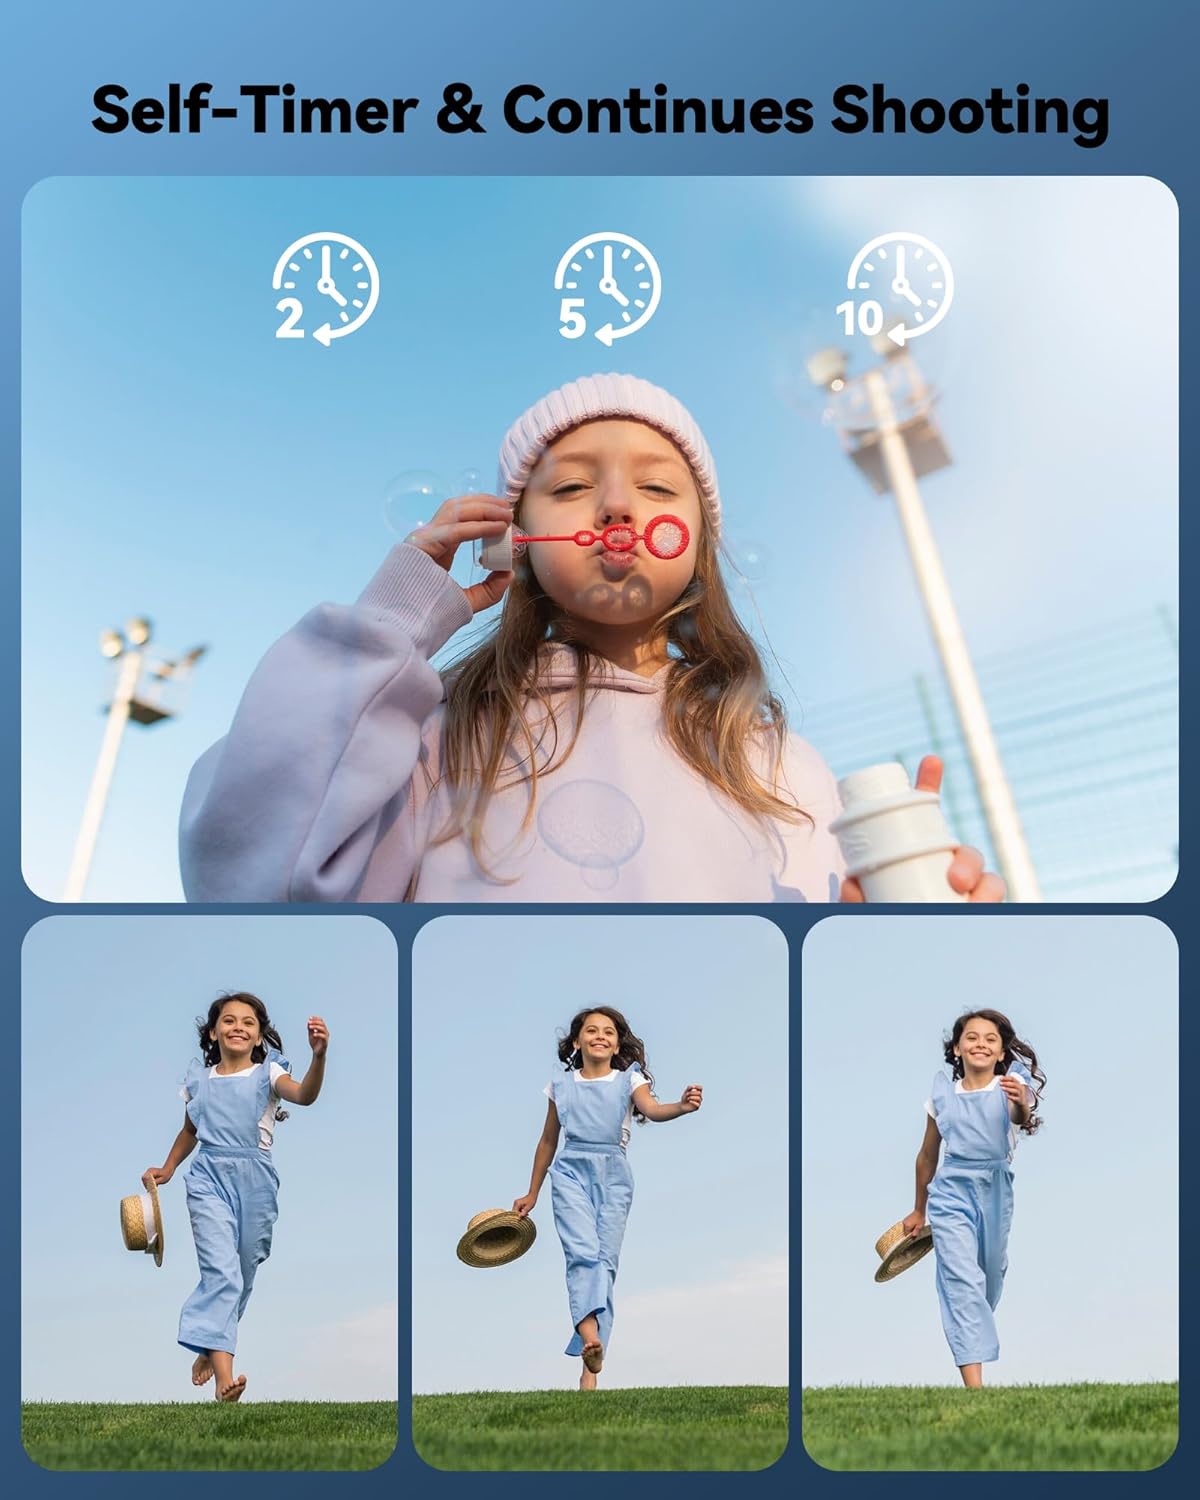
Image: A demonstration of the camera's various interesting filters, including Normal, Black/white, Warm Filter, and Cold Filter, applied to a child's photo.
5.6 Self-Timer and Continuous Shooting
Use the self-timer for group shots or continuous shooting for action sequences.
- Self-Timer: Access the self-timer option in the menu. Select a delay (e.g., 2, 5, or 10 seconds). The camera will count down before taking the photo.
- Continuous Shooting: Select continuous shooting mode from the menu to capture multiple photos in quick succession with a single press of the shutter button.
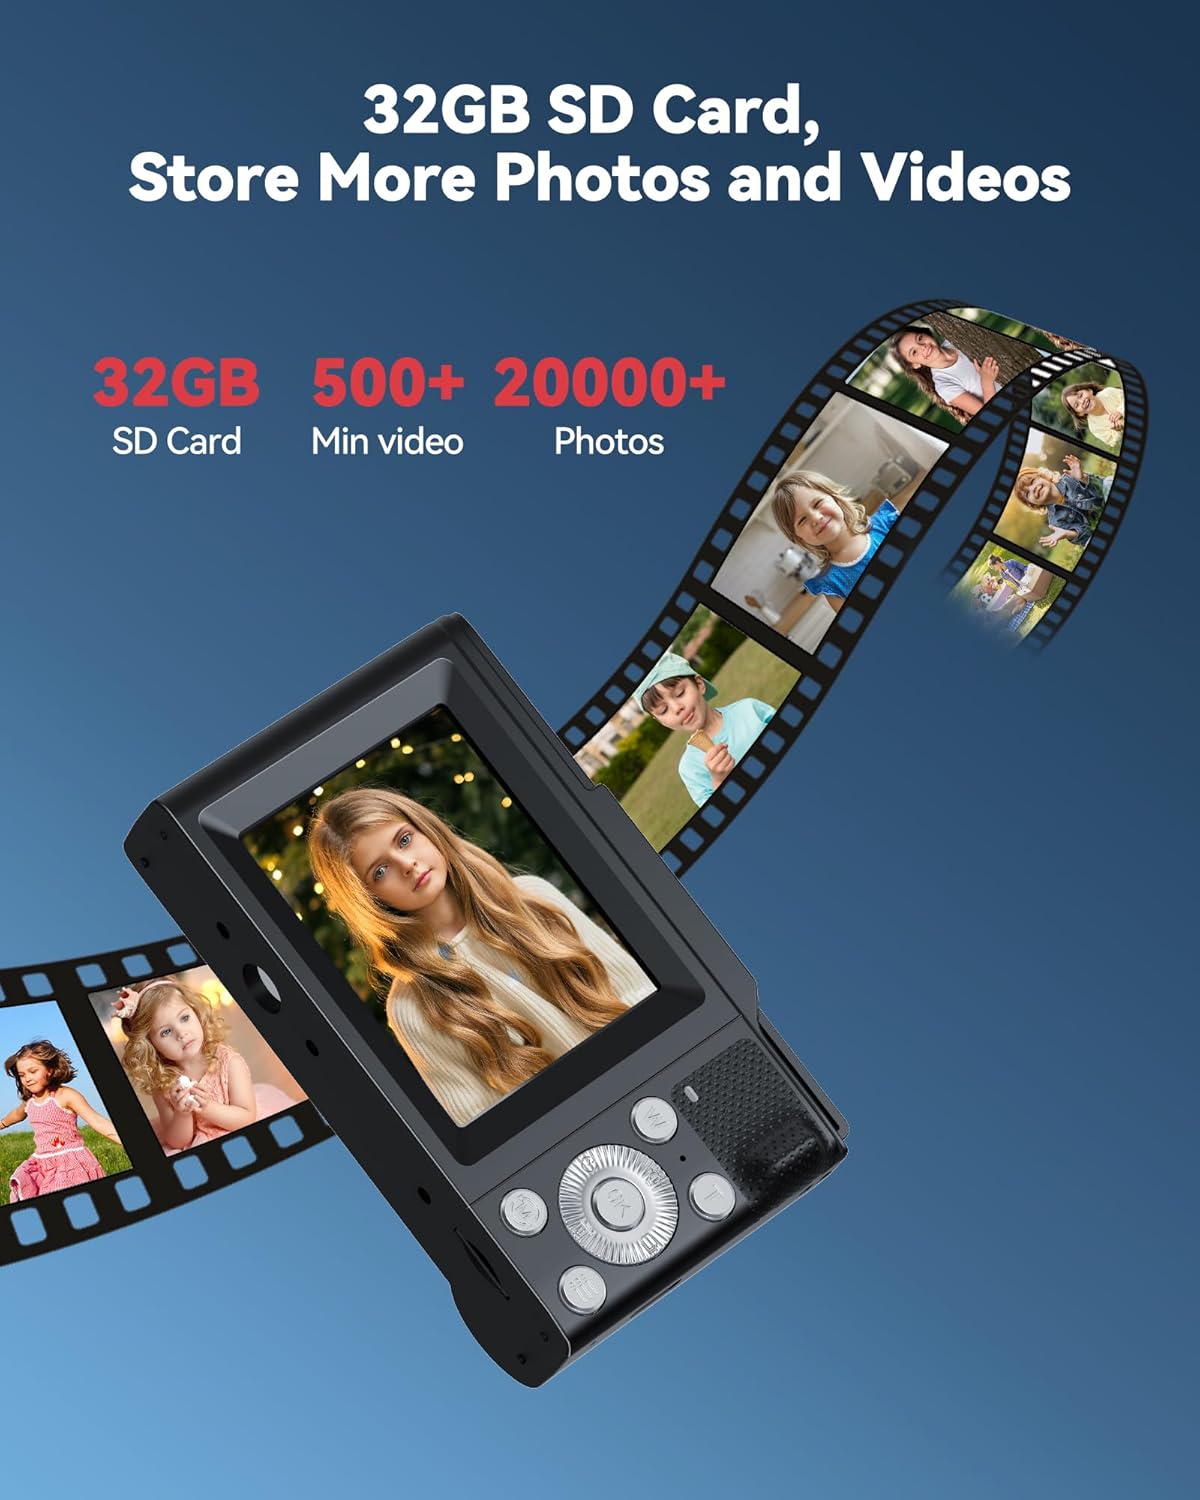
Image: A visual illustrating the Self-Timer and Continuous Shooting functions, showing a girl blowing bubbles with timer options and a sequence of a girl running.
5.7 Anti-Shake and Flash
The camera includes anti-shake technology and a built-in flash.
- Anti-Shake: This feature is typically enabled by default to reduce blur from camera movement. Check the settings menu if you need to toggle it.
- Flash: The built-in flash provides additional light in low-light conditions. Access flash settings through the menu to choose modes like Auto Flash, Fill Flash, or Flash Off.

Image: A split image demonstrating the Anti-Shake feature, showing a clear photo of a girl walking when Anti-Shake is ON, and a blurry photo when it is OFF.
Image: A split image demonstrating the Fill Light (Flash) feature, showing a bright photo of two children with flash ON, and a dark photo of Jenga blocks with flash OFF.
6. Care and Maintenance
- Cleaning: Use the provided cleaning cloth or a soft, dry cloth to wipe the camera body and screen. For stubborn smudges, slightly dampen the cloth with water. Do not use harsh chemicals or abrasive cleaners.
- Lens Care: Gently wipe the lens with a lens cleaning cloth. Avoid touching the lens with your fingers.
- Storage: When not in use, store the camera in its portable storage bag in a cool, dry place away from direct sunlight and extreme temperatures.
- Battery: If the camera will not be used for an extended period, charge the battery periodically to maintain its health.
- Water Exposure: This camera is not waterproof. Avoid exposing it to water or high humidity.
7. Troubleshooting
| Problem | Possible Cause | Solution |
|---|---|---|
| Camera does not turn on. | Low or depleted battery. | Charge the camera fully. |
| Camera does not turn on. | Power button not pressed long enough. | Press and hold the Power button for a few seconds. |
| Photos are blurry. | Camera shake. | Ensure Anti-Shake is enabled. Hold the camera steady or use a tripod. |
| Photos are blurry. | Subject out of focus. | Half-press the shutter button to allow the camera to autofocus before fully pressing. |
| Cannot take photos/videos. | MicroSD card is full or not inserted. | Insert a MicroSD card or delete existing files to free up space. |
| Cannot delete a single photo. | Incorrect button press in playback mode. | When in playback mode and selecting 'Delete', press the button directly above the 'OK' button to select 'Delete Current' instead of 'Delete All'. |
8. Technical Specifications
- Model Name: DC-S1
- Item Model Number: DC01
- Maximum Webcam Image Resolution: 48 MP
- Photo Sensor Technology: CMOS
- Photo Sensor Size: 1/4-inch
- Optical Zoom: 16x (Digital)
- Image Stabilization: Digital
- Supported File Format: MP4 (for video)
- Aspect Ratio: 4:3
- Batteries: 1 D battery required (included, likely internal rechargeable)
- Item Weight: 5 ounces
- Package Dimensions: 5.04 x 2.95 x 1.54 inches
- Manufacturer: ROQIOO
9. Warranty and Support
For information regarding warranty coverage, technical support, or service inquiries, please contact ROQIOO customer service. Details for contacting support are typically provided on the product packaging or the manufacturer's official website.
Please retain your proof of purchase for any warranty claims.