1. Important Safeguards
Please read all instructions carefully before using your WHALL Stand Mixer. Keep this manual for future reference.
- Do not immerse the motor unit, cord, or plug in water or other liquids.
- Close supervision is necessary when any appliance is used by or near children.
- Unplug from the outlet when not in use, before assembling or disassembling parts, and before cleaning.
- Avoid contact with moving parts. Keep hands, hair, clothing, and other utensils away from attachments during operation to prevent injury and/or damage to the mixer.
- Do not operate any appliance with a damaged cord or plug, or after the appliance malfunctions or has been dropped or damaged in any manner.
- The use of attachments not recommended or sold by the manufacturer may cause fire, electric shock, or injury.
- Do not use the appliance outdoors.
- Do not let the power cord hang over the edge of a table or counter.
- Ensure the appliance is switched off before plugging in or unplugging the power cord.
- Always operate the mixer on a dry, stable, and level surface.
2. Product Overview
2.1 Components
Familiarize yourself with the parts of your WHALL Stand Mixer:

Image 2.1: Labeled diagram of the WHALL Stand Mixer and its accessories. This image shows the main unit, the 5.5QT bowl, splashguard, spatula, dough hook, whisk, and Y-beater, with labels pointing to each part for easy identification.
- Stand Mixer Body: The main unit housing the motor and controls.
- Head-lift Button: Releases the mixer head for tilting.
- On/Off and Speed Switch: Rotary knob to turn the mixer on/off and adjust speed.
- Tool Socket: Where attachments are inserted.
- Dough Hook: Used for kneading yeast doughs.
- Y-Beater (Flat Beater): Ideal for mixing batters, cookie dough, and mashed potatoes.
- Whisk (Wire Whip): Used for whipping eggs, cream, and aerating mixtures.
- Bowl (5.5 Quarts): Stainless steel mixing bowl.
- Splashguard: Prevents ingredients from splashing out of the bowl during mixing.
- Spatula: For scraping down the sides of the bowl.
2.2 Key Features
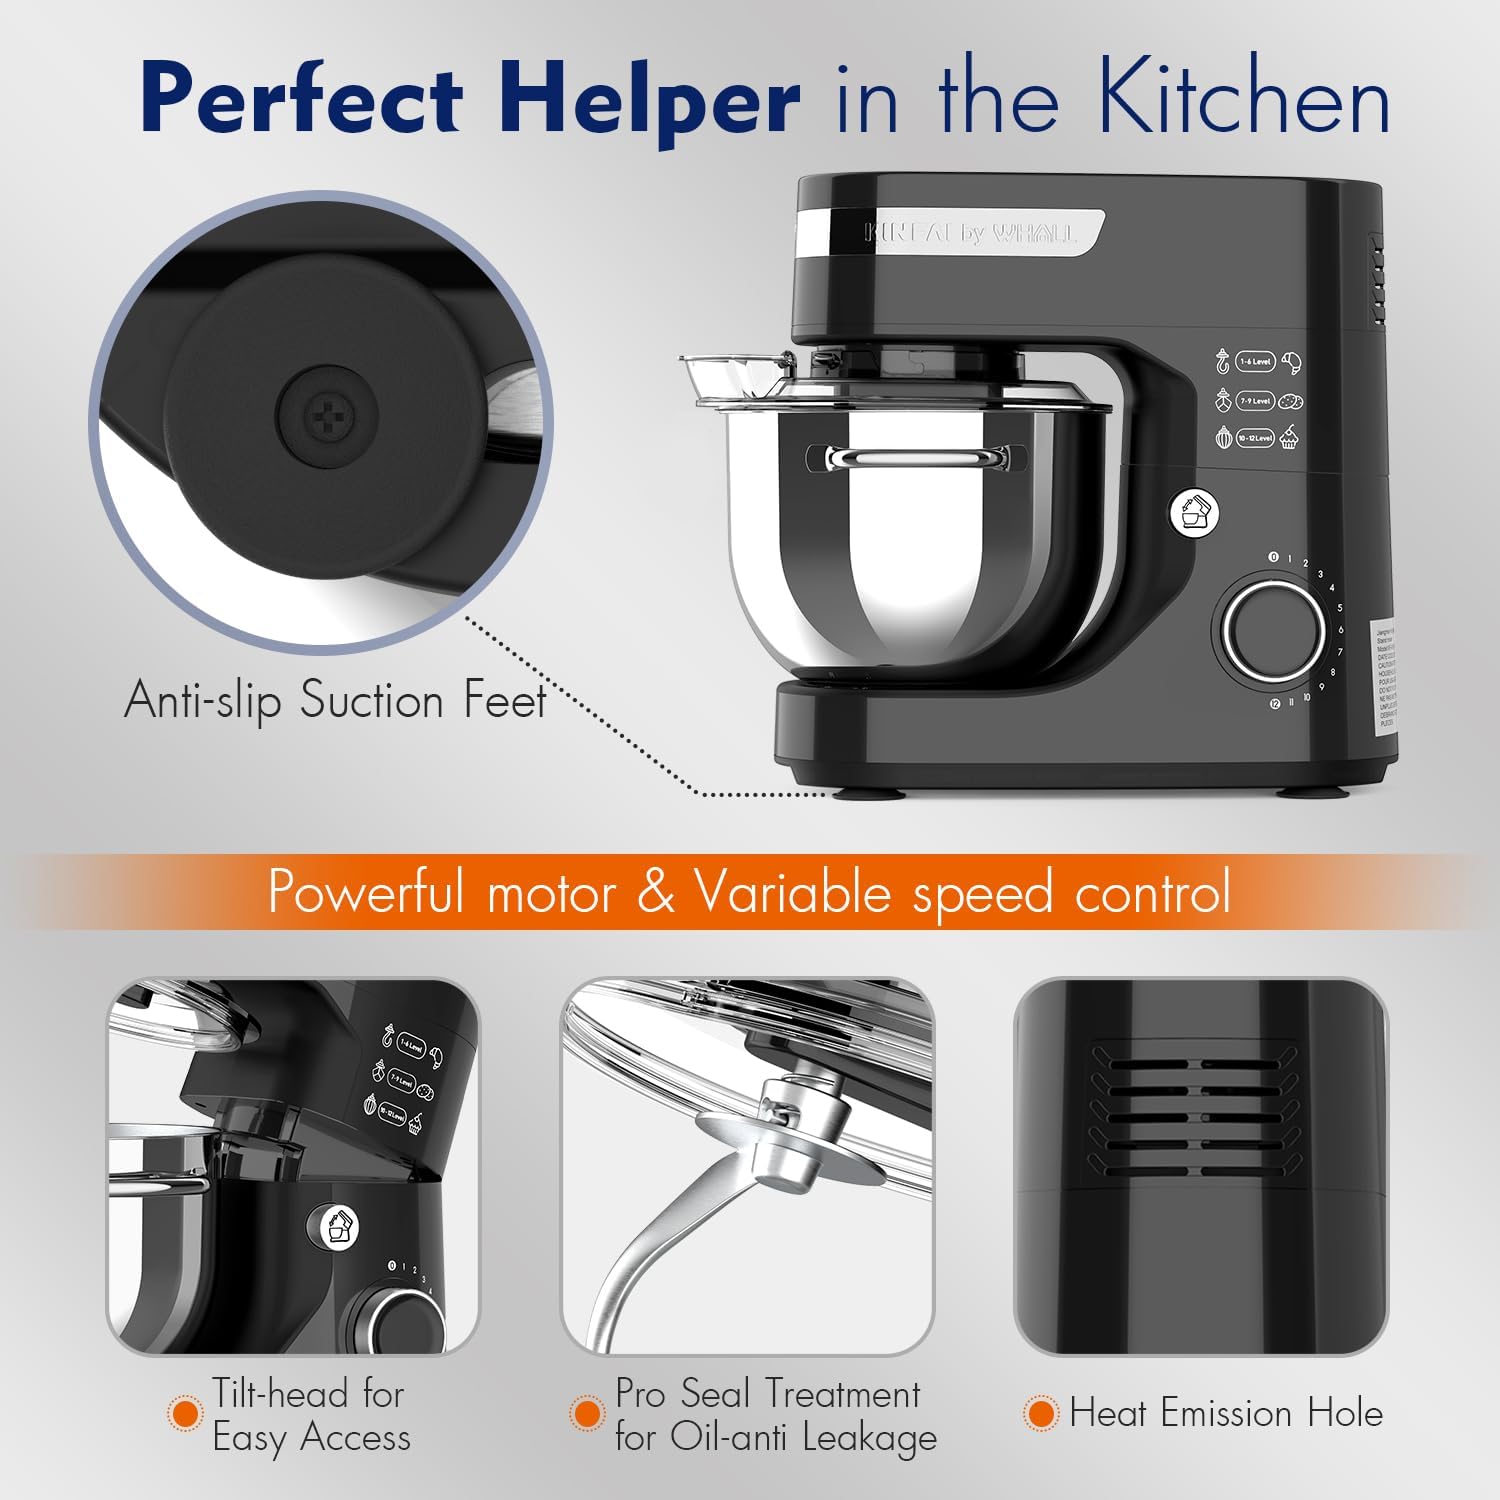
Image 2.2: Illustration of key features of the WHALL Stand Mixer. This image highlights the anti-slip suction feet for stability, the tilt-head design for easy access, the pro seal treatment to prevent oil leakage, and the heat emission holes for motor cooling.
- Anti-slip Suction Feet: Provides stability during operation.
- Tilt-Head Design: Allows for easy access to the bowl and attachments.
- Pro Seal Treatment: Designed to prevent oil leakage from the motor housing.
- Heat Emission Hole: Ensures proper ventilation and cooling of the motor.
3. Assembly
3.1 Attaching the Bowl
- Ensure the mixer is unplugged and the speed switch is in the '0' (off) position.
- Place the mixing bowl onto the base, aligning the grooves on the bowl with the pins on the base.
- Turn the bowl clockwise until it locks securely into place.
3.2 Attaching/Detaching Accessories

Image 3.1: The WHALL Stand Mixer displayed with its three primary attachments: the dough hook, the Y-beater (flat beater), and the whisk (wire whip). This image provides a visual reference for each accessory.
- Press the head-lift button and tilt the motor head upwards until it locks.
- Insert the desired attachment (dough hook, Y-beater, or whisk) into the tool socket. Push upwards and turn clockwise until it clicks into place.
- To detach, push upwards and turn counter-clockwise, then pull down.
- Lower the motor head by pressing the head-lift button and gently pushing the head down until it locks into position.
3.3 Using the Splashguard
- After attaching the bowl and accessory, slide the splashguard onto the mixer head.
- Ensure the pouring chute is positioned conveniently for adding ingredients.
4. Operation
4.1 Before First Use
- Wash the mixing bowl, splashguard, and all attachments (dough hook, Y-beater, whisk, spatula) in warm, soapy water. Rinse thoroughly and dry completely.
- Wipe the exterior of the mixer body with a damp cloth. Do not immerse the motor unit in water.
4.2 Using the Tilt-Head Feature
To add ingredients or change attachments, press the head-lift button located on the side of the mixer. The head will tilt up and lock into place. Once finished, gently push the head down while pressing the head-lift button until it locks securely.
4.3 Speed Control Guide
The WHALL Stand Mixer features 12 speeds for versatile mixing. Refer to the guide below for recommended speeds for different tasks and attachments.

Image 4.1: Speed recommendations for the WHALL Stand Mixer attachments. This image shows that the Dough Hook is ideal for kneading dough at MIN speed, the Mixing Beater for salad, cookie dough, and mashed potatoes at MIN-MID speeds, and the Egg Whisk for egg whites and whipped cream at MID-MAX speeds.
| Speed Level | Attachment | Recommended Use |
|---|---|---|
| 1-2 (MIN) | Dough Hook | Kneading dough for bread, pizza, etc. |
| 3-8 (MIN-MID) | Y-Beater (Flat Beater) | Mixing batters, cookie dough, mashed potatoes, salad. |
| 9-12 (MID-MAX) | Whisk (Wire Whip) | Whipping egg whites, cream, meringues. |
Note: Always start at a lower speed and gradually increase to prevent splashing and ensure thorough mixing.
5. Cleaning and Maintenance
Proper cleaning and maintenance will extend the life of your stand mixer.
- Always unplug the mixer before cleaning.
- Motor Unit: Wipe the exterior of the mixer body with a soft, damp cloth. Do not use abrasive cleaners or immerse in water.
- Mixing Bowl, Splashguard, and Spatula: These parts are dishwasher safe or can be washed by hand in warm, soapy water. Rinse and dry thoroughly.
- Attachments (Dough Hook, Y-Beater, Whisk): Wash immediately after use in warm, soapy water. Rinse and dry thoroughly. Some attachments may be dishwasher safe; refer to specific product labeling if available.
- Storage: Store the mixer and its accessories in a clean, dry place.
6. Troubleshooting
If you encounter any issues with your stand mixer, refer to the table below for common problems and solutions.
| Problem | Possible Cause | Solution |
|---|---|---|
| Mixer does not turn on. | Not plugged in; power outlet issue; speed switch not at '0'. | Ensure the mixer is securely plugged into a working outlet. Check that the speed switch is at '0' before turning on. |
| Attachments are difficult to install/remove. | Head not fully tilted; attachment not aligned correctly. | Ensure the mixer head is fully tilted and locked. Align the attachment correctly with the tool socket before twisting. |
| Mixer head not locking down. | Head-lift button not fully pressed; obstruction. | Press the head-lift button firmly while lowering the head until it clicks into place. Check for any obstructions. |
| Excessive noise or vibration. | Bowl or attachment not properly secured; mixer on an uneven surface. | Ensure the bowl and attachment are securely locked. Place the mixer on a stable, level surface. Reduce batch size if overloaded. |
If the problem persists after trying these solutions, please contact customer support.
7. Specifications
| Feature | Specification |
|---|---|
| Brand | WHALL |
| Model Number | B0DJ2VLBZB |
| Capacity | 5.5 Quarts |
| Controls Type | Knob |
| Dimensions (L×W×H) | 38.5 × 25.9 × 32.8 cm |
8. Warranty and Support
Your WHALL Stand Mixer is covered by a manufacturer's warranty. For detailed warranty information, product support, or service inquiries, please refer to the warranty card included with your purchase or visit the official WHALL website. Please have your model number (B0DJ2VLBZB) and purchase date available when contacting support.


