Introduction
This user manual provides detailed instructions for the setup, operation, maintenance, and troubleshooting of your new Business Office Multifunction Telephone Dial Pad and Call Center Traffic Telephone Headset. Please read this manual thoroughly before using the product to ensure proper function and longevity.
Package Contents
Upon opening the package, please verify that all the following components are present:
- 1 x Telephone Mainframe
- 1 x Headphone Holder
- 1 x 3.5mm to 3.5mm connecting cable
- 1 x Telephone line with six slots and two pins
- 1 x Traffic Headset
- 1 x English introduction (this manual)

Image: All components included in the package, including the telephone mainframe, headset, headphone holder, and various connecting cables.
Product Features
- Noise Cancellation: Ensures clear voice reproduction for both the operator and the caller.
- Multiple Functions & Adjustable Volume: Provides ease of use and customization for various call center environments.
- Caller ID Display: Supports FSK/DTMF caller ID display function, capable of checking up to 30 16-bit phone numbers.
- Headphone Stand: Includes a convenient and practical stand for the headset.
- Backlight Instructions: Display flashes backlight instructions when an incoming call rings.
- Smart Calling: Features closed and indicator light indication for smart calling.
- Pickup Options: Offers both manual and automatic pickup options.
- Compact Design: Small and easy to install, suitable for various office setups.
Setup Guide
Connect the Telephone Line: Insert one end of the telephone line (with six slots and two pins) into the "LINE" port on the back of the telephone mainframe. Connect the other end to your wall telephone jack.

Image: Rear view of the telephone mainframe, highlighting the "LINE" port for telephone line connection.
Connect the Headset: Plug the 3.5mm jack of the traffic headset into the corresponding headset port on the telephone mainframe. Ensure a secure connection.

Image: The telephone dial pad with the traffic headset properly connected and ready for use.
Install Headphone Holder: Attach the headphone holder to the side or back of the mainframe as desired, or place it on your desk for convenient headset storage.

Image: The standalone headphone holder, designed for convenient storage of the traffic headset.
Power On: The device is powered via the telephone line. Once connected, the display should illuminate, indicating it is ready for use.
Operating Instructions
Making a Call
- Ensure the headset is connected and worn comfortably.
- Press the ON/OFF button to activate the line.
- Dial the desired phone number using the numeric keypad.
- The call will connect automatically.
Receiving a Call
- When an incoming call rings, the backlight display will flash.
- Press the ON/OFF button to answer the call.
- Alternatively, if automatic pickup is enabled, the call may connect without pressing a button.
Keypad Functions
- ON/OFF: Activates or deactivates the telephone line.
- MUTE: Mutes your microphone during a call. Press again to unmute.
- REDIAL: Redials the last dialed number.
- FLASH: Used for call waiting or transferring calls (functionality depends on your telephone service provider).
- SET: Enters settings mode for date, time, or other configurations.
- OUT: Reviews outgoing call records.
- BACK: Navigates back through menus or call records.
- DEL: Deletes entries or digits.
- HOLD: Puts the current call on hold.
- BRIGHT: Adjusts display brightness.
- PAUSE: Inserts a pause in a dialing sequence.
- VOL +/-: Adjusts the volume of the headset speaker.
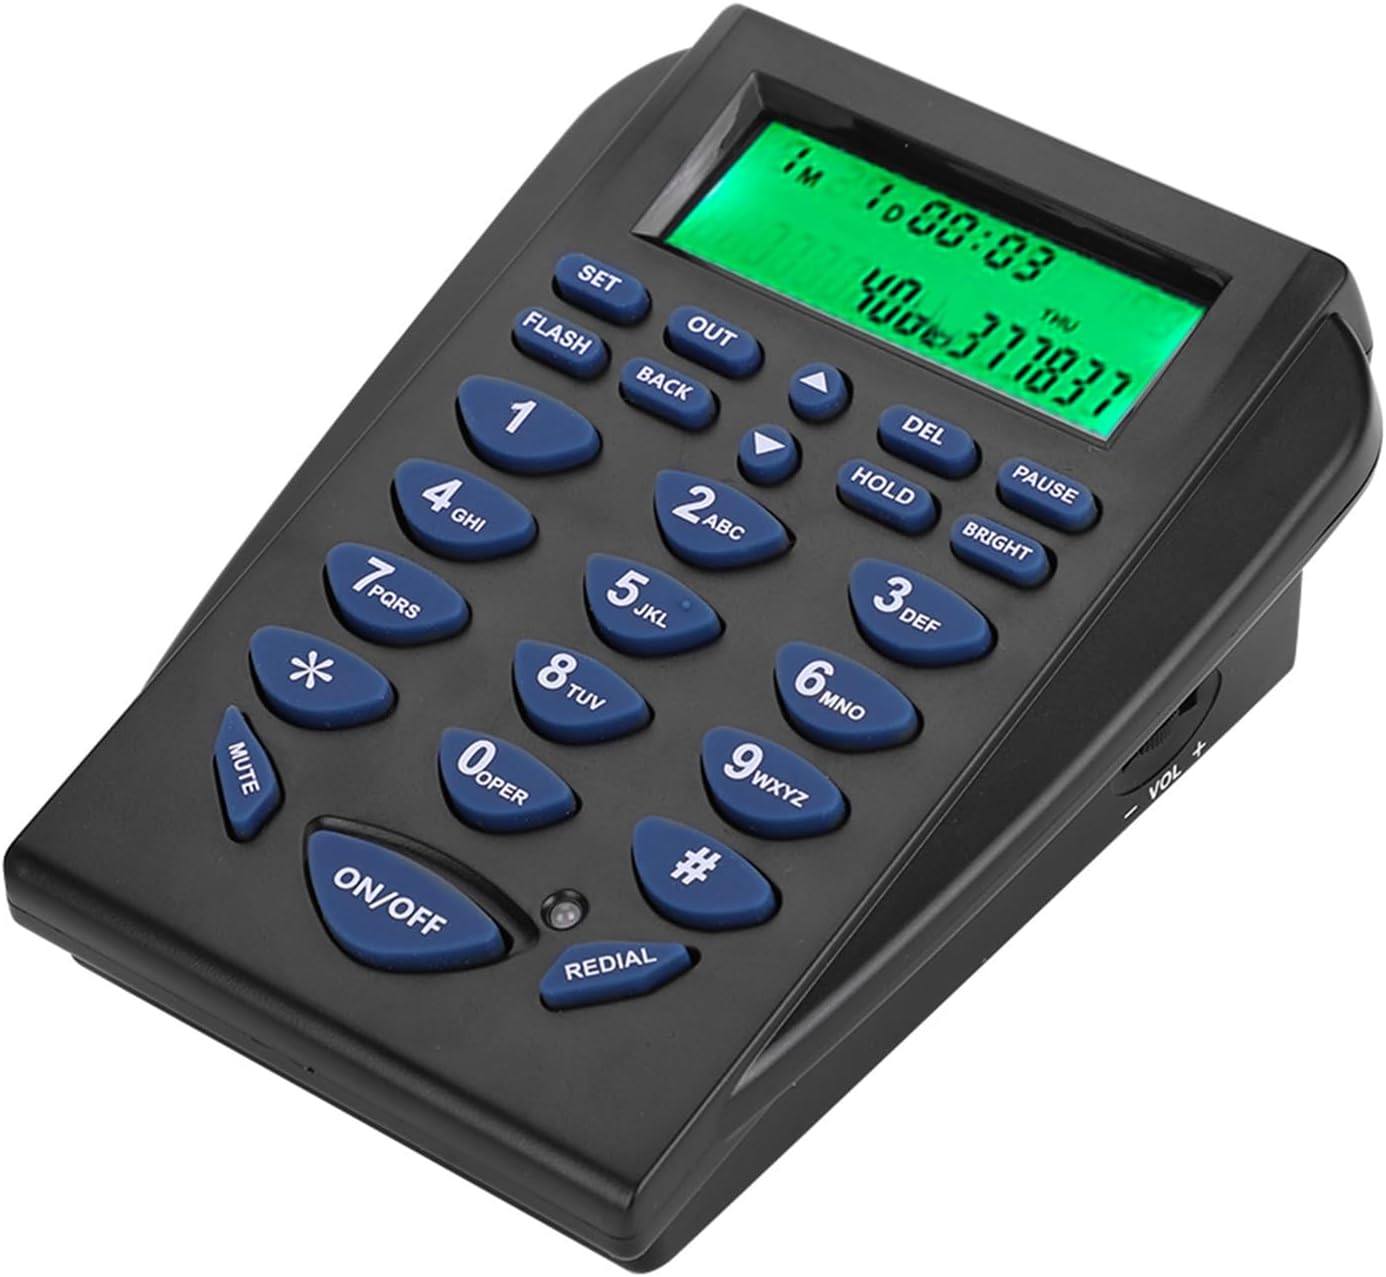
Image: The main telephone dial pad unit, showing the numeric keypad, function buttons, and the illuminated display.
Maintenance
- Cleaning: Use a soft, dry cloth to clean the surface of the telephone mainframe and headset. Do not use liquid cleaners or abrasive materials.
- Storage: When not in use for extended periods, store the device in a cool, dry place away from direct sunlight and extreme temperatures.
- Cable Care: Avoid bending or twisting cables excessively to prevent damage.
Troubleshooting
| Problem | Possible Cause | Solution |
|---|---|---|
| No dial tone/Cannot make calls. | Telephone line not connected properly or service issue. | Ensure the telephone line is securely connected to both the mainframe and the wall jack. Check your telephone service. |
| Cannot hear caller/Caller cannot hear me. | Headset not connected, volume too low, or mute function active. | Verify headset connection. Adjust volume using the VOL +/- buttons. Check if the MUTE button is active. |
| Display is blank or dim. | No power from telephone line or brightness setting. | Ensure telephone line is connected. Press the BRIGHT button to adjust display brightness. |
| Caller ID not displaying. | Caller ID service not active or incompatible format. | Contact your telephone service provider to ensure Caller ID service is active and compatible with FSK/DTMF formats. |
Specifications
| Attribute | Value |
|---|---|
| Item Type | Traffic Phone |
| Brand | Generic |
| Model Number | Genericb4109ivdmx |
| Material | Acrylonitrile Butadiene Styrene (ABS) |
| Color | Black |
| Mainframe Dimensions (Approx.) | 13 x 10.5 x 5.5 cm (5.1 x 4.1 x 2.2 inches) |
| Item Weight | 429g (15.1 ounces) |
| Caller ID Support | FSK/DTMF (30 16-bit phone numbers check) |
| Connectivity Technology | Ethernet (as per product specifications, typically for VoIP or network connectivity) |
| Wireless Communication Technology | Bluetooth (as per product specifications, may refer to headset compatibility) |
Warranty and Support
For warranty information and technical support, please refer to the contact details provided by your retailer or the manufacturer's official website. Keep your purchase receipt as proof of purchase for any warranty claims.
This product is designed for reliable performance. Should you encounter any issues not covered in the troubleshooting section, please contact customer support for assistance.