1. Introduction
The Caruner e450 is an economical, high-quality AC balance charger designed for charging various battery types. It supports LiPo, LiFe, and LiHV batteries from 2 to 4 cells in balance mode, and NiMH batteries from 6 to 8 cells. With a circuit power of 50W, it can deliver a maximum charge current of 4A. Users can select from four charge current options: 1A, 2A, 3A, or 4A, to match the battery's capacity. This charger is compact, lightweight, and user-friendly, suitable for both beginners and experienced users.
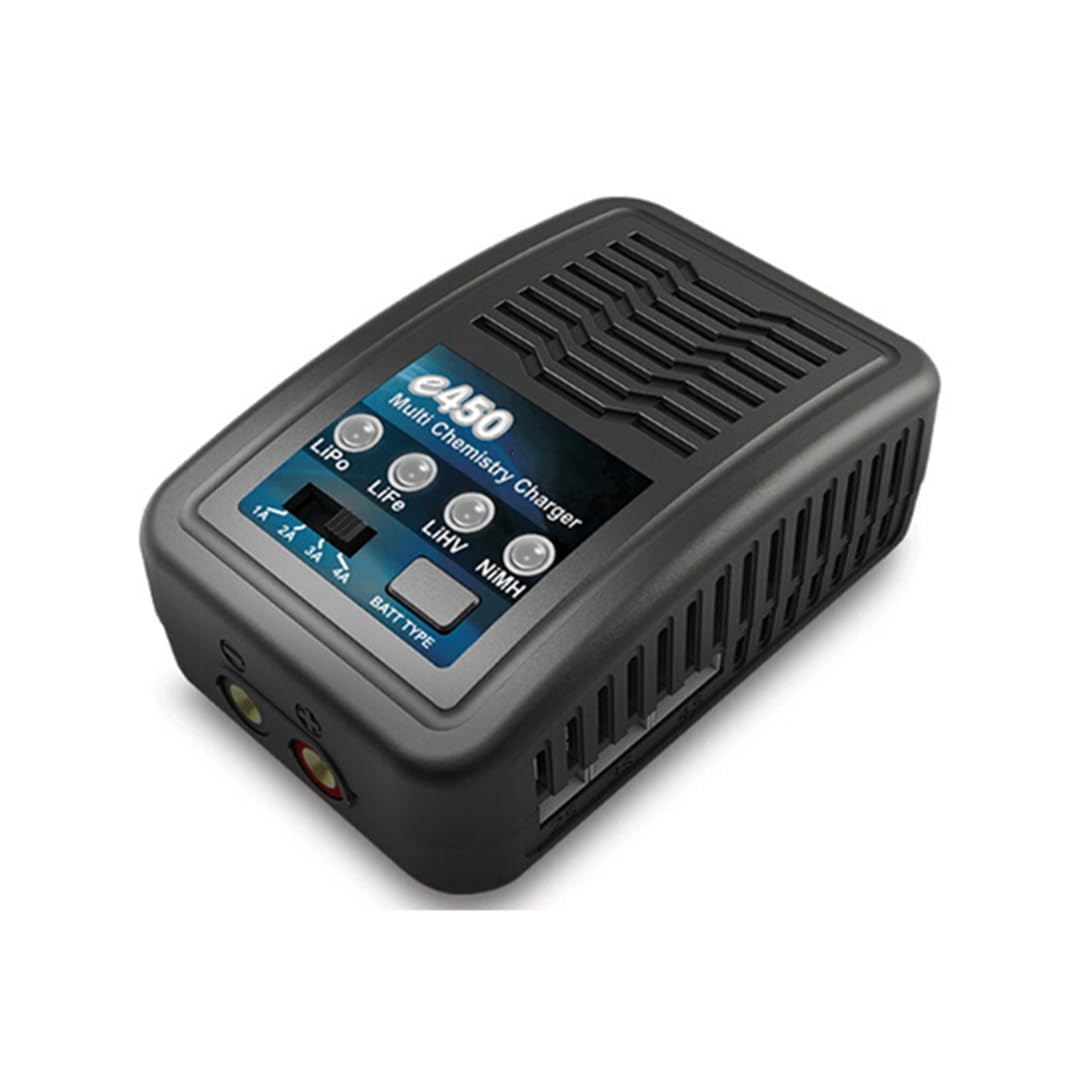
Image 1.1: Caruner e450 Multi Chemistry RC Balance Charger overview.
2. What's in the Box
Please check the package contents upon unboxing to ensure all items are present:
- e450 Charger
- AC Power Cord
- XT60 Charging Cable
- Instruction Manual (this document)
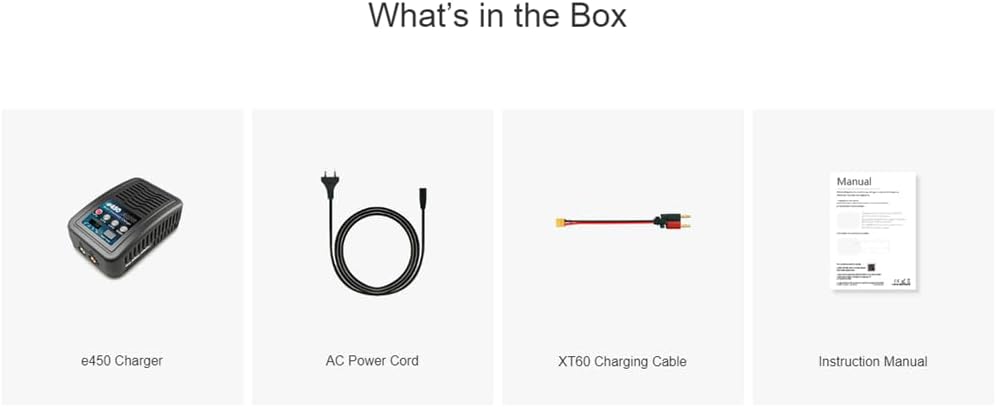
Image 2.1: Visual representation of the package contents.
3. Product Features
- Multi-Chemistry Support: Charges LiPo, LiFe, LiHV (2-4S) and NiMH (6-8S) batteries.
- Adjustable Charge Current: Selectable current options of 1A, 2A, 3A, or 4A.
- Integrated Balance Function: Automatically balances LiPo, LiFe, and LiHV cells during charging.
- Compact and Portable Design: Easy to transport and operate.
- Safety Protections: Includes short circuit and reverse polarity protection.
- AC Input: 100-240V AC for worldwide compatibility.

Image 3.1: Key features and functions of the e450 charger.
4. Product Overview (Controls and Indicators)
Familiarize yourself with the charger's interface:

Image 4.1: Front panel controls and indicators.
- Battery Type LED Indicators: LEDs for LiPo, LiFe, LiHV, and NiMH illuminate to show the selected battery type.
- Current Switch: Allows selection of charging current (1A, 2A, 3A, 4A).
- Battery Type Select Button: Press to cycle through and select the battery chemistry.
LED Status Explanation
The charger uses LEDs to indicate its operational status:

Image 4.2: Explanation of LED indicators.
| LED Status | Meaning |
|---|---|
| Green blinking | Charger is ready to charge. |
| Glows constant red | Charger is in CC (Constant Current) mode. |
| Glows constant orange | Charger is in CV (Constant Voltage) mode. |
| Glows constant green | Charging process is finished. |
| LED Status | Meaning |
|---|---|
| Glows constant red | The cell is charging. |
| Flashes red | The cell is discharging. |
5. Specifications
| Parameter | Value |
|---|---|
| AC Input | 100-240V |
| Battery Type Support | LiPo / LiFe / LiHV / NiMH |
| Cell Count (LiPo/LiFe/LiHV) | 2-4S |
| Cell Count (NiMH) | 6-8S |
| Charge Current | 1A / 2A / 3A / 4A (±10%) |
| Circuit Power | 50W |
| Current Drain for Balancing | 300mA |
| Dimensions (L x W x H) | 110.7 x 69.4 x 40.5 mm (4.33"D x 2.72"W x 1.57"H) |
| Weight | 220g |

Image 5.1: Physical dimensions of the e450 charger.

Image 5.2: Back label with additional specifications and warnings.
6. Safety Instructions
Please read and understand these safety instructions before using the charger:
- Indoor Use Only: This charger is designed for indoor use. Do not expose it to rain or moisture.
- Ventilation: Ensure adequate ventilation during charging to prevent overheating.
- Explosive Gases: Batteries can produce explosive gases. Keep away from flames and sparks.
- Disconnect Power: Always disconnect the power supply before making or breaking connections to the battery.
- Correct Battery Type: Only charge batteries of the specified types (LiPo, LiFe, LiHV, NiMH) and cell counts. Charging incorrect battery types or cell counts can lead to fire or explosion.
- Supervision: Never leave the charger unattended while in use.
- Damage: Do not use the charger if it or the battery appears damaged.
- Children: Keep out of reach of children.
7. Setup
- Placement: Place the charger on a stable, non-flammable surface, away from flammable materials. Ensure good ventilation.
- Power Connection: Connect the AC power cord to the charger's AC input port, then plug the other end into a suitable 100-240V AC wall outlet. The charger will power on.
- Battery Connection: Connect your battery to the appropriate charging port on the charger. For LiPo/LiFe/LiHV batteries, connect both the main discharge plug and the balance plug. For NiMH batteries, only the main discharge plug is needed.
8. Operating Instructions
Follow these steps to charge your batteries:
- Power On: Connect the charger to AC power. The Charge Status LED will blink green, indicating it's ready.
- Select Battery Type: Press the 'BATT TYPE' button repeatedly to cycle through LiPo, LiFe, LiHV, and NiMH. The corresponding LED indicator for the selected battery type will illuminate.
- Select Charge Current: Use the 'Current Switch' to select the desired charge current (1A, 2A, 3A, or 4A). Choose a current appropriate for your battery's capacity (e.g., 1C rate).
- Connect Battery: Connect your battery to the charger. For LiPo/LiFe/LiHV, ensure both the main discharge plug and the balance plug are securely connected. For NiMH, only the main discharge plug is needed.
- Start Charging: Once the battery type and current are selected, and the battery is connected, the charger will automatically begin charging. The Charge Status LED will glow constant red (CC mode) then constant orange (CV mode) for LiPo/LiFe/LiHV, or constant red for NiMH. The Cell Status LED will glow constant red.
- Monitor Charging: Observe the LED indicators. When the Charge Status LED glows constant green, the charging process is complete.
- Disconnect Battery: Once charging is complete, first disconnect the battery from the charger, then unplug the charger from the AC power outlet.
9. Maintenance
- Cleaning: Use a soft, dry cloth to clean the charger. Do not use solvents or abrasive cleaners.
- Storage: Store the charger in a cool, dry place when not in use.
- Cable Inspection: Regularly inspect all cables and connectors for any signs of damage. Replace damaged cables immediately.
- Ventilation: Ensure the ventilation slots are free from dust and debris to maintain proper airflow.
10. Troubleshooting
- Charger Not Powering On:
- Check if the AC power cord is securely connected to both the charger and the wall outlet.
- Verify the wall outlet has power.
- Battery Not Charging:
- Ensure the battery is correctly connected to the charger (main and balance plugs for LiPo/LiFe/LiHV).
- Confirm the correct battery type has been selected using the 'BATT TYPE' button.
- Check if the battery is severely over-discharged or damaged.
- Charger Overheating:
- Ensure adequate ventilation around the charger.
- Reduce the selected charge current if possible.
- Stop charging immediately if overheating persists and allow the unit to cool.
- LEDs Not Behaving as Expected:
- Refer to the 'LED Status Explanation' table in Section 4.
- If an error is indicated, disconnect the battery and power, then reconnect.
11. Warranty and Support
Caruner products are manufactured to high-quality standards. For warranty information or technical support, please refer to the contact details provided with your purchase documentation or visit the official Caruner website. Please retain your proof of purchase for warranty claims.