Introduction
This manual provides detailed instructions for the installation, operation, and maintenance of the LiftMaster SP20W12V 20-Watt 12-Volt Solar Panel. This solar panel is designed to provide a reliable and eco-friendly power source for compatible gate operators and 12V systems. Please read these instructions thoroughly before proceeding with installation or operation.
Safety Information
Always observe the following safety precautions to prevent injury or damage to the product:
- Disconnect all power sources before installation or maintenance.
- Ensure proper grounding to prevent electrical shock.
- Do not attempt to modify the solar panel or its components.
- Handle the solar panel with care to avoid damage to the glass surface.
- Wear appropriate personal protective equipment (PPE) during installation.
- Consult a qualified electrician if you are unsure about any part of the installation process.
Package Contents
Verify that all components are present in your package:
- LiftMaster SP20W12V Solar Panel (20W/12V)
- Mounting Bracket
- Hardware (Lag Screws, Hex Bolts, Hex Nuts, Washers)
- 10 ft. Cable

This diagram shows all components provided with the solar panel kit, including the solar panel, mounting bracket, 10 ft. cable, lag screws, hex bolts, hex nuts, and washers for installation.

This image displays the product label for the LiftMaster SP20W12V Solar Panel, detailing its features, model number, and UPC.
Setup and Installation
The LiftMaster SP20W12V Solar Panel is designed for straightforward installation. Follow these steps:
- Choose a Location: Select a location that receives maximum direct sunlight throughout the day, free from obstructions like trees or buildings. The panel should be oriented to face south (in the Northern Hemisphere) for optimal sun exposure.
- Mount the Bracket: Secure the provided mounting bracket to a stable surface using the appropriate hardware (lag screws, hex bolts, hex nuts, washers). Ensure the bracket is firmly attached and can support the weight of the solar panel.
- Attach the Solar Panel: Mount the solar panel onto the bracket. Adjust the angle of the panel to optimize sun exposure based on your geographical location and season. Tighten all fasteners securely.
- Connect the Cable: Connect the 10 ft. cable from the solar panel to your compatible gate operator or 12V system. Ensure all connections are secure and properly insulated to prevent short circuits or moisture ingress. The panel uses MC4 connectors for reliable connection.
- Verify Connection: After installation, verify that the solar panel is correctly connected to your system and that power is being supplied.
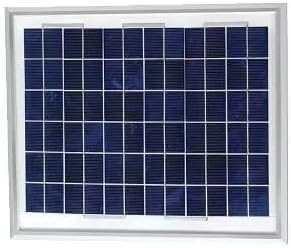
A detailed view of the solar panel's photovoltaic cells, which convert sunlight into electrical energy.
Operating Instructions
The LiftMaster SP20W12V Solar Panel operates automatically by converting sunlight into electrical energy. Once properly installed and connected to a compatible 12V system or gate operator, it will continuously charge the system's battery during daylight hours.
- The panel provides a consistent 20 watts of power at 12 volts.
- Ensure the panel remains unobstructed by shadows for optimal performance.
- The panel is designed to work with various gate operators and 12V systems.
Maintenance
The LiftMaster SP20W12V Solar Panel is constructed with durable, weather-resistant materials for long-lasting performance. Regular maintenance is minimal but important for efficiency:
- Cleaning: Periodically clean the surface of the solar panel with a soft cloth and mild soapy water to remove dirt, dust, leaves, or other debris that may accumulate. Avoid abrasive cleaners or tools that could scratch the glass.
- Inspection: Annually inspect the panel, mounting hardware, and cable connections for any signs of wear, corrosion, or damage. Ensure all connections remain tight and secure.
- Obstructions: Regularly check for any new obstructions (e.g., growing tree branches) that might cast shadows on the panel and reduce its efficiency.
Troubleshooting
If your solar panel system is not performing as expected, consider the following:
- No Power Output:
- Check all cable connections to ensure they are secure and free from corrosion.
- Verify that the solar panel surface is clean and free of obstructions.
- Ensure there is sufficient direct sunlight hitting the panel.
- Test the voltage output of the panel directly with a multimeter in direct sunlight.
- Low Power Output:
- Clean the panel surface thoroughly.
- Adjust the panel's angle to optimize sun exposure.
- Check for partial shading from nearby objects.
- Physical Damage: If the panel or cable is physically damaged, contact LiftMaster support for replacement parts or service.
Specifications
| Model Number | SP20W12V |
| Power Output | 20 Watts |
| Output Voltage | 12 Volts (DC) |
| Material | Aluminum, Tempered Glass |
| Efficiency | High Efficiency |
| Included Components | Solar Panel, Mounting Bracket, Hardware, 10 ft. Cable |
| Connector Type | MC4 |
| Number of Cells | 20 |
| Compatibility | Various gate operators and 12V systems |
| UPC | 012381179763 |
Warranty
For detailed warranty information regarding your LiftMaster SP20W12V Solar Panel, please refer to the official LiftMaster website or the warranty documentation included with your purchase. Warranty terms and conditions may vary.
Support
If you require further assistance, technical support, or replacement parts, please contact LiftMaster customer service. You can find contact information on the official LiftMaster website: www.liftmaster.com