Introduction
This manual provides essential instructions for the safe and efficient operation of your Horokarda Vinyl Record Player. Please read this manual thoroughly before using the product and retain it for future reference.
The Horokarda Vinyl Record Player is a versatile audio system featuring a 3-speed turntable, built-in stereo speakers, and an FM radio tuner. It supports various connectivity options including a headphone jack and RCA line-out jacks, allowing you to enjoy your music collection in multiple ways.
Safety Instructions
- Read all instructions before use.
- Keep the unit away from water, moisture, and direct sunlight.
- Do not place the unit near heat sources such as radiators, heat registers, stoves, or other apparatus (including amplifiers) that produce heat.
- Use only attachments/accessories specified by the manufacturer.
- Unplug the unit during lightning storms or when unused for long periods.
- Refer all servicing to qualified service personnel. Servicing is required when the apparatus has been damaged in any way, such as power-supply cord or plug is damaged, liquid has been spilled or objects have fallen into the apparatus, the apparatus has been exposed to rain or moisture, does not operate normally, or has been dropped.
- Do not block any ventilation openings. Install in accordance with the manufacturer's instructions.
Package Contents
Carefully unpack the box and ensure all items are present and in good condition. If any items are missing or damaged, contact your retailer.
- Horokarda Vinyl Record Player
- 2 x Replacement Needles
- 2 x Replacement Turntable Belts
- Power Adapter (usually integrated or standard)
- Instruction Manual (this document)

This image illustrates the product's dimensions (approximately 12.2 inches wide, 11.42 inches deep, 5.12 inches high) and the included accessories: two replacement stylus needles and two replacement turntable belts (128 mm diameter).
Product Overview
Familiarize yourself with the components and controls of your record player.

This diagram highlights key components: the Left Speaker and Right Speaker (built-in), the protective Dust Cover, and the RCA Line Out ports located on the rear panel for connecting external speakers.
Front Panel Controls:
- Power/Volume Knob: Turns the unit on/off and adjusts the volume.
- Function Selector: Switches between Phono (Vinyl), FM Radio, and other input modes.
- Tuning Knob: Used to tune FM radio stations.
- Headphone Jack (3.5mm): For private listening.
Rear Panel Connections:
- RCA Line Out Jacks (L/R): Connect to external amplifiers or powered speakers.
- Power Input: Connect the power adapter here.
Setup
- Placement: Place the record player on a stable, level surface away from direct sunlight, heat sources, and excessive dust or vibrations.
- Power Connection: Connect the power adapter to the DC input jack on the rear of the unit, then plug the adapter into a wall outlet.
- Dust Cover: Ensure the dust cover is properly seated. It can be opened during playback to protect the record.
- External Audio (Optional): If connecting to external speakers or an amplifier, use RCA cables (not included) to connect the RCA Line Out jacks on the record player to the corresponding input jacks on your audio system.
Operating Instructions
Playing a Vinyl Record:
- Power On: Turn the Power/Volume knob clockwise to turn on the unit and set a low volume.
- Select Phono Mode: Set the Function Selector to "Phono" or "Vinyl".
- Choose Speed: Select the appropriate speed (33, 45, or 78 RPM) using the speed selector switch, matching the record you intend to play.
- Place Record: Place a vinyl record on the turntable platter. If playing a 45 RPM single, place the included 45 RPM adapter on the center spindle first.
- Prepare Tonearm: Release the tonearm lock. Gently lift the tonearm using the cue lever.
- Start Playback: Position the stylus over the desired track of the record. Slowly lower the tonearm using the cue lever. The record will begin to play.
- Adjust Volume: Adjust the volume to your desired listening level using the Power/Volume knob.
- End Playback: At the end of the record, the tonearm may return automatically (depending on model) or you may need to manually lift it using the cue lever and return it to the tonearm rest. Secure the tonearm lock.

This image demonstrates the record player's ability to play records at three speeds: 33, 45, and 78 RPM, accommodating various vinyl formats.
Built-in Speakers:
The record player features dual built-in stereo speakers, providing clear audio playback without the need for external amplification. These speakers are active when headphones are not connected and no external RCA output is used.

This image highlights the integrated stereo speakers, designed to deliver original sound quality for an immersive listening experience.
Using the FM Radio:
- Power On: Turn the Power/Volume knob clockwise to turn on the unit.
- Select FM Mode: Set the Function Selector to "FM".
- Tune Station: Rotate the Tuning Knob to scan for FM radio stations. The frequency display will show the current station.
- Adjust Volume: Adjust the volume to your desired listening level.
- Antenna: For better reception, extend the FM antenna (if applicable, usually a wire at the back) and adjust its position.
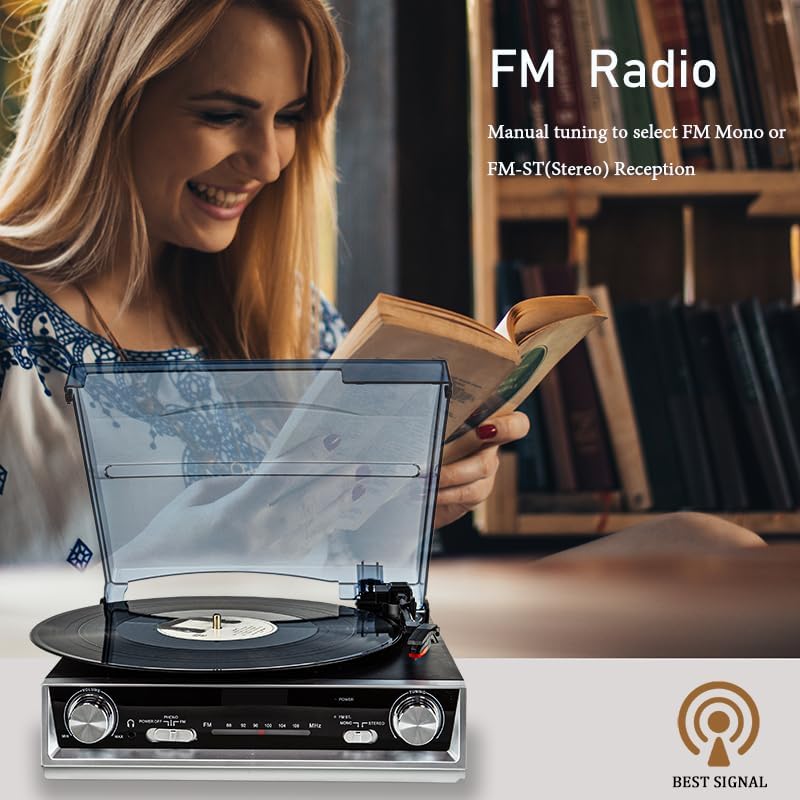
This image highlights the record player's FM Radio capability, which allows for manual tuning to select FM Mono or FM-ST (Stereo) reception.
Using the Headphone Jack:
Plug your 3.5mm headphones into the headphone jack on the front panel for private listening. The built-in speakers will automatically mute when headphones are connected.
Maintenance
Cleaning the Unit:
- Always unplug the unit from the power outlet before cleaning.
- Use a soft, dry cloth to wipe the exterior surfaces.
- Do not use harsh chemicals, cleaning solvents, or strong detergents.
- Gently wipe the dust cover with a soft, slightly damp cloth if necessary, then dry thoroughly.
Stylus (Needle) Replacement:
The stylus is a delicate component and will wear out over time. A worn stylus can damage your records and degrade sound quality. Replace the stylus after approximately 200-300 hours of playback, or if you notice a decrease in sound quality or visible damage.
- Gently pull the old stylus cartridge downwards and forwards to detach it from the tonearm.
- Carefully insert the new stylus cartridge by pushing it upwards and backwards until it clicks into place. Avoid touching the stylus tip.
Note: Two replacement needles are included in your package.
Turntable Belt Replacement:
The drive belt may need replacement if the platter stops spinning or spins inconsistently. Refer to the included replacement belts (128 mm diameter).
- Remove the rubber mat from the platter.
- Carefully lift the platter off the spindle.
- Remove the old belt and replace it with a new one, ensuring it is correctly seated around the motor pulley and the inner rim of the platter.
- Carefully place the platter back onto the spindle.
Note: Two replacement belts are included in your package.
Troubleshooting
| Problem | Possible Cause | Solution |
|---|---|---|
| No power | Power adapter not connected; Power outlet not working; Power/Volume knob off. | Ensure power adapter is securely connected. Try a different outlet. Turn Power/Volume knob clockwise. |
| No sound from speakers | Volume too low; Function selector incorrect; Headphones connected; External speakers not connected/powered. | Increase volume. Set function to "Phono" or "FM". Disconnect headphones. Check external speaker connections and power. |
| Turntable not spinning | Belt dislodged or broken; Speed selector incorrect; Tonearm not lifted. | Check/replace drive belt (see Maintenance). Ensure correct speed is selected. Lift tonearm from rest. |
| Poor sound quality / Skipping | Dirty record; Worn or dirty stylus; Unit not level; Excessive vibration. | Clean record. Clean or replace stylus (see Maintenance). Place unit on a stable, level surface. Avoid placing near vibrating objects. |
| Poor FM reception | Antenna not extended/positioned correctly; Weak signal. | Extend and adjust the FM antenna. Try repositioning the unit. |
Specifications
| Feature | Detail |
|---|---|
| Brand | Horokarda |
| Model | B0DJ13232T |
| Turntable Speeds | 33 1/3, 45, 78 RPM |
| Drive Type | Belt Drive |
| Speakers | Built-in Stereo Speakers |
| Radio Tuner | FM Radio |
| Output Connections | RCA Line Out, 3.5mm Headphone Jack |
| Material | Wood |
| Item Weight | 4.66 pounds (2.11 kg) |
| Package Dimensions | 13.3 x 13.03 x 6.5 inches (33.78 x 33.09 x 16.51 cm) |
| Included Components | Record Player, 2P Needles, 2P Belts |
| UPC | 764909995064 |
Warranty Information
Horokarda products are designed and manufactured to the highest quality standards. For specific warranty details, please refer to the warranty card included with your product or contact Horokarda customer support. Keep your purchase receipt as proof of purchase for warranty claims.
Customer Support
If you encounter any issues or have questions regarding your Horokarda Vinyl Record Player, please contact our customer support team. For the most up-to-date contact information, please visit the official Horokarda website or refer to your product packaging.
When contacting support, please have your product model number (B0DJ13232T) and purchase date available.