Jumplushion NV680, NV681, NV682, NV683
Jumplushion Vacuum Cleaner Maintenance Kit User Manual
For Shark NV680, NV681, NV682, NV683 Models
1. Introduction
This manual provides essential instructions for the installation, maintenance, and care of your Jumplushion Vacuum Cleaner Maintenance Kit. This kit is designed to help maintain the optimal performance of your compatible Shark vacuum cleaner by replacing worn components.
Kit Contents:
- 1 x HEPA Filter
- 2 Sets of Foam and Felt Filters (4 pieces total)
- 1 x Roller Brush
- 1 x Cleaning Brush Tool

Image 1: Overview of the Jumplushion Vacuum Cleaner Maintenance Kit components.
2. Compatibility
This maintenance kit is specifically designed for use with the following Shark vacuum cleaner models:
- Shark NV680
- Shark NV681
- Shark NV682
- Shark NV683
It replaces original parts XHF680 and XFF680.
3. Installation Instructions
Safety First: Always ensure your vacuum cleaner is unplugged from the power outlet before performing any maintenance or installation procedures.
3.1. Replacing the Filters
The kit includes a HEPA filter and two sets of foam and felt filters. Refer to your Shark vacuum's original manual for exact filter locations if unsure.
- Pre-Motor Filters (Foam & Felt): These are typically located under the dust cup. Remove the dust cup, then carefully pull out the old foam and felt filters. Insert the new foam filter first, followed by the new felt filter. Ensure they are seated correctly.
- Post-Motor Filter (HEPA): This filter is usually located at the bottom or front of the vacuum's main body. Open the filter cover, remove the old HEPA filter, and insert the new one. Close the cover securely.

Image 2: The HEPA filter and pre-motor foam and felt filters.
3.2. Replacing the Roller Brush
The roller brush is located in the floor nozzle of your vacuum cleaner.
- Lay the vacuum's floor nozzle flat on the ground, brush-roll side up.
- Use a coin or screwdriver to unlock the brush-roll garage.
- Lift off the cover.
- Remove the old roller brush by lifting it out.
- Insert the new roller brush, ensuring the ends fit into their designated slots.
- Replace the cover and lock it securely.

Image 3: The replacement roller brush.
4. Maintenance
Regular maintenance of your vacuum components ensures optimal cleaning performance and extends the lifespan of your appliance.
4.1. Filter Cleaning and Replacement
- Pre-Motor Filters (Foam & Felt): Rinse these filters with lukewarm water until the water runs clear. Squeeze out excess water and allow them to air dry completely for at least 24 hours before reinserting. Do not use a machine dryer.
- HEPA Filter: Tap the HEPA filter clean over a trash bin to remove loose dust. Do not wash the HEPA filter unless specified by your vacuum's original manual.
- Replacement Schedule: It is recommended to replace the foam and felt filters every 3 months, and the HEPA filter every 6 months, or more frequently depending on usage.
4.2. Roller Brush Cleaning
Periodically check the roller brush for tangled hair, strings, or debris. Use the included cleaning brush tool to cut and remove any obstructions. Ensure the brush-roll spins freely.
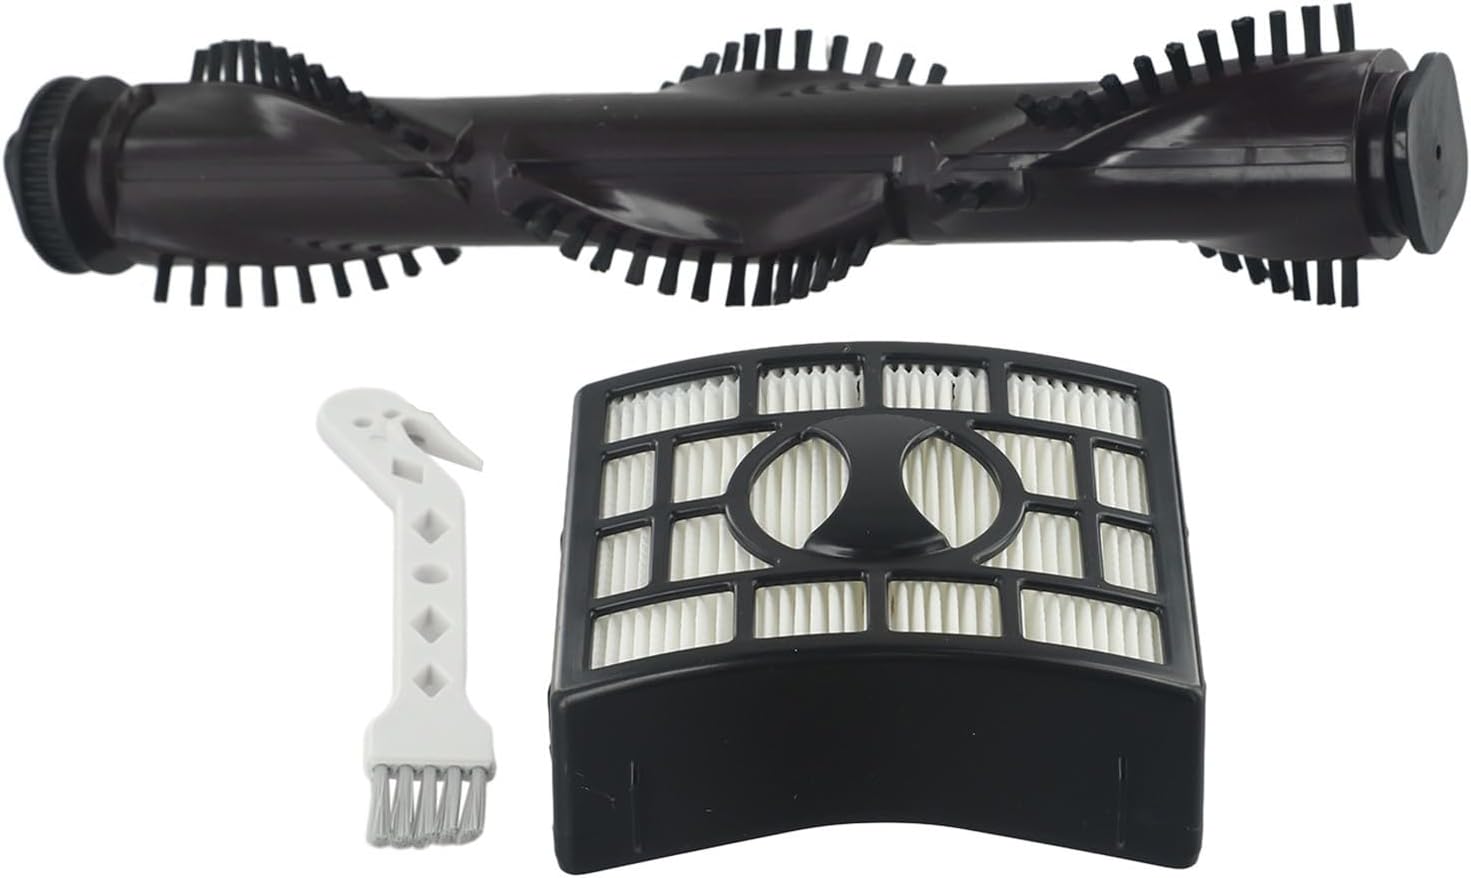
Image 4: The cleaning brush tool alongside other kit components.
5. Specifications
| Brand | Jumplushion |
| Material | Plastic |
| Compatible Devices | Shark NV680, NV681, NV682, NV683 |
| Item Weight | 9.5 ounces (approx.) |
| Product Dimensions | 11.02 x 5.91 x 1.97 inches (approx.) |
6. Troubleshooting
If you experience issues after installing the new components, consider the following:
- Reduced Suction: Ensure all filters are correctly installed and fully dry. Check for any blockages in the vacuum's hoses or nozzles.
- Unusual Noises: Verify the roller brush is installed correctly and spins freely without obstruction. Check for any foreign objects caught in the brush-roll area.
- Components Not Fitting: Double-check that your vacuum model is listed under the compatible models in Section 2. Ensure components are oriented correctly during installation.
7. Warranty and Support
For any questions regarding the Jumplushion Vacuum Cleaner Maintenance Kit, or for information on warranty coverage, please contact the manufacturer directly through your purchase platform or their official website. Please retain your proof of purchase for warranty claims.