UE-MAOLU HDWQDEBXWUS-A-130*40CM
UE-MAOLU Flood Protection Barrier User Manual
Model: HDWQDEBXWUS-A-130*40CM
Introduction
The UE-MAOLU Flood Protection Barrier is designed to provide a quick and effective solution for preventing water ingress into various structures. This reusable barrier offers a reliable alternative to traditional sandbags, deploying rapidly to protect your property from floodwaters. Its robust aluminum alloy construction ensures durability and excellent waterproof performance, making it suitable for a wide range of applications.
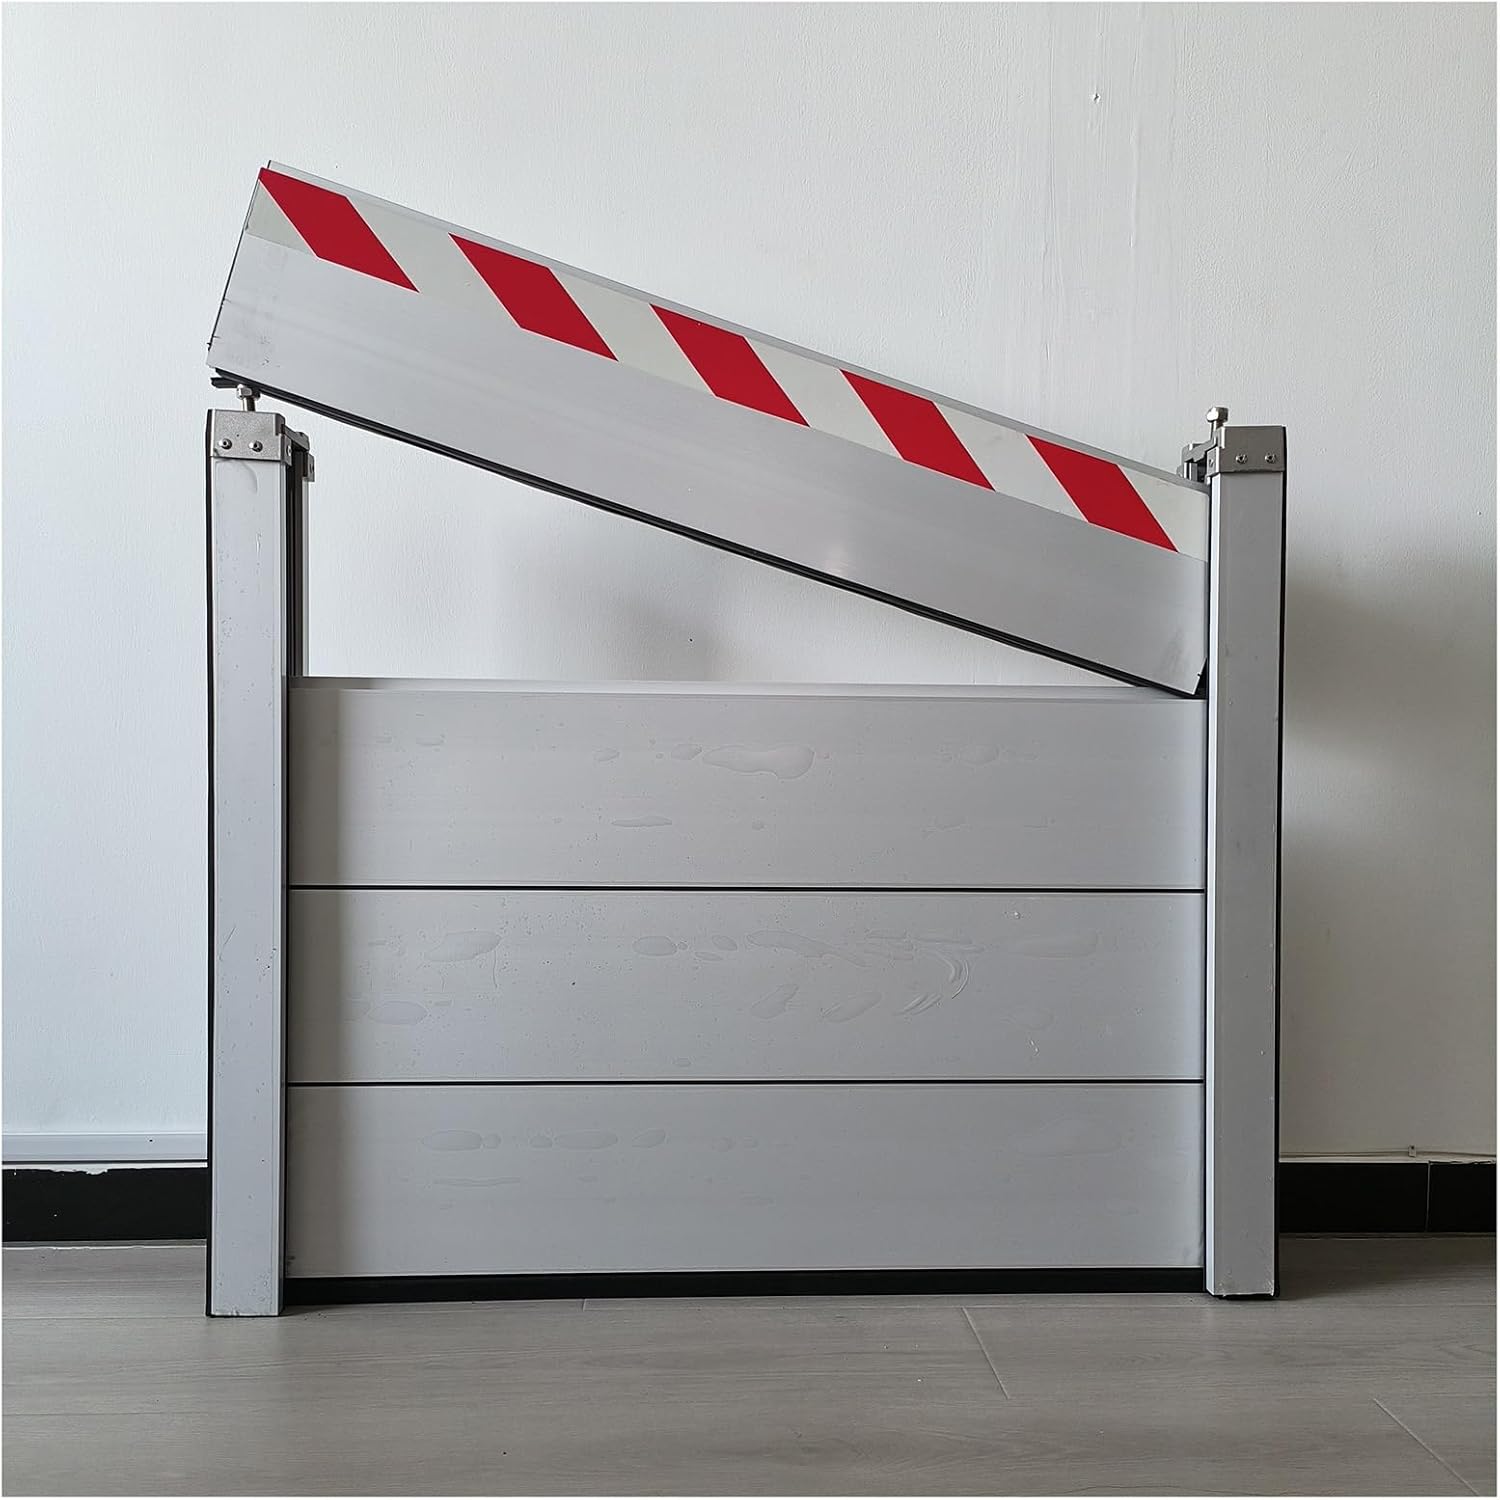
Figure 1: Main view of the UE-MAOLU Flood Protection Barrier.
Product Components and Features
The flood barrier consists of several key components designed for effective water sealing and ease of installation.
- Aluminum Alloy Construction: The barrier is made from high-quality aluminum alloy, treated with electrophoresis for enhanced durability and corrosion resistance.
- Modular Baffles: Multiple baffle sections stack vertically to achieve the desired height.
- Sealing Strips: Each baffle features sealing strips between sections to prevent water leakage. A waterproof strip is also present at the bottom of the barrier for ground sealing.
- Side Posts: Sturdy side posts provide structural support and secure the baffles in place.
- Reflective Warning Strips: Black and yellow warning strips are located on the top of the barrier and on the side posts for increased visibility, especially at night.
- Top Nut Fixing: A mechanism at the top secures the entire assembly.
- Plug-in Design: Allows for easy assembly and disassembly of the baffle sections.
- Side Perforated Fixing: Provides options for securing the side posts.
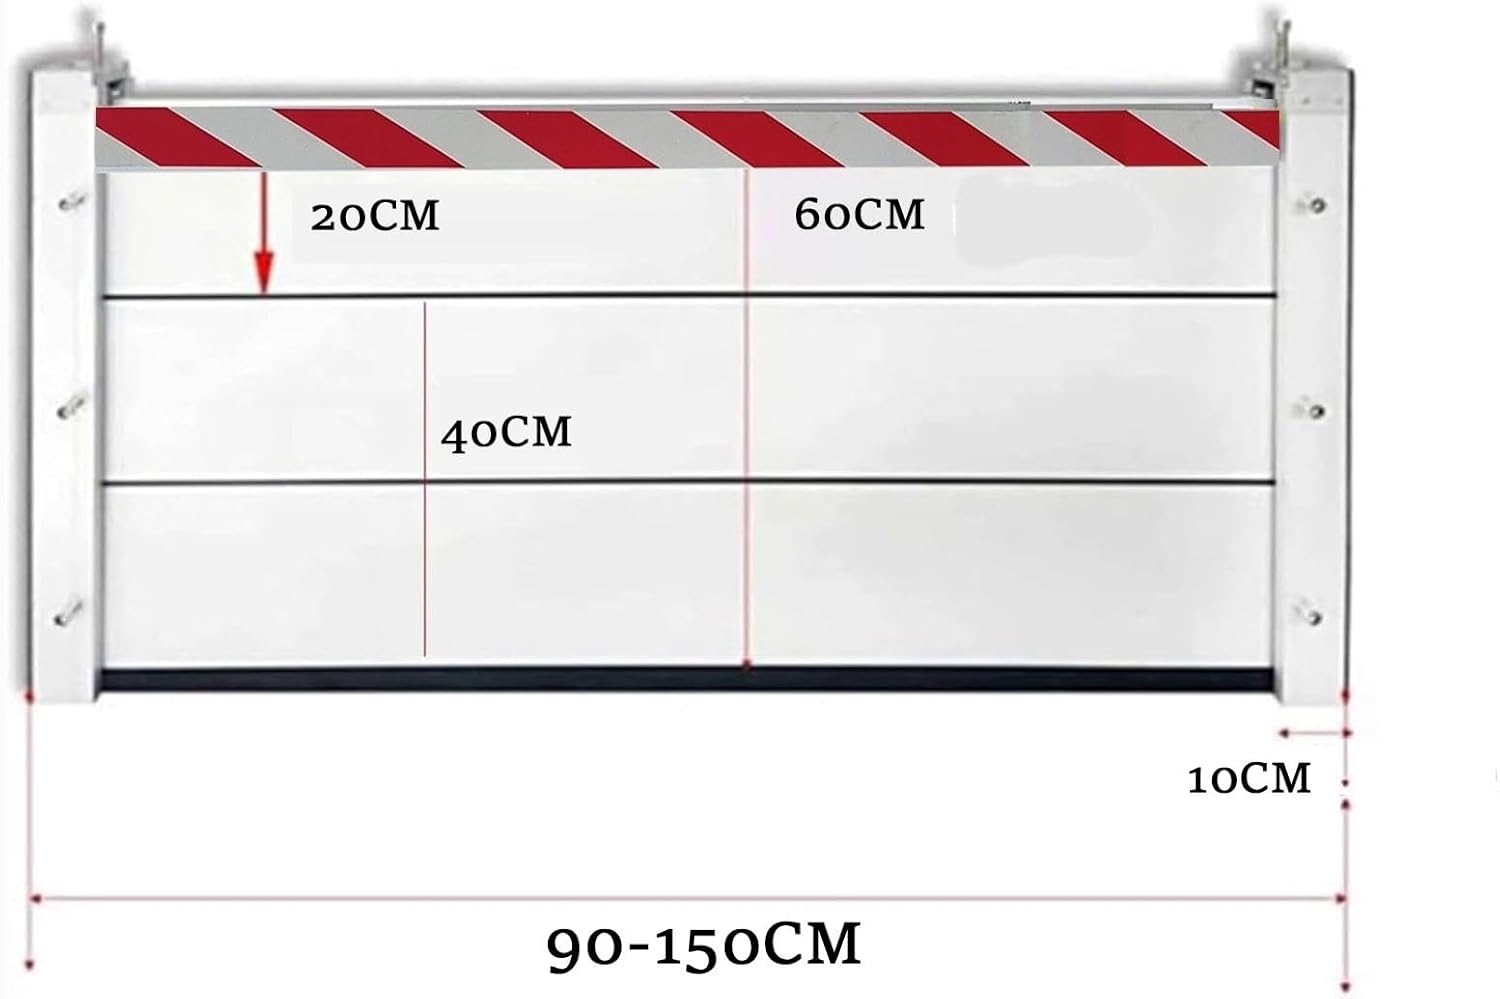
Figure 2: Detailed view of flood barrier components and features.

Figure 3: Illustration of the waterproof sealing strip at the bottom of the barrier.
Specifications
| Attribute | Value |
|---|---|
| Product Material | Aluminum Alloy (including columns) |
| Baffle Thickness | 4 cm (1.6 inches) |
| Post Length | 9 cm (3.5 inches) |
| Post Width | 6 cm (2.4 inches) |
| Item Weight | 6.61 pounds (for 130*40cm model) |
| Assembly Required | No (pre-assembled components) |
| Number of Pieces | 1 (complete barrier unit) |
| Available Sizes (Width x Height) | 90*40cm, 100*40cm, 120*40cm, 130*40cm, 140*40cm, 150*40cm, 90*60cm, 100*60cm, 120*60cm, 130*60cm, 140*60cm, 150*60cm, 90*80cm, 100*80cm, 120*80cm, 130*80cm, 140*80cm, 150*80cm |

Figure 4: General dimensions and modularity of the flood barrier.
Setup and Installation
Proper measurement and installation are crucial for the effective performance of the flood barrier. The barrier can be installed using either a built-in (inside the wall) or external (outside the wall) measurement method.
1. Measurement Method
Before installation, determine the appropriate measurement method for your specific opening.
- Built-in Measurement Method: Measure the exact distance between the two walls where the barrier will be installed. This method is for installation inside the wall opening.
- External Measurement Method: Measure the distance required to extend 10cm beyond the wall rock on each side. This method is for installation outside the wall opening.

Figure 5: Illustration of built-in and external measurement methods for installation.
2. Assembly Steps
- Ensure the installation surface is clean and free of debris.
- Position the side posts according to your chosen measurement method (built-in or external).
- Secure the side posts using the side perforated fixing points. Ensure they are plumb and firmly attached.
- Begin inserting the baffle sections into the grooves of the side posts, starting from the bottom. The plug-in design allows for easy sliding.
- Ensure each baffle section is properly seated and the sealing strips are aligned to create a watertight seal between sections.
- Continue stacking baffles until the desired height is reached.
- Once all baffles are in place, secure the top of the assembly using the top nut fixing mechanism on the side posts. Tighten securely to compress the baffles and enhance the seal.
- Verify that the bottom waterproof strip is making full contact with the ground surface to prevent water leakage.
Operation
The flood barrier is designed for quick deployment and removal.
Deployment:
- Ensure the area where the barrier will be deployed is clear of obstructions.
- If the side posts are permanently installed, simply slide the baffle sections into place from the bottom up.
- If the barrier is stored disassembled, first secure the side posts, then insert the baffle sections.
- Tighten the top nut fixing to ensure a secure and watertight seal.
Removal:
- Loosen the top nut fixing.
- Carefully slide out each baffle section, starting from the top.
- If the side posts are not permanently installed, they can also be removed.
Maintenance
Regular maintenance will ensure the longevity and effectiveness of your flood barrier.
- Cleaning: After each use, especially after contact with floodwaters, clean all components with mild soap and water. Rinse thoroughly and allow to air dry completely before storage.
- Inspection: Periodically inspect the sealing strips for any signs of wear, cracking, or damage. Damaged seals may compromise the barrier's waterproof performance and should be replaced if necessary.
- Storage: Store the disassembled barrier components in a dry, cool place away from direct sunlight and extreme temperatures. This helps preserve the integrity of the materials and sealing strips.
- Hardware Check: Ensure all nuts, bolts, and fixing mechanisms are clean and in good working order. Lubricate moving parts if needed.
Troubleshooting
If you encounter issues with your flood barrier, refer to the following common problems and solutions:
| Problem | Possible Cause | Solution |
|---|---|---|
| Water leakage at the bottom | Uneven ground surface; Damaged bottom sealing strip; Insufficient pressure from top nut fixing. | Ensure ground surface is clean and level. Inspect and replace damaged sealing strip. Tighten top nut fixing firmly. |
| Water leakage between baffle sections | Misaligned baffles; Damaged inter-baffle sealing strips. | Re-align baffles during assembly. Inspect and replace damaged sealing strips. |
| Difficulty in assembling/disassembling baffles | Debris in grooves; Baffles are not aligned properly. | Clean grooves in side posts and baffles. Ensure baffles are inserted straight and level. |
| Barrier feels unstable after assembly | Side posts not securely fixed; Top nut fixing not tightened. | Re-secure side posts firmly. Tighten the top nut fixing completely. |
Applications
The UE-MAOLU Flood Protection Barrier is versatile and can be used in various locations requiring temporary or semi-permanent flood defense.
- Garage Exits and Entrances
- Factory Entrances
- House Entrances and Doors
- Basement Windows
- Underground Garages and Shopping Malls
- Tunnel Entrances
- Subway Entrances
- Commercial and Industrial Buildings
- Temporary Water Storage (e.g., for construction sites)

Figure 6: Examples of various application scenarios for the flood barrier.
Warranty and Support
For any questions regarding the product, its installation, or operation, please contact our customer service team.
Customer Service: If you have any questions about the product, you can email us. We aim to respond and assist you within 24 hours.
Please refer to your purchase documentation for specific warranty details and contact information.
Ask a question about this manual
Ask about setup, troubleshooting, compatibility, parts, safety, or missing instructions. Manuals+ will review the question and use this page’s manual context to help answer it.