1. Introduction
This manual provides comprehensive instructions for the safe and efficient installation, operation, and maintenance of your FPBIGCHA 1.5KW 380V Variable Frequency Drive (VFD). This VFD is designed for precise speed control of CNC spindle motors and other industrial applications requiring variable frequency output. Please read this manual thoroughly before installation and operation to ensure proper usage and to prevent damage to the unit or connected equipment.
2. Safety Information
WARNING: Improper installation or operation can lead to serious injury or death. Always follow safety precautions.
- Ensure power is disconnected before any installation, wiring, or maintenance.
- Only qualified personnel should perform installation and wiring.
- Verify correct voltage and current ratings before connecting the VFD.
- Ground the VFD properly to prevent electrical shock.
- Do not touch internal components immediately after power-off, as residual voltage may be present.
- Install the VFD in a clean, dry, and well-ventilated environment, away from direct sunlight, corrosive gases, and flammable materials.
- Ensure adequate cooling space around the unit.
3. Product Features
The FPBIGCHA VFD offers robust performance and protection features:
- Multiple protection methods for stable and safe operation.
- Ample cooling space between components and multi-hole casing design for efficient heat dissipation.
- Support for external braking resistors for rapid acceleration and deceleration control.
- Wide application in various automatic control equipment.
4. Specifications
Key specifications for the FPBIGCHA 1.5KW 380V VFD (Model HY01D543B):
- Power: 1.5KW
- Input Voltage: 3-phase 380V 50Hz/60Hz
- Output Voltage: 3-phase 0-380V
- Output Frequency: 0-400Hz
- Output Current: 4.0A
- Drive Capacity: 3.2 KVA
- Applicable Motor: 1.5KW
- Dimensions (approx): 17cm x 16cm x 13cm
- Item Weight: 6.61 pounds (3000 Grams)
- Certification: CE
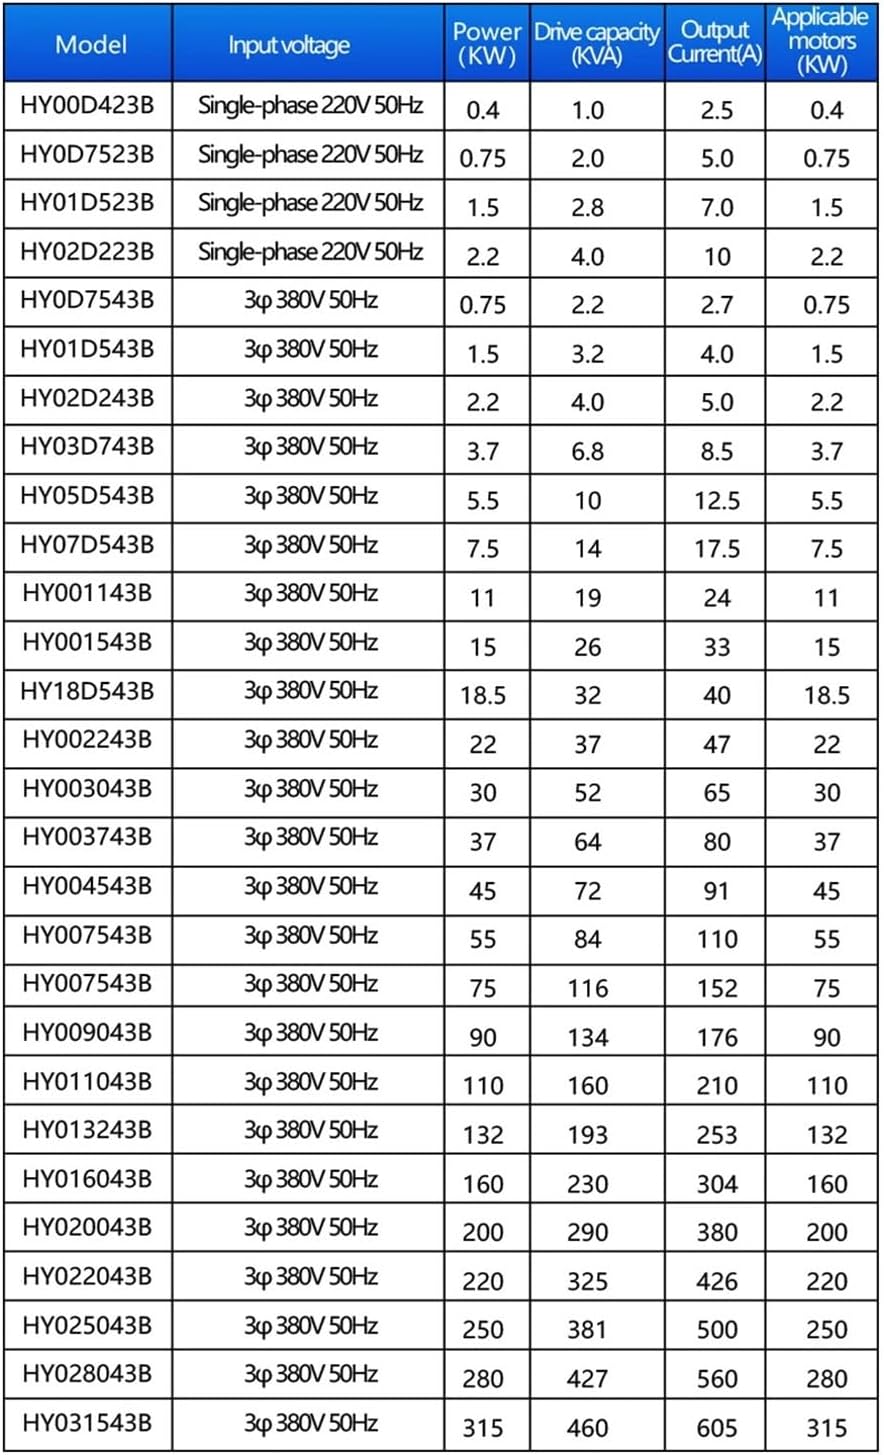
Figure 4.1: Detailed specifications for various VFD models, including input voltage, power, drive capacity, output current, and applicable motors.
5. Setup and Installation
Proper installation is critical for the VFD's performance and safety.
5.1 Mounting
- Mount the VFD vertically on a stable, non-flammable surface.
- Ensure sufficient clearance (at least 10cm) around the VFD for proper ventilation and heat dissipation.
- Avoid mounting in areas with excessive vibration, dust, or moisture.
5.2 Wiring
Refer to the wiring diagram below for correct connections. All wiring must comply with local electrical codes.

Figure 5.1: VFD Wiring Diagram. Connect Earthwire, Input Power (R, S, T), optional Brake Unit (P+, PR), and Output Power (U, V, W) to the motor.
- Earth (Ground): Connect the VFD's ground terminal to a reliable earth ground.
- Input Power (R, S, T): Connect the 3-phase 380V AC power supply to these terminals. Ensure correct phase sequence.
- Output Power (U, V, W): Connect these terminals to the corresponding terminals of your 3-phase spindle motor.
- Brake Unit (P+, PR): These terminals are for connecting an optional external braking resistor, if required for fast deceleration.
- Ensure all connections are tight and secure.
6. Operating Instructions
The VFD features a user-friendly control panel for operation.
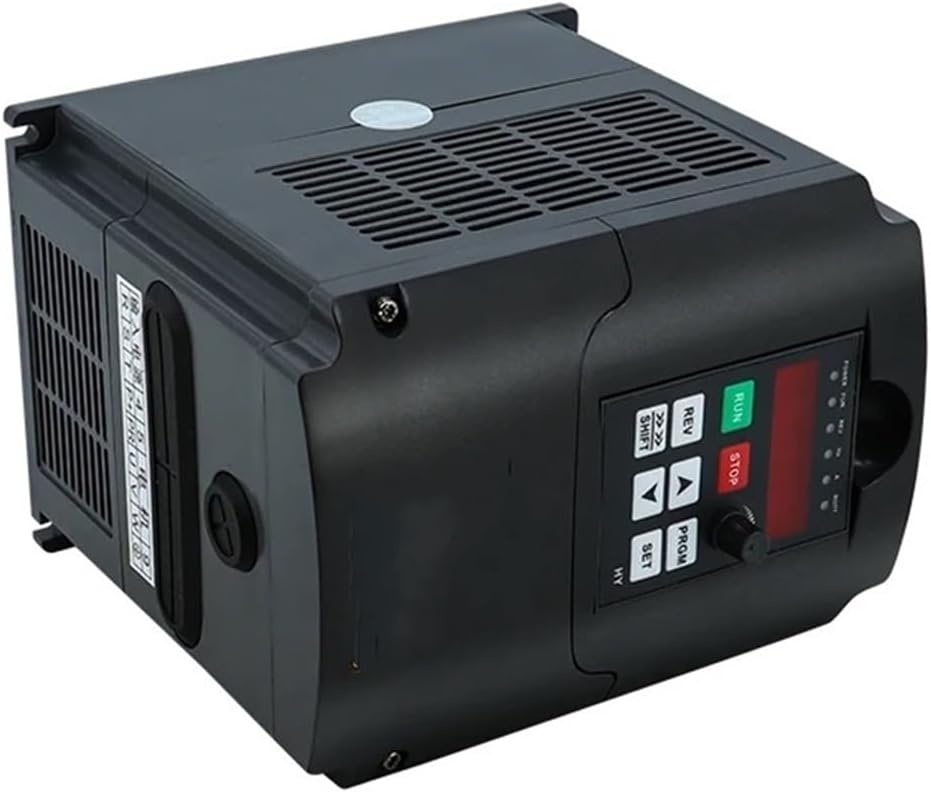
Figure 6.1: VFD Control Panel Overview.
6.1 Control Panel Functions
- RUN: Starts the motor.
- STOP: Stops the motor.
- REV: Reverses the motor direction.
- SHIFT: Used to shift the cursor during parameter setting.
- ▲ (Up): Increases parameter values or navigates menus.
- ▼ (Down): Decreases parameter values or navigates menus.
- PRGM (Program): Enters or exits the parameter setting mode.
- SET: Confirms parameter settings.
- Digital Display: Shows current frequency, output voltage, current, or parameter codes/values.
6.2 Basic Operation Sequence
- Power On: Apply power to the VFD. The digital display will illuminate.
- Set Frequency: Use the ▲ and ▼ buttons to adjust the desired output frequency.
- Start Motor: Press the RUN button to start the motor. The motor will accelerate to the set frequency.
- Stop Motor: Press the STOP button to decelerate and stop the motor.
- Reverse Direction: While the motor is running, press the REV button to reverse its direction.
For advanced parameter settings and detailed programming, refer to the full programming manual (not included in this basic guide).
7. Maintenance
Regular maintenance ensures the longevity and reliable operation of your VFD.
- Cleaning: Periodically clean the VFD's exterior and ventilation openings to prevent dust accumulation. Use a soft, dry cloth. Do not use liquid cleaners.
- Inspection: Regularly inspect wiring connections for tightness and signs of wear or damage. Check for any unusual noises or odors during operation.
- Environment: Ensure the operating environment remains within specified temperature and humidity ranges.
- Cooling Fan: Check the cooling fan for proper operation and ensure it is free from obstructions.
8. Troubleshooting
If you encounter issues with your VFD, refer to the following basic troubleshooting steps. For complex problems, consult a qualified technician.
| Problem | Possible Cause | Solution |
|---|---|---|
| VFD does not power on. | No input power; loose connections; internal fault. | Check power supply; verify all wiring connections; consult technician if power is present but unit remains off. |
| Motor does not run. | Incorrect wiring; VFD in stop mode; parameter settings incorrect; motor fault. | Verify motor and VFD wiring; press RUN button; check parameter settings; inspect motor. |
| Motor runs erratically or at wrong speed. | Incorrect frequency setting; motor parameters not matched; load too high. | Adjust frequency; verify motor parameters (e.g., rated frequency, voltage); reduce load if possible. |
| VFD displays an error code. | Overcurrent, overvoltage, undervoltage, overload, overheat, etc. | Refer to the VFD's full programming manual for specific error code meanings and solutions. Address the underlying cause (e.g., reduce load, check input voltage). |
9. Warranty and Support
For warranty information and technical support, please contact your original point of purchase or the manufacturer directly. Keep your purchase receipt as proof of purchase.