Introduction
This manual provides detailed instructions for the installation, operation, and maintenance of your Automatic Power Cut-Off Switch. This device is designed to protect your vehicle's battery from drain, extend its lifespan, and offer convenient remote control functionality. Please read this manual thoroughly before use to ensure proper and safe operation.
What's in the Box
- Cut off Switch x 1
- Remote controller x 2
- Manual x 1
Features
- Battery Preservation: Prevents battery drain during long-term parking, from aging wires, or forgotten lights, maximizing power storage and extending battery lifespan.
- Smart Protection: Automatically cuts off power after 120 seconds if voltage drops below 11.8V. Remote control is disabled if voltage exceeds 13.2V to prevent accidental shutdown while driving, allowing manual control only.
- LED Voltage Display: Features an LED display for real-time battery voltage monitoring.
- Remote Control: Can be controlled from up to 100 meters away via the included remote.
- Adjustable Mounting: Uses a negative link method. The connector can be replaced to adjust mounting position if the initial location in the engine compartment is incompatible.
- Wide Application: Suitable for most 12V vehicles with a rated battery current below 240A, including cars, boats, RVs, trailers, trucks, ATVs, UTVs, and motorcycles. Compatible with negative pole sizes 9-13 mm and 15-17 mm. Not compatible with small post vehicles.
Setup and Installation
Follow these steps carefully to install your Automatic Power Cut-Off Switch. Ensure your vehicle's ignition is off before beginning installation.

Image: The Automatic Power Cut-Off Switch with its components.
- Remove Battery's Negative Terminal Clamp: Disconnect the existing negative terminal clamp from your vehicle's battery.
- Connect Switch Clamp to Battery's Negative Terminal: Attach the main clamp of the disconnect switch directly to the negative post of your vehicle's battery.
- Attach Battery's Negative Terminal Clamp to Switch's Negative Terminal: Connect the vehicle's original negative terminal clamp to the designated negative terminal on the disconnect switch.
- Connect Switch's Red Power Cord to Battery's Positive Terminal: Route the red power cord from the disconnect switch to the positive terminal of your vehicle's battery and secure it.
Video: Step-by-step installation guide for the Smart Car Battery Disconnect Switch. This video demonstrates how to connect the switch to your vehicle's battery terminals, including the negative and positive connections.

Image: A mechanic demonstrating the installation of a 12V/24V car battery disconnect switch.
Operating Instructions
The Automatic Power Cut-Off Switch offers both manual and remote control for managing your vehicle's battery power.
Manual Operation
- Use the ON/OFF buttons directly on the switch unit to manually connect or disconnect the battery.
Remote Control Operation
- Press the 'ON' button on the remote control to connect the battery and supply power to the vehicle.
- Press the 'OFF' button on the remote control to disconnect the battery and cut off power to the vehicle.
- The remote control has an operating range of up to 100 meters.
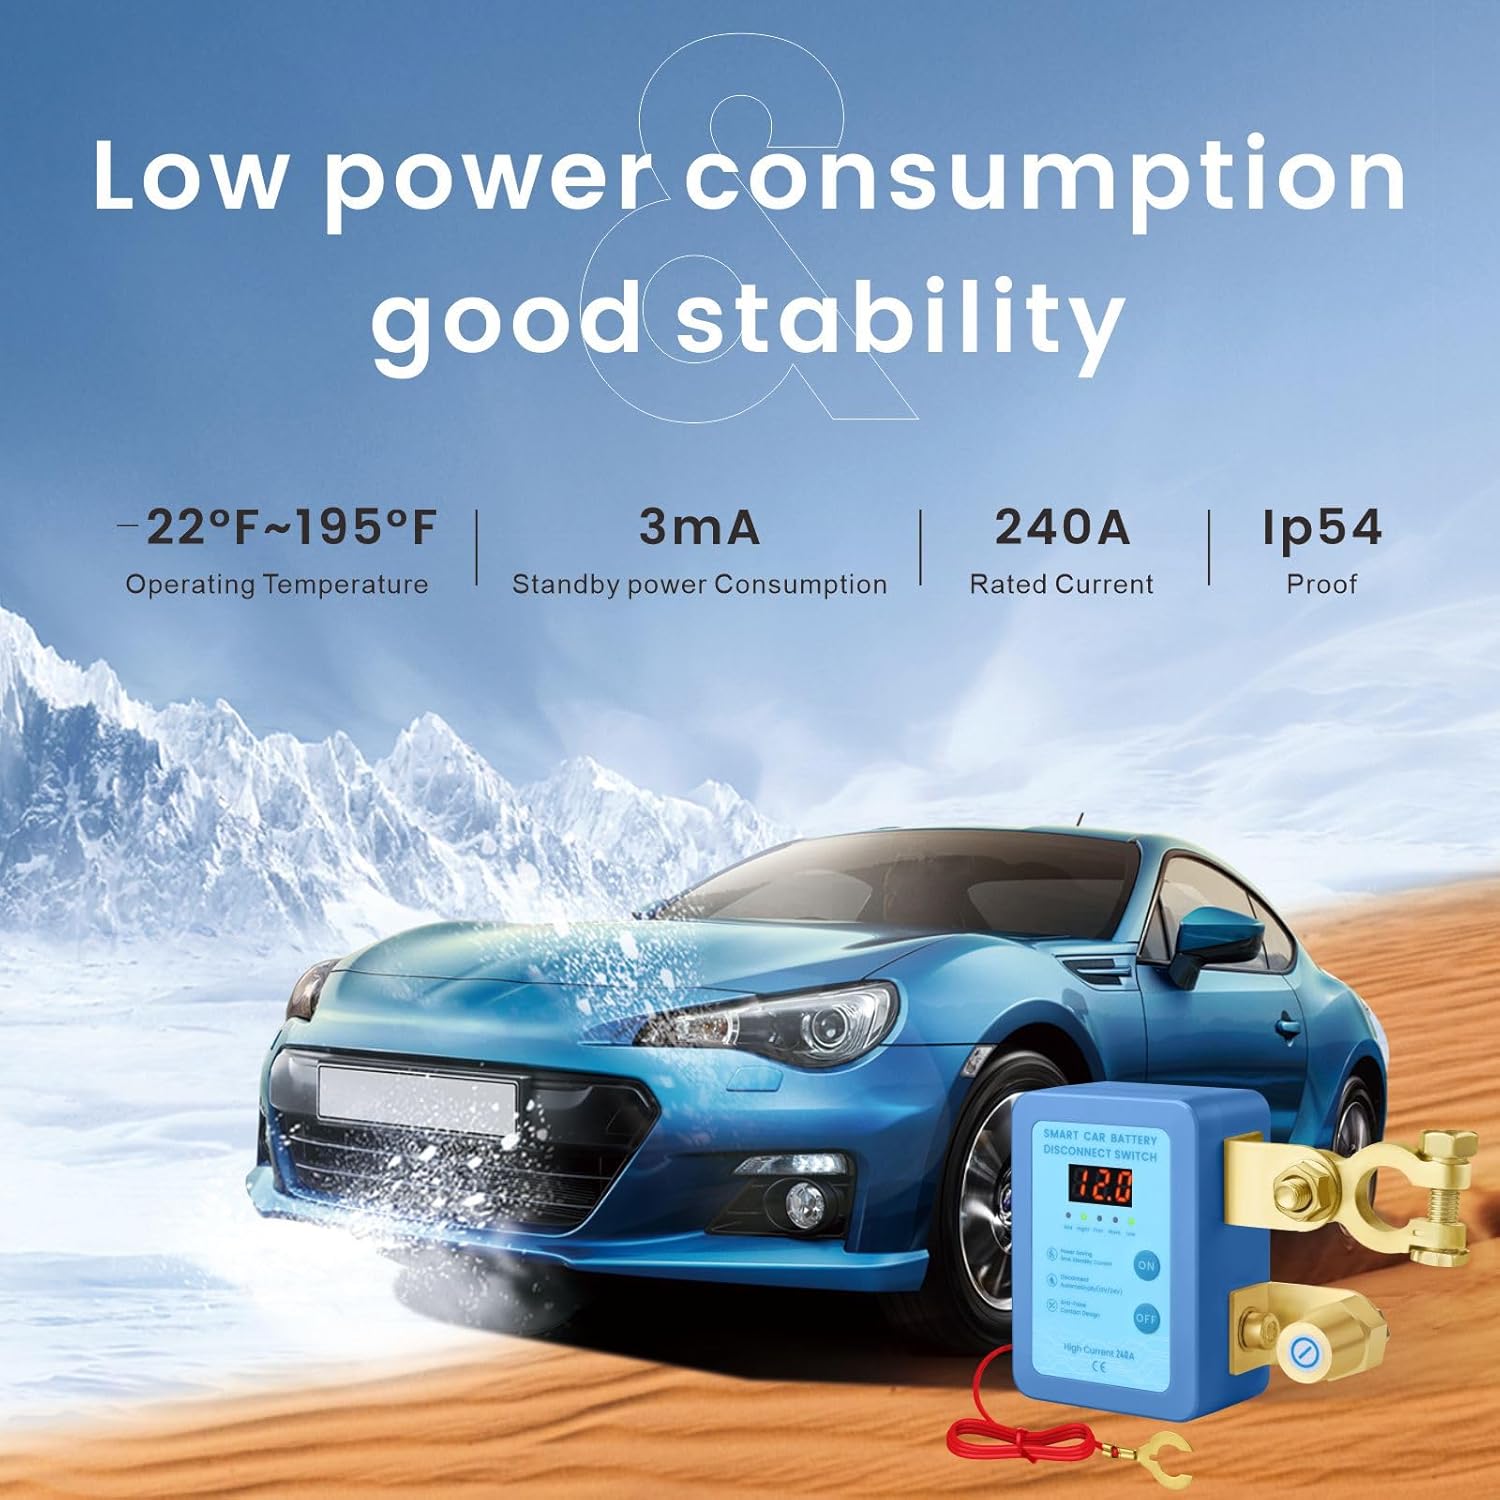
Image: Demonstrating remote control functionality for the battery disconnect switch.
Voltage Display and Smart Protection
- The integrated LED display shows the real-time voltage of your vehicle's battery.
- If the battery voltage drops below 11.8V, the switch will automatically cut off power after 120 seconds to prevent deep discharge and protect the battery.
- When the battery voltage is higher than 13.2V (typically when the engine is running and charging), the remote control function is temporarily disabled. This prevents accidental power cut-off while driving, ensuring safety. Manual operation is still possible in this state.

Image: Visual representation of the low voltage protection feature and its benefits for long-term parking, anti-theft, and preventing car line aging.
Maintenance
To ensure optimal performance and longevity of your Automatic Power Cut-Off Switch, consider the following maintenance tips:
- Periodically inspect all connections to ensure they are clean, tight, and free from corrosion.
- Keep the switch unit clean and free from dirt, dust, and moisture. Use a dry cloth for cleaning.
- Avoid exposing the unit to extreme temperatures or direct water spray.
- Check the battery terminals for any signs of wear or damage and replace if necessary.
Troubleshooting
If you encounter issues with your Automatic Power Cut-Off Switch, refer to the following common problems and solutions:
| Problem | Possible Cause | Solution |
|---|---|---|
| Switch does not turn ON/OFF | Loose connections, low battery voltage, remote control battery dead. | Check all terminal connections for tightness. Verify vehicle battery voltage. Replace remote control battery. |
| Voltage display is off or inaccurate | Poor connection, internal fault. | Ensure all wires are securely connected. If problem persists, contact customer support. |
| Remote control not working | Out of range, battery dead, vehicle voltage too high. | Move closer to the vehicle. Replace remote battery. Check vehicle voltage (remote is disabled above 13.2V). |
| Automatic cut-off occurs frequently | Vehicle battery is weak or draining quickly. | Have your vehicle's battery tested and charged or replaced if necessary. Investigate potential parasitic drains. |
Specifications
| Feature | Specification |
|---|---|
| Product Dimensions | 2.36 x 3.35 x 1.5 inches; 7.05 ounces |
| Operation Mode | ON-OFF |
| Current Rating | 240 Amps |
| Operating Voltage | 12 Volts |
| Contact Type | Normally Closed |
| Connector Type | Clamp |
| Brand | YG Culture |
| Terminal | Through Hole |
| Circuit Type | 1-way |
| Actuator Type | Push Button |
Warranty and Support
For warranty information and customer support, please refer to the documentation included with your purchase or contact the manufacturer directly. Keep your proof of purchase for any warranty claims.