1. Introduction
This manual provides comprehensive instructions for the installation, operation, and maintenance of your wowuseful Digital Instrument Cluster, model B0FN3XJZNN. This product is specifically designed as an aftermarket replacement for Volkswagen Tiguan and Golf 5 models manufactured between 2004 and 2008.
Please read this manual thoroughly before installation and use to ensure proper function and to maximize your product experience.
2. Product Features
- Applicable Model: Designed for Volkswagen Tiguan Golf 5, years 2004-2008.
- Multifunctional Display: Supports original tire data, oil temperature, water temperature, oil display, fuel consumption, and body balance.
- High Performance: Runs on a LINUX system with a 4-core CPU (1.5 GHz), 1GB RAM, and 4GB ROM.
- Multi-Language Support: Includes English, German, Spanish, Japanese, Russian, Chinese (Simplified/Traditional), Arabic, Turkish, Korean, French, and Italian.
- LCD Display: 12.3-inch HD display with 1920x720 resolution, offering various UI styles (Classic, Sporty, Offroad).
- Steering Wheel Control Integration: Retains original steering wheel control functions for audio and settings.
3. Package Contents
Verify that all items listed below are included in your package:
- Digital Cluster Unit x 1
- Cluster Frame x 1
- User Manual x 1
- Update Cable (USB port) x 1
- Assembly Tools (Pry tools) x 1 set

Figure 3.1: Contents of the product package, including the digital cluster, frame, user manual, USB cable, and assembly tools.
4. Setup and Installation
The wowuseful Digital Instrument Cluster is designed for non-destructive installation, integrating seamlessly with your vehicle's existing systems. Professional installation is recommended to ensure correct wiring and functionality.
4.1 Pre-Installation Checklist
- Ensure the vehicle's ignition is off and the battery is disconnected before beginning installation.
- Verify all package contents are present and undamaged.
- Familiarize yourself with your vehicle's dashboard removal procedures.
4.2 Installation Steps (General Guidance)
- Carefully remove the original instrument cluster from your vehicle's dashboard using appropriate pry tools.
- Disconnect all wiring harnesses from the original cluster.
- Connect the vehicle's wiring harnesses to the corresponding ports on the new wowuseful Digital Instrument Cluster. Ensure all connections are secure.
- Mount the new digital cluster into the dashboard opening. Ensure it is seated correctly and securely.
- Reconnect the vehicle battery.
- Turn on the ignition and test the functionality of the new digital cluster.

Figure 4.1: Visual comparison of the dashboard before and after the digital instrument cluster installation.
5. Operating Instructions
5.1 Initial Startup
Upon first power-on, the system will initiate. The digital cluster features a fast startup time, typically less than 3 seconds from ignition to full display.

Figure 5.1: The digital cluster's quick startup capability.
5.2 User Interface (UI) and Themes
The digital cluster offers multiple UI styles, including Classic, Sport, Racing, Minimalist, and Economic. These can be selected and customized to your preference.

Figure 5.2: Selection screen for various UI themes.
5.3 Steering Wheel Controls
The unit retains compatibility with your vehicle's original steering wheel controls. This allows for easy adjustment of settings, switching songs, and managing channels without diverting attention from the road.

Figure 5.3: Steering wheel controls for operating the digital cluster.
5.4 Displaying Original Car Data
The digital cluster supports the display of various original vehicle data, including:
- Real-time door switch status (opening/closing reminders).
- Fuel consumption display and real-time monitoring.
- Tire pressure and angle information.
- Oil temperature and water temperature.
- Body balance information.
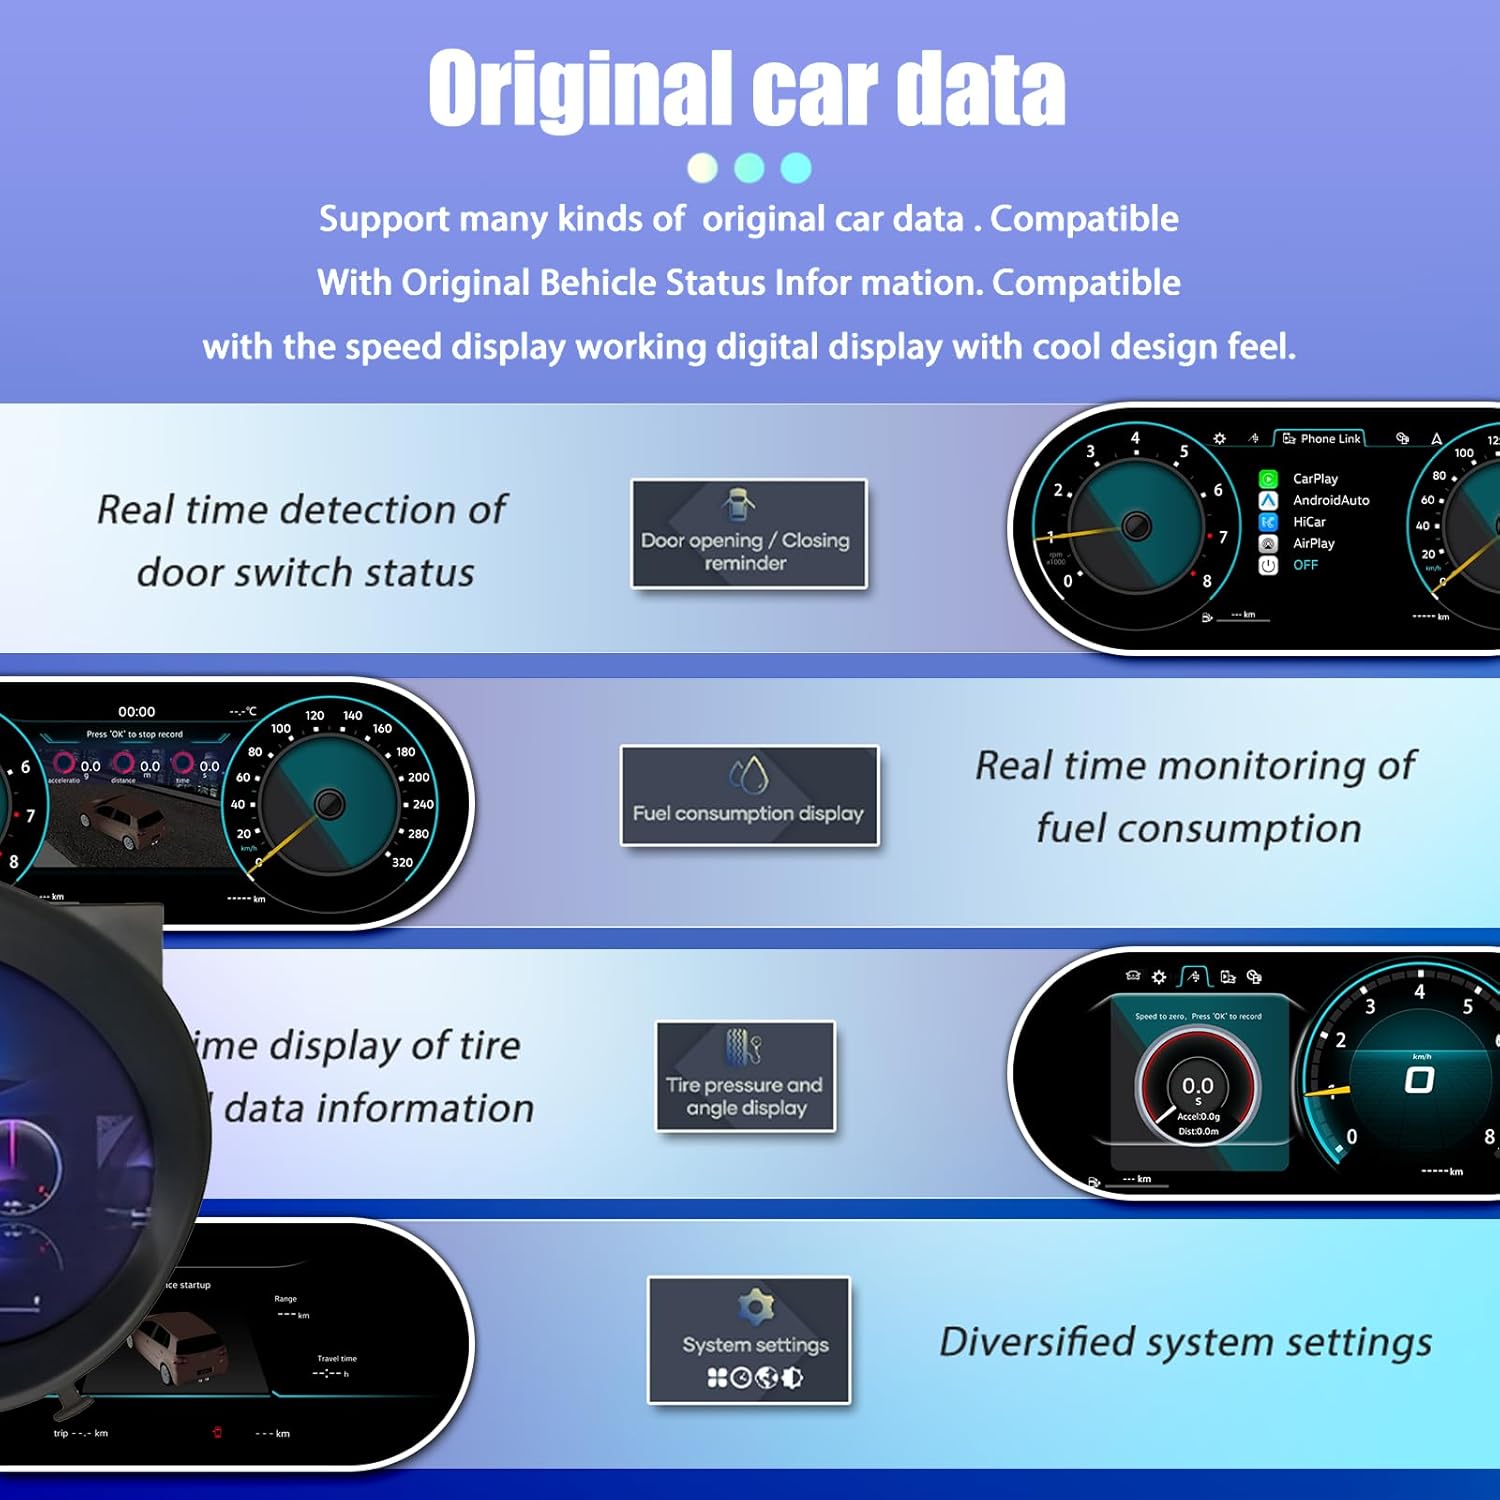
Figure 5.4: Examples of original car data displayed on the cluster.
5.5 Language Settings
The system supports multiple languages. To change the display language, navigate to the system settings menu and select your preferred language from the available options.

Figure 5.5: Supported languages for the digital cluster.
6. Maintenance
6.1 Cleaning the Display
To clean the 12.3-inch HD display, use a soft, lint-free cloth. For stubborn smudges, lightly dampen the cloth with a screen-safe cleaning solution. Avoid abrasive materials or harsh chemicals, as these can damage the screen surface.
6.2 Software Updates
Firmware, software, UI, and GPS navigation map updates are provided free of charge. Refer to the manufacturer's website or contact customer support for instructions on how to perform updates using the provided USB update cable.
7. Troubleshooting
If you encounter any issues with your digital instrument cluster, please refer to the following common troubleshooting steps:
- No Power/Display: Check all wiring connections to ensure they are secure. Verify the vehicle's battery is properly connected and charged.
- Incorrect Data Display: Ensure the unit is correctly configured for your vehicle model. A system reset may resolve minor data display issues.
- Steering Wheel Controls Not Responding: Confirm that the wiring harness for steering wheel controls is properly connected.
- System Freezes/Slow Performance: Perform a system restart. Ensure the software is up to date.
If the problem persists after attempting these steps, please contact customer service for further assistance.
8. Specifications
| Feature | Detail |
|---|---|
| Model | B0FN3XJZNN |
| Applicable Vehicle | Volkswagen Tiguan Golf 5 (2004-2008) |
| Display Size | 12.3 inches |
| Screen Resolution | 1920x720 |
| Operating System | LINUX |
| CPU | 4-core, 1.5 GHz |
| RAM | 1GB |
| ROM | 4GB |
| Package Dimensions | 14.17 x 8.66 x 7.87 inches |
| Weight | 5.51 Pounds |
9. Warranty and Support
Your wowuseful Digital Instrument Cluster comes with the following support and warranty:
- Warranty: The product is covered by a 365-day warranty from the date of receipt confirmation.
- Returns/Refunds: Free return and refund within 15 days of receipt confirmation if the product has a problem. Alternatively, a new machine replacement will be provided. Please contact customer service first.
- Customer Service: 24-hour customer service is available.
- Technical Support: An engineer team is available to assist with installation and technical queries. Please contact us if you require assistance.