INFIYA M1
INFIYA M1 Wireless 2K Video Doorbell Camera Instruction Manual
Model: M1
1. Introduction
The INFIYA M1 Wireless 2K Video Doorbell Camera provides advanced home security with convenient features. This manual offers detailed instructions for setting up, operating, and maintaining your video doorbell to ensure optimal performance and security for your home.
Key features include 2K video resolution, an included indoor chime, night vision, AI human detection, instant alerts, and two-way audio communication.

Image 1.1: INFIYA M1 Video Doorbell Camera and Chime highlighting key features like 2K resolution, two-way audio, human detection, instant alerts, night vision, built-in battery, weather resistance, and 2.4GHz Wi-Fi support.
2. What's in the Box
- Video Doorbell Camera (with mounting plate attached) x1
- Indoor Chime x1
- AAA Batteries x3 (for chime)
- 1.5m (4.92ft) USB Power Cord x1
- Mounting Kit (screws and anchors) x1
- Positioning Sticker x1
- Quick Start Guide x1
- 24-hour Surveillance Sticker x1
Image 2.1: All items included in the INFIYA M1 Video Doorbell Camera package, neatly arranged in their packaging.
3. Product Overview
The INFIYA M1 Video Doorbell features a sleek, compact design suitable for outdoor installation. It includes a camera lens, motion sensor, microphone, speaker, and a doorbell button with an LED indicator. The accompanying indoor chime is a portable unit that alerts you to visitors.
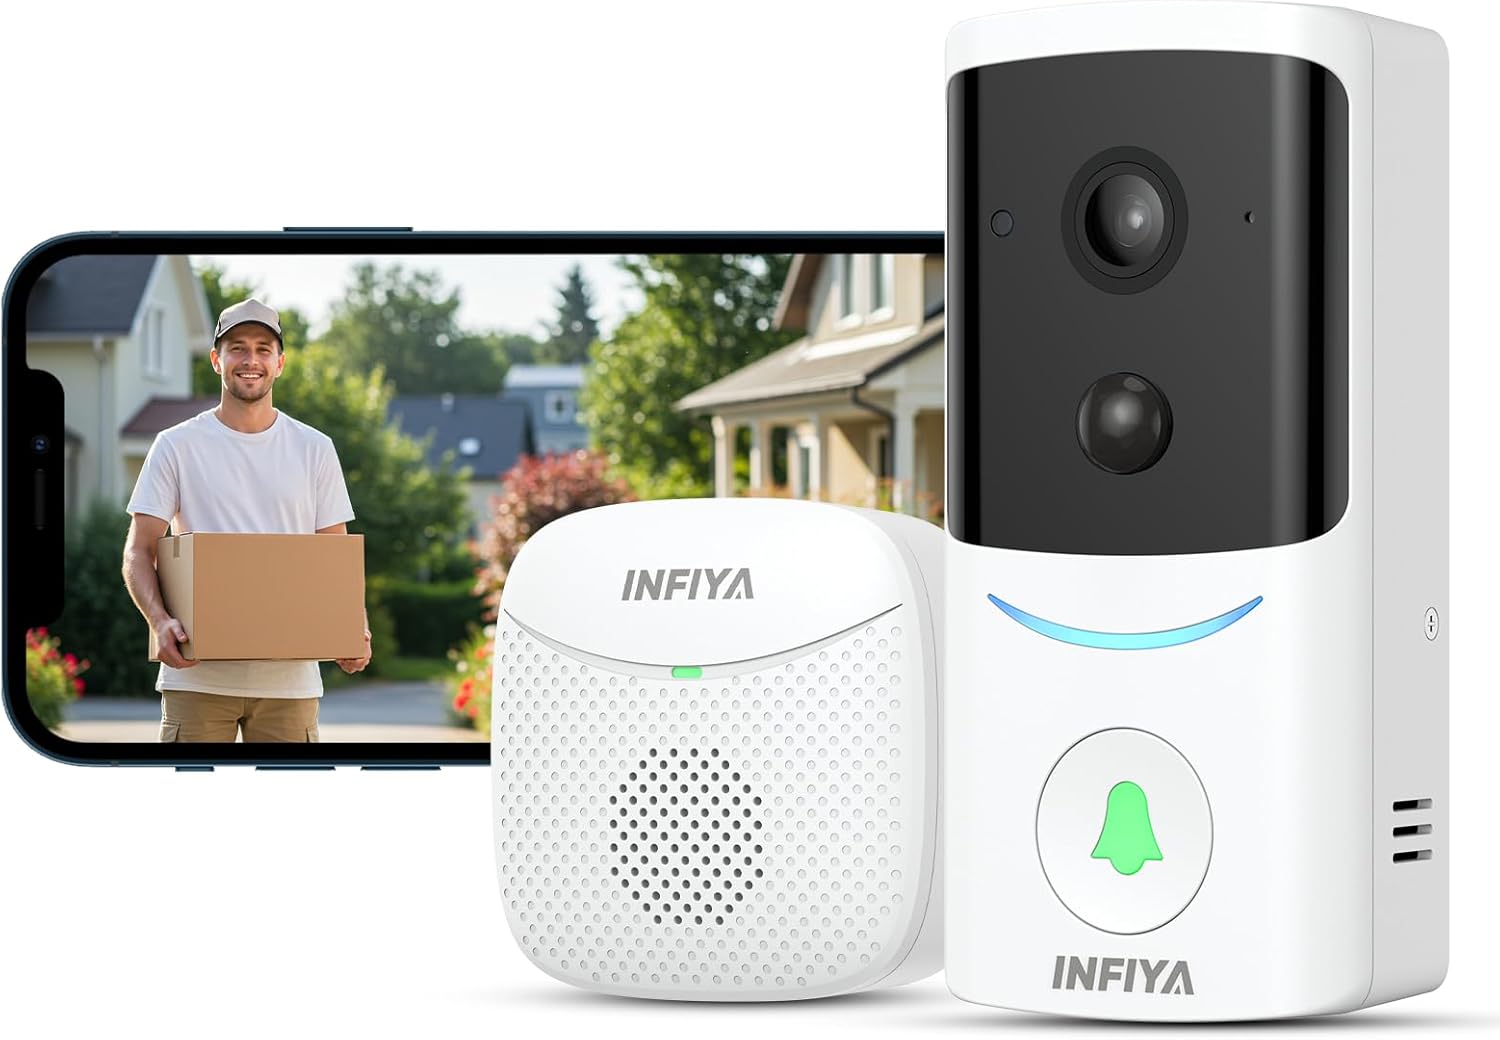
Image 3.1: The INFIYA M1 Wireless 2K Video Doorbell Camera and its indoor chime, with a smartphone displaying the live feed.

Image 3.2: Icons representing the main features of the INFIYA M1 Doorbell: 2.4GHz Wi-Fi, AI Human Detection, Battery Powered, Night Vision, IP65 Waterproof, Two-way Audio, Cloud Storage, Wide-Angle Lens, and 2K Clear Image.
4. Setup
4.1. Chime Setup
- Open the battery compartment on the back of the indoor chime.
- Insert 3 AAA batteries (included) into the compartment, ensuring correct polarity.
- Close the battery compartment.
4.2. Doorbell Installation
The doorbell offers two installation methods: screw mounting or adhesive mounting.
- Screw Mounting: Use the provided mounting kit (screws and anchors) to securely attach the backing plate to your desired location on the wall. Then, slide the doorbell onto the backing plate.
- Adhesive Mounting: For apartment tenants or surfaces where drilling is not preferred, use the pre-applied 3M adhesive backing plate. Ensure the surface is clean and dry before attaching.
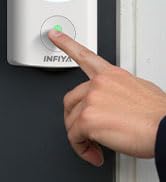
Image 4.1: Visual guide for installing the doorbell using either screws or 3M adhesive tape.
4.3. App Connection & Pairing
To connect your INFIYA M1 Video Doorbell, follow these steps:
- Download the App: Install the 'Wansview Cloud' app from Google Play Store (Android) or Apple App Store (iOS).
- Register/Log In: Open the app, create a new account, and log in.
- Connect to 2.4GHz Wi-Fi: Ensure your smartphone is connected to a 2.4GHz Wi-Fi network. 5GHz Wi-Fi is not supported.
- Power On Doorbell: Remove the doorbell from its mounting plate. Press and hold the power button for 5 seconds until you hear a startup sound and see the lights turn on.
- Enter Pairing Mode: Press and hold the reset button on the back of the doorbell until the indicator light flashes blue and red alternately.
- Add Device in App: In the Wansview Cloud app, tap 'Add device' or the '+' icon. Select 'Video doorbell' and then 'M1'.
- Scan QR Code: The app will display a QR code. Double-tap to enlarge it. Position the doorbell camera 3-8 inches in front of your phone screen to scan the QR code. Adjust screen brightness to avoid reflections.
- Confirmation: Once the QR code is successfully scanned, you will hear a voice prompt and the indicator light will flash blue. Tap 'Next' in the app.
- Pair Chime: Follow the in-app instructions to pair the indoor chime with the doorbell. Press the pairing button on the chime, then press the doorbell button within 30 seconds.
- Name Device: Name your video doorbell (e.g., 'Front Door') and tap 'OK'.
Video 4.1 Description: This video provides a step-by-step visual guide on connecting your INFIYA M1 Wireless Video Doorbell. It covers downloading the Wansview Cloud app, connecting to a 2.4GHz Wi-Fi network, powering on the doorbell, entering pairing mode, scanning the QR code displayed in the app, and pairing the indoor chime. The video emphasizes ensuring the doorbell is in pairing mode (flashing blue and red lights) and that the phone is connected to a 2.4GHz Wi-Fi network.
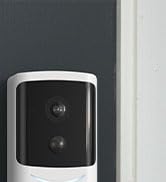
Image 4.2: A visual flowchart showing the steps to connect the doorbell camera: install Wansview Cloud app, register account, power on and place near router, then follow app instructions for Wi-Fi configuration.
5. Operating the Doorbell
5.1. Live View & 2K Resolution
Access the live video feed anytime, anywhere through the Wansview Cloud app. The doorbell provides crystal-clear 2K resolution, offering sharper images and more details than 1080P video, with a 125-degree wide viewing angle.
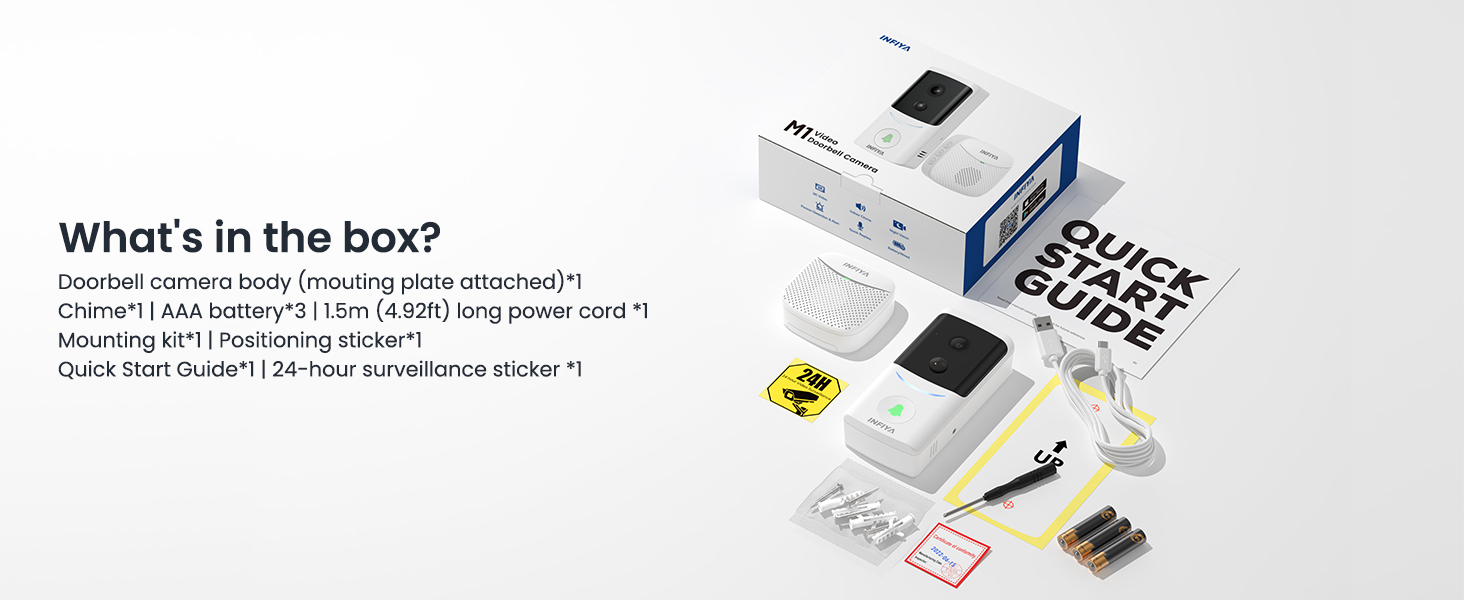
Image 5.1: Comparison of 2K resolution video quality during day and night, showcasing the wide 125-degree viewing angle.
5.2. Two-Way Audio & Voice Changer
Communicate with visitors at your door using the two-way audio feature. The app also includes a built-in voice changer function, allowing you to modify your voice for added privacy or security, especially when children or elderly individuals are home alone.

Image 5.2: A person using the smartphone app to communicate via two-way audio with a delivery person at the door.
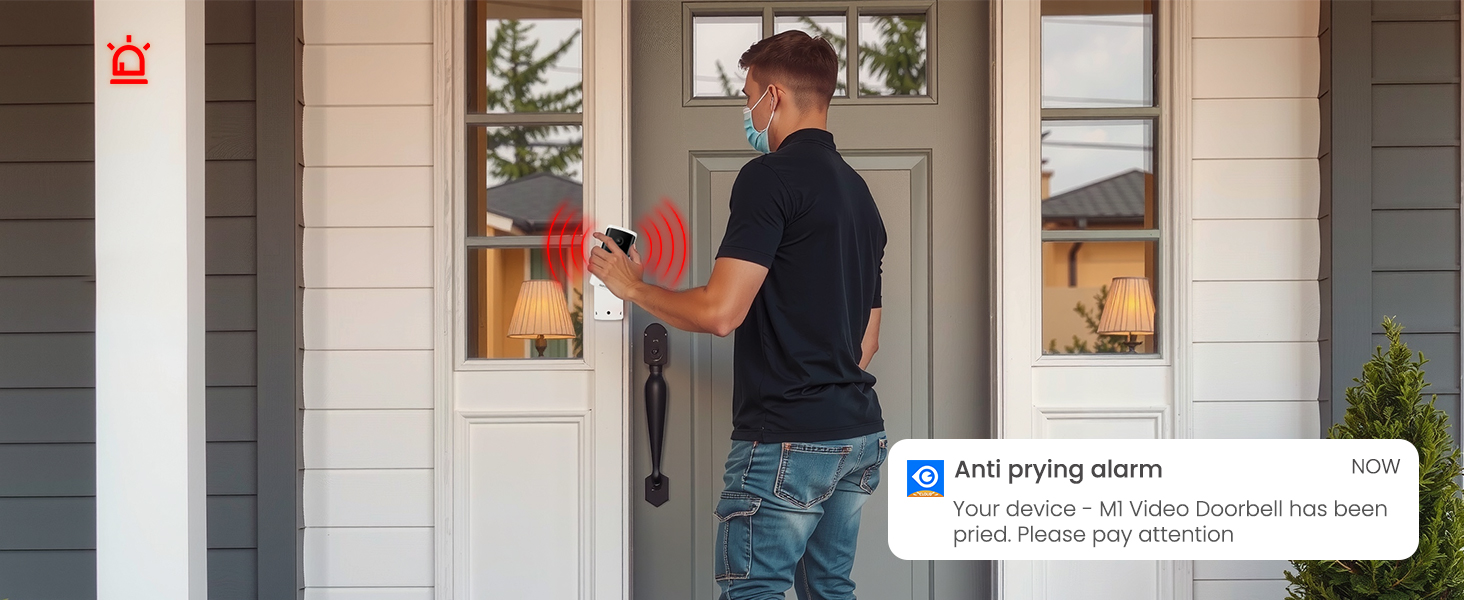
Image 5.3: Illustration of the voice changer function in the app, offering original, gentleman, and funny tone options for two-way audio.
5.3. AI Human Detection & Instant Alerts
The doorbell features AI-enhanced human detection with customizable sensitivity. When a person is detected, the camera records a 10-second alert video and sends an instant notification to your smartphone via the app, reducing false alarms from pets or inanimate objects.

Image 5.4: A person walking with a dog, with the AI human detection feature highlighting the person and sending a motion alarm notification to a smartphone.
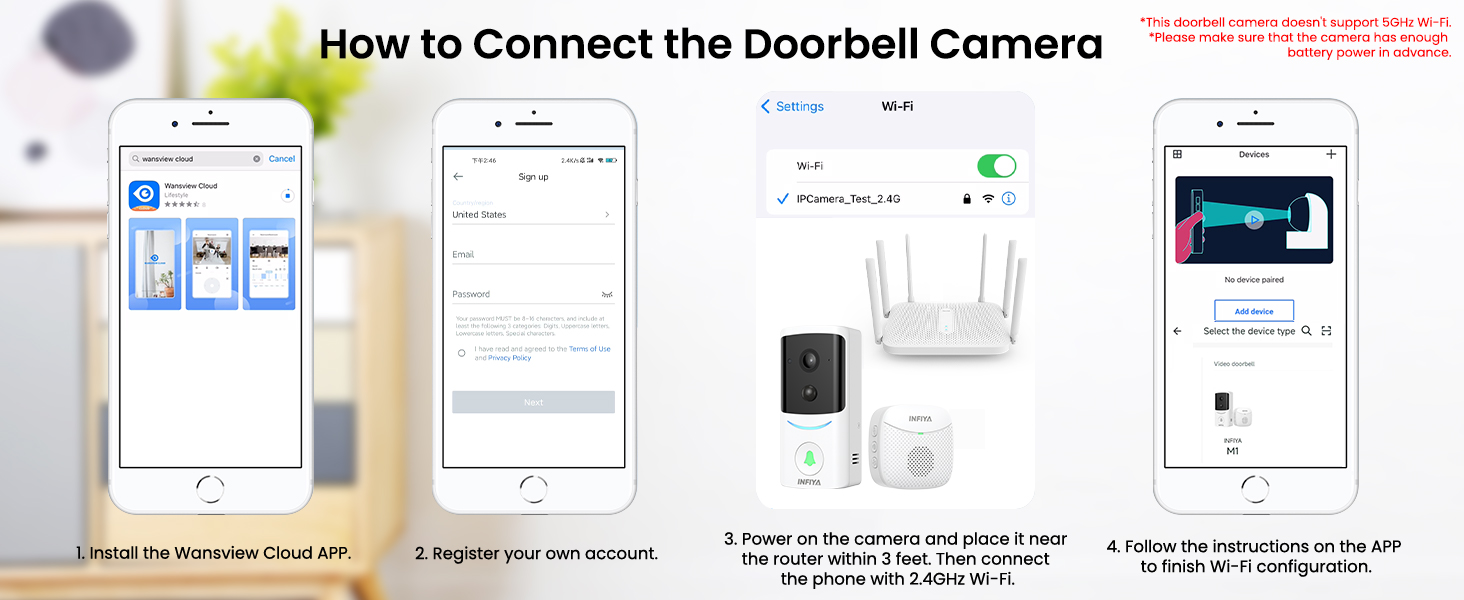
Image 5.5: Screenshot of the app's custom mode settings for motion detection, allowing adjustment of detection distance, length of stay, motion sensitivity, and retrigger interval.
5.4. Night Vision
Equipped with 4 infrared LEDs and a high-sensitivity PIR sensor, the doorbell provides clear night vision for extended surveillance in low-light conditions, ensuring your property is monitored 24/7.

Image 5.6: A split image showing the difference between day vision (color) and night vision (black and white infrared) from the doorbell camera.
5.5. Real-time Call
When a visitor presses the doorbell button, a real-time video call notification is pushed to your phone. You can choose to accept or decline the call. If unanswered, the call automatically ends after 60 seconds. These calls are generated via the app and do not consume cellular minutes.
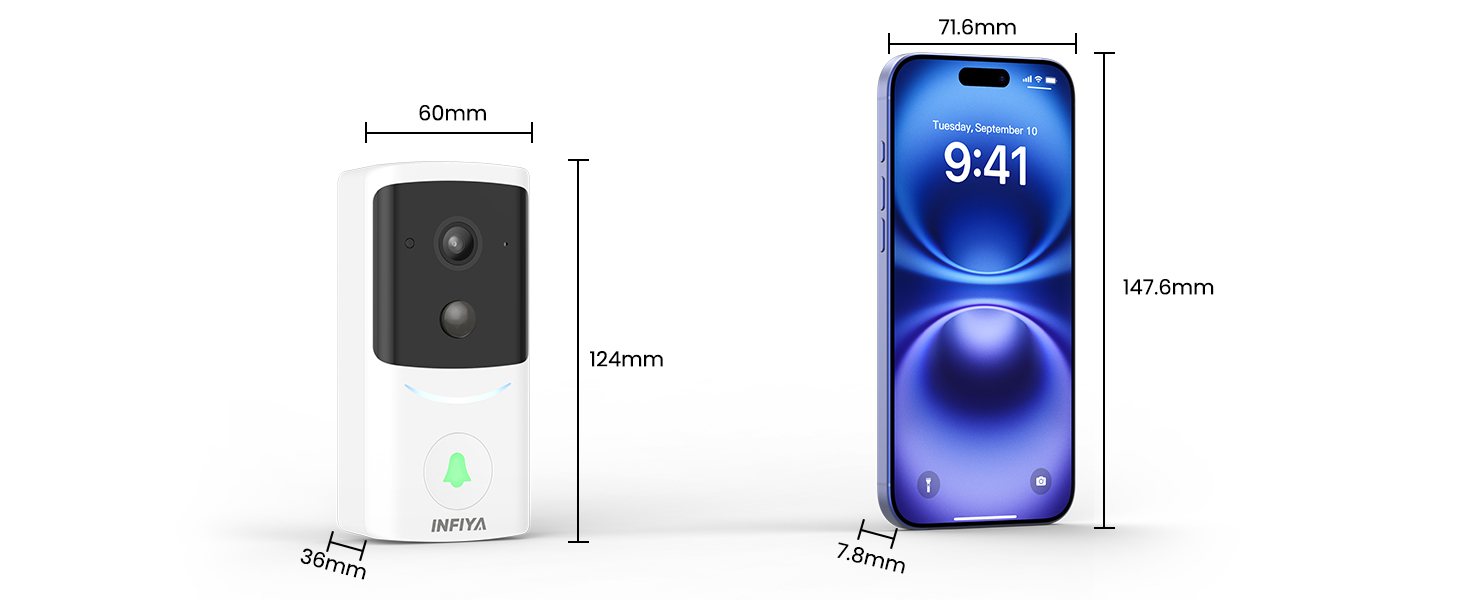
Image 5.7: A hand pressing the doorbell button, triggering a real-time call notification on a smartphone screen.
5.6. Tamper-Proof Alert
The doorbell is equipped with an anti-theft feature. If the doorbell is forcibly removed from its backing plate, it will sound an immediate alarm, and a warning message will be sent to your mobile phone via the app.

Image 5.8: A two-panel image showing a person attempting to remove the doorbell, followed by a smartphone displaying an 'Anti prying alarm' notification.
6. Maintenance
6.1. Battery Charging
The doorbell has a built-in 5000mAh rechargeable battery. To charge, remove the doorbell from its mounting plate and connect it to the provided USB power cord. You can customize power-save settings in the app to balance performance and battery efficiency.

Image 6.1: The doorbell with an illustration of its 5000mAh battery and a smartphone screen showing power-save, standard, performance, and custom modes.
6.2. Weather Resistance
The INFIYA M1 doorbell is IP65 dustproof and waterproof, ensuring stable operation in various weather conditions including rain, snow, and sunshine.

Image 6.2: The doorbell mounted outdoors in the rain, with icons indicating its suitability for shine, rain, dust, and snow conditions.
6.3. Data Security & Storage
All data from the doorbell camera is secured with AES-128 encryption. Alerts are stored safely on the cloud. Only the doorbell owner and invited members can view recordings in the app. Optional cloud service provides longer video recording and storage loops.
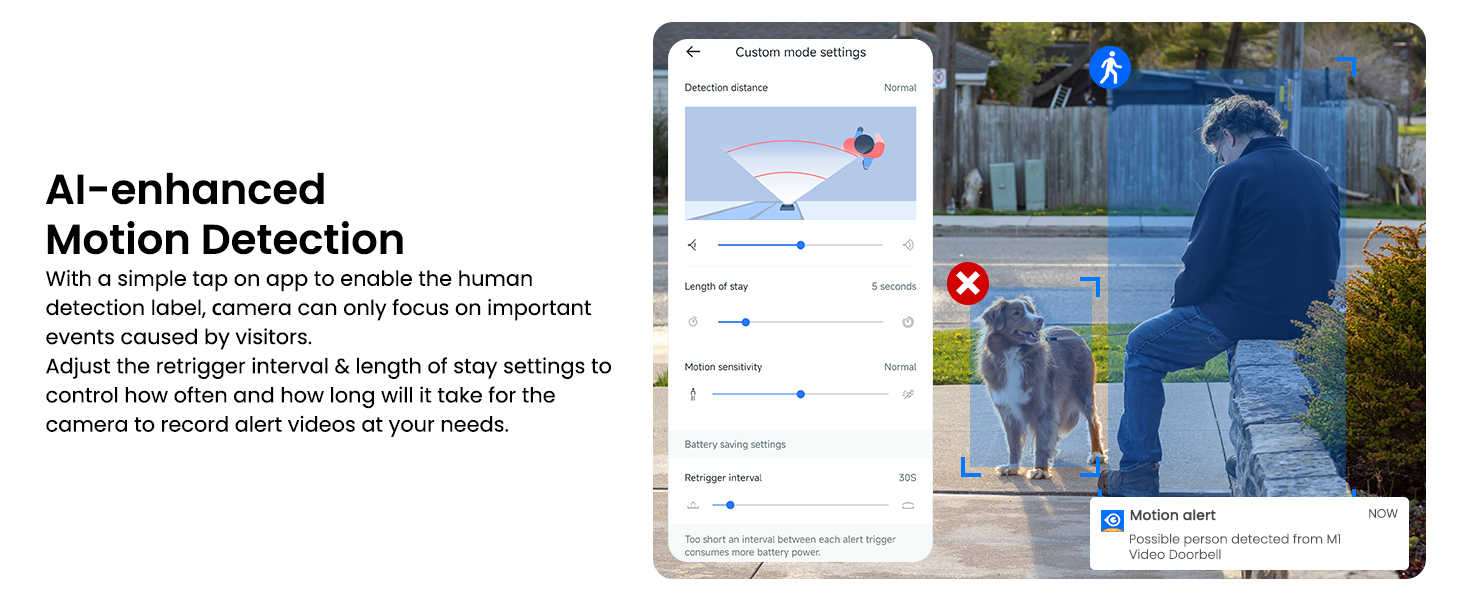
Image 6.3: A smartphone displaying the app's interface for reviewing recorded events stored in optional cloud storage.
7. Troubleshooting
- Doorbell not connecting to Wi-Fi: Ensure your router is broadcasting a 2.4GHz Wi-Fi signal. The doorbell does not support 5GHz Wi-Fi. Make sure your phone is connected to the 2.4GHz network during setup.
- Poor video quality: Check your Wi-Fi signal strength at the doorbell's location. A weak signal can affect video streaming quality. Ensure the camera lens is clean and free from obstructions.
- Short battery life: Adjust power-save settings in the app. High motion detection sensitivity or frequent live view access can drain the battery faster. Ensure the doorbell is fully charged after installation.
- False motion alerts: Customize the AI human detection sensitivity in the app to reduce alerts triggered by non-human movements.
- Chime not ringing: Verify that the chime has fresh AAA batteries and is properly paired with the doorbell. Check the volume settings on the chime.
8. Specifications
| Model Name | M1 |
| Brand | INFIYA |
| Video Resolution | 2K (3MP Max Webcam Image Resolution) |
| Viewing Angle | 125 degrees |
| Connectivity | 2.4GHz Wi-Fi (5GHz not supported) |
| Power Source | Battery Powered (Built-in 5000mAh Lithium Ion battery) |
| Weather Rating | IP65 Dustproof and Waterproof |
| Special Features | 2-Way Audio, AI Human Detection, Chime Included, Easy to Install, Night Vision, Tamper-Proof Alert |
| Dimensions | 4.88 x 2.36 x 1.42 inches |
| Item Weight | 14.4 ounces |
9. Warranty and Support
For warranty information, technical support, or any product-related inquiries, please refer to the contact details provided in your Quick Start Guide or visit the official INFIYA website. Our customer service team is available to assist you with any questions or issues.
Ask a question about this manual
Ask about setup, troubleshooting, compatibility, parts, safety, or missing instructions. Manuals+ will review the question and use this page’s manual context to help answer it.