1. Introduction
The Caruner e680 is a versatile AC/DC battery balance charger, discharger, and power supply unit. It is designed to support a wide range of battery types, including LiPo, LiHV, LiFe, LiIon (1-6S), NiMH, NiCd (1-15 cells), and Pb (2-20V). This device features an integrated DC power supply function with an output of 13.8V and power ranging from 10W to 80W. It also includes advanced charging modes for PB batteries, such as AGM and cold charge, and a built-in cooling fan for efficient operation.
2. Safety Precautions
- Always read the entire manual before using the charger.
- Never leave the charger unattended during operation.
- Ensure proper ventilation to prevent overheating.
- Do not attempt to charge damaged or swollen batteries.
- Verify battery type, cell count, and charging parameters before starting a charge cycle. Incorrect settings can lead to fire or explosion.
- Keep the charger away from moisture, heat sources, and flammable materials.
- Use only the provided cables and connectors.
- Keep out of reach of children.
3. Package Contents
Verify that all items are present in the package:
- 1 x e680 Charger
- 1 x Power Cord
- 1 x XT60 Connector Charging Cable
- 1 x DC Cable with Alligator Clip Connector
- 1 x XH Adaptor
4. Product Overview
The Caruner e680 charger features a clear LCD display and intuitive button controls for easy navigation and operation. Key components include various input/output ports and a cooling system.
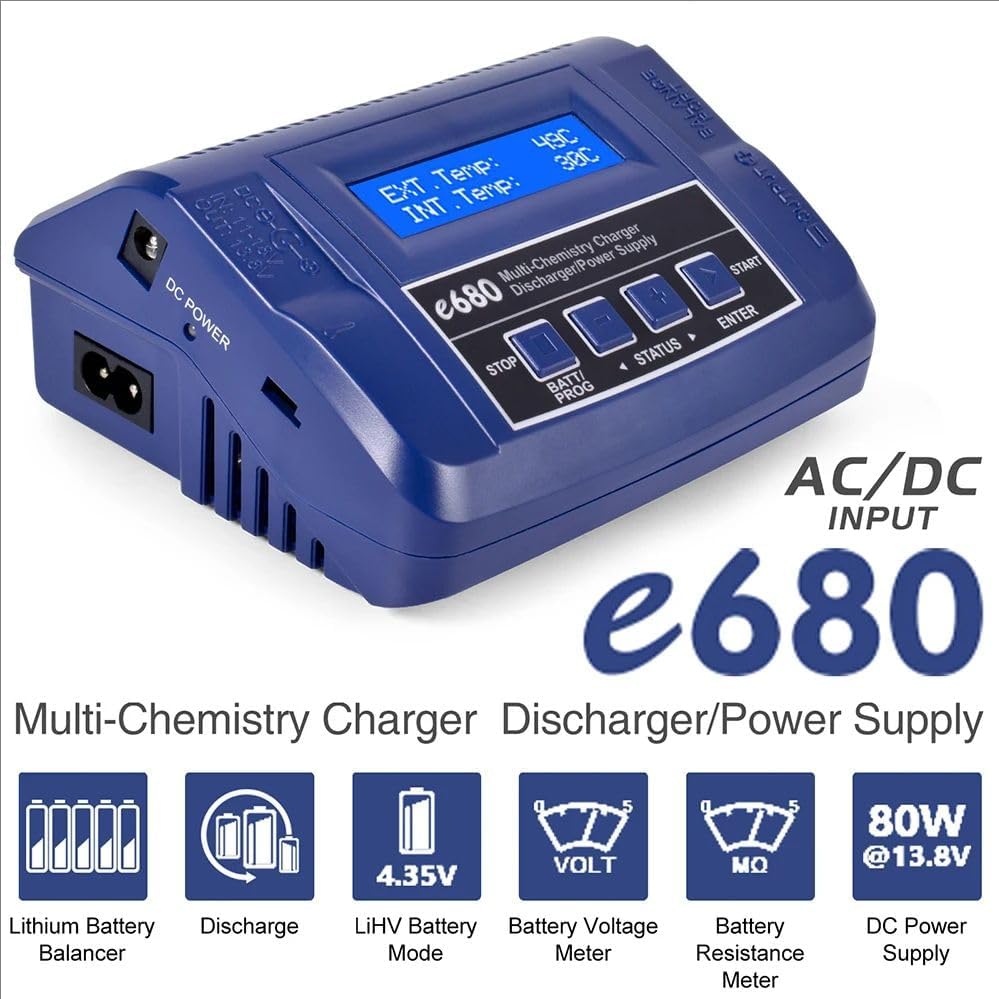
Figure 4.1: Front view of the e680 charger with LCD display showing external and internal temperatures.
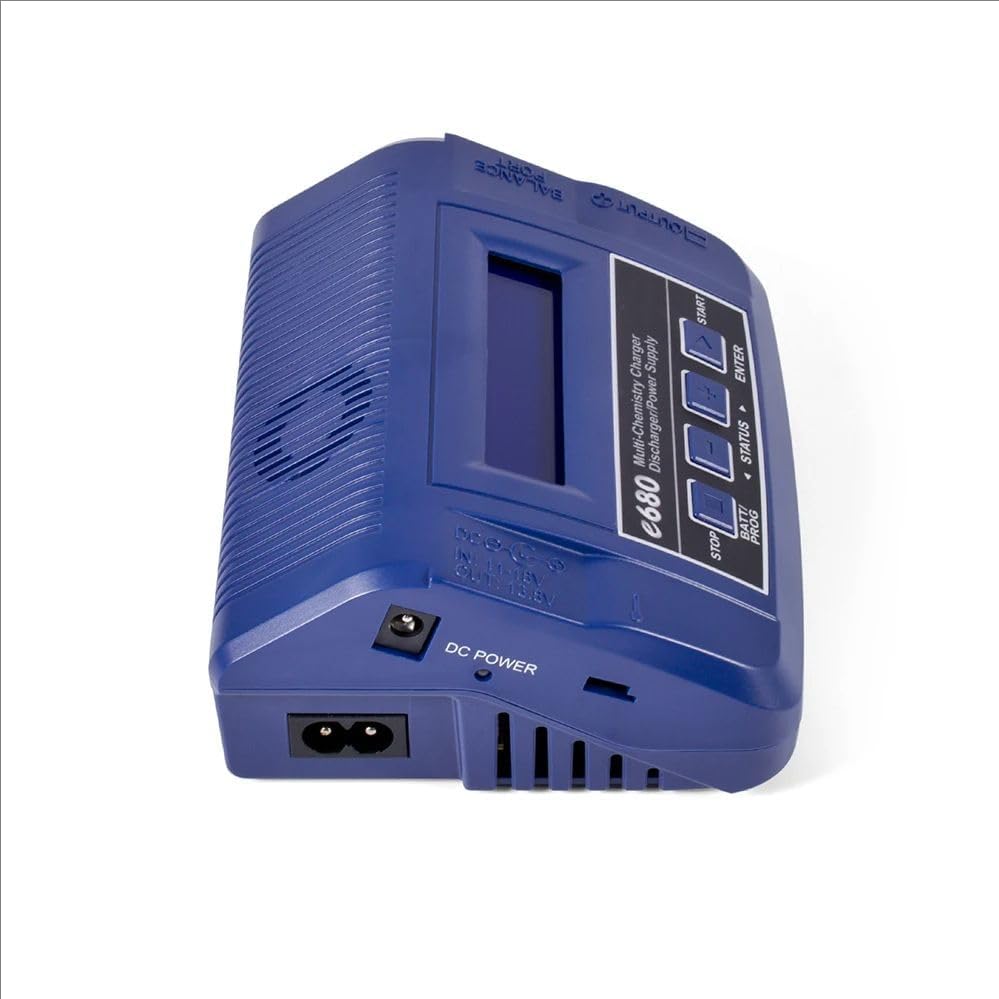
Figure 4.2: Detailed diagram of the e680 charger's ports and controls.
Controls and Ports:
- LCD Display: 2x16 character display for showing program settings and status.
- Control Buttons: Four buttons (STOP, BATT/PROG, STATUS, ENTER) for navigation and selection.
- DC Input: 11-18V DC input for external power sources.
- AC Input: 100-240V AC input for direct wall power.
- External Port: Includes 1-6S Balance Socket-XH, Temperature Probe Socket, Battery Socket, DC Output.
- Output Socket: 4mm Banana Plug for connecting charging cables.
- Balance Lead Socket: For connecting battery balance leads.
- Cooling Fan: Integrated fan for thermal management.
5. Specifications
| Feature | Specification |
|---|---|
| DC Input Voltage | 11-18V |
| AC Input Voltage | 100-240V |
| Display Type | 2x16 LCD with Blue Backlight |
| Case Material | Plastic |
| Case Size | 135x110x60mm (5.31 x 4.33 x 2.36 inches) |
| Weight | 390g |
| Delta Peak Detection (NiMH/NiCd) | 3-15mV/cell (Default: 4mV/cell) |
| Battery Cut-off Temperature | 20°C/68°F - 80°C/176°F (adjustable) |
| Charge Voltage (LiPo) | 4.18-4.25V/cell |
| Charge Voltage (LiHV) | 4.25-4.35V/cell |
| Charge Voltage (LiFe) | 3.58-3.7V/cell |
| Charge Voltage (LiIon) | 4.08-4.2V/cell |
| Charge Voltage (Pb Normal) | 2.4V/cell |
| Charge Voltage (Pb AGM) | 2.45V/cell |
| Charge Voltage (Pb Cold) | 2.45V/cell |
| Balance Current | 300mA/cell |
| Reading Voltage Range | 0.1-26.1V/cell |
| Battery Types/Cells | LiPo/LiHV/LiFe/LiIon: 1-6 cells; NiMH/NiCd: 1-15 cells; Pb: 2-20V |
| Battery Capacity Range | 100-50000mAh (all types) |
| Charge Current | 0.1A-8.0A |
| Safety Timer | 1-120 minutes (off) |
| Charge Wattage | 80W |
| Discharge Current | 0.1A-2.0A |
| Discharge Wattage | 10W |
| Balance Cells | 2-6 cells |
| Memory | 10 charge/discharge profiles |
| Charge Method | CC/CV for lithium types and lead (Pb) batteries; Delta-peak Sensitivity for NiMH/NiCd |
6. Setup
Follow these steps to set up your Caruner e680 charger:
- Connect Power: Plug the provided AC power cord into the charger's AC input port and then into a wall outlet (100-240V). Alternatively, connect a DC power source (11-18V) to the DC input port.
- Connect Battery: Connect your battery to the appropriate charging port on the charger. For lithium batteries, ensure the balance lead is also connected to the balance socket.
- Power On: The charger will power on and display the main menu.

Figure 6.1: Example setup showing the e680 charger connected to a battery for charging.
7. Operating Instructions
7.1 General Operation
- BATT/PROG button: Scroll through the main menu and select battery programs.
- STATUS button: View the status of individual cells in balance charge mode or other parameters.
- ENTER button: Confirm selections or start/resume charge processes.
- STOP button: Stop any ongoing charge or discharge processes.
7.2 Charging Batteries
The e680 features an AUTO function that automatically sets the feeding current during charging or discharging. To charge a battery:
- Connect the battery and balance lead (if applicable) to the charger.
- Use the BATT/PROG button to navigate to the desired battery type (e.g., LiPo BATT, NiMH BATT).
- Press ENTER to select the program.
- Adjust parameters such as charge current, cell count, and charge mode (e.g., Balance Charge, Fast Charge) using the STATUS and BATT/PROG buttons, then confirm with ENTER.
- Press and hold ENTER to start the charging process. The charger will perform a battery check before starting.

Figure 7.1: Display showing selection for LiPo battery program.
7.3 DC Power Supply Function
The e680 can operate as a DC power supply, providing 13.8V output with power ranging from 10W to 80W. This is useful for powering various DC devices.
- Navigate to the DC Power Supply mode in the main menu.
- Connect your DC device to the charger's DC output port.
- Adjust the output wattage as needed.
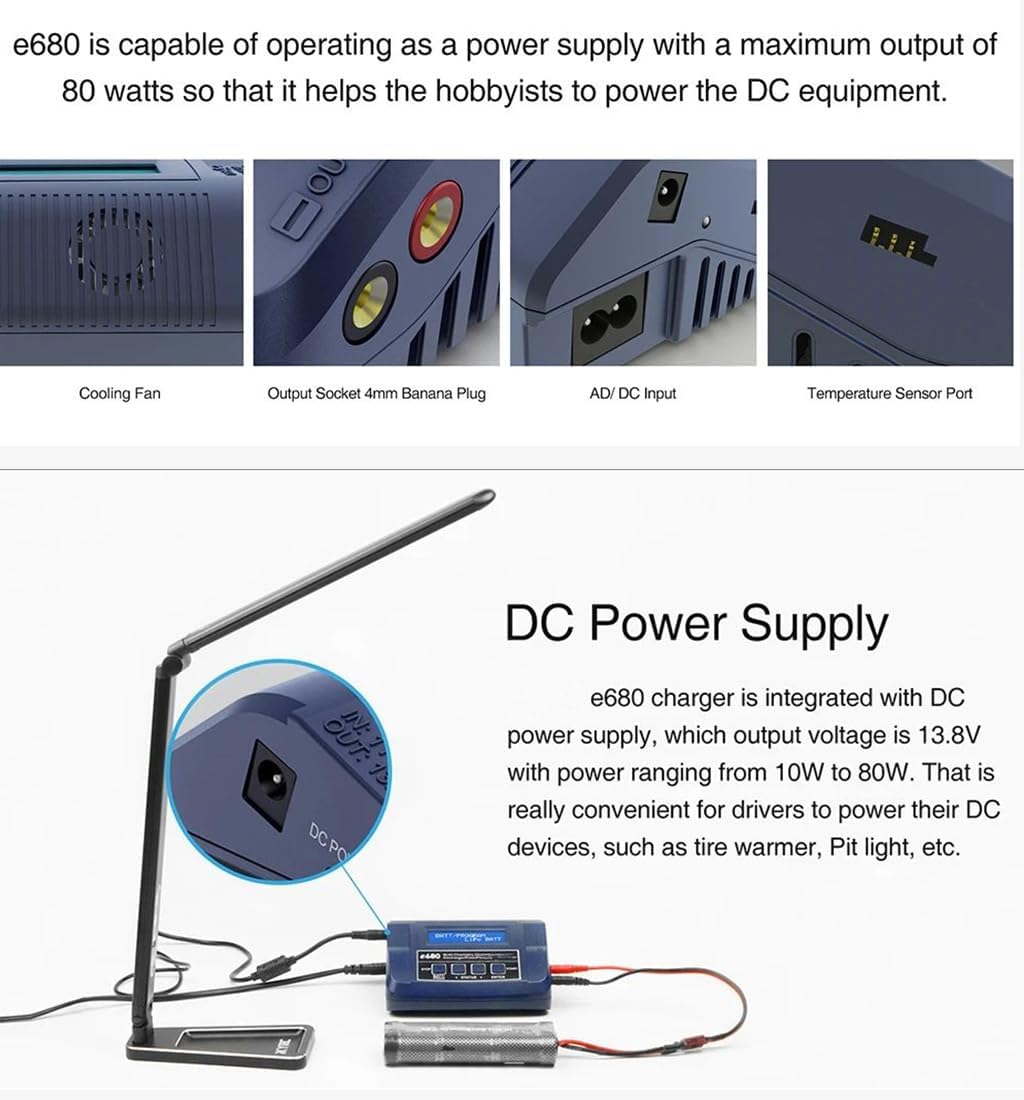
Figure 7.2: The e680 charger providing DC power to an external device.
7.4 AGM & Cold Charge Modes for PB Battery
For Lead-Acid (Pb) batteries, the e680 includes specialized AGM and Cold Charge modes. The Cold Charge mode is suitable for charging Pb batteries in low-temperature environments.

Figure 7.3: e680 charger utilizing AGM or Cold Charge mode for a Pb battery.
7.5 Thermal Cutoff
The charger features a thermal cutoff mechanism to prevent battery damage from excessive heat. If the internal battery temperature rises beyond a set limit, the charging process will terminate. This function requires an optional temperature sensor cable (part number 600040-01), which is not included and must be purchased separately.
Figure 7.4: Thermal cutoff feature with an optional temperature sensor.
7.6 Smart & Efficient Cooling System
The e680 incorporates a temperature-controlled 8000rpm high-speed sleeve bearing cooling fan. This fan effectively blows air through the extruded aluminum heat sink, ensuring the device remains cool during operation and prolonging its lifespan.
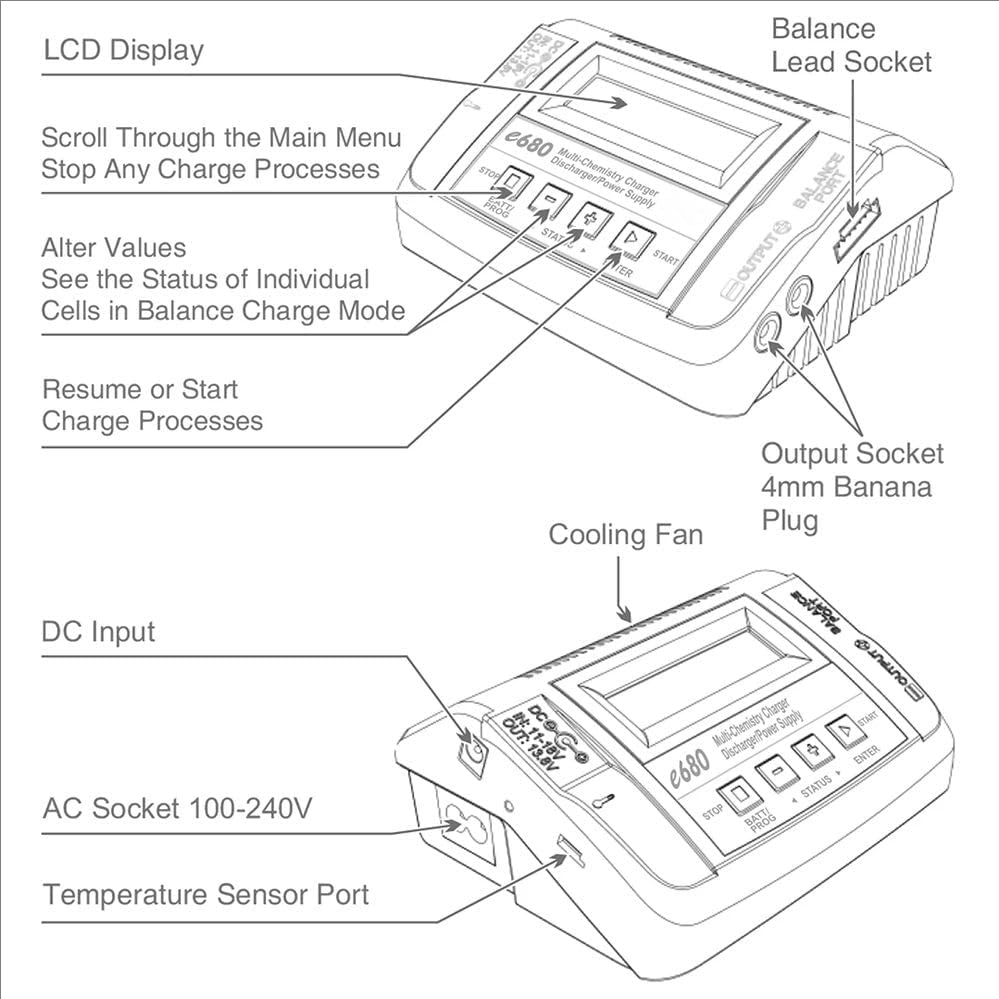
Figure 7.5: Internal view of the e680's cooling system.
7.7 Memory Function
The charger allows you to store up to 10 different charge/discharge profiles. This feature enables quick recall of preferred settings for frequently used batteries, streamlining the charging process.
8. Maintenance
- Cleaning: Regularly wipe the charger's exterior with a soft, dry cloth. Do not use solvents or abrasive cleaners.
- Ventilation: Ensure the cooling fan and vents are free from dust and obstructions to maintain proper airflow.
- Storage: Store the charger in a cool, dry place away from direct sunlight and extreme temperatures when not in use.
- Cable Inspection: Periodically check all cables and connectors for signs of wear or damage. Replace any damaged components immediately.
9. Troubleshooting
- Charger not powering on: Ensure the power cord is securely connected to both the charger and a working power outlet. Check the input voltage (AC or DC) matches the charger's requirements.
- Charging error message: Verify that the battery type, cell count, and charging parameters are correctly set for the connected battery. Check battery connections for proper contact.
- Battery not charging: Confirm the battery is not fully charged or damaged. Ensure all cables are securely connected.
- Overheating: Ensure the charger has adequate ventilation and the cooling fan is not obstructed. If using an optional temperature sensor, ensure it is correctly connected.
10. Warranty and Support
Warranty information for the Caruner e680 charger is typically provided with the product packaging or available through the retailer at the time of purchase. For technical support or service inquiries, please refer to the contact information provided by your seller or the manufacturer's official website.