Introduction
This manual provides comprehensive instructions for the installation, operation, and maintenance of the Vancasuk SM550 Universal Bathroom Vent Exhaust Fan Motor Replacement Kit. Designed for broad compatibility, this motor offers an efficient and quiet solution for restoring proper ventilation in your bathroom. Please read this manual thoroughly before proceeding with installation or use.
Product Overview
The Vancasuk SM550 is a high-quality replacement motor for various bathroom exhaust fan units. It is engineered to provide reliable performance and improve indoor air quality by effectively removing moisture and odors.

Figure 1: Vancasuk SM550 Universal Bathroom Vent Exhaust Fan Motor and Fan Blade. This image displays the primary components of the replacement kit, including the motor unit with its electrical plug and the white plastic fan blade.
Key Features:
- Efficient Ventilation: Provides 50 CFM (Cubic Feet per Minute) airflow for effective moisture and odor removal.
- Quiet Operation: Designed for consistent, low-noise performance.
- Durable Construction: Features a 5/8 coil stack and fine craftsmanship using high-quality metal materials for longevity.
- Universal Compatibility: Engineered to replace a wide range of existing bathroom fan motors.
- Easy Installation: Simple design for straightforward replacement.
Compatibility
The Vancasuk SM550 motor is designed as a universal replacement for many common bathroom exhaust fan models. It is compatible with units from brands such as Nutone, Broan, Uppco, Fasco, Dayton, and others.
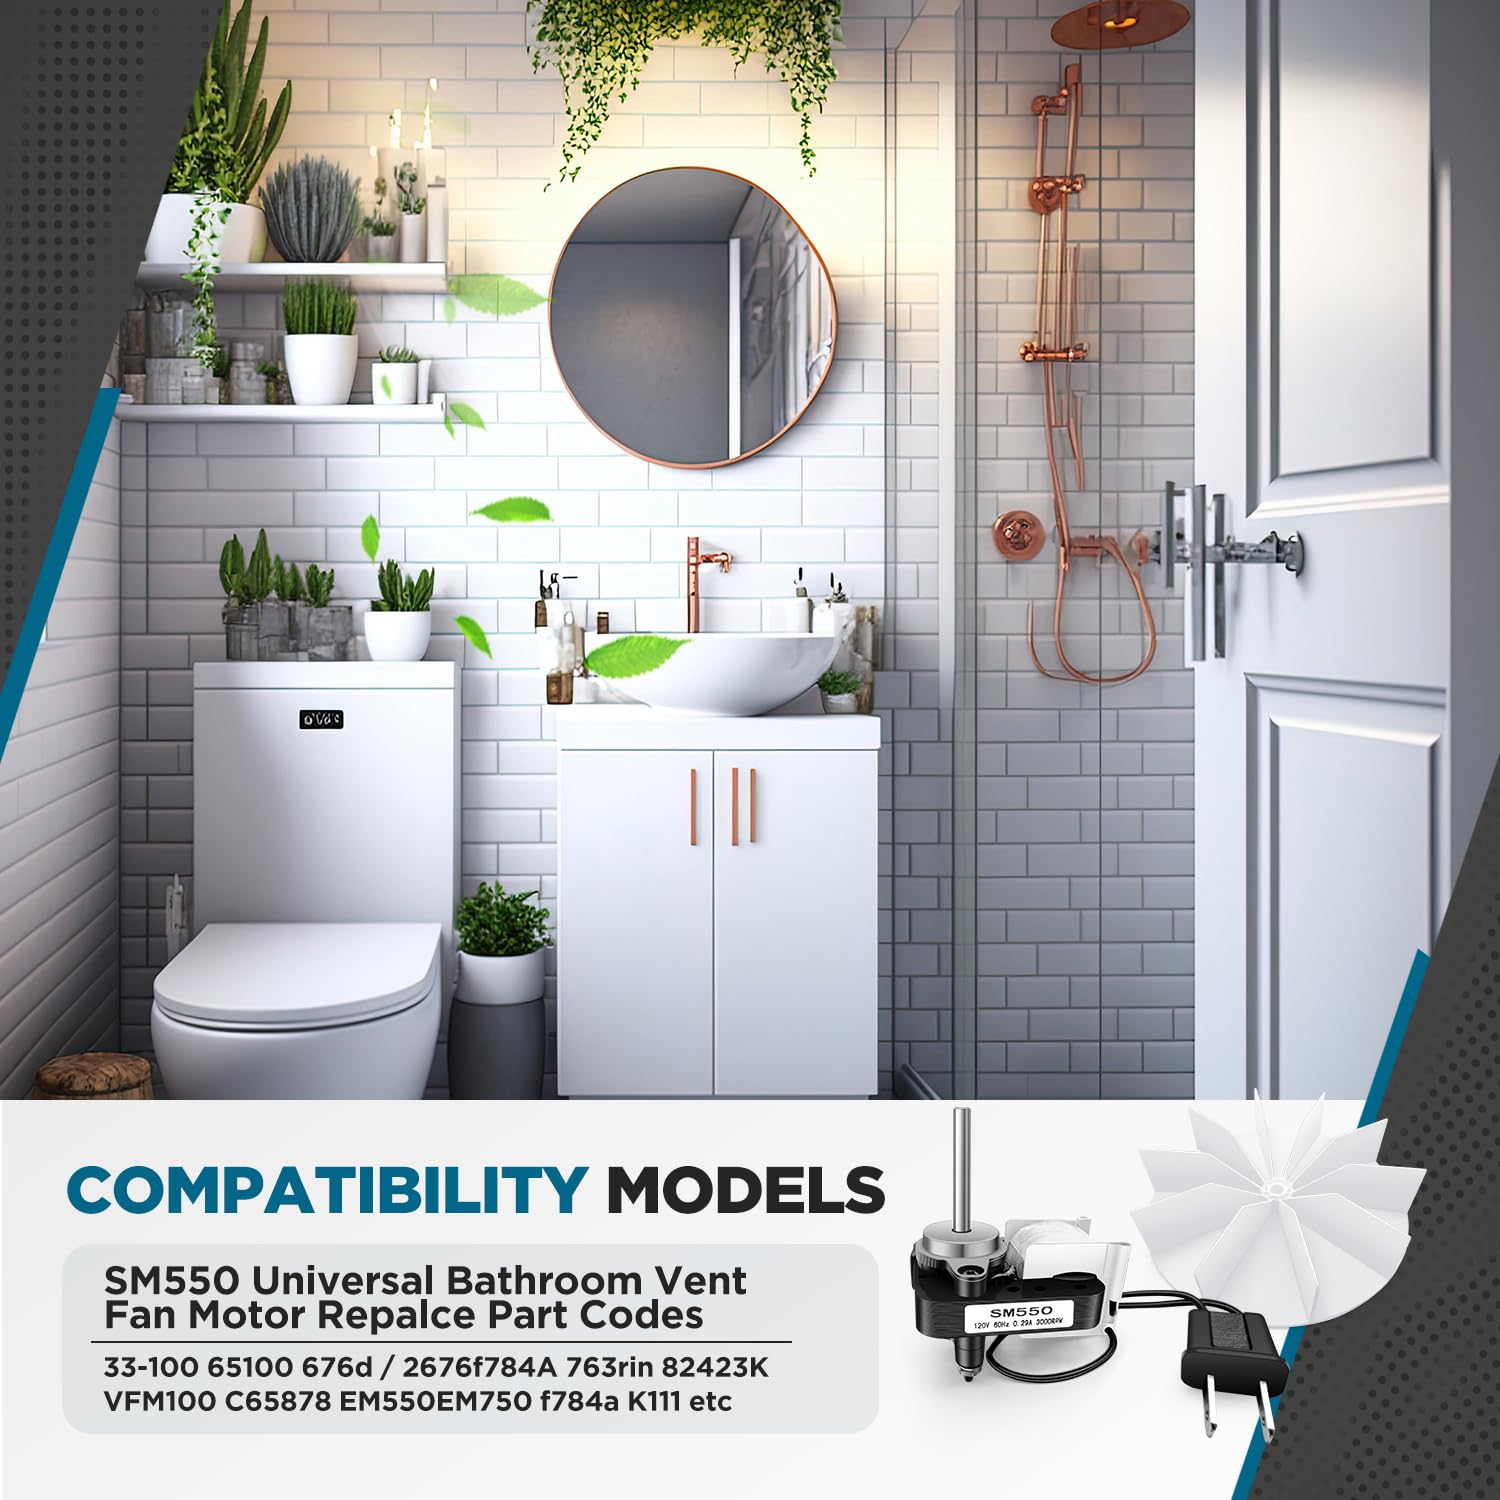
Figure 2: Compatibility Overview. This image illustrates the broad compatibility of the SM550 motor, listing various model numbers and brands it can replace, set against a bathroom backdrop.
Replaces the following part numbers:
- 65100
- VFM100
- C65878
- 33-100
- 82423K
- EM550
- K111
- EM750
- 784A
- f784a
- 676d/2676f
- 763rln
- Ventorola E498-1
- Bay Motors
- Sears 569
- And many other units.
Specifications
Detailed technical specifications for the Vancasuk SM550 motor and fan blade are provided below:

Figure 3: SM550 Motor and Fan Blade Dimensions. This image provides a visual representation of the key measurements for the motor and fan blade, including shaft length, wire length, and fan diameter.
| Attribute | Value |
|---|---|
| Model Number | SM550 |
| Airflow (CFM) | 50 CFM |
| Amperage | 0.65 Amp |
| Speed | 3000 RPM |
| Voltage | 120 Volts, 60 Hz |
| Shaft Dimensions | 3/16" diameter x 1 3/4" length |
| Wire Length | 6" with 2-prong plug |
| Fan Blade Diameter | 4 1/2" |
| Fan Blade Height | 1" |
| Mounting Studs | 1 7/8" on center |
| Coil Stack | 5/8" |
| Material | Metal (motor), High quality ABS (fan blade) |
| Item Weight | 0.58 Kilograms (580 g) |
| Country of Origin | China |
Setup and Installation
WARNING: Before beginning any installation or maintenance, ensure the power supply to the appliance is completely disconnected at the circuit breaker to prevent electrical shock.

Figure 4: Installation Steps. This image visually guides the user through the process of replacing a bathroom fan motor, highlighting key actions like disconnecting power and reassembling the unit.
Step-by-Step Installation Guide:
- Disconnect Power: For safety, turn off the power to the bathroom fan circuit at your home's main electrical panel or circuit breaker. Verify power is off using a voltage tester.
- Remove Grille Cover: Carefully remove the decorative grille cover from the fan housing in the ceiling. This usually involves pulling down on spring clips or unscrewing small fasteners.
- Unplug Old Motor: Locate the existing fan motor within the housing. Unplug the wire connector from the fan housing.
- Remove Mounting Bracket (if applicable): If your fan has a separate mounting bracket for the motor, remove any screws or clips securing it.
- Unscrew Whole Plate (if no bracket): If the motor is attached directly to a plate, unscrew the entire plate from the fan housing.
- Release Tabs (if applicable): Some models may have tabs that need to be levered out with a flathead screwdriver to release the motor assembly.
- Attach New Motor: Secure the new Vancasuk SM550 motor onto your fan assembly. Ensure the shaft is properly aligned with the fan blade.
- Tighten All Screws: Securely tighten all screws to prevent vibration noises during operation.
- Reinstall Fan Assembly: Reinstall the fan assembly back into the bathroom ceiling housing.
- Reconnect Power: Once the installation is complete and all components are securely in place, restore power to the circuit at the main electrical panel.
- Test Operation: Turn on the fan switch to ensure the new motor operates correctly and quietly.
Note: Some older fan units may require minor modifications, such as flipping the motor shaft or adjusting mounting points, to achieve a perfect fit. Refer to online resources or consult a qualified electrician if you encounter difficulties.
Operating Instructions
The Vancasuk SM550 motor is designed for continuous operation in a bathroom exhaust fan system. Once installed, the fan will operate whenever the associated light switch or dedicated fan switch is activated. Ensure the fan is run during and after showers or baths to effectively remove humidity and prevent mold and mildew growth.
The motor supports both Clockwise (CW) and Counter-Clockwise (CCW) rotation, adapting to the specific requirements of your fan housing and blade orientation.
Maintenance
Regular maintenance helps ensure the longevity and optimal performance of your bathroom exhaust fan. Always disconnect power before performing any maintenance.
- Clean Fan Grille: Periodically remove the fan grille and clean it with a damp cloth to remove dust and debris.
- Clean Fan Blade: If accessible, gently wipe down the fan blade to remove accumulated dust. Excessive dust can reduce airflow and cause imbalance.
- Inspect Motor: Check the motor for any signs of wear, loose connections, or unusual noises. The SM550 motor is designed to be maintenance-free, but regular inspection is recommended.
- Check Ductwork: Ensure the exhaust ductwork is clear of obstructions and properly connected to allow for efficient airflow.
Troubleshooting
If you encounter issues with your Vancasuk SM550 replacement motor, refer to the following table for common problems and solutions:
| Problem | Possible Cause | Solution |
|---|---|---|
| Fan does not turn on | No power to the unit; Loose wiring connection; Faulty switch | Check circuit breaker; Ensure all wires are securely connected; Test or replace the fan switch. |
| Fan is noisy or vibrating | Loose mounting screws; Fan blade hitting housing; Motor imbalance; Obstruction in ductwork | Tighten all mounting screws; Ensure fan blade is clear of housing; Clean fan blade; Check ductwork for obstructions. |
| Poor airflow | Clogged fan grille or blade; Obstructed ductwork; Incorrect fan blade orientation | Clean grille and fan blade; Clear ductwork; Verify fan blade is installed correctly for proper airflow direction. |
| Motor direction is opposite | Motor installed in reverse orientation for specific fan housing | As noted in some reviews, the motor's end caps can be swapped to reverse shaft direction if needed. Disconnect power, remove motor screws, gently pop off end caps, swap them, reassemble. |
Warranty and Support
Vancasuk is committed to customer satisfaction. If you encounter any problems during the use of this product, or have questions regarding its installation or performance, please do not hesitate to contact our customer service team.
For support, please refer to the contact information provided with your purchase or visit the official Vancasuk store on Amazon: Vancasuk Store.
Note: This product is a compatible spare part and not an original equipment manufacturer (OEM) part. Any mention of brand names or model designations is solely for demonstrating compatibility.
