Knagsfa Z8
Knagsfa Kids Digital Video Camcorder Camera User Manual
Model: Z8
1. Introduction
Thank you for choosing the Knagsfa Kids Digital Video Camcorder Camera. This camera is designed to be a fun and educational tool for children aged 3-12, allowing them to capture photos, record videos, and explore their creativity with various features. Please read this manual carefully before using the camera to ensure proper operation and longevity of the device.
2. Safety Information
- This product is not waterproof. Avoid exposure to water or excessive moisture.
- Do not disassemble or attempt to repair the camera yourself. Refer to qualified personnel for service.
- Keep the camera away from extreme temperatures and direct sunlight.
- Ensure children use the camera under adult supervision, especially during charging.
- The included lanyard is for carrying; do not use it for any other purpose.
3. Package Contents
Please check the box for the following items:
- 1 x Knagsfa Kids Camera (Model Z8)
- 1 x USB Charging Cable
- 1 x 32GB Memory Card (pre-installed)
- 1 x Neck Hanging Lanyard
- 1 x User Manual (this document)
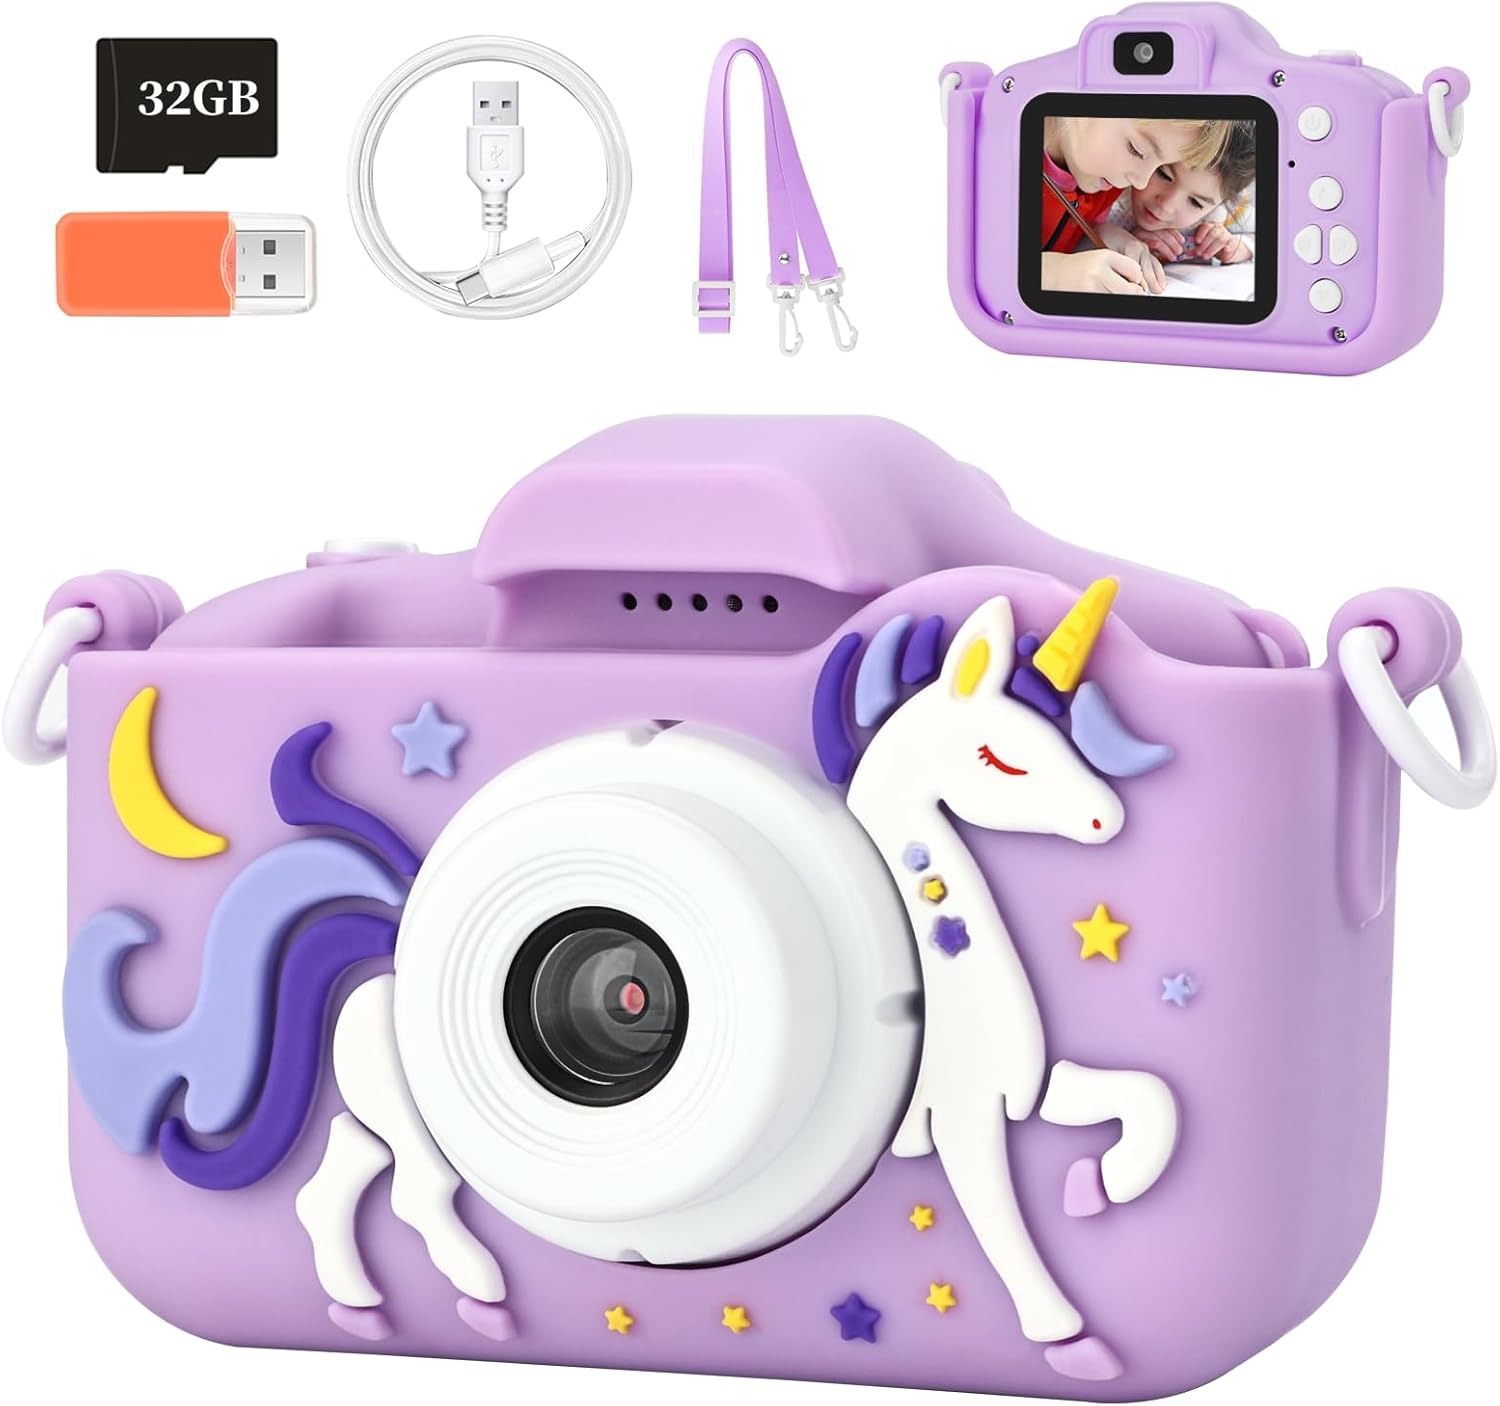
Image: Contents of the Knagsfa Kids Camera package.
4. Product Overview
Familiarize yourself with the camera's buttons and ports:
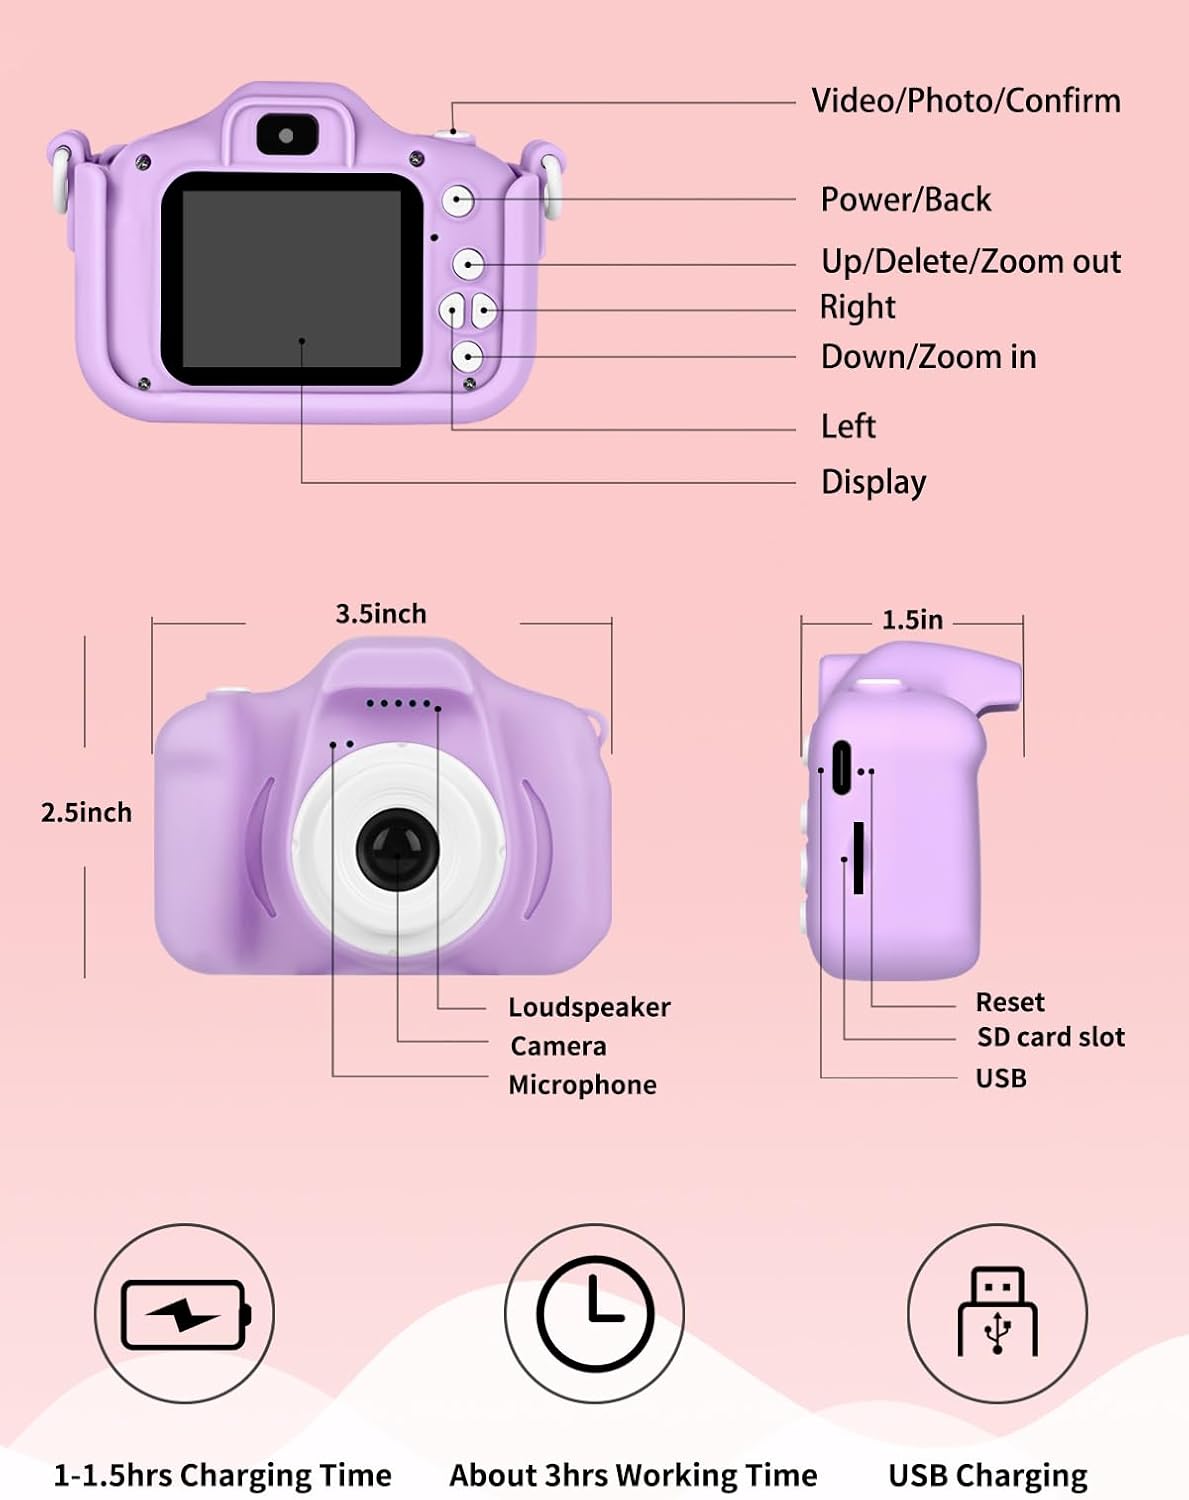
Image: Labeled diagram of the Knagsfa Kids Camera with dimensions.
Button Functions:
- Video/Photo/Confirm: Press to switch between photo/video modes, or confirm selections in menus.
- Power/Back: Press and hold to power on/off. Short press to go back in menus.
- Up/Delete/Zoom out: Navigate up in menus, delete files, or zoom out in photo/video mode.
- Right: Navigate right in menus.
- Down/Zoom in: Navigate down in menus, or zoom in in photo/video mode.
- Left: Navigate left in menus.
5. Setup
5.1 Charging the Camera
Before first use, fully charge the camera. Connect the included USB cable to the camera's USB port and the other end to a USB power adapter (not included) or a computer's USB port. The charging indicator light will illuminate. Charging typically takes 1-1.5 hours for about 3 hours of working time.
5.2 Inserting the SD Card
The camera comes with a 32GB SD card pre-installed. If you need to remove or re-insert it, gently push the card into the SD card slot until it clicks into place. To remove, push it again until it pops out.
5.3 Attaching the Lanyard
Thread the neck hanging lanyard through the designated loops on the camera body to prevent accidental drops and for easy carrying.
6. Operating Instructions
6.1 Powering On/Off
To power on, press and hold the Power/Back button for a few seconds. To power off, press and hold the same button until the screen turns off.
6.2 Taking Photos
From the main screen, ensure you are in photo mode (indicated by a camera icon). Frame your shot and press the Video/Photo/Confirm button to take a picture.
6.3 Recording Videos
From the main screen, press the Video/Photo/Confirm button to switch to video mode (indicated by a video camera icon). Press the Video/Photo/Confirm button again to start recording. Press it once more to stop recording.
6.4 Navigating Menus
Use the Up, Down, Left, and Right buttons to navigate through menu options. Press the Video/Photo/Confirm button to select an option. Press the Power/Back button to return to the previous screen.
6.5 Using Filters and Frames
The camera offers 6 filters and 28 frames to add creative effects to your photos. Access these options through the camera's menu settings. Select your desired filter or frame before taking a picture.

Image: Examples of multiple funny frames and filters.
6.6 Timer Shooting
Set a timer for 2, 5, or 10 seconds before taking a photo. This feature is useful for group photos or selfies. Navigate to the timer setting in the menu and select your preferred delay.
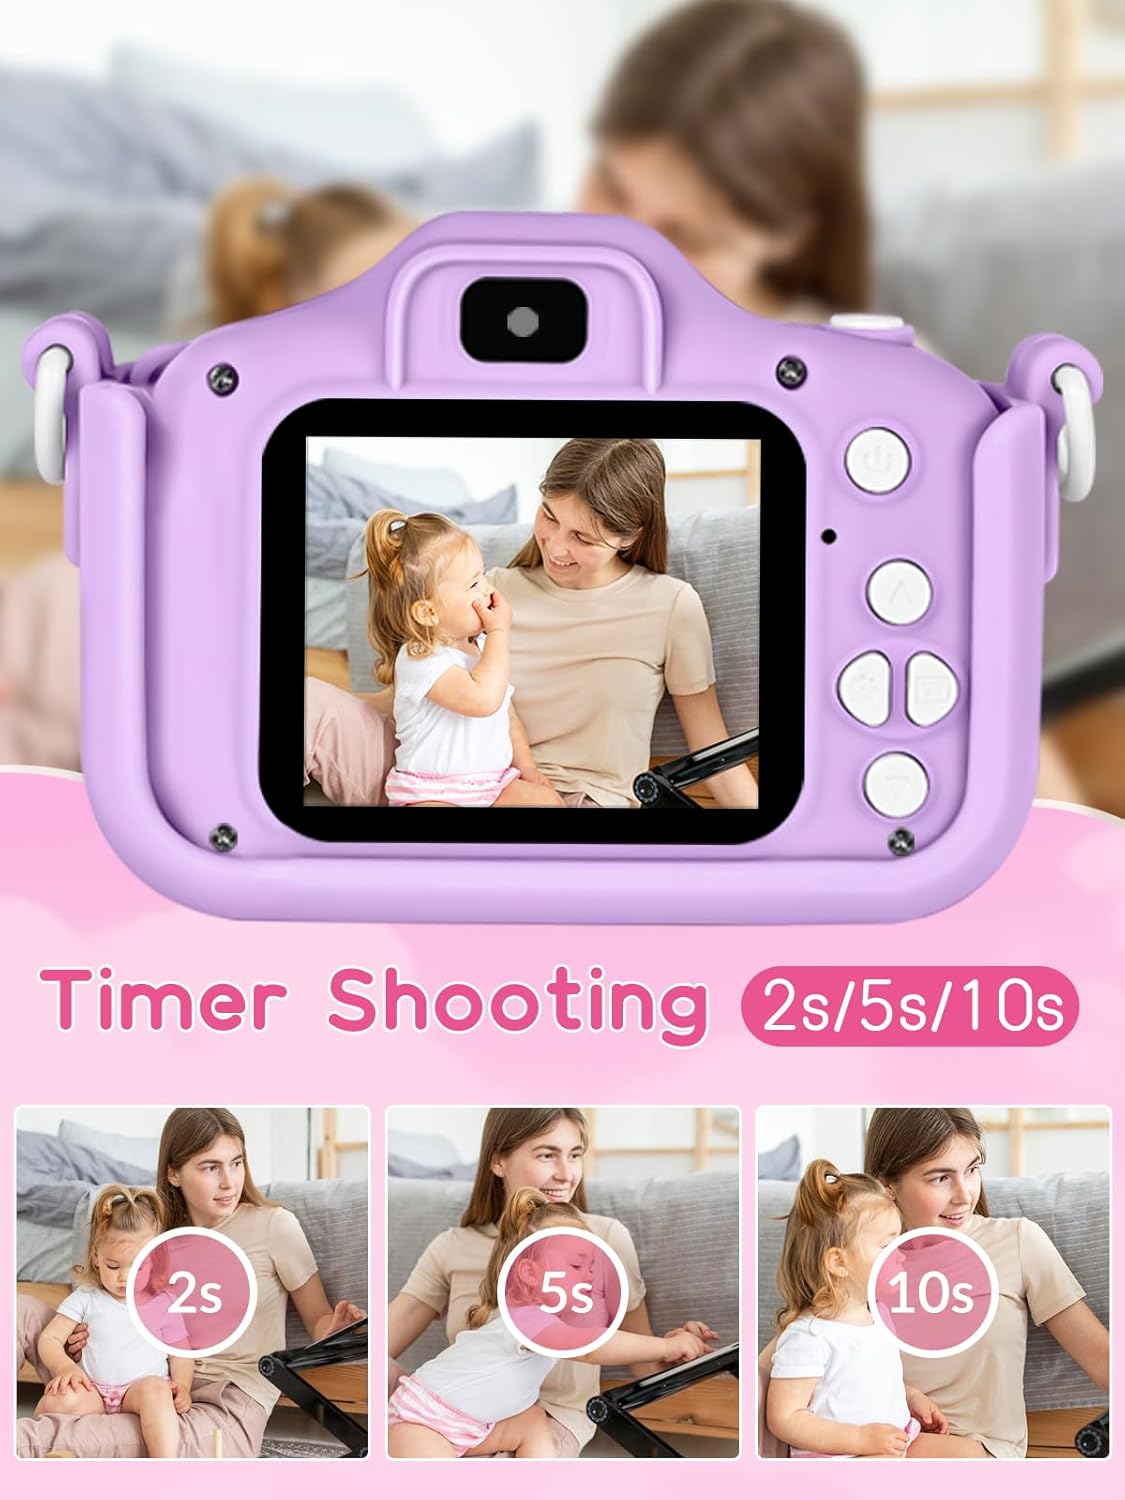
Image: Timer shooting options (2s, 5s, 10s).
6.7 Digital Zoom
The camera supports up to 8x digital zoom. While in photo or video mode, use the Up/Delete/Zoom out and Down/Zoom in buttons to adjust the zoom level.

Image: Demonstration of 8x digital zoom effect.
6.8 Playing Games
The camera includes 3 puzzle games for entertainment. Access these games through the main menu.

Image: The camera features 3 built-in puzzle games.
7. Maintenance
7.1 Cleaning
Use a soft, dry cloth to clean the camera body. For the lens, use a specialized lens cleaning cloth. Do not use liquid cleaners or abrasive materials.
7.2 Storage
When not in use, store the camera in a cool, dry place, away from direct sunlight and extreme temperatures. If storing for an extended period, ensure the battery is partially charged (around 50%) to prolong its lifespan.
8. Troubleshooting
8.1 Camera Not Turning On
- Ensure the battery is charged. Connect the camera to a charger for at least 15 minutes.
- Press and hold the Power/Back button for a few seconds.
- If unresponsive, locate the small reset hole (refer to Product Overview diagram) and gently press it with a thin, non-metallic object (like a paperclip) to reset the camera.
8.2 Cannot Take Photos/Record Videos
- Check if the SD card is properly inserted.
- Ensure there is enough free space on the SD card. Delete unnecessary files if needed.
- The battery might be too low. Charge the camera.
8.3 Poor Image/Video Quality
- Ensure the camera lens is clean and free of smudges.
- Ensure adequate lighting in the environment.
- Hold the camera steady while taking photos or recording videos.
8.4 Camera Freezes
- Perform a reset by gently pressing the reset hole with a thin, non-metallic object.
9. Specifications
| Brand | Knagsfa |
| Model Number | Z8 |
| Maximum Webcam Image Resolution | 12 MP |
| Photo Sensor Resolution | 12 MP |
| Screen Size | 2 Inches |
| Image Stabilization | Digital |
| Lens Type | Zoom |
| Viewfinder Type | Electronic |
| Exposure Control Type | Automatic |
| White Balance Settings | Auto |
| Battery Type | Lithium Ion |
| Charging Time | 1-1.5 hours (approx.) |
| Working Time | About 3 hours (approx.) |
| Video Capture Format | MP4 |
| Water Resistance Level | Not Water Resistant |
10. Warranty and Support
Knagsfa products are manufactured with high quality standards. For any issues or inquiries regarding your camera, please refer to the seller or retailer from whom you purchased the product. Please retain your proof of purchase for any warranty claims. Specific warranty terms may vary by region and retailer.
Ask a question about this manual
Ask about setup, troubleshooting, compatibility, parts, safety, or missing instructions. Manuals+ will review the question and use this page’s manual context to help answer it.