Introduction
This manual provides detailed instructions for the installation, operation, and maintenance of your SUNER POWER 10 Amp 12V MPPT Solar Charge Controller. This device is designed to efficiently manage power from your solar panel to charge various 12-volt battery types, including Lead-Acid (Flooded, Gel, AGM, SLA, VRLA) and Lithium (LiFePO4) batteries. Please read this manual thoroughly before use to ensure proper function and safety.

Image: The SUNER POWER 10 Amp 12V MPPT Solar Charge Controller, showing its compact design, LCD display, and included MC4 connectors for solar panel connection.
Safety Information
Please observe the following safety precautions to prevent personal injury and damage to the controller or battery:
- Ensure all connections are correct and secure before applying power.
- Do not disassemble or attempt to repair the controller. Contact qualified personnel for service.
- Install the controller in a well-ventilated area, away from flammable materials and moisture.
- Always connect the battery to the controller first, then the solar panel. Disconnect in reverse order.
- Wear eye protection when working with batteries.
- Ensure the solar panel input voltage (PV Input) does not exceed 30V.

Image: Diagram illustrating the multiple safety protections integrated into the controller, including over-charge, over-voltage, over-current, short circuit, reverse polarity, and over-temperature protection.
Product Features
The SUNER POWER MPPT Solar Charge Controller offers advanced features for optimal solar charging:
- Ultra-Smart MPPT Technology: Achieves up to 99% tracking efficiency and 98% peak conversion efficiency, improving utilization by 20-30% compared to PWM controllers.
- Improved 3-Stage Charging: Utilizes Bulk, Absorption, and Float stages for effective and safe 12-volt battery charging, extending battery life.
- Real-time Monitoring: An integrated LCD display shows real-time data for solar panel input and battery status.
- Comprehensive Safety Protections: Includes over-charge, over-voltage, over-current, short circuit, reverse polarity, and over-temperature protection. It is also waterproof and spark-proof.
- Temperature Compensation Sensor: Detects ambient temperature to prevent over-charging in hot climates and under-charging in cold climates.
- Versatile Battery Compatibility: Supports 12-volt Lead-Acid (Flooded, Gel, AGM, SLA, VRLA) and Lithium (LiFePO4) batteries with selectable charging modes.
- Zero Self-Consumption: The controller is solar-powered, operating only when sunlight is effective, thus preventing battery drain at night.
- Easy to Use: Plug-and-play design with immediate charging upon battery detection.

Image: A graphic comparing the efficiency of the SUNER POWER MPPT 10A Solar Charge Controller (99%) against other MPPT controllers (90%) and PWM controllers (65-80%).

Image: An illustration showing the internal circuitry of the controller, highlighting its 99% tracking efficiency and 98% peak conversion efficiency, along with a graph depicting the 3-stage charging algorithm (Bulk, Absorption, Float).
Setup and Installation
Follow these steps for proper installation:
- Connect to Battery: First, connect the controller to your 12V battery using the appropriate battery cables. Ensure correct polarity (red to positive, black to negative). The controller will power on once connected to the battery.
- Connect to Solar Panel: Next, connect your solar panel to the controller's solar input terminals. Ensure correct polarity. The controller will begin charging if sufficient sunlight is available. The PV input voltage should be between 15V and 30V, with a maximum power of 120W.
- Mounting: Mount the controller in a location that is dry, well-ventilated, and protected from direct sunlight and extreme temperatures.
Important: Always connect the battery first and disconnect the solar panel first when removing the system.
Operating Instructions
Battery Type Selection
The controller supports various 12V battery types. To select the correct battery type:
- Press the MODE button on the controller's display.
- Cycle through the available battery types (e.g., AGM, Lithium, Flooded) until the desired type is displayed.
- The controller will automatically adjust its charging parameters for the selected battery chemistry.

Image: An illustration depicting different types of 12V batteries (Starter, Deep-cycle, Marine, Powersport, Car, RV, Trailer) and chemistries (Flooded, GEL, Maintenance-free, AGM, Seal-Lead Acid, Lithium) that can be charged by the controller.
Charging Process
Once connected and the battery type is selected, the controller will automatically begin the 3-stage charging process:
- Bulk Charge: Delivers maximum current to rapidly charge the battery to approximately 80% capacity.
- Absorption Charge: Charges at a constant voltage to bring the battery to 100% capacity, reducing current as the battery fills.
- Float Charge: Maintains the battery at a full charge with a reduced voltage and minimal current, compensating for self-discharge.
The integrated temperature compensation sensor adjusts charging parameters based on ambient temperature to optimize charging performance and prevent damage.
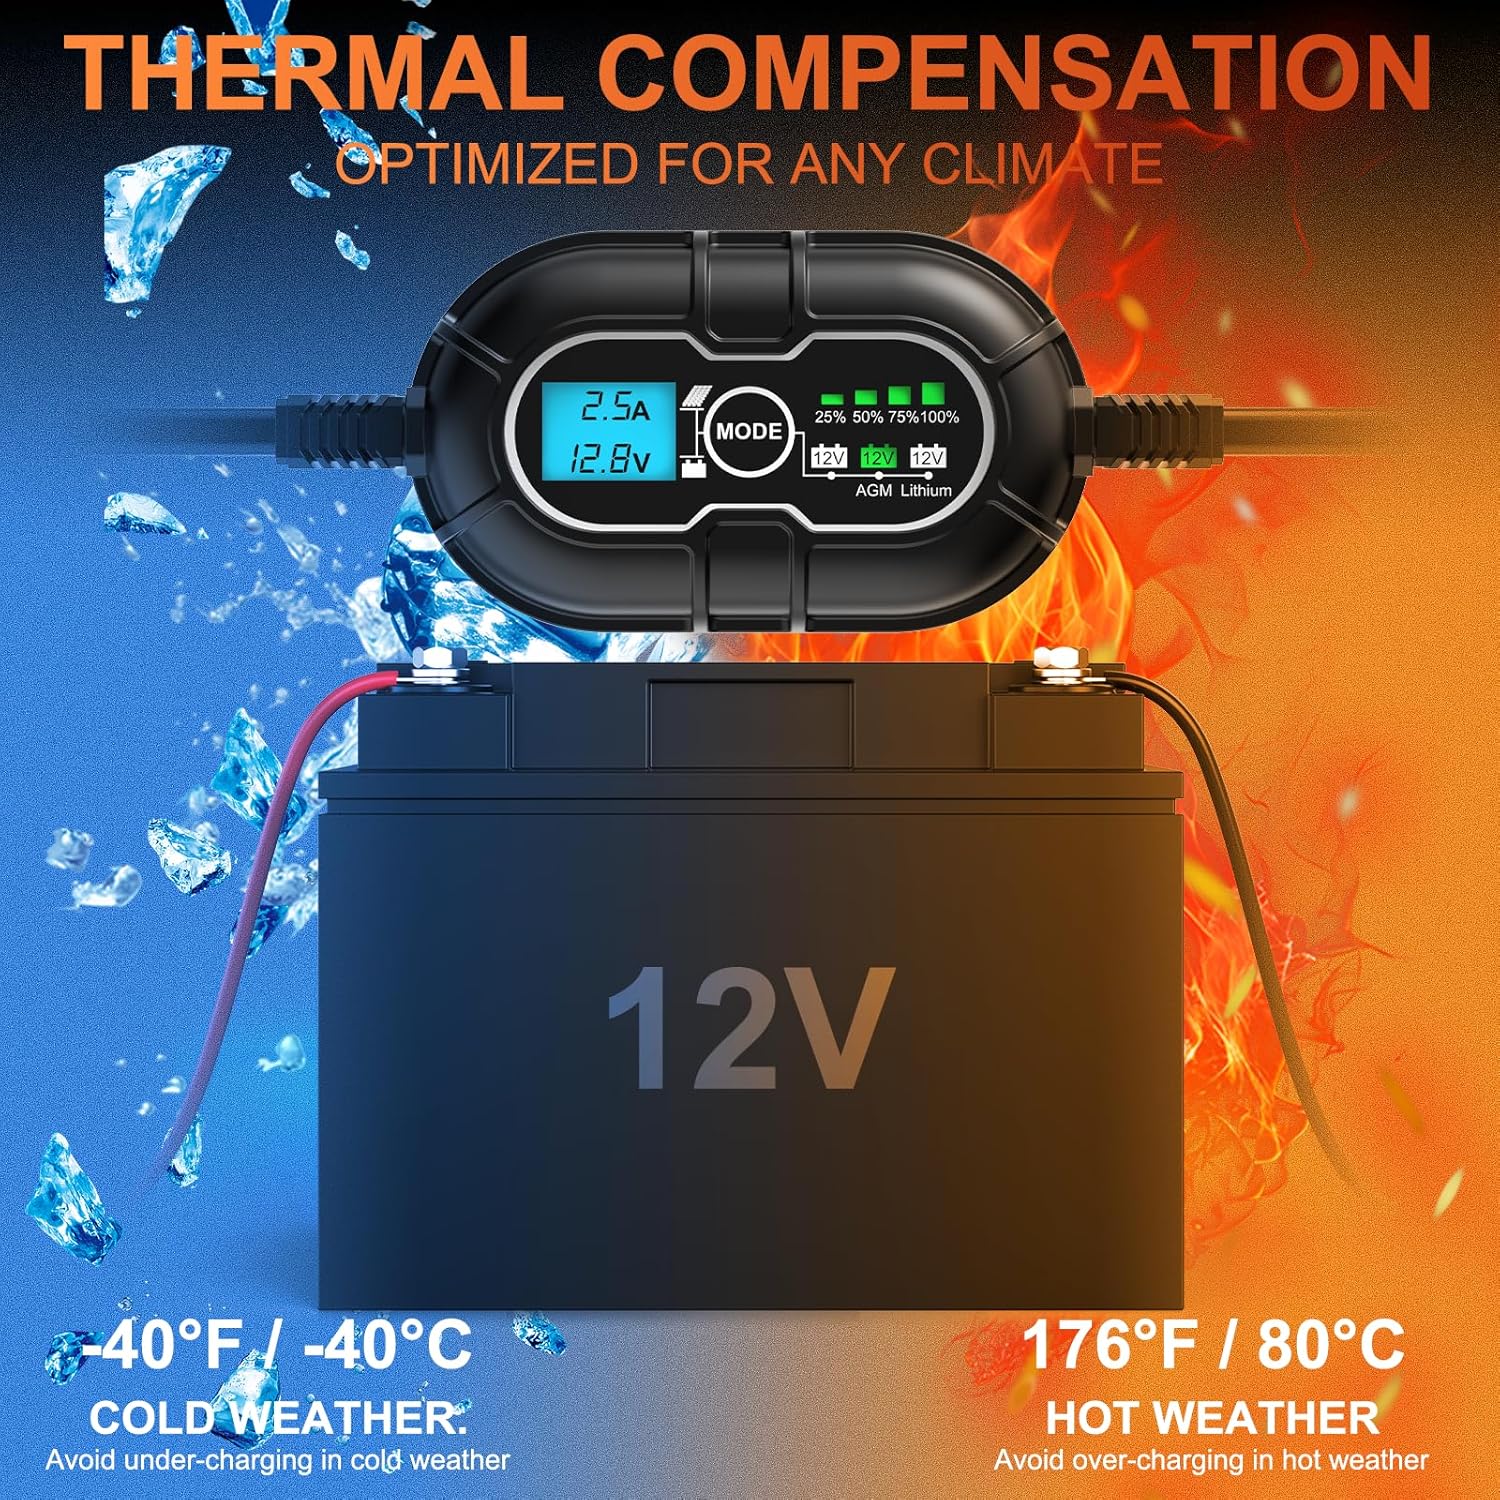
Image: An illustration demonstrating the thermal compensation feature, showing how the controller adjusts charging for both cold weather (-40°F/-40°C) to avoid under-charging and hot weather (176°F/80°C) to avoid over-charging.
LCD Display and Indicators
The LCD display provides real-time information about the charging process:
- Current (Amps): Displays the charging current from the solar panel to the battery.
- Voltage (Volts): Shows the current battery voltage.
- Battery Type: Indicates the currently selected battery chemistry (e.g., AGM, Lithium).
- State-of-Charge Bars: Visual representation of the battery's charge level (25%, 50%, 75%, 100%).

Image: A detailed view of the LCD display, explaining the meaning of the current (Amps), voltage (Volts), battery type, and the progressive charge level bars (25%, 50%, 75%, 100% charged, and maintenance pulsing).
Troubleshooting
If you encounter issues, refer to the following common problems and solutions:
| Problem | Possible Cause | Solution |
|---|---|---|
| Controller not powering on. | Incorrect battery connection or low battery voltage. | Ensure battery is connected with correct polarity. Check battery voltage; it must be above 8V for the controller to activate. |
| No charging current. | No sunlight, solar panel not connected, or incorrect polarity. | Verify solar panel connection and polarity. Ensure sufficient sunlight. Check solar panel output voltage. |
| Battery not fully charging. | Incorrect battery type selected, insufficient solar power, or battery degradation. | Confirm correct battery type is selected. Ensure solar panel is adequately sized and receiving full sun. Test battery health. |
| LCD display is dim or unreadable. | High ambient temperature or excessive current. | Ensure controller is in a well-ventilated area. Reduce solar input if current is consistently high and causing overheating. |
Specifications
- Model: SP-MPPT-10A-MC4
- Brand: SUNER POWER
- Rated Charging Current: 10 Amp
- System Voltage: 12V
- PV Input Voltage Range: 15V - 30V
- Max PV Input Power: 120W
- Tracking Efficiency: Up to 99%
- Conversion Efficiency: Up to 98%
- Battery Types Supported: Lead-Acid (Flooded, Gel, AGM, SLA, VRLA), Lithium (LiFePO4)
- Charging Stages: 3-stage (Bulk, Absorption, Float)
- Protections: Over-charge, Over-voltage, Over-current, Short circuit, Reverse polarity, Over-temperature, Waterproof, Spark-proof
- Dimensions: 6.14 x 4.06 x 2.17 inches
- Item Weight: 5.6 ounces (0.16 Kilograms)
Maintenance
To ensure the longevity and optimal performance of your solar charge controller:
- Regular Inspection: Periodically check all wiring connections for tightness and corrosion.
- Cleaning: Keep the controller free from dust and debris. Use a dry cloth for cleaning. Do not use liquids.
- Ventilation: Ensure the installation area remains well-ventilated to prevent overheating.
- Environmental Protection: Protect the controller from direct exposure to rain, snow, and extreme temperatures beyond its operating range.
Warranty and Support
For warranty information, technical support, or service inquiries, please contact SUNER POWER customer service directly. Refer to the product packaging or the official SUNER POWER website for contact details.


