Introduction
Thank you for choosing the ZIPCIDE 64GB Digital Voice Recorder. This device is designed for high-quality audio recording, offering features such as voice activation, noise reduction, and extensive storage capacity. This manual provides detailed instructions to help you set up, operate, and maintain your voice recorder for optimal performance.
Product Overview and Key Features
The ZIPCIDE 64GB Digital Voice Recorder is a compact and versatile recording device. Its key features include:
- 64GB Memory Capacity: Stores up to 4800 hours of audio recordings.
- Voice Activated Recording (VAR/VOX): Automatically starts and stops recording based on sound detection, saving memory and power.
- AI Intelligent Noise Reduction: Equipped with a professional noise cancellation chip for clear audio quality.
- Long Battery Life: Up to 40 hours of continuous recording on a single charge.
- 1.44-inch TFT Colour Screen: Provides clear display for navigation and settings.
- One-Click Operation: Simple and intuitive controls for recording and playback.
- File Playback & Transfer: Easy connection to PC for managing and transferring audio files.
- Password Protection: Secure your recordings from unauthorized access.
- Low Battery Auto-Save: Automatically saves recordings before the battery runs out.

Image: The ZIPCIDE 64GB Digital Voice Recorder shown with its included accessories: USB-C charging cable and wired headphones.

Image: Close-up view of the voice recorder's screen, illustrating its 64GB memory, 4608 hours recording time, 40 hours battery life, 1.44' TFT screen, Voice Activation Sensor, and AI intelligent noise reduction capabilities.
Package Contents
Please check the package for the following items:
- 1 x ZIPCIDE 64GB Digital Voice Recorder
- 1 x USB-C Charging Cable
- 1 x Wired Headphones
- 1 x User Manual (this document)
Setup
1. Charging the Device
Before first use, fully charge the voice recorder. Connect the included USB-C cable to the recorder's USB-C port and the other end to a USB power adapter (not included) or a computer's USB port.
- A full charge typically takes approximately 2 hours.
- The battery indicator on the screen will show charging status.
- A fully charged battery provides up to 40 hours of continuous recording.

Image: The voice recorder highlighting its 40 hours of continuous recording, 2 hours charging time, and 400mAh battery capacity, along with the USB-C port for fast charging.
2. Initial Power On/Off
To power on the device, slide the power switch to the 'ON' position. To power off, slide it to the 'OFF' position. The screen will illuminate upon power-on.
3. Connecting to a Computer
To transfer or manage files, connect the recorder to your computer using the provided USB-C cable. The device will appear as a removable disk drive. You can then drag and drop files as needed.
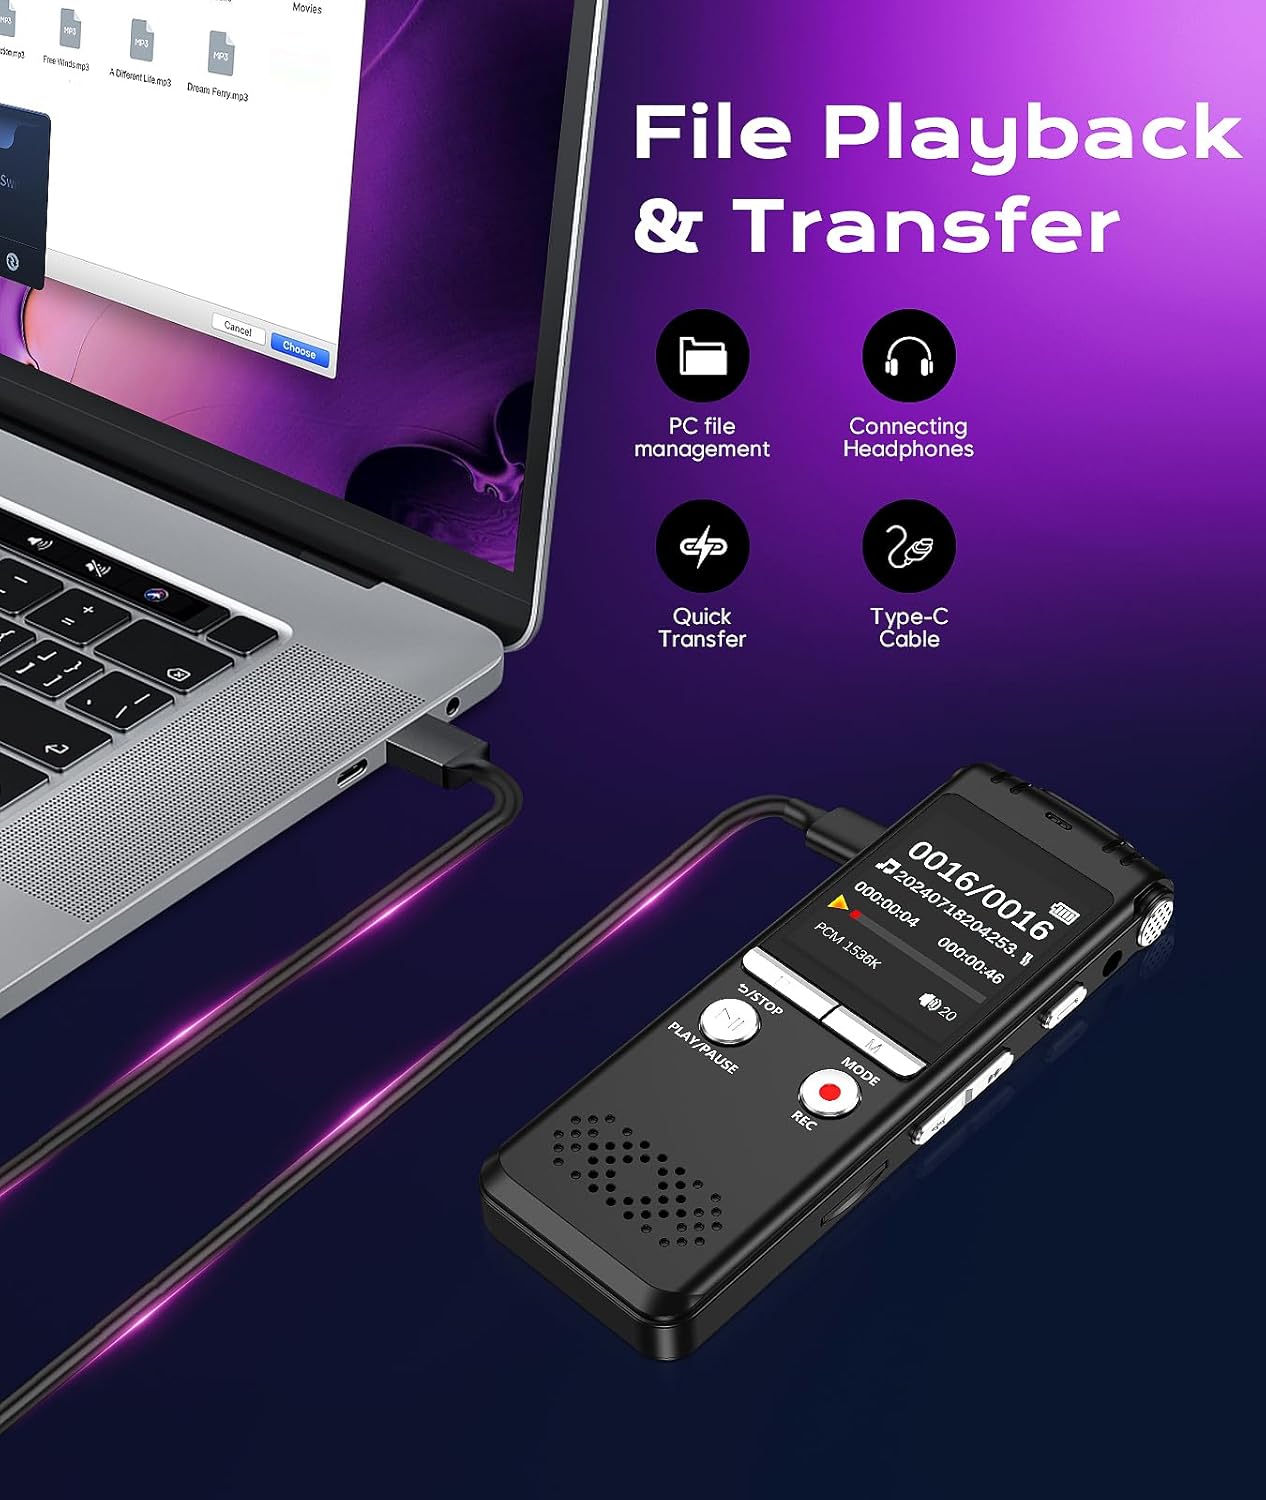
Image: The voice recorder connected to a laptop via USB-C cable, demonstrating PC file management, quick transfer, and the option to connect headphones for playback.
Operating Instructions
1. Basic Recording
To start recording, simply press the REC button. The recording indicator will light up, and the screen will show the recording time. To stop and save the recording, press the S/STOP button.

Image: A hand demonstrating the one-click operation of the voice recorder, highlighting the REC button for easy recording initiation.
2. Voice Activated Recording (VAR/VOX)
This feature allows the recorder to automatically start recording when sound is detected and pause when there is silence, optimizing memory usage. Refer to the on-screen menu for VAR settings and sensitivity levels (1-7).
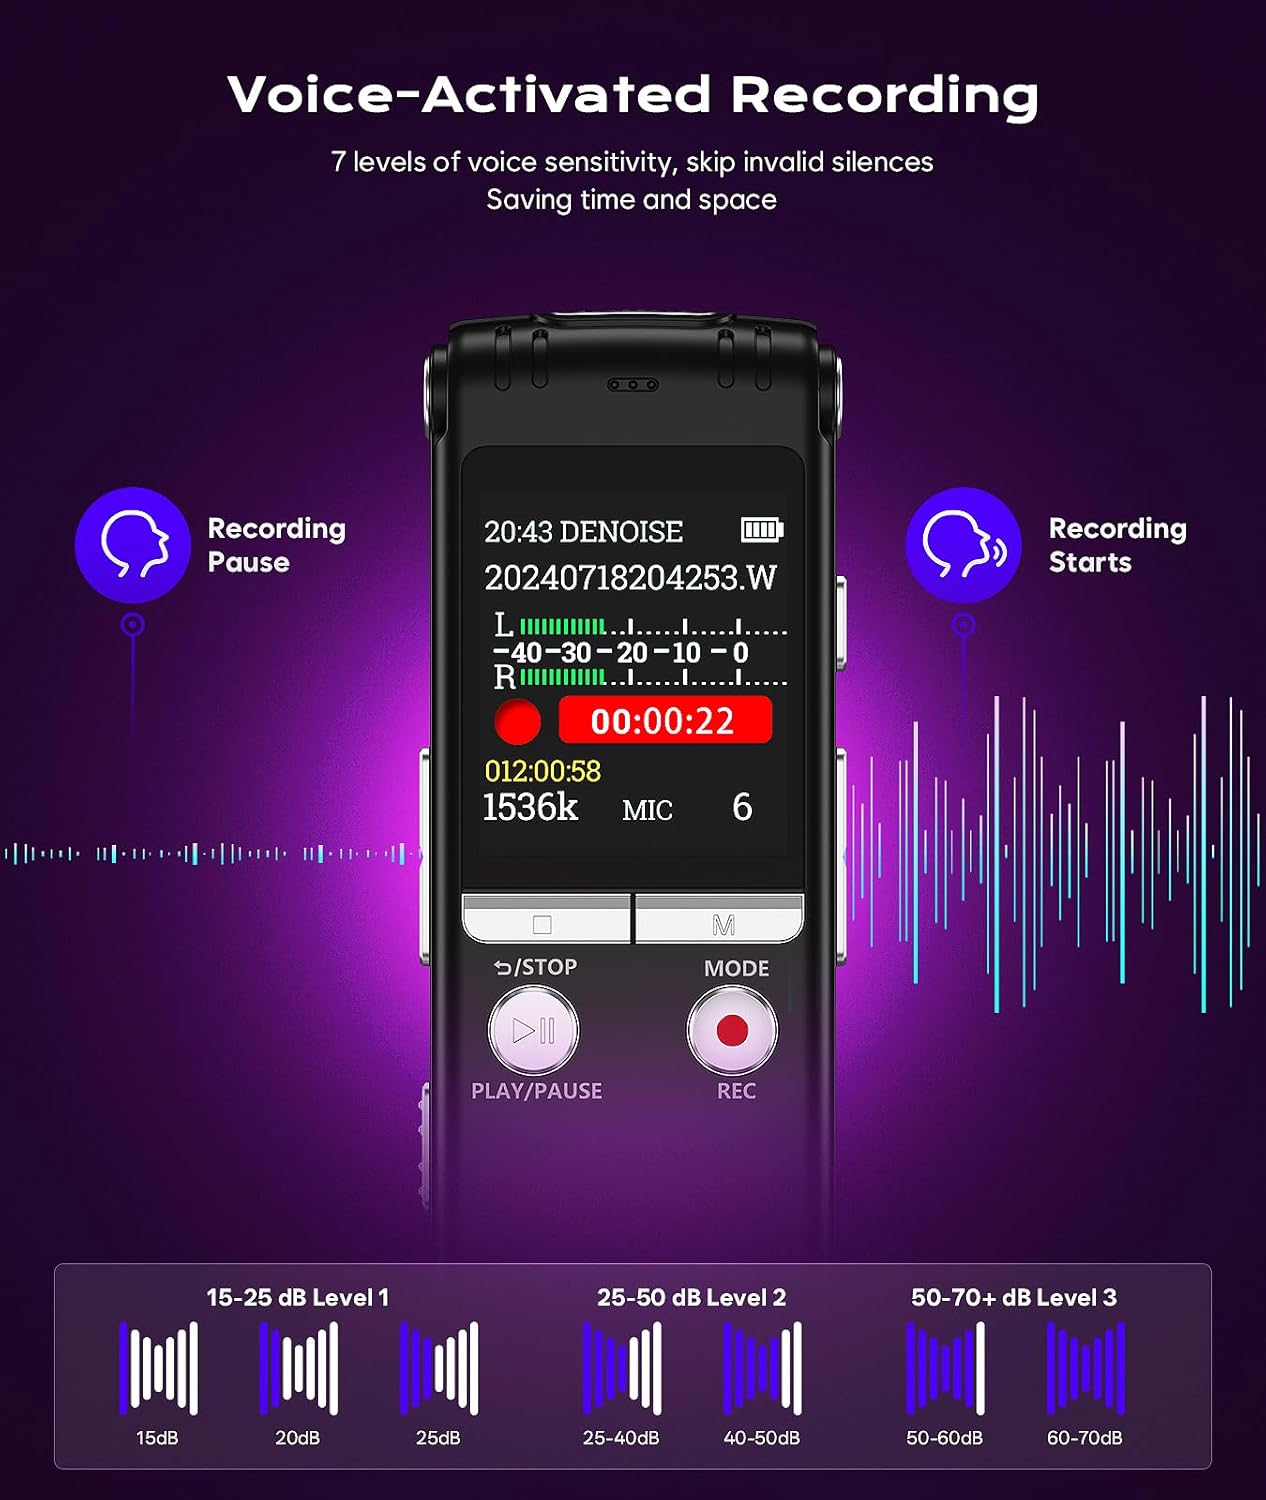
Image: Visual explanation of the voice-activated recording feature, showing how recording pauses and starts based on sound levels, with examples of 7 levels of voice sensitivity.
3. Playback
Navigate through your saved recordings using the navigation buttons. Press the PLAY/PAUSE button to start or pause playback. You can listen through the built-in speaker or connect the included headphones to the 3.5mm jack.
4. File Management
Connect the recorder to a computer to access and manage your audio files. Recordings are typically saved in a designated folder. You can copy, move, or delete files directly from your computer.
- Deleting Files: Select the file on the device or computer and choose the delete option.
- Organizing Files: Create new folders on the device via your computer to categorize recordings.
5. Advanced Settings
Access the device's menu using the MODE button to adjust various settings:
- Date and Time: Set the correct date and time for accurate file timestamps.
- Noise Reduction: Enable or disable the intelligent noise reduction feature.
- A-B Repeat: For playback, set start and end points to loop a specific section of an audio file.
- Password Protection: Set a password to prevent unauthorized access to your device and recordings.
- Timed Recording: Schedule recordings to start at a specific time.
- Variable Speed Playback: Adjust playback speed for faster review or detailed listening.

Image: Illustration of advanced features including Dual-Microphone 360° Surrounding Pickup, Line-in Recording capability (3.5mm audio cable not included), Recording Monitoring, 1.44-inch TFT Colour Screen, Timed Recording, and Variable Speed Playback.

Image: Depiction of A-B Repeat function for detailed playback, Password Protection for device security, and Files Protection with low battery auto-save feature.
Maintenance
- Cleaning: Use a soft, dry cloth to clean the device. Do not use liquid cleaners or solvents.
- Storage: Store the recorder in a cool, dry place away from direct sunlight and extreme temperatures.
- Battery Care: To prolong battery life, avoid fully discharging the battery frequently. Charge the device regularly, even if not in use for extended periods.
- Data Backup: Regularly back up important recordings to your computer to prevent data loss.
Troubleshooting
| Problem | Possible Solution |
|---|---|
| Device does not power on. | Ensure the battery is charged. Connect to a power source and try again. Check if the power switch is fully in the 'ON' position. |
| Cannot record. | Check if the device has sufficient memory. Ensure the 'REC' button is pressed firmly. The device might be in playback or menu mode. |
| Poor sound quality. | Ensure the microphone is not covered. Try enabling the noise reduction feature. Record in a quieter environment. |
| Device not recognized by computer. | Try a different USB port or cable. Restart both the recorder and the computer. Ensure the recorder is powered on when connected. |
| Voice Activated Recording (VAR) not working as expected. | Adjust the VAR sensitivity level in the settings. A higher sensitivity might be needed for quieter environments. |
Specifications
| Feature | Detail |
|---|---|
| Brand | ZIPCIDE |
| Model Number | 64GB |
| Memory Storage Capacity | 64 GB (approx. 4800 hours recording) |
| Digital Recording Time | 40 hours (continuous) |
| Screen Size | 1.44 Inches TFT Colour Screen |
| Microphone Format | Built-In Dual-Microphone (360° pickup) |
| Hardware Interface | USB-C |
| Headphones Jack | 3.5 millimeters |
| Compatible Devices | Laptop, Personal Computer, Tablet |
| Product Dimensions | 9.4 x 1.27 x 3.3 cm; 132 g |
| Noise Reduction | AI Intelligent Noise Reduction (DSP4.0 chip) |
Warranty and Support
Your ZIPCIDE Digital Voice Recorder comes with a standard manufacturer's warranty. For specific warranty terms and conditions, please refer to the warranty card included in your product packaging or visit the official ZIPCIDE website.
If you encounter any issues or have questions not covered in this manual, please contact ZIPCIDE customer support through the retailer where you purchased the product or via the contact information provided on the official ZIPCIDE website.
Please have your product model number (64GB) and purchase details ready when contacting support.