WallarGe CL5008
WallarGe Extra Large Atomic Clock Instruction Manual
Model: CL5008
Product Overview
The WallarGe Extra Large Atomic Clock is designed for clear visibility and automatic time synchronization. It features a built-in receiver that automatically synchronizes with the WWVB radio broadcast, ensuring accurate time to within one second with daily updates. This clock also includes a high-precision temperature sensor to monitor both indoor and outdoor temperatures, helping you stay informed about your environment. Its extra-large 4.5-inch high-contrast jumbo digits make it easily readable from a distance, beneficial for the elderly and visually impaired. The clock is battery-operated, offering flexible placement without the need for wires, and includes a low battery indicator.

Figure 1: The WallarGe Extra Large Atomic Clock with its remote outdoor temperature sensor.
Setup Guide
1. Battery Installation
The clock and the outdoor sensor require AA batteries for operation. Ensure you use fresh batteries for optimal performance.
- For the Main Clock Unit: Insert 3 new AA batteries into the battery compartment located on the back of the clock. Ensure correct polarity (+/-). The clock display will activate upon successful battery insertion.
- For the Outdoor Sensor: Insert 2 new AA batteries into the battery compartment of the remote outdoor sensor. Ensure correct polarity (+/-). The sensor's indicator light will begin to blink, signaling it is searching for a signal.

Figure 2: Inserting 3 AA batteries into the main clock unit's battery compartment.

Figure 3: Inserting 2 AA batteries into the remote outdoor sensor.
2. Sensor Pairing and Signal Reception
After installing batteries in both units, the clock will automatically attempt to receive the atomic time signal and pair with the outdoor sensor. For faster pairing, press the 'TX' button on the outdoor sensor for 2 seconds. The clock should quickly receive the signal from the sensor.

Figure 4: Once the signal is successfully received, the outdoor sensor indicator stops blinking, and both indoor and outdoor temperatures are displayed normally.
Operating Instructions
Atomic Time Synchronization
The WallarGe Atomic Clock features a built-in receiver that automatically synchronizes with the WWVB radio broadcast from Fort Collins, Colorado. This ensures the clock is always accurate to within one second. The clock will receive daily updates to maintain precision.

Figure 5: The atomic clock automatically receives time signals, eliminating the need for manual time setting.

Figure 6: The clock ensures accurate timing by syncing automatically.
Daylight Saving Time (DST)
The clock automatically adjusts for Daylight Saving Time (DST). This feature eliminates the need for manual adjustments when DST begins or ends.

Figure 7: The clock's automatic DST feature simplifies time changes.
Temperature Display
The clock displays both indoor and outdoor temperatures. The outdoor temperature is provided by the remote sensor. You can switch between Celsius (℃) and Fahrenheit (℉) using the dedicated button on the clock.
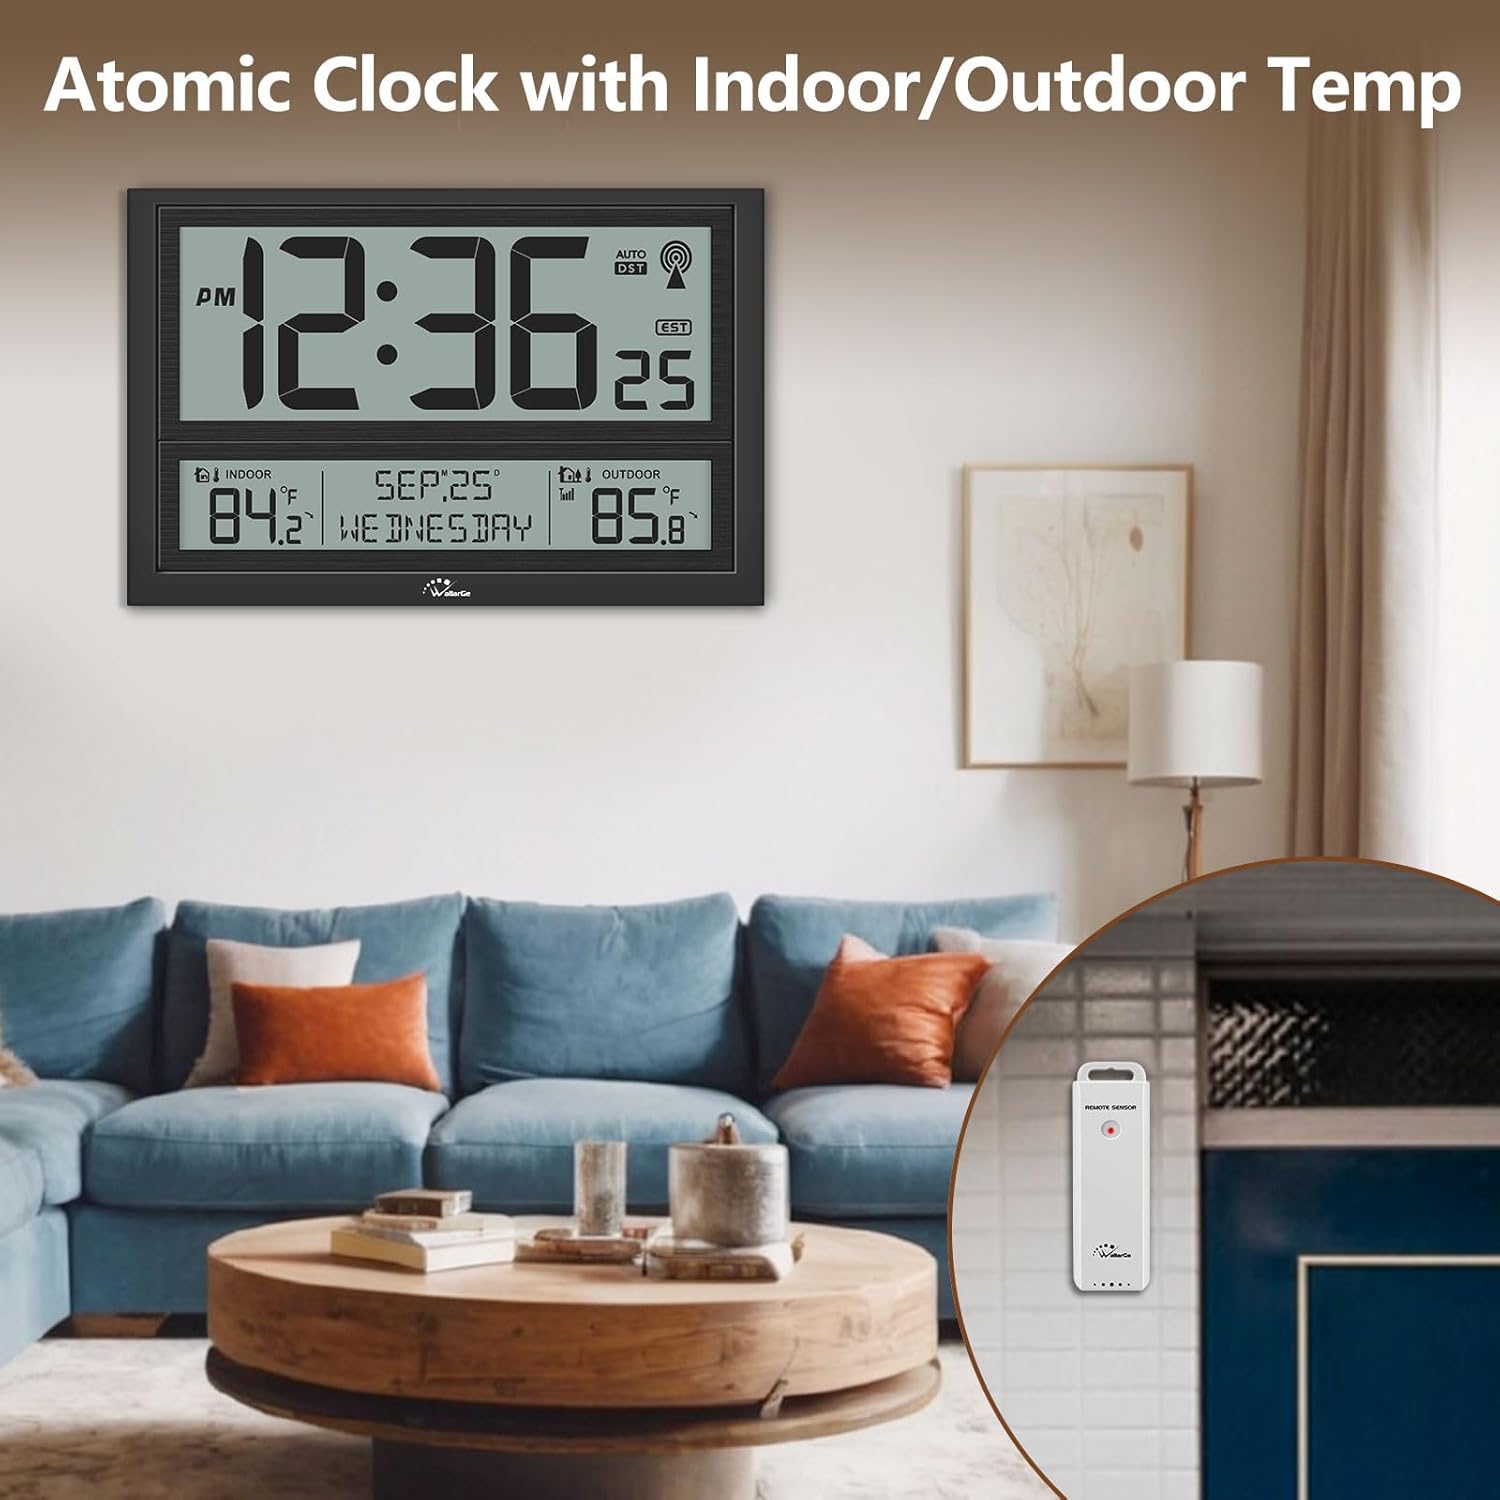
Figure 8: The clock provides real-time indoor and outdoor temperature readings.

Figure 9: Easily monitor indoor and outdoor temperatures to plan your day.
Date and Day Display
In addition to time and temperature, the clock clearly displays the current date and day of the week, providing comprehensive information at a glance.

Figure 10: The clock provides a clear display of the current date and day of the week.
Time Zones
The clock supports 4 time zones. Refer to the buttons on the back of the clock to select your desired time zone (e.g., EST, PST, MST, CST).
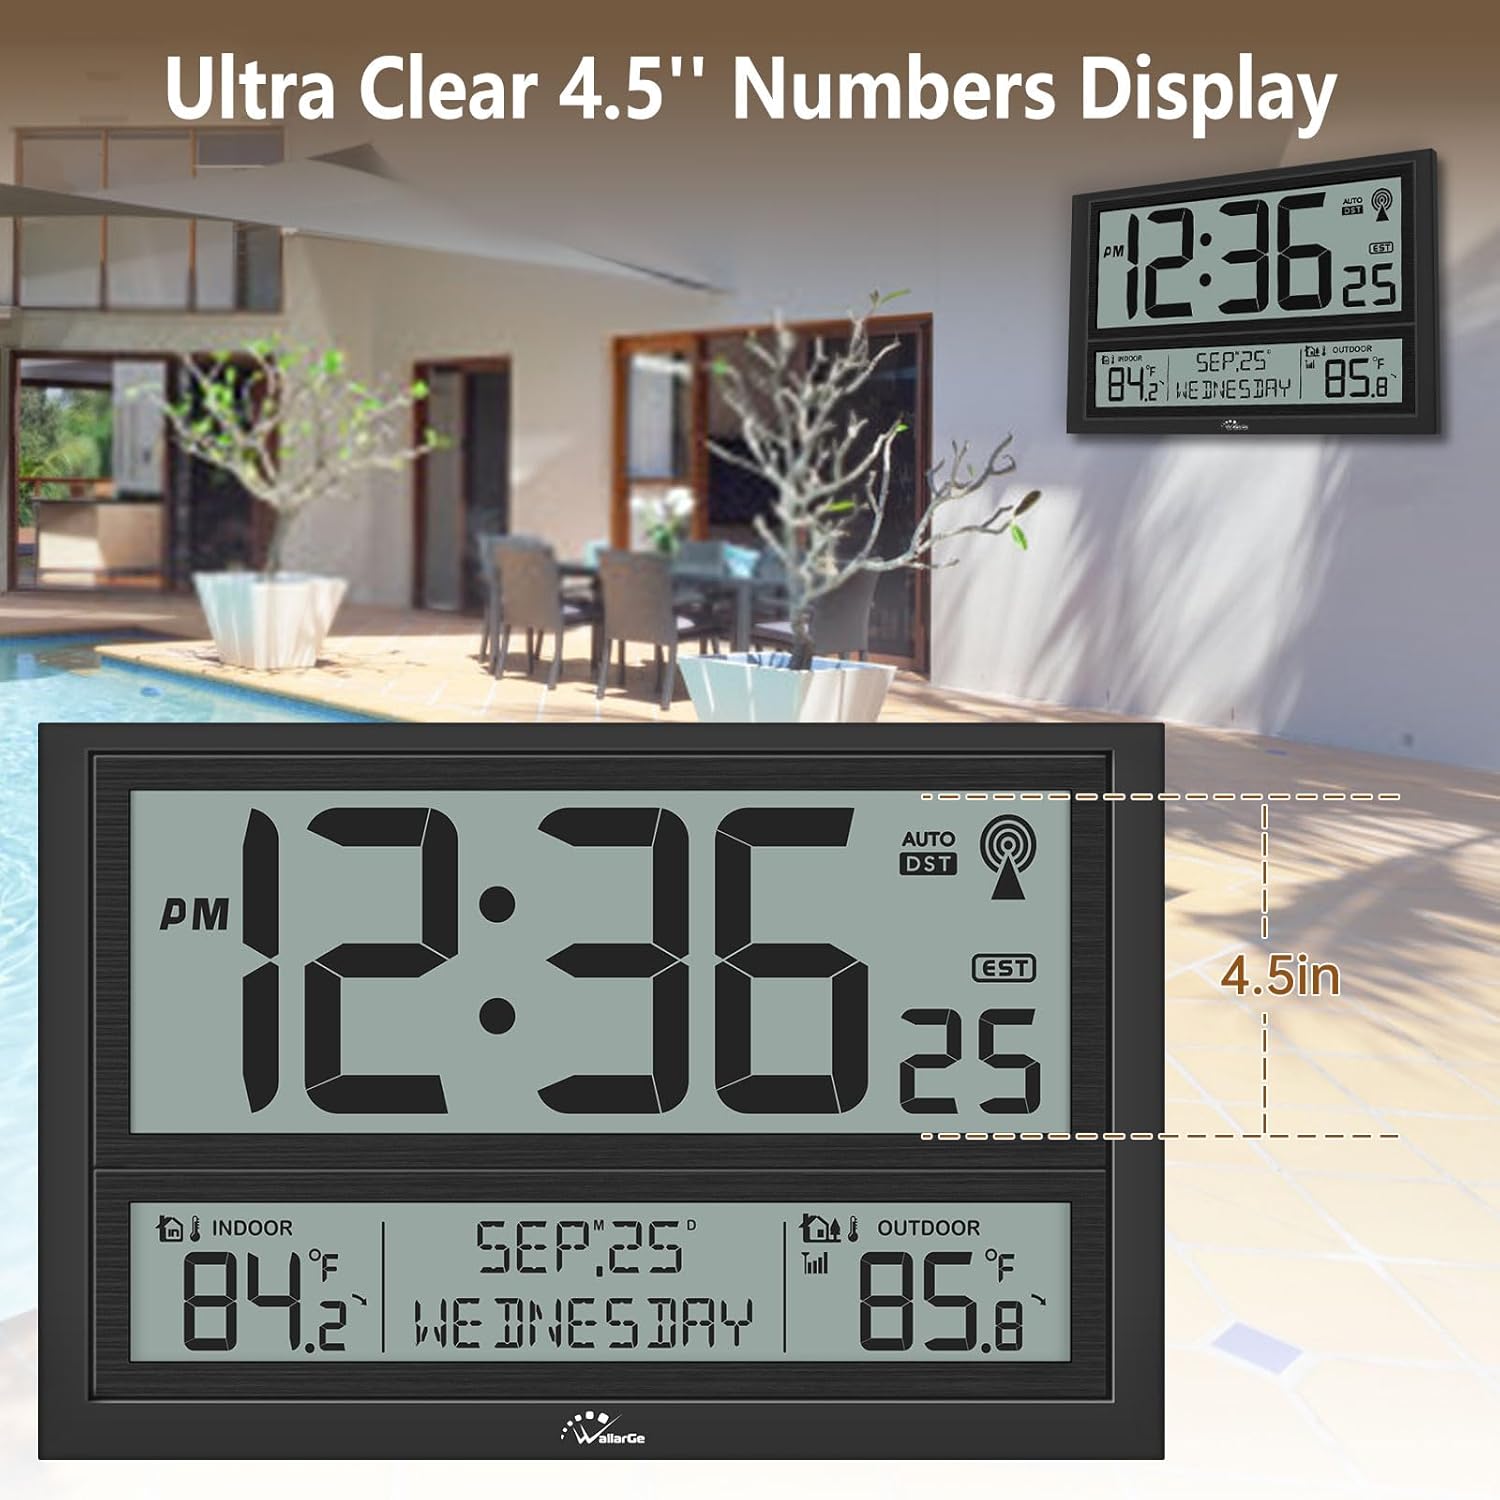
Figure 11: The ultra-clear 4.5-inch numbers display time, date, and temperature, including the selected time zone.
Maintenance
To ensure the longevity and optimal performance of your WallarGe Atomic Clock, follow these simple maintenance guidelines:
- Cleaning: Wipe the clock and sensor surfaces with a soft, dry cloth. Avoid using abrasive cleaners or solvents, as they may damage the display or casing.
- Battery Replacement: Replace batteries promptly when the low battery indicator appears to ensure continuous and accurate operation.
- Placement: Place the outdoor sensor in a location protected from direct sunlight and heavy precipitation to ensure accurate temperature readings and extend its lifespan.
Troubleshooting
If you encounter issues with your WallarGe Atomic Clock, refer to the following common troubleshooting steps:
Outdoor Temperature Issues
If the outdoor temperature display is inaccurate, shows a dash, or the sensor is not working:
- Check Batteries: Ensure the outdoor sensor has fresh batteries and they are inserted with correct polarity.
- Re-pair Sensor: Remove batteries from both the main clock and the outdoor sensor. Wait a few minutes, then reinsert batteries into the main clock first, followed by the outdoor sensor. Press the 'TX' button on the sensor for 2 seconds to force a signal transmission.
- Sensor Placement: Ensure the outdoor sensor is within range of the main clock and there are no significant obstructions (thick walls, large metal objects) interfering with the signal.

Figure 12: Visual guide for common outdoor temperature sensor issues and setup.
Atomic Time Signal Issues
If the clock is not synchronizing with the atomic time signal:
- Relocate Clock: Move the clock to a location with better reception, ideally near a window and away from electronic devices that might cause interference.
- Manual Sync: Some models allow for a manual atomic signal search. Refer to the buttons on the back of your clock for a 'WAVE' or 'SYNC' button.
Specifications
| Feature | Detail |
|---|---|
| Product Dimensions | 16.7 x 1.5 x 10.8 inches; 3.44 Pounds |
| Item Model Number | CL5008 |
| Batteries Required | 5 AA batteries (3 for clock, 2 for sensor) |
| Power Source | Battery Powered |
| Special Features | Daylight Saving, Temperature Display, Extra Large Display, Battery Operated |
| Style | Modern |
| Color | Black |
| Temperature Accuracy | 1 ℃ |
| Manufacturer | ShenZhen litian technology Co.,Ltd |
Warranty and Support
For warranty information or technical support, please refer to the documentation included with your product packaging or visit the official WallarGe website. Specific warranty terms and support contact details are typically provided by the manufacturer.