1. Introduction
This manual provides detailed instructions for the proper use and maintenance of your Uharbour 1/2 Drive Digital Torque Wrench (Model UHXM013). This precision instrument is designed for accurate torque application, featuring a range of 3.8-250.8 Ft.lb, digital display, and multiple alert systems. Adhering to these instructions will ensure optimal performance and longevity of the tool.
2. Safety Information
Always observe the following safety precautions when operating the digital torque wrench:
- Read and understand all instructions before use.
- Wear appropriate personal protective equipment, including safety glasses.
- Do not exceed the maximum torque capacity of the wrench.
- Ensure the socket or attachment is correctly seated on the drive.
- Keep the wrench clean and free from oil or grease to maintain a secure grip.
- Store the wrench in its protective case when not in use to prevent damage.
- Do not use the wrench as a pry bar or hammer.
- Keep out of reach of children.
3. Package Contents
Verify that all items are present in the package:
- 1 x Uharbour Digital Torque Wrench
- 1 x Protective Storage Case
- 3 x AAA Batteries
- 1 x User Manual (this document)
- 1 x Certificate of Calibration
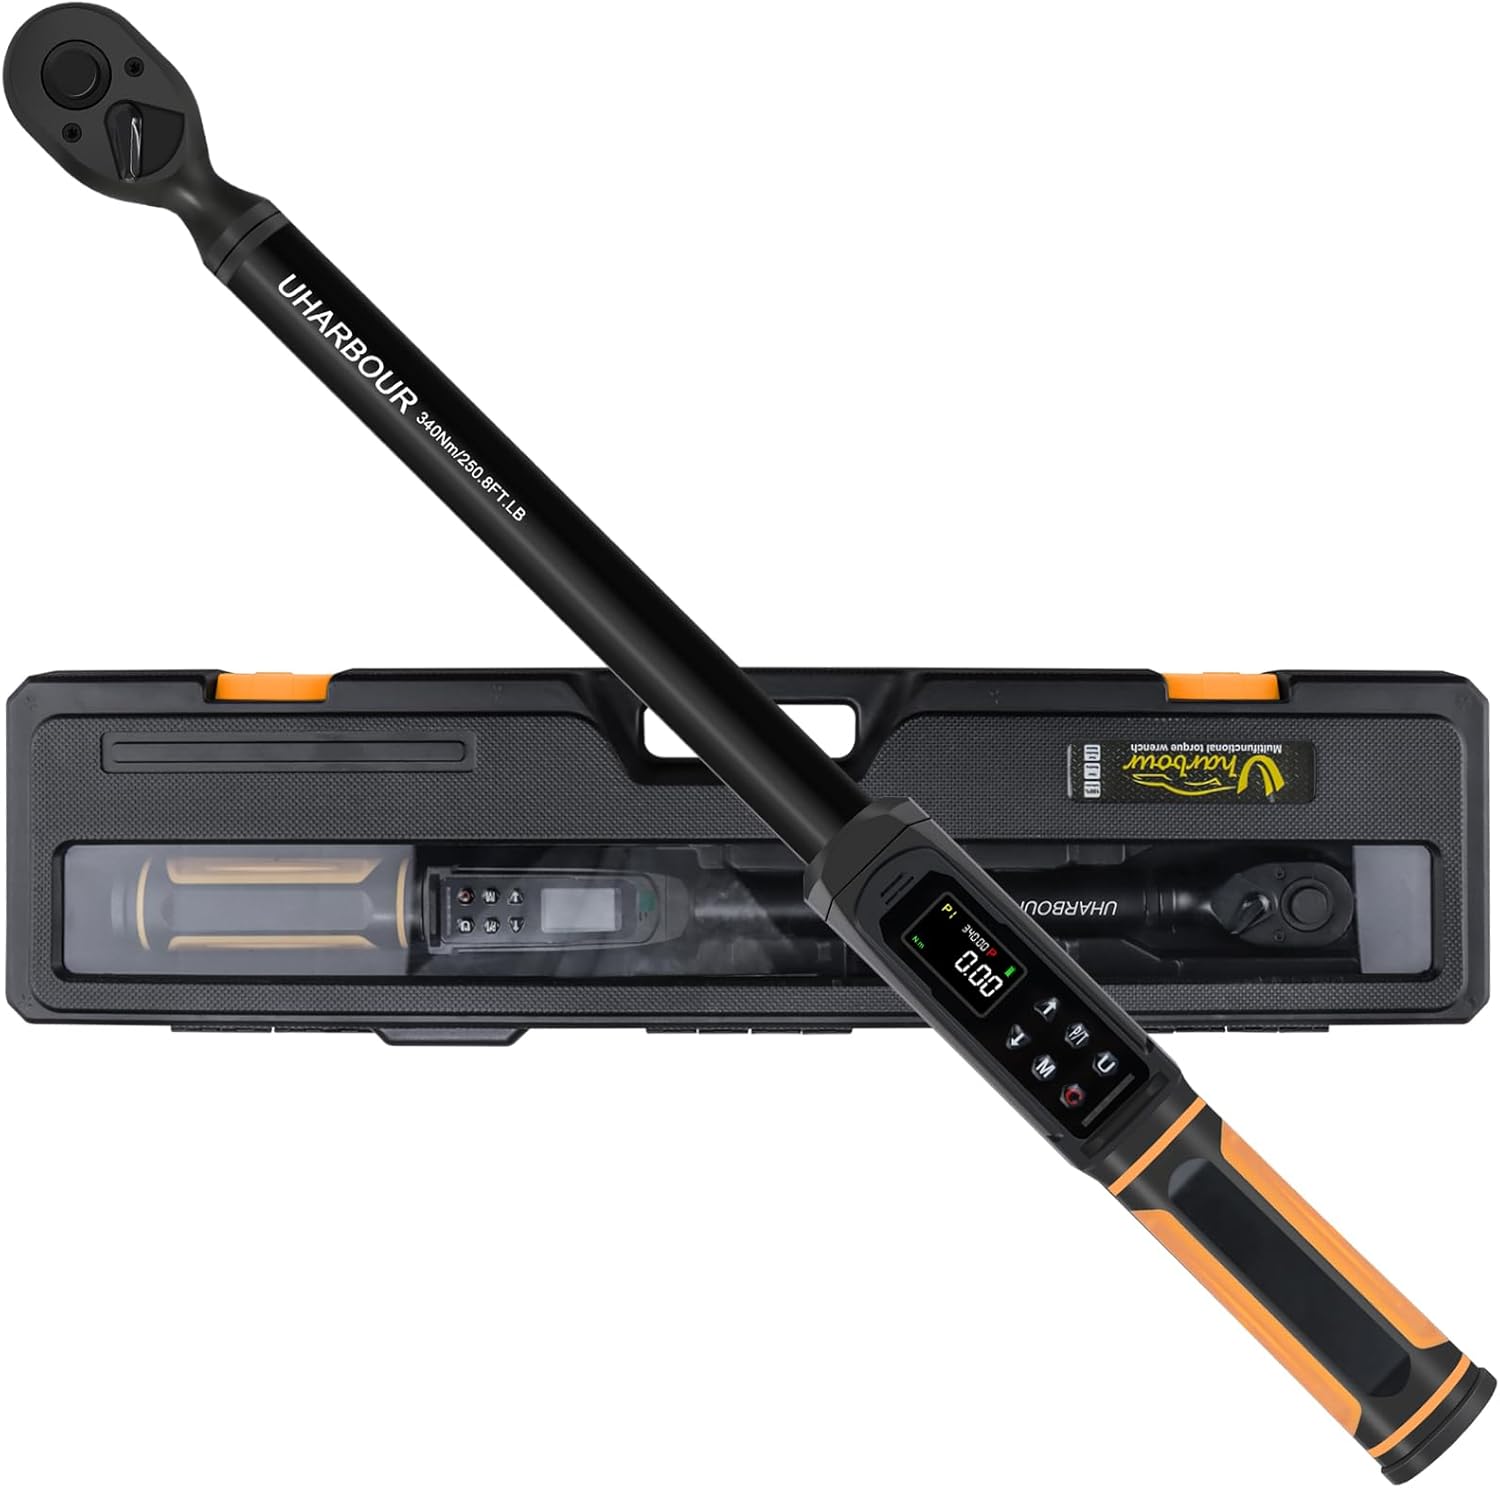
Image 3.1: The Uharbour Digital Torque Wrench shown with its included protective storage case.
4. Product Overview
The Uharbour Digital Torque Wrench features a robust design with advanced functionalities for precise torque measurement and application.
4.1 Key Components
- 1/2" Drive Head: Compatible with standard 1/2-inch sockets.
- Digital Display (LCD Screen): High-definition screen with backlight for clear torque readings.
- Control Buttons: For power, unit selection, mode selection, and value adjustment.
- LED Indicators: Visual alerts for approaching and reaching target torque.
- Buzzer: Audible alerts for approaching and reaching target torque.
- Vibration Alert: Tactile feedback when target torque is reached.
- Dual-Direction Ratchet: Allows for both clockwise and counterclockwise torque application.
- Quick Release Button: For easy and secure socket attachment and removal.

Image 4.1: Detailed view of the digital display, control buttons, LED indicators, and buzzer location on the torque wrench.

Image 4.2: The wrench in use, highlighting the dual-direction ratchet head and the quick release button for sockets.
5. Setup
5.1 Battery Installation
The Uharbour Digital Torque Wrench requires three (3) AAA batteries for operation. To install or replace batteries:
- Locate the battery compartment cover, typically at the base of the handle.
- Open the cover by twisting or sliding it according to the markings.
- Insert three AAA batteries, ensuring correct polarity (+/-) as indicated inside the compartment.
- Close the battery compartment cover securely.
The wrench is now ready for initial power-on.
6. Operating Instructions
6.1 Power On/Off
- Power On: Press and hold the power button (usually marked 'C' or power symbol) for a few seconds until the display illuminates.
- Power Off: Press and hold the power button until the display turns off. The wrench will automatically power off after a period of inactivity to conserve battery life.
6.2 Unit Selection
The wrench supports multiple measurement units. To change units:
- Press the 'U' button (Unit button) to cycle through available units: N-m, kgf-cm, lb-ft, and lb-in.
- Select the desired unit for your application.
6.3 Mode Selection (Peak & Track)
The wrench offers two primary operating modes:
- Track Mode: Displays the real-time torque value as it is applied. This is useful for monitoring torque during continuous application.
- Peak Mode: Captures and displays the maximum torque value applied during an operation. In this mode, you can set a target torque value, and the wrench will provide alerts (vibration, buzzer, LED) when the target is approached and reached.
Press the 'P/T' button to switch between Track and Peak modes.

Image 6.1: Illustration of the three reading modes: Track mode for real-time display, Peak mode for target setting with alerts, and Torque memory for storing historical values.
6.4 Setting Target Torque (Peak Mode)
To set a target torque value in Peak mode:
- Ensure the wrench is in Peak mode (indicated on the display).
- Press the 'M' button (Memory/Set button) to enter the setting interface.
- Use the Up (▲) and Down (▼) arrow buttons to adjust the target torque value.
- Press the 'M' button again to confirm and save the setting.
6.5 Applying Torque
Once the target torque is set (or in Track mode):
- Attach the appropriate 1/2" drive socket to the wrench head.
- Place the socket onto the fastener.
- Apply steady, smooth force to the wrench handle.
- In Peak mode, observe the LED indicators, listen for the buzzer, and feel for vibration as you approach and reach the target torque. Stop applying force immediately upon receiving the final alert.
- In Track mode, monitor the real-time display to achieve the desired torque.

Image 6.2: The digital display providing instant and accurate torque readings, eliminating guesswork.
6.6 Torque Memory
The wrench can store torque value histories for future reference. Consult the specific instructions in the included printed manual for details on accessing and managing stored memory slots (P1-P9).
7. Maintenance
7.1 Cleaning
- Wipe the wrench clean with a soft, dry cloth after each use.
- Do not use abrasive cleaners or solvents, as these can damage the finish or electronic components.
7.2 Storage
- Store the torque wrench in its protective case in a dry, clean environment.
- Remove batteries if the wrench will not be used for an extended period to prevent leakage.
7.3 Calibration
Digital torque wrenches require periodic calibration to maintain accuracy. The included Certificate of Calibration provides details on the initial calibration. It is recommended to verify calibration every 12 months or after 5000 cycles of use, whichever comes first. Contact Uharbour customer service for calibration services.

Image 7.1: The Uharbour Digital Torque Wrench is supplied with a calibration certificate, ensuring initial accuracy.
8. Troubleshooting
If you encounter issues with your Uharbour Digital Torque Wrench, refer to the following common problems and solutions:
| Problem | Possible Cause | Solution |
|---|---|---|
| Wrench does not power on. | Dead or incorrectly installed batteries. | Check battery polarity. Replace with fresh AAA batteries. |
| Inaccurate torque readings. | Wrench needs calibration; improper technique. | Ensure smooth, steady pull. Refer to calibration section. Contact customer service for recalibration. |
| Alerts (buzzer, LED, vibration) not functioning. | Low battery; alert settings disabled. | Replace batteries. Check user manual for alert setting adjustments. |
| Display is dim or flickering. | Low battery. | Replace with fresh AAA batteries. |
9. Specifications
| Feature | Detail |
|---|---|
| Model Number | UHXM013 |
| Drive Size | 1/2 inch |
| Torque Range | 3.8-250.8 Ft.lb (5-340 N.m) |
| Accuracy | ±1% |
| Measurement Units | N-m, kgf-cm, lb-ft, lb-in |
| Operation Modes | Peak, Track |
| Alerts | Vibration, Buzzer, LED Indicators |
| Ratchet Head | Dual-Direction (Clockwise/Counterclockwise) |
| Power Source | 3 x AAA Batteries |
| Material | Alloy Aluminum, Chrome Vanadium Steel, Plastic, Rubber |
| Item Weight | 2.45 Kilograms (5.39 pounds) |
| Dimensions | Approx. 23 x 6 x 3 inches (Package) |
10. Warranty and Support
The Uharbour Digital Torque Wrench typically comes with a two-year warranty from the date of purchase. Please refer to your Certificate of Calibration and the warranty information included in your package for specific terms and conditions.
For technical support, calibration services, or warranty claims, please contact Uharbour customer service through their official website or the contact information provided in your product documentation.
Official Website: www.uharbour.net
Customer Service Email: support@uharbour.net