1. Introduction
This manual provides essential instructions for the proper installation, operation, and maintenance of your Startbuymore JR-RX-6V Bluetooth RC Electric Car Receiver Controller. Please read this manual thoroughly before use to ensure safe and efficient operation.
2. Product Overview
The JR-RX-6V is a control box designed for children's electric ride-on cars, enabling Bluetooth remote control functionality. It provides a smooth start control and is compatible with various JR-RX series models. This receiver operates on a 6V power supply.
Compatible Models: JR-RX-12V/6V series, including JR1705RX, JR1758RX, JR1738RX, JR1758RX-2S, JR1858RX-12V, JR1810RX, JR1705RX, and others as listed in specifications.
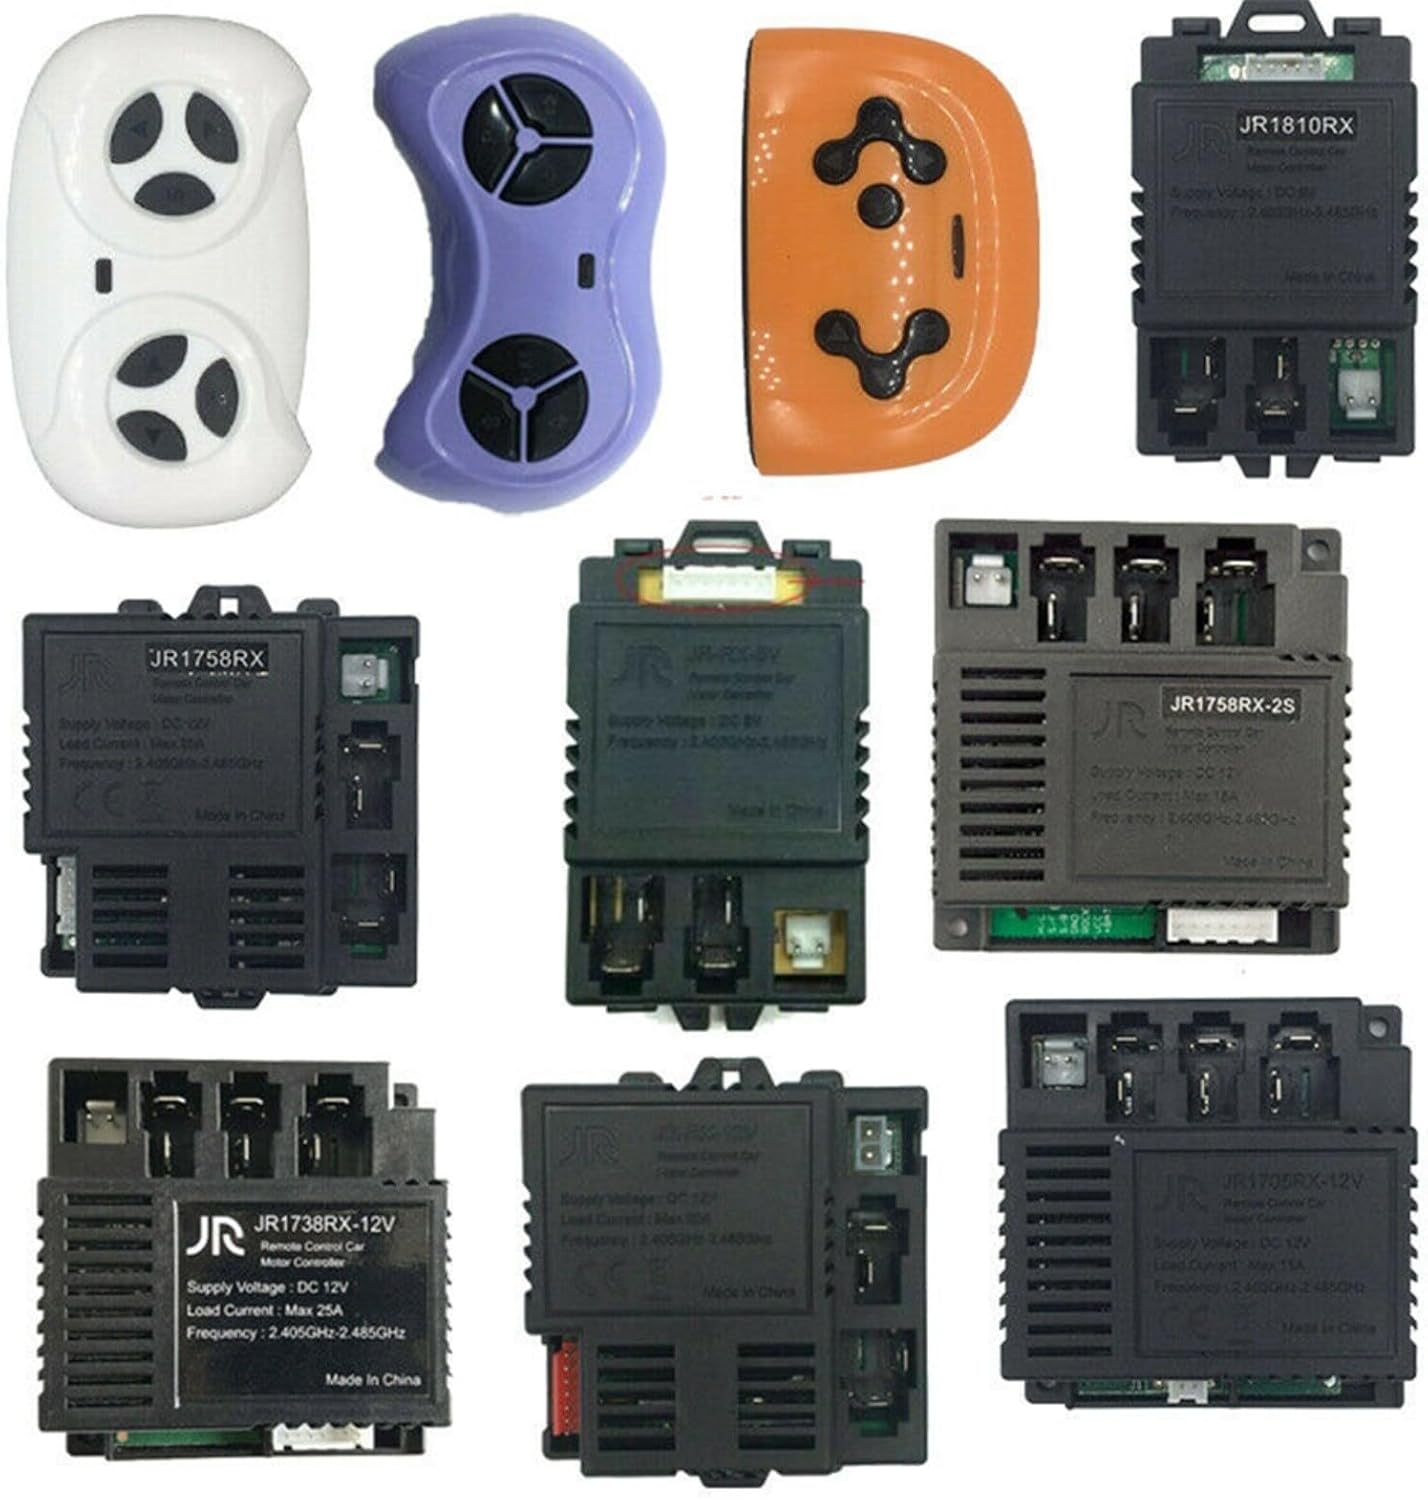
Image 1: Various Startbuymore remote controls and receiver units, illustrating the range of compatible components.
3. Setup and Pairing Instructions
Follow these steps to connect and pair your remote control with the JR-RX-6V receiver:
- Install the Receiver: Securely install the JR-RX-6V receiver into the designated compartment of your children's electric car. Ensure all wiring connections are correct and secure according to the car's wiring diagram.
- Prepare the Remote Control: Ensure fresh batteries are installed in your remote control unit.
- Initiate Pairing Mode: On the remote control, simultaneously press and hold both the Forward and Reverse buttons. The indicator light on the remote control will begin to flash.
- Power On the Car: While still holding the Forward and Reverse buttons on the remote, turn on the children's electric car.
- Confirm Connection: The indicator light on the remote control will stop flashing, indicating a successful connection between the remote and the receiver. Release the buttons.
- Test Functionality: After successful pairing, test all functions of the remote control (forward, reverse, steering) to ensure proper operation.

Image 2: A detailed view of the JR-RX-6V receiver unit, showing its ports and labeling.

Image 3: A remote control unit shown with a receiver, representing the components involved in the pairing process.
4. Operating Instructions
Once the remote control and receiver are successfully paired, you can operate the electric car using the remote control. Refer to your specific remote control's button layout for detailed functions such as:
- Forward/Reverse: Controls the direction of movement.
- Left/Right: Controls steering.
- Speed Selection: If available, adjusts the car's speed.
- Brake: Stops the car.
Always supervise children during operation of the electric car.
5. Maintenance
To ensure the longevity and optimal performance of your receiver controller, follow these maintenance guidelines:
- Cleaning: Keep the receiver and remote control clean and free from dust and debris. Use a soft, dry cloth for cleaning. Avoid using liquids or harsh chemicals.
- Storage: Store the unit in a dry, cool place away from direct sunlight and extreme temperatures when not in use.
- Battery Care: Replace remote control batteries as needed. Remove batteries if the remote will not be used for an extended period to prevent leakage.
- Wiring Inspection: Periodically check all wiring connections for any signs of wear, damage, or looseness. Ensure connections remain secure.
6. Troubleshooting
If you encounter issues with your receiver controller, refer to the following common troubleshooting steps:
- No Power:
- Check the car's main power switch and battery connection.
- Ensure the car's battery is charged.
- Verify the receiver's power input connection.
- Remote Not Responding:
- Replace the batteries in the remote control.
- Re-attempt the pairing process as described in Section 3.
- Ensure there are no obstructions between the remote and the car.
- Intermittent Connection:
- Check for potential sources of interference (e.g., other wireless devices).
- Ensure the remote control is within the effective operating range.
- Inspect receiver and remote for any physical damage.
If problems persist after attempting these steps, contact customer support.
7. Specifications
| Feature | Specification |
|---|---|
| Product Model | JR-RX-6V |
| Item Model Number | 577N8448T904B3FH341CZ73P |
| Supply Voltage | DC 6V (Compatible with 6V, 12V, 24V systems depending on specific model variant) |
| Load Current | Max 20A |
| Frequency | 2.405GHz - 2.485GHz |
| Product Dimensions | 1.97 x 1.97 x 0.79 inches |
| Item Weight | 2.57 ounces |
| Manufacturer | Startbuymore |
8. Warranty and Support
Information regarding product warranty and specific customer support contact details is not provided within this manual. Please refer to the product packaging or the retailer's website for warranty terms and customer service contact information.