Introduction
This manual provides detailed instructions for the installation, operation, and maintenance of your SMUDUKKIT 450W Brushless Servo Motor for industrial sewing machines. This energy-efficient motor offers precise speed control, reduced noise, and a long operational lifespan, making it an ideal upgrade or replacement for various industrial sewing equipment.
Product Overview and Components
The SMUDUKKIT 450W Brushless Servo Motor integrates the motor and control box into a compact unit, simplifying installation. It delivers 450 Watts (3/5 HP) of power and operates on AC110V, 50/60Hz. The package includes the motor unit, a separate power switch, belt guard, mounting hardware, and a treadle rod.
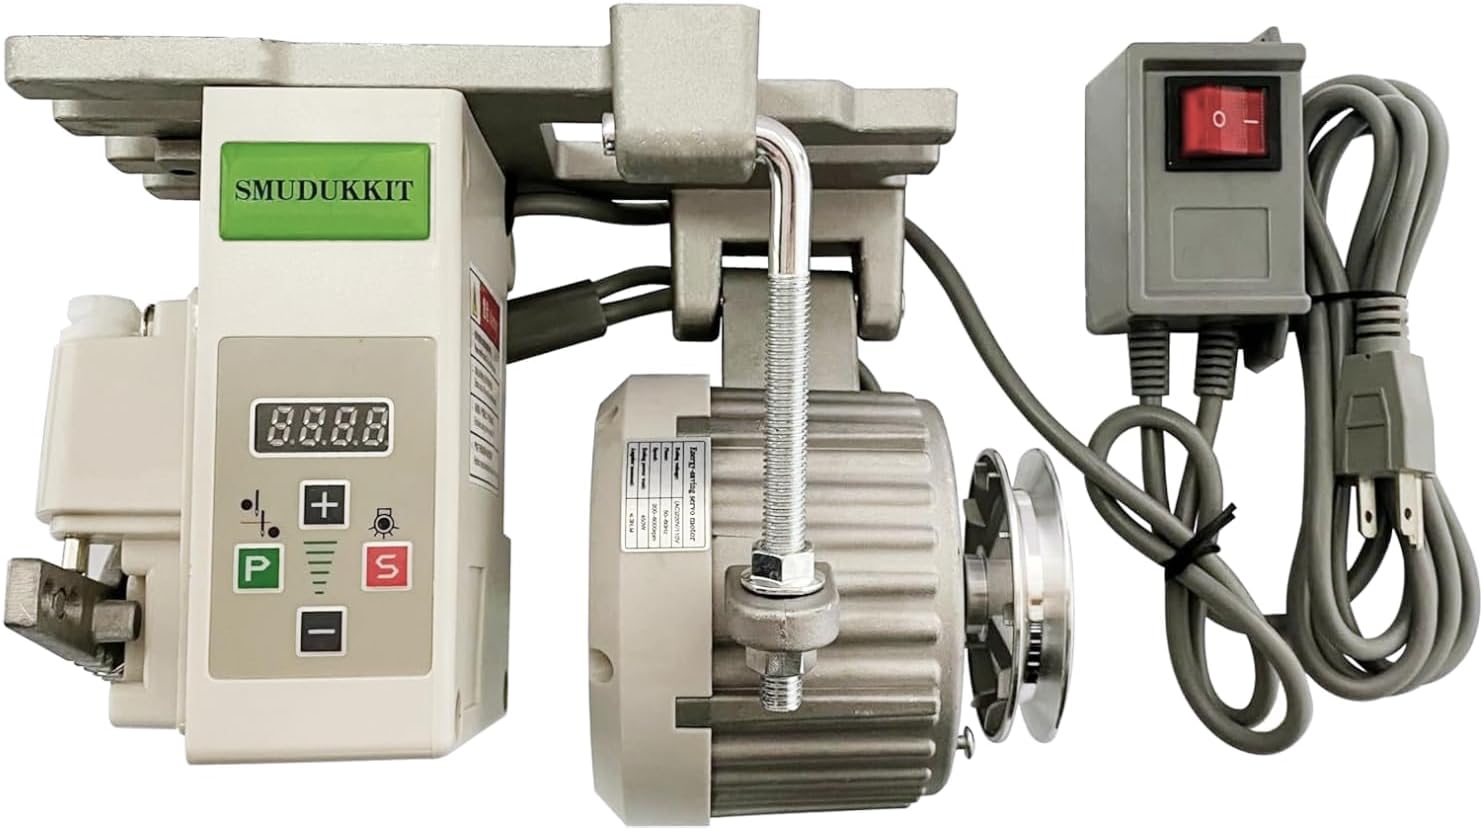
Figure 1: SMUDUKKIT 450W Brushless Servo Motor with integrated control panel and separate power switch.

Figure 2: Complete package contents including the motor, control unit, power switch, belt guard, mounting hardware, and treadle rod.
Key Features:
- Brushless design for quiet operation and extended lifespan.
- Energy-efficient, reducing electricity consumption by up to 70%.
- Variable speed control from 200 RPM to 4500 RPM.
- Integrated control panel for easy adjustments.
- Separate power switch for convenient access.
Setup
1. Mounting the Motor
The motor unit is designed to mount directly to your industrial sewing machine table. Ensure the mounting holes on the motor's base align with the existing holes on your table. Use the provided mounting bolts and rubber vibration dampeners.

Figure 3: The motor's mounting plate. Ensure rubber vibration dampeners are placed between the motor and the table, with the small tab on the dampener pointing downwards.
2. Installing the Belt Guard
Attach the belt guard to the motor unit using the provided screws. This guard protects against accidental contact with the rotating belt and pulley.

Figure 4: The belt guard installed over the motor pulley for safety.
3. Connecting the Foot Switch and Power
Connect the foot switch cable to the designated port on the motor's control unit. Plug the separate power switch into a standard AC110V outlet, then connect the motor's power cable to the power switch.

Figure 5: The separate power switch for convenient control of the motor's power supply.
4. Adjusting Belt Tension
Ensure the drive belt connecting the motor pulley to the sewing machine's handwheel is properly tensioned. Adjust the two nuts on the motor's mounting bolt to move the motor slightly, achieving optimal belt tension. The belt should have a small amount of play, but not be loose enough to slip.
Operating Instructions
1. Power On/Off
Use the separate power switch to turn the motor ON or OFF. The digital display on the control panel will illuminate when powered on.
2. Speed Adjustment
The motor offers variable speed control. Use the '+' and '-' buttons on the control panel to increase or decrease the maximum speed (RPM). The display shows the current maximum RPM setting. The minimum speed is 200 RPM, and the maximum is 4500 RPM.

Figure 6: The control panel with '+' and '-' buttons for speed adjustment, and 'P' and 'S' buttons for programming and special functions.
3. Needle Up/Down and Sewing Light
- The control panel includes a needle up/down selection feature. Consult the included instruction pamphlet for specific button functions related to needle positioning.
- If your sewing machine has a compatible light plugged into the motor unit, you can turn it on or off using the designated button on the control panel.
4. Adjusting Foot Pedal Pressure
The foot pedal's responsiveness can be adjusted. On the side of the motor, there is a spring mechanism that controls the downward pressure required on the foot pedal. Moving the spring to different notches will change the pedal's feel. Adjust this to your preference for a longer or shorter throw.
5. Changing Motor Direction (CW/CCW)
To change the motor's rotation direction (Clockwise/Counter-Clockwise):
- Ensure the motor is powered on.
- Press the 'P' button and the '+' button simultaneously. The display will show 'P-00'.
- Press '+' to navigate to 'P-02'.
- Press 'P' to change the value from '0' to '1' or '1' to '0' to switch direction.
- Press 'S' to save the setting.
Video 1: Demonstration of the SMUDUKKIT servo motor's operation, including power-on, speed adjustment, and changing rotation direction via the control panel settings.
Maintenance
The brushless design of this servo motor requires minimal maintenance. Regularly inspect the drive belt for wear and tear, and ensure proper tension. Keep the motor and control unit clean and free from dust and debris. No internal lubrication is typically required for brushless motors.

Figure 7: The motor casing features cooling fins to dissipate heat, contributing to its longevity.
Troubleshooting
- Motor not starting: Check power connections, ensure the separate power switch is ON, and verify the foot switch cable is securely connected.
- Motor running erratically: Ensure the drive belt is correctly tensioned and not slipping. Check for any obstructions around the motor or pulley.
- Unusual noise or vibration: Verify all mounting bolts are tight and rubber dampeners are correctly installed. Inspect the motor for any visible damage.
- Speed control issues: Ensure the '+' and '-' buttons are functioning correctly and the display shows the desired RPM. If issues persist, consult the detailed instruction pamphlet for advanced parameter settings.
Specifications
| Feature | Detail |
|---|---|
| Brand | SMUDUKKIT |
| Model | 450W Servo Motor |
| Type | Brushless Servo Motor |
| Power | 450 Watts (3/5 HP) |
| Voltage | AC 110V, 50/60Hz |
| Speed Range | 200 - 4500 RPM |
| Material | Metal |
| Item Weight | 7.85 pounds |
| Motor Pulley Diameter | 75 mm (standard) |
Warranty and Support
For warranty information and technical support, please refer to the contact details provided in the original product packaging or visit the official SMUDUKKIT website. Keep your purchase receipt for warranty claims.


