Introduction
This manual provides instructions for the installation, operation, and maintenance of the Generic A10/S60 Right Angle Golden Eagle Binder Sewing Attachment (28mm). This attachment is designed to assist with binding operations on industrial single-needle sewing machines, ensuring precise fabric feeding and folding.
Product Overview
The A10/S60 Right Angle Golden Eagle Binder is a specialized attachment for industrial sewing machines, crafted from durable stainless steel. It facilitates the binding process by guiding and folding fabric strips at a right angle, preparing them for stitching. Key features include:
- Compatibility: Suitable for various types of single-needle industrial sewing machines.
- Adjustable Cloth Outlet: Features a screw for adjusting the upper and lower position of the fabric outlet, allowing for precise control over the binding width.
- Adjustable Tool Outlet: An adjustable wrench mechanism allows for fine-tuning the front and rear position of the tool outlet, optimizing fabric flow.
- Durable Construction: Made from stainless steel for longevity and consistent performance.
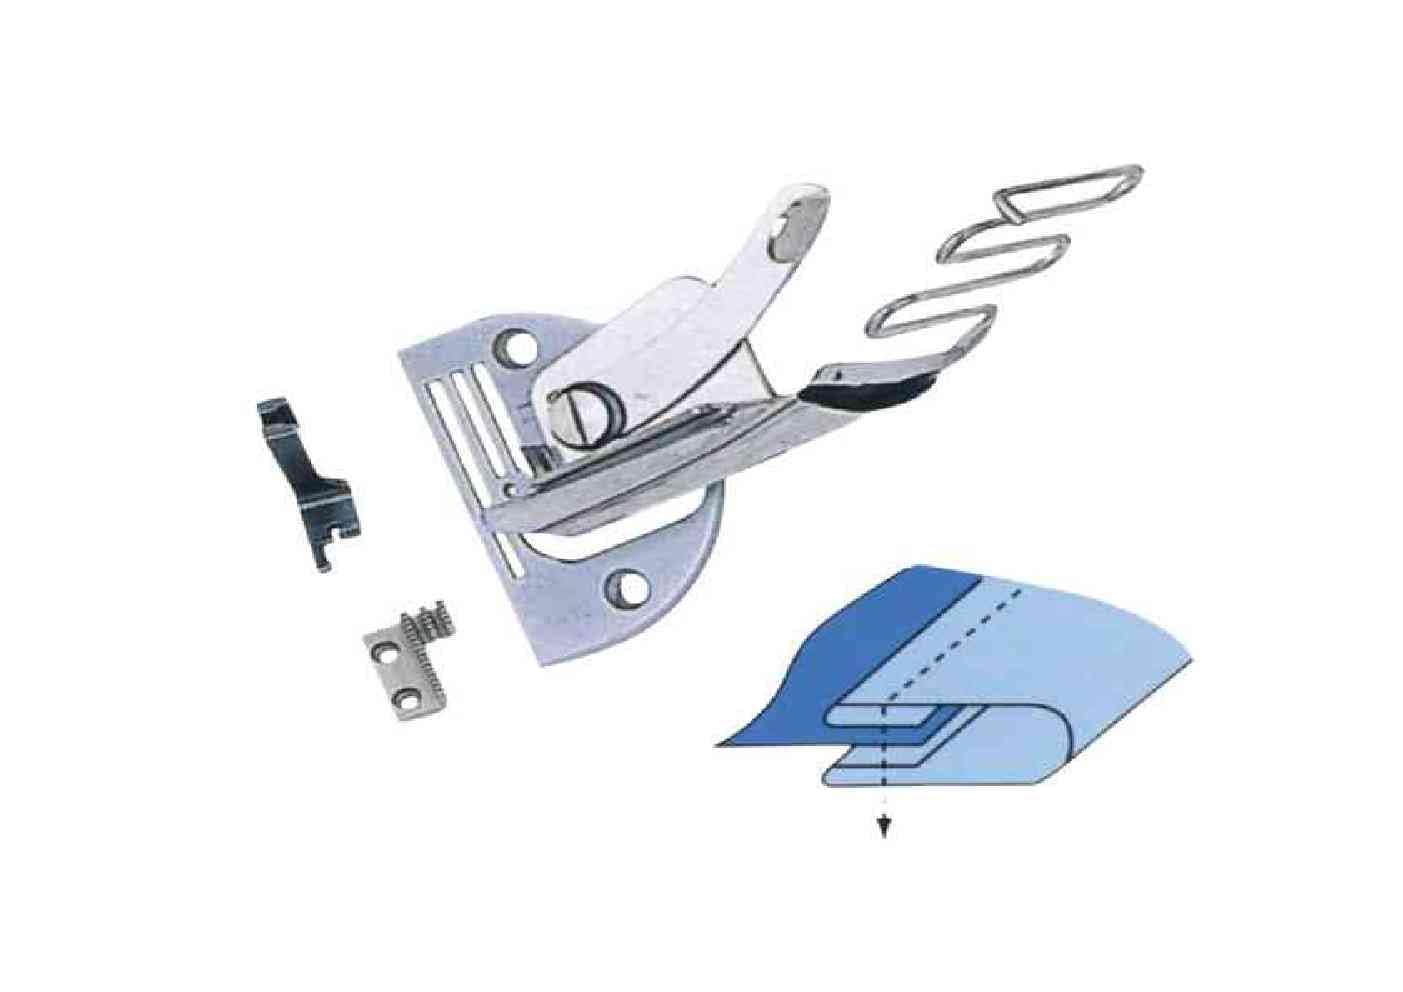
Image 1: The Generic A10/S60 Right Angle Golden Eagle Binder Sewing Attachment. This image displays the attachment itself, highlighting its metallic construction and the various components designed for fabric guiding and folding.
Setup and Installation
Proper installation is crucial for optimal performance. Follow these steps to attach the binder to your industrial sewing machine:
- Power Off: Ensure your sewing machine is turned off and unplugged from the power source before beginning installation.
- Prepare Machine: Remove any existing presser foot, needle plate, or feed dog components that may obstruct the binder's placement, if necessary. Refer to your sewing machine's manual for specific instructions.
- Position Binder: Place the A10/S60 binder onto the sewing machine bed, aligning its mounting holes with the corresponding holes on your machine.
- Secure Attachment: Use the appropriate screws (typically provided with the sewing machine or the attachment) to firmly secure the binder in place. Ensure it is stable and does not wobble.
- Adjust Cloth Outlet: Use the designated screw to adjust the upper and lower position of the cloth outlet. This adjustment determines the final width of the folded fabric strip. Test with a scrap piece of fabric to achieve the desired fold.
- Adjust Tool Outlet: Utilize the adjustable wrench to fine-tune the front and rear position of the tool outlet. This ensures smooth feeding of the fabric into the binder without snagging or uneven tension.
- Verify Alignment: Once secured, manually turn the machine's handwheel to ensure that the needle clears all parts of the binder and that the fabric path is unobstructed.
Note: Always refer to your specific industrial sewing machine's manual for compatibility and detailed attachment procedures.
Operating Instructions
Once the binder is installed, follow these steps for effective operation:
- Prepare Fabric Strip: Cut your binding fabric strip to the appropriate width, typically wider than the desired finished binding to account for folding. The exact width will depend on the binder's size (e.g., 28mm for this model) and the desired final fold.
- Insert Fabric: Carefully feed the leading edge of the fabric strip into the binder's inlet. The binder will automatically fold the edges of the fabric as it passes through.
- Start Sewing: Position the main fabric (the item to be bound) under the presser foot and align it with the folded binding strip exiting the binder. Begin sewing slowly, guiding both the main fabric and the binding strip.
- Maintain Tension: Ensure consistent tension on both the binding fabric and the main fabric to achieve an even stitch and a neat finish.
- Monitor Feed: Continuously monitor the fabric as it feeds through the binder and under the needle to prevent bunching or misalignment. Make minor adjustments to the fabric path as needed.
Maintenance
Regular maintenance ensures the longevity and optimal performance of your binder attachment:
- Cleaning: After each use, wipe down the binder with a soft, dry cloth to remove any fabric lint or dust. For stubborn residue, a slightly damp cloth can be used, followed by thorough drying.
- Inspection: Periodically inspect the attachment for any signs of wear, damage, or loose screws. Tighten any loose fasteners.
- Storage: Store the binder in a clean, dry place when not in use to prevent corrosion, especially since it is made of stainless steel.
Troubleshooting
If you encounter issues while using the binder, consider the following common problems and solutions:
- Uneven Binding:
- Cause: Incorrect fabric strip width or uneven feeding.
- Solution: Ensure the fabric strip is cut consistently and feed it smoothly. Adjust the cloth outlet screw to fine-tune the fold.
- Fabric Snagging/Sticking:
- Cause: Tool outlet position is incorrect or binder is dirty.
- Solution: Adjust the front/rear position of the tool outlet using the wrench. Clean the binder thoroughly to remove any obstructions.
- Binder Not Secure:
- Cause: Mounting screws are loose or not properly tightened.
- Solution: Power off the machine and re-tighten all mounting screws. Ensure the binder is flush with the machine bed.
Specifications
| Brand | Generic |
| Model Number | A10/S60 (USRABBSASM 01) |
| Size | 28mm |
| Material | Stainless Steel |
| Colour | Silver |
| Product Dimensions (L x W x H) | 10 x 10 x 5 Centimeters |
| Item Weight | 150 Grams |
| Included Components | 1*Sewing attachment |
| Country of Origin | India |
Warranty and Support
This product comes with a 10-day replacement policy from the date of purchase. For any manufacturing defects or issues within this period, please contact your retailer for assistance.
Extended warranty plans are available for purchase separately:
- 1 Year Extended Warranty Plan by Onsitego
- 2 Year Extended Warranty Plan by Onsitego
For technical support or inquiries, please refer to the contact information provided by your seller or the manufacturer, Prince Sewtech.