Introduction
Thank you for choosing the Sukeen 14-inch Digital Wall Clock, Model 2804. This clock features a large, easy-to-read display with multiple functions including time, date, day, temperature, alarm, and countdown timer. It offers both automatic and manual brightness adjustment and can be used as a wall-mounted or tabletop clock. This manual provides detailed instructions for setup, operation, and maintenance to ensure optimal performance and longevity of your device.
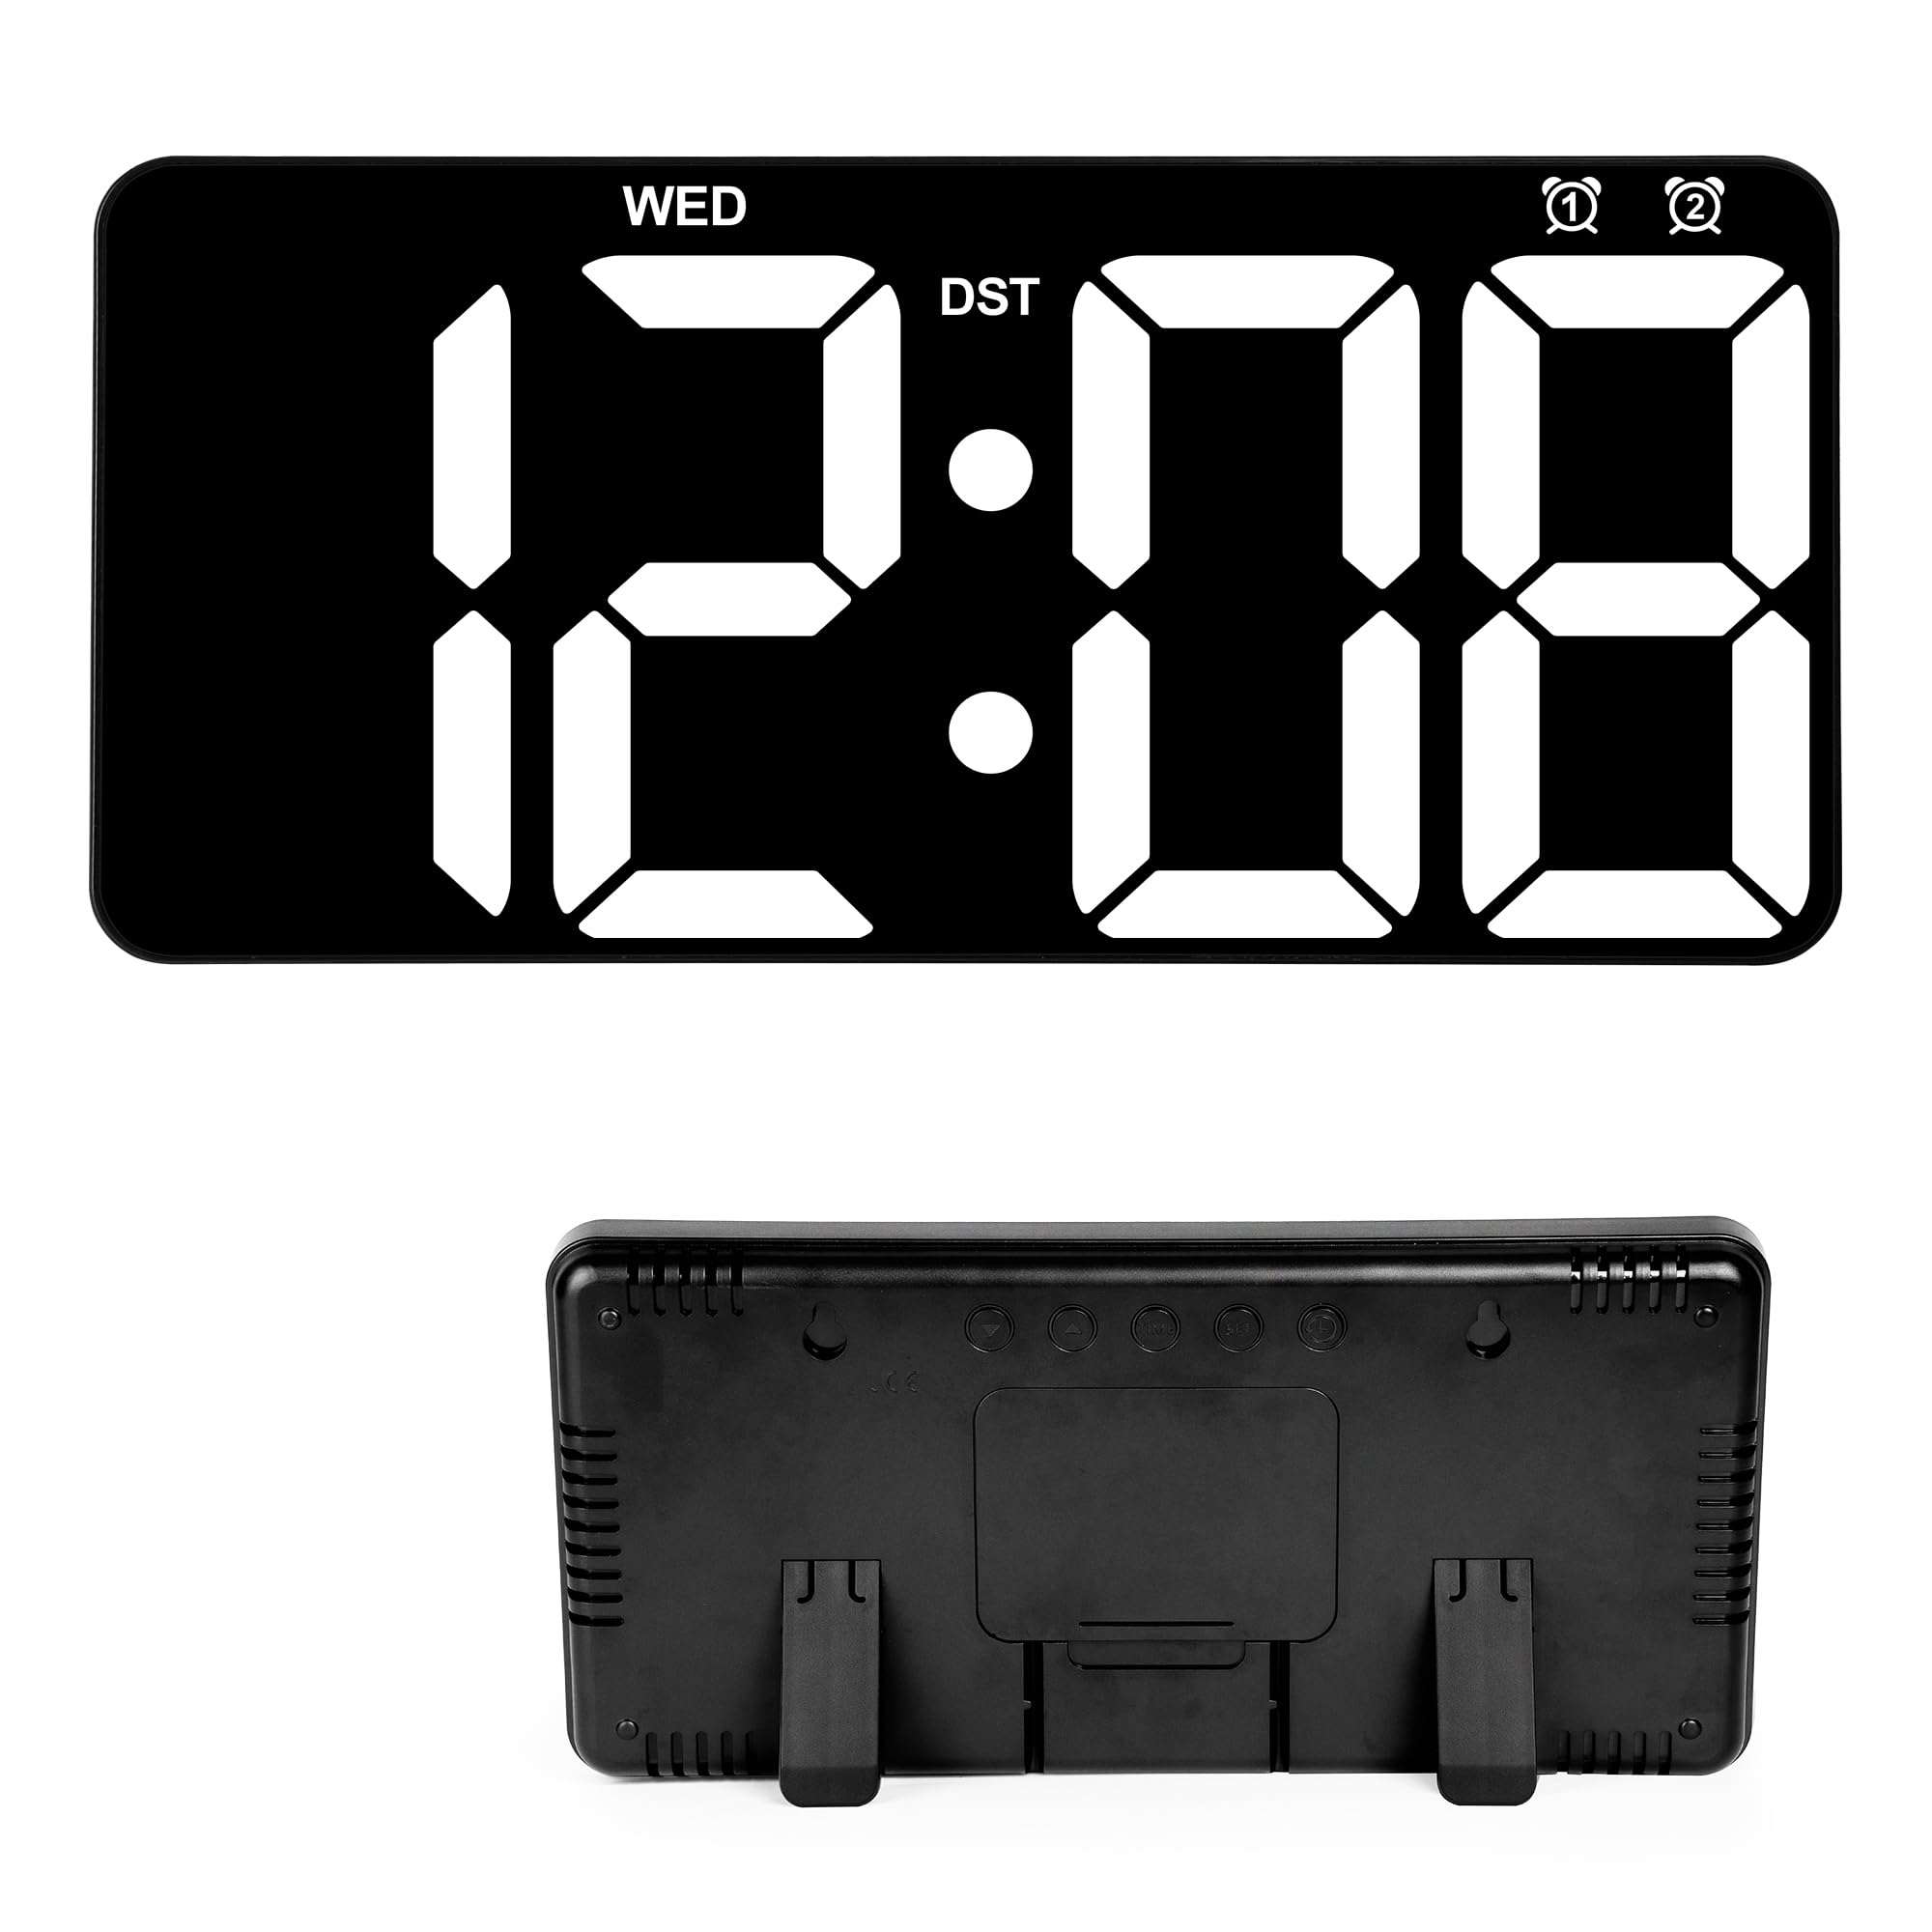
Figure 1: Sukeen 14-inch Digital Wall Clock overview with key features highlighted.
Package Contents
- Sukeen 14-inch Digital Wall Clock (Model 2804)
- USB Charging Cable
- Remote Control
- User Manual (this document)
- Mounting Accessories
Note: 2x AAA batteries for the remote control are not included and must be purchased separately. The clock requires continuous power via the USB cable to operate; the internal battery only saves settings during power interruptions.
Setup
1. Power Connection
- Insert 2x AAA batteries (not included) into the remote control.
- Connect the provided USB charging cable to the clock's power input port.
- Plug the other end of the USB cable into a compatible USB power adapter (not included) and then into a wall outlet. The clock will power on.
- The clock has an internal battery to retain settings during power outages. This battery is not for operating the clock without external power.
2. Mounting Options
The Sukeen Digital Wall Clock can be either wall-mounted or placed on a tabletop.
- Tabletop Placement: Extend the foldable stand located on the back of the clock to place it securely on any flat surface.
- Wall Mounting: Use the provided mounting accessories to hang the clock on a wall. Ensure the wall can support the clock's weight and that the power cable can reach an outlet discreetly.

Figure 2: The clock can be used as a wall clock or a table clock.
Operating Instructions
All settings and operations are primarily controlled using the included remote control.

Figure 3: Operating the clock using the remote control.
1. Setting Time and Date
- Press the TIME button on the remote control.
- Use the arrow buttons (Up/Down) to adjust the hour, then press SET to confirm.
- Repeat for minutes, year, month, and day.
- Press SET again to exit the time/date setting mode.
- To enable or disable Daylight Saving Time (DST), press the DST button on the remote.
2. Display Modes
The clock offers two main display modes:
- Mode 1 (Cyclic Display): Displays time for 10 seconds, then date for 3 seconds, then temperature for 3 seconds, cycling continuously.
- Mode 2 (Time Only): Displays only the current time.
To switch between display modes, refer to the specific button on your remote control (often labeled "MODE" or similar, or indicated in the remote's diagram in the full manual).

Figure 4: The clock supports cyclic display of time, date, and temperature, or time-only display.
3. Brightness Adjustment
The clock features both manual and automatic brightness adjustment.
- Manual Adjustment: Use the brightness buttons (e.g., "L1", "L2", "L3" or +/-) on the remote control to select one of three brightness levels.
- Automatic Dimming: The clock can automatically adjust its brightness based on the time of day, dimming during nighttime hours for comfortable viewing. This feature is typically enabled by default or can be toggled via the remote control (look for an "Auto Dimmer" or light bulb icon button).

Figure 5: Three levels of adjustable brightness and auto-dimming function.
4. Alarm Settings
The clock supports setting two independent alarms and a weekend mode.
- Press the ALARM button on the remote control.
- Select Alarm 1 or Alarm 2 using the arrow buttons.
- Adjust the alarm time (hour and minute) using the arrow buttons and confirm with SET.
- To enable/disable the alarm, press the ALARM button again or a dedicated ON/OFF button.
- Weekend Mode: If available, press the "Weekend" button to disable alarms on Saturdays and Sundays.
5. Countdown Timer
The countdown function allows you to set a timer up to 99 minutes and 99 seconds.
- Press the COUNTDOWN button on the remote control.
- Use the arrow buttons to set the desired minutes and seconds.
- Press START/STOP to begin or pause the countdown.
- Press RESET to clear the countdown.
Maintenance
- Clean the clock's display and casing with a soft, dry cloth.
- Do not use abrasive cleaners or solvents, as these may damage the surface.
- Ensure the clock is kept away from direct sunlight, extreme temperatures, and high humidity.
- If the clock will not be used for an extended period, disconnect it from power and remove batteries from the remote control.
Troubleshooting
| Problem | Possible Cause | Solution |
|---|---|---|
| Clock does not turn on. | No power supply or loose connection. | Ensure the USB cable is securely connected to the clock and a working power adapter/outlet. |
| Remote control not working. | Dead batteries or obstruction. | Replace AAA batteries in the remote. Ensure there is no obstruction between the remote and the clock's sensor. |
| Time/Date is incorrect after power outage. | Internal backup battery is low or missing. | The clock's internal battery saves settings. If settings are lost, ensure the clock has been powered for a sufficient period to charge the internal battery, or replace the internal battery if accessible and specified in the full manual. Reset time/date manually. |
| Display is too dim or too bright. | Brightness settings need adjustment or auto-dimming is active. | Use the remote control to manually adjust brightness levels. Check if the auto-dimming feature is enabled and adjust if necessary. |
Specifications
| Feature | Detail |
|---|---|
| Brand | Sukeen |
| Model Number | 2804 |
| Display Type | Digital LED |
| Color | Black |
| Product Dimensions | 33 cm (W) x 16 cm (H) |
| Power Source | Corded Electric (USB) |
| Mounting Type | Wall Mount, Tabletop |
| Special Features | Large Display, Date, Day, Temperature, Dual Alarm, Countdown, Automatic/Manual Brightness Adjustment, Daylight Saving Time |
| Batteries Required (Remote) | 2x AAA (not included) |
| Usage Environment | Indoor |
Warranty and Support
For warranty information and customer support, please refer to the documentation provided with your purchase or contact the retailer where you purchased the Sukeen Digital Wall Clock. You may also visit the official Sukeen website for further assistance.