1. Introduction
This manual provides detailed instructions for the installation, operation, and maintenance of your RUIX CV103 ATX Mid-Tower PC Case. Please read this manual thoroughly before beginning assembly to ensure proper setup and optimal performance.

Figure 1: RUIX CV103 ATX Mid-Tower PC Case, showcasing its design with pre-installed RGB fans and a tempered glass side panel.
2. Package Contents
Verify that all components are present in the package:
- RUIX CV103 ATX Mid-Tower PC Case
- 4 x 120mm RGB Fans (pre-installed)
- Accessory kit (screws, cable ties, standoffs)
- User Manual (this document)
3. Setup and Installation
3.1 Removing Side Panels
The tempered glass side panel features a quick-release design for tool-free installation and removal. Gently pull the panel to detach it. The opposite side panel can be removed by unscrewing the thumbscrews at the rear of the case.

Figure 2: Illustration of the quick-release tempered glass panel and removable magnetic dust filters for easy access and maintenance.
3.2 Motherboard Installation
The RUIX CV103 case supports ATX, Micro ATX (MATX), and Mini ITX (ITX) motherboards. Install the necessary standoffs for your motherboard form factor before securing the motherboard with screws.
3.3 Component Compatibility
Ensure your components fit within the case's dimensions:
- GPU Length: Up to 350mm
- CPU Cooler Height: Up to 170mm
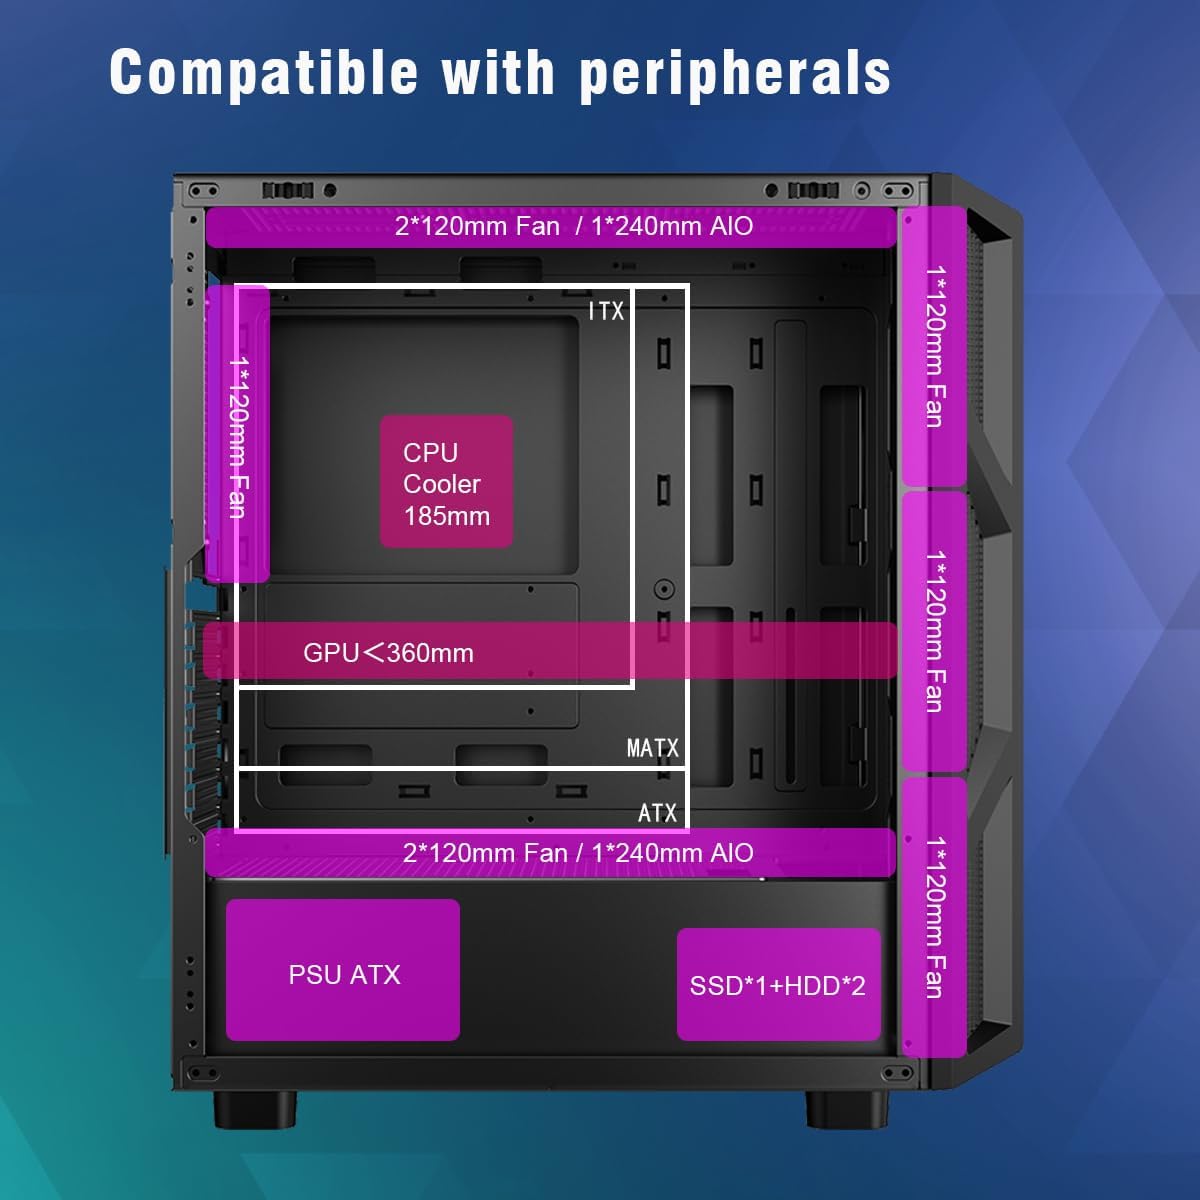
Figure 3: Internal layout showing compatible component sizes for GPU, CPU cooler, and motherboard types.
3.4 Drive Installation
The case supports both 3.5-inch and 2.5-inch drives. Refer to the internal layout for specific mounting locations for SSDs and HDDs.
3.5 Fan and Cooling System Installation
The case comes with 4 pre-installed 120mm RGB fans. Additional cooling options are available:
- Total Fan Support: Up to 8 fans
- AIO Liquid Cooler Support: Up to 240mm AIO liquid cooler (with 6 fans)

Figure 4: Fan and AIO liquid cooler mounting options and compatibility.
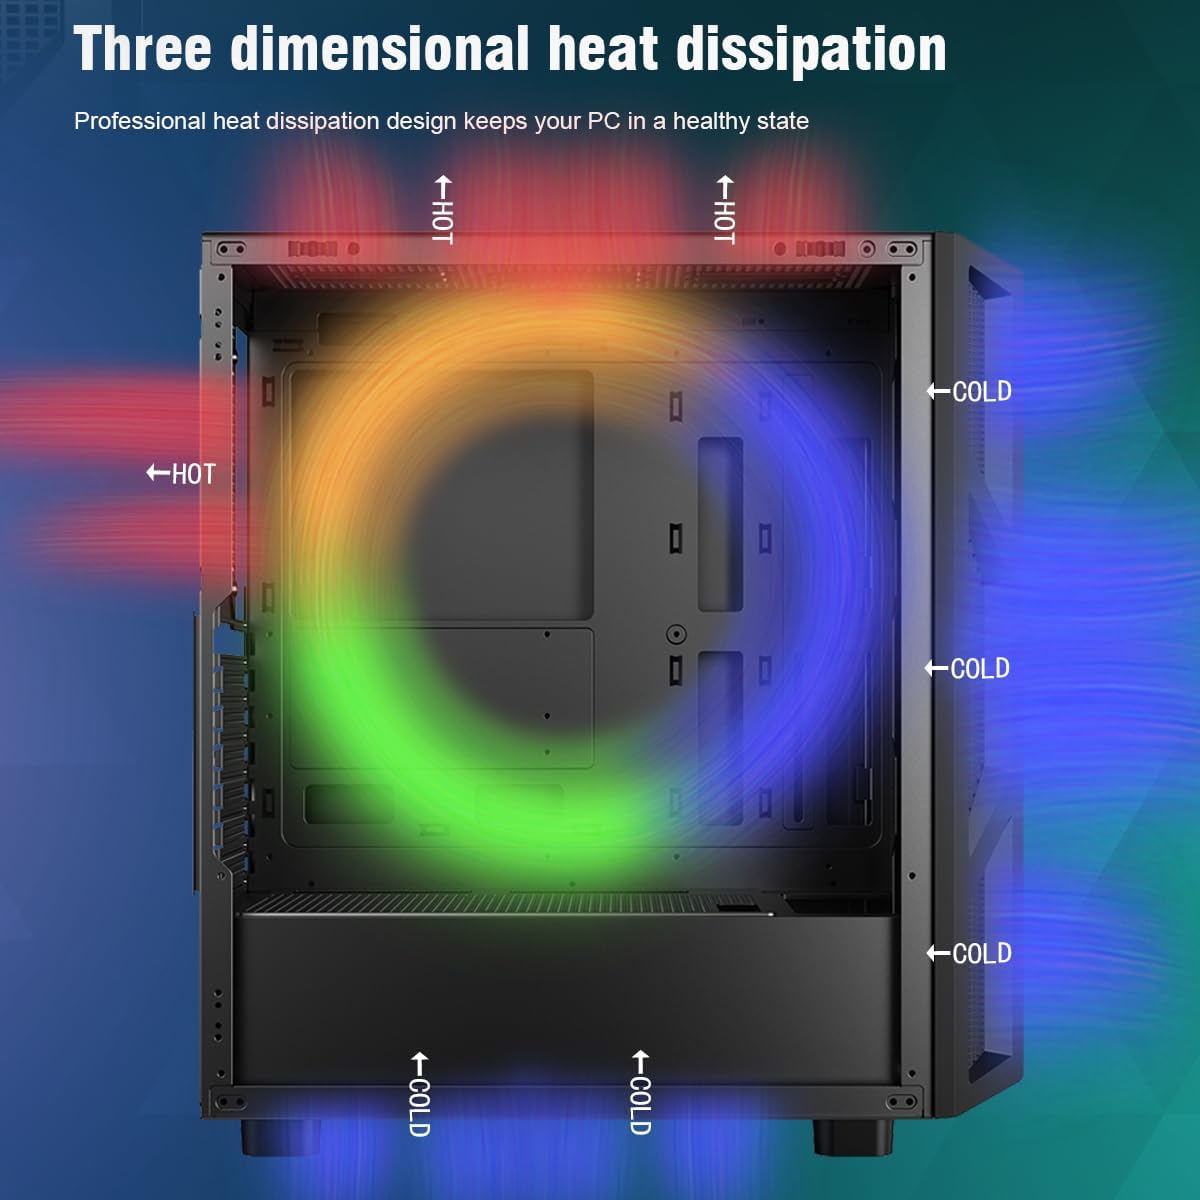
Figure 5: Airflow diagram demonstrating the three-dimensional heat dissipation design for optimal cooling.
4. Operating Instructions
4.1 Front Panel I/O Ports
The front panel provides convenient access to essential ports and controls:
- USB 3.0 Port: 1
- USB 1.0 Port: 1
- HD Audio Jacks: For headphones and microphone
- Reset Button: To restart the system
- Power Button: To turn the system on/off
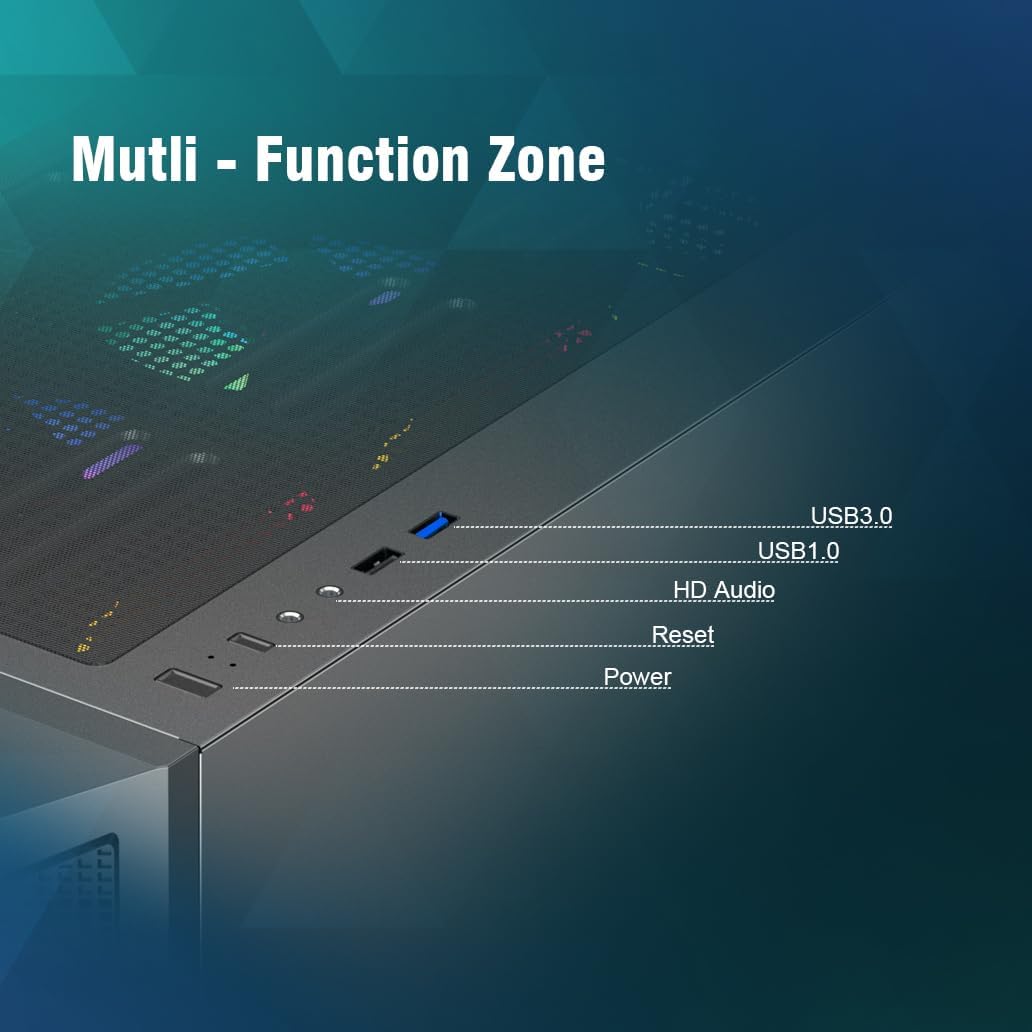
Figure 6: Front panel I/O ports and controls.
4.2 RGB Fan Control
The pre-installed RGB fans feature color lighting. If a dedicated light switch button is present on the case, use it to cycle through lighting modes. Otherwise, RGB control may be managed via your motherboard's software, if compatible.
5. Maintenance
5.1 Dust Filters
The top and bottom of the case are equipped with large magnetic dust filters. Regularly remove and clean these filters to prevent dust accumulation and maintain optimal airflow and cooling performance. To clean, simply detach the filters and gently brush or rinse off accumulated dust.
5.2 General Cleaning
Use a soft, dry cloth to clean the exterior surfaces of the case. For the tempered glass panel, use a glass cleaner and a microfiber cloth to avoid scratches.
6. Troubleshooting
6.1 System Does Not Power On
- Ensure all power supply cables are securely connected to the motherboard and components.
- Verify that the front panel power switch cable is correctly connected to the motherboard's front panel header. Refer to your motherboard manual for the correct pinout.
- Test the power supply independently if possible, or try starting the system by shorting the power pins on the motherboard directly (consult your motherboard manual for this advanced step).
6.2 Fans Not Spinning or RGB Not Lighting Up
- Check that all fan power cables are securely connected to the power supply or motherboard fan headers.
- Ensure RGB cables are properly connected to the motherboard's RGB header or a dedicated RGB controller.
- If the fans are connected via an older IDE power connector, ensure it is fully seated. Note that some older fan connections may not offer speed control via the motherboard.
6.3 Components Do Not Fit
- Re-verify the dimensions of your GPU, CPU cooler, and other components against the specifications provided in Section 3.3 and Section 7.
- Ensure proper orientation during installation.
7. Specifications

Figure 7: Comprehensive specifications and compatibility overview.
| Feature | Specification |
|---|---|
| Model Name | CV103 |
| Case Type | Mid Tower |
| Color | Black |
| Material | Metal, Tempered Glass |
| Product Dimensions (LxWxH) | 14.2 x 9.1 x 17.2 inches (360 x 230 x 436 mm) |
| Item Weight | 13.67 pounds (6.21 kg) |
| Motherboard Compatibility | ATX, Micro ATX, ITX |
| GPU Length Limit | 350mm |
| CPU Cooler Height Limit | 170mm |
| Drive Bays | SSD*1 + HDD*2 (or similar configurations) |
| PCI-E Slots | 7 |
| Pre-installed Fans | 4 x 120mm RGB Fans |
| Max Fan Support | Up to 8 fans |
| Water Cooling Support | Top: 240mm x 1, Front: 360mm x 1 |
| Power Supply Mounting Type | Bottom Mount |
| Front I/O Ports | 1 x USB 3.0, 1 x USB 1.0, HD Audio |
8. Warranty and Support
For warranty information and technical support, please refer to the official RUIX website or contact your retailer. Keep your proof of purchase for warranty claims.