Introduction
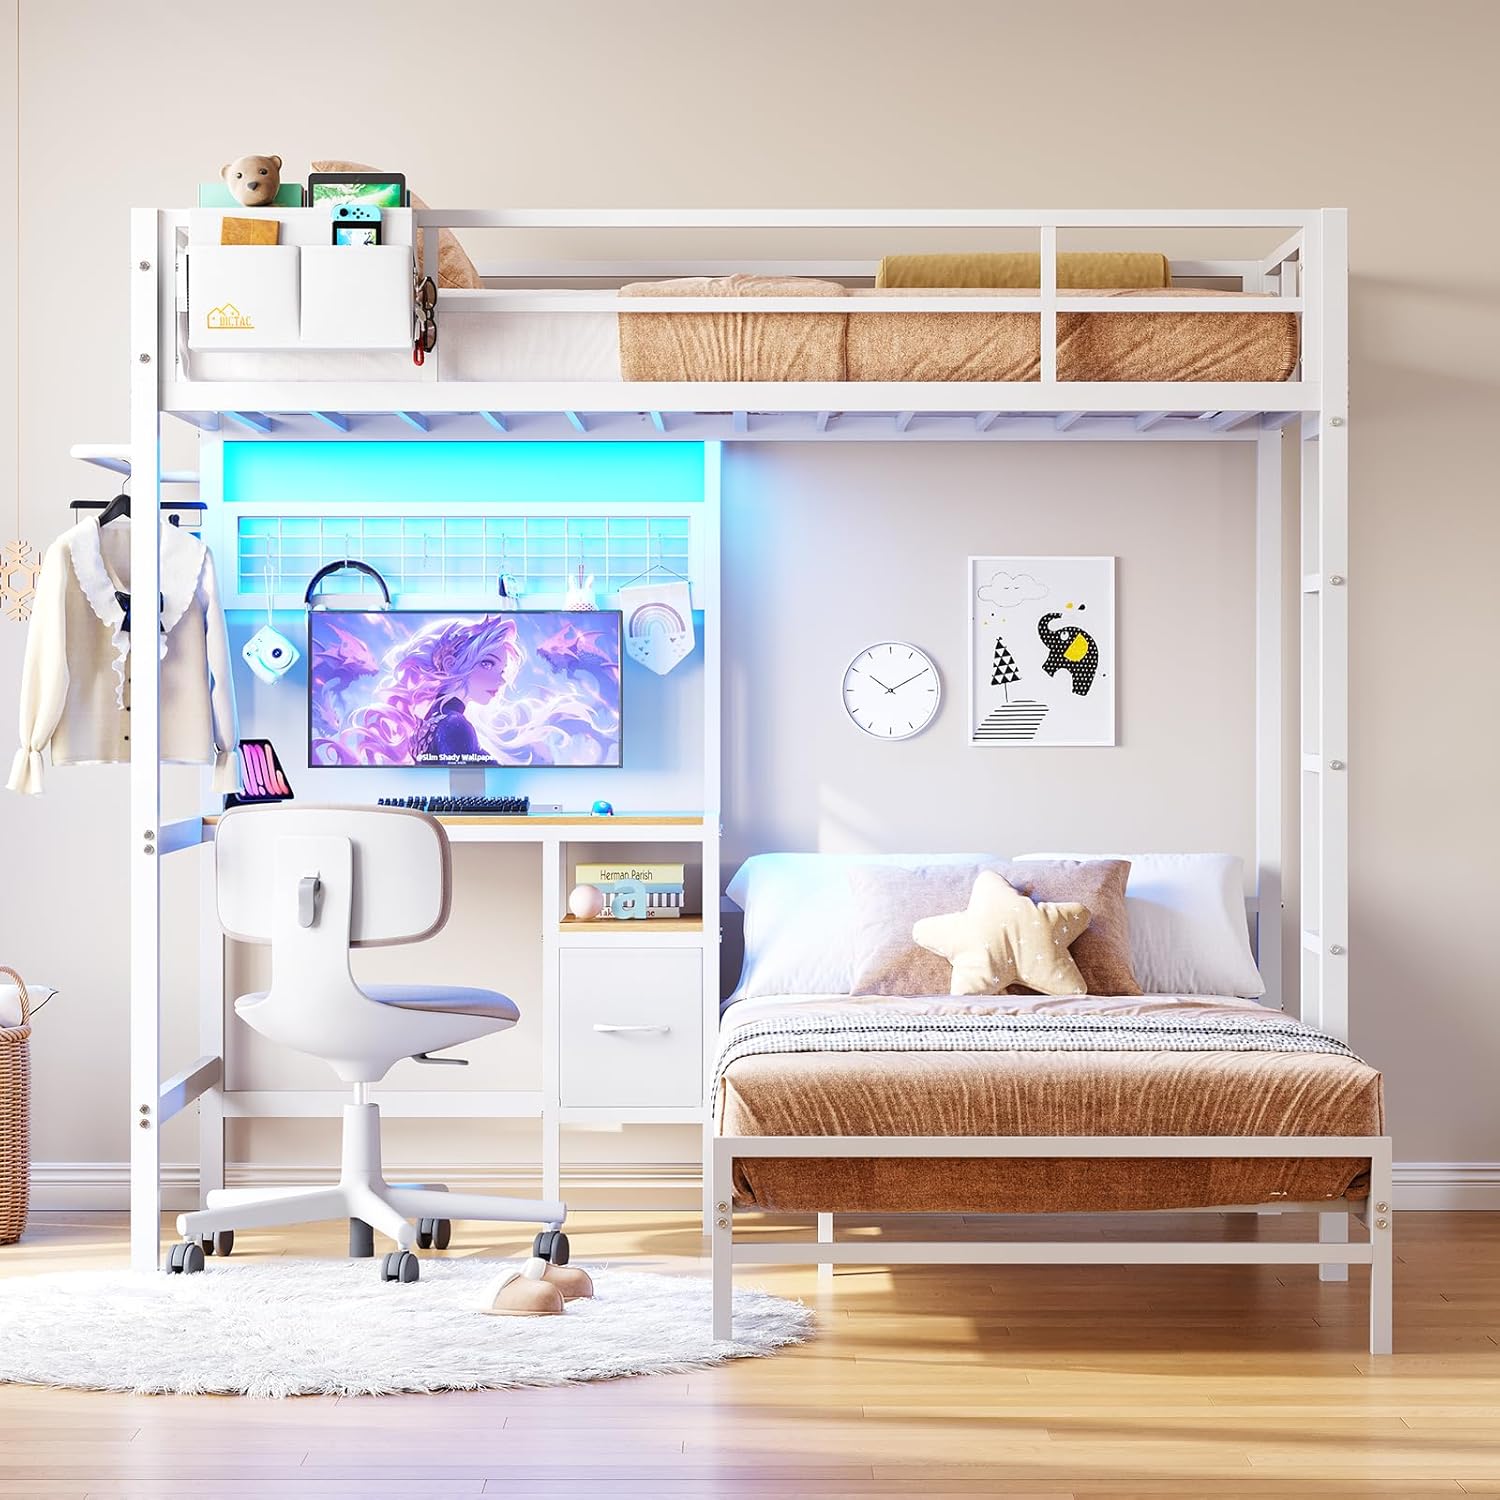
This manual provides comprehensive instructions for the assembly, operation, maintenance, and troubleshooting of your DICTAC Twin Over Twin Bunk Bed with Desk and Charging Station (Model LB-07). Please read all instructions carefully before assembly and use to ensure safe and proper operation.
Safety Information
Your safety is paramount. Adhere to all warnings and instructions to prevent injury or damage.
- Maximum Weight Capacity: The upper and lower bunks are designed to support a maximum weight of 400 lbs each. Do not exceed this limit.
- Mattress Requirements: For the upper bunk, use a twin-size mattress (75"L x 38"W) with a thickness between 4"-6". Ensure the top of the mattress is at least 5" (127mm) below the top edge of the guardrail. For the lower bunk, use a twin-size mattress (75"L x 38"W) with a thickness between 6"-12".
- Guardrails: The upper bunk is equipped with full-length guardrails. Always ensure they are securely in place.
- Ladder Safety: Always use the provided ladder for accessing the upper bunk. Ensure the ladder is stable before climbing.
- Anti-Tipping Device: Securely attach the anti-tipping device to a wall stud to prevent accidental tipping.
- No Jumping: Do not allow jumping on the bed.
- Children: This bunk bed is suitable for teens and children. Supervise young children when using the bunk bed.
- Ventilation: Ensure adequate ventilation around the charging station to prevent overheating.

Product Components
Before beginning assembly, verify that all parts listed below are present and undamaged. If any parts are missing or damaged, contact DICTAC customer service.

Included Components:
- Bunk Bed Frame (various metal parts)
- Desk Panel
- Charging Station Unit
- RGB LED Light Kit
- Fabric Drawer
- Bedside Oxford Fabric Caddy with 2 Hooks
- Metal Decorative Mesh with 6 Hooks
- Easy Assemble Tools (Hex key, etc.)
- Installation Manual (this document)
Setup and Assembly Instructions
Assembly typically requires two adults. Follow the numbered steps in the provided diagrammatic instructions. A power drill (on low torque setting) can expedite assembly, but exercise caution to avoid stripping screws.
- Unpack and Identify Parts: Lay out all components on a clean, soft surface to prevent scratches. Refer to the parts list and diagrams to identify each piece.
- Assemble Base Frames: Begin by assembling the base frames for both the upper and lower bunks according to the diagrams. Ensure all connections are finger-tight initially.
- Attach Vertical Supports: Connect the vertical support posts that form the L-shape and support the upper bunk and desk. Pay close attention to the orientation of each post as indicated in the instructions.
- Install Desk and Shelves: Secure the desk panel and any integrated shelves to the frame. Ensure the charging station cutout is correctly positioned.
- Install Charging Station: Insert the charging station into its designated slot on the desk. Connect the power cord.
- Attach Guardrails and Ladder: Securely fasten the guardrails to the upper bunk and attach the ladder. Double-check all connections for stability.
- Install Storage Accessories: Attach the metal decorative mesh, hanging rail, and position the fabric drawer and bedside caddy.
- Install LED Lights: Adhere the LED light strips to the designated areas, typically under the upper bunk or around the desk area. Connect the LED controller.
- Final Tightening: Once all components are assembled, systematically tighten all bolts and screws. Do not overtighten.
- Attach Anti-Tipping Device: Secure the anti-tipping device to a wall stud using appropriate hardware. This step is crucial for stability.
Operating Instructions
Charging Station:
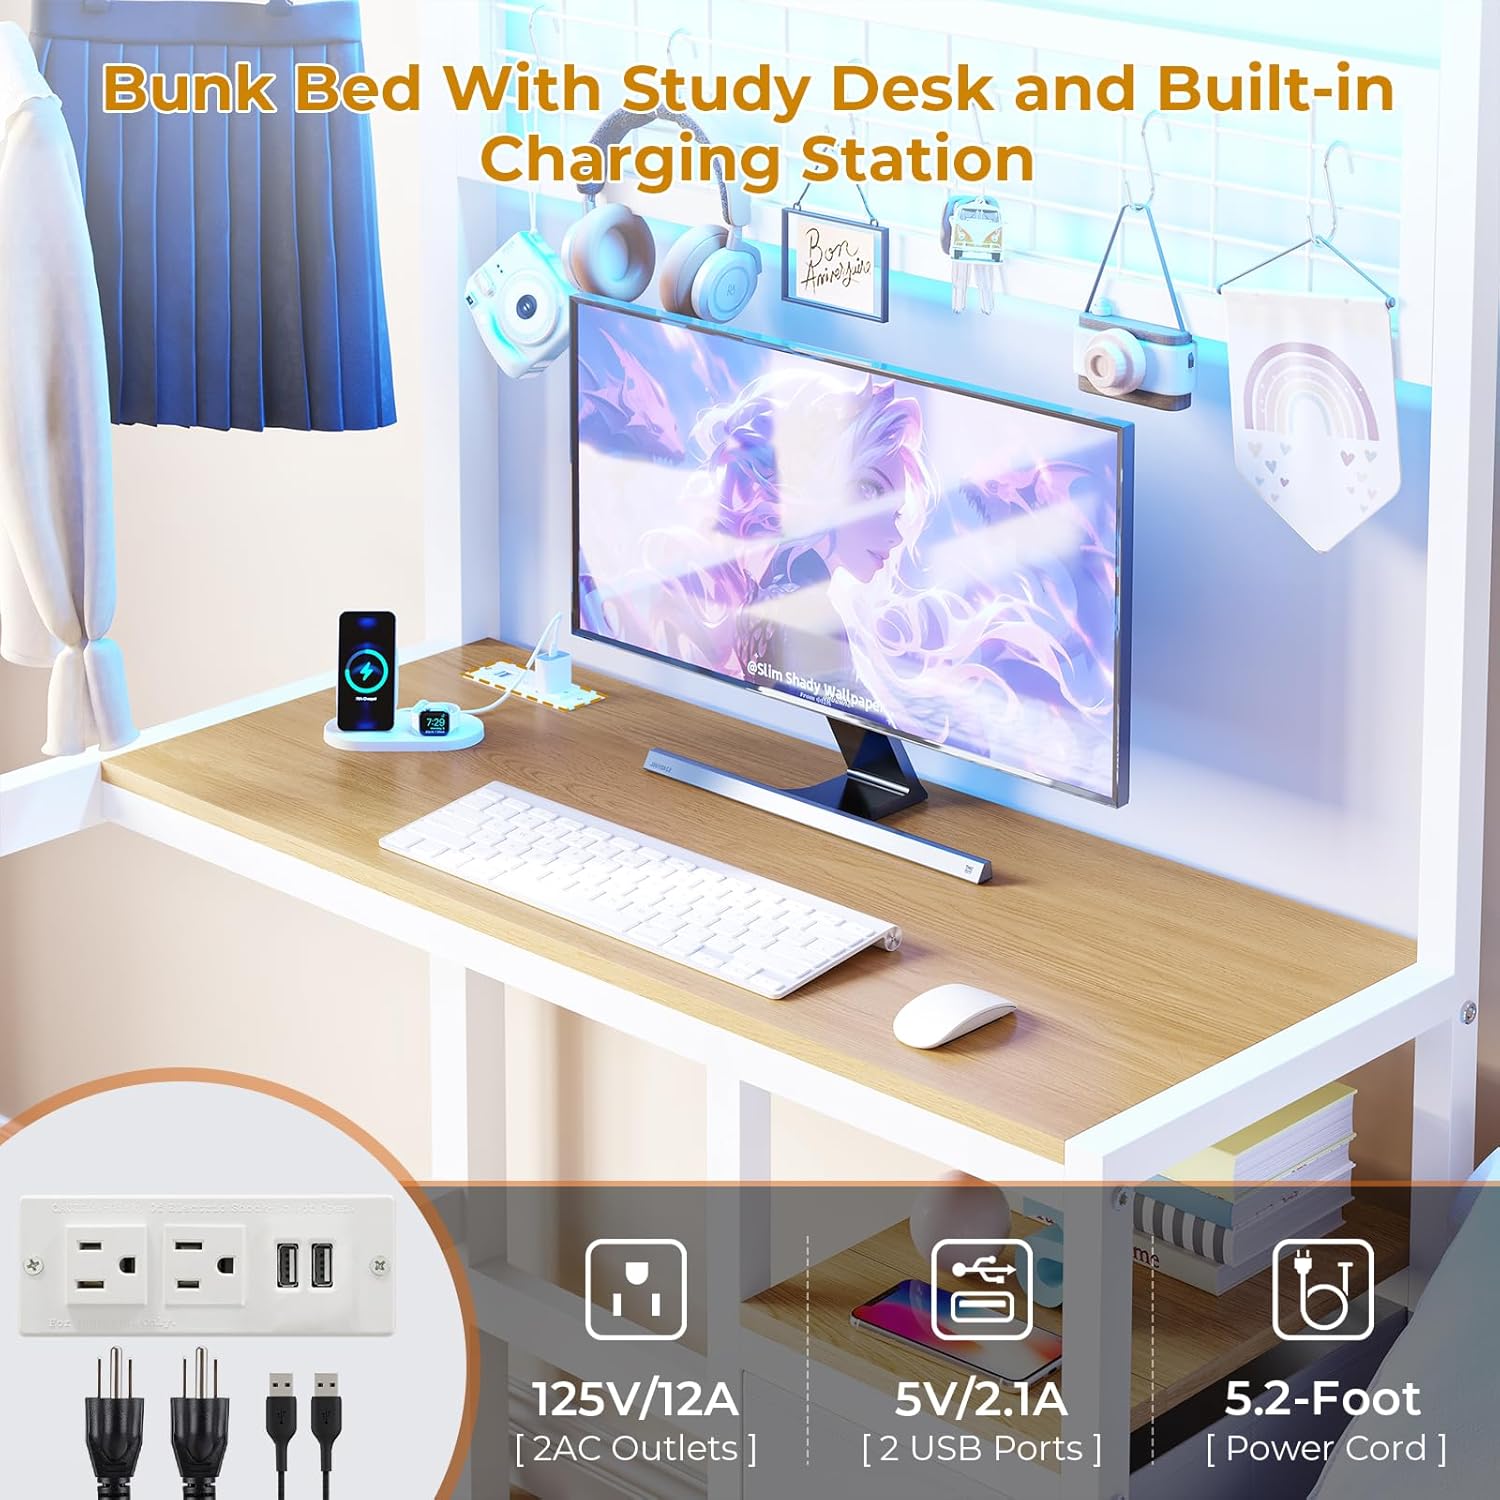
- The charging station includes two 125V/12A AC outlets and two 5V/2.1A USB ports.
- Plug the charging station's power cord into a standard wall outlet.
- Use the AC outlets for devices requiring standard power and the USB ports for charging mobile phones, tablets, or other USB-powered devices.
- Avoid overloading the charging station.
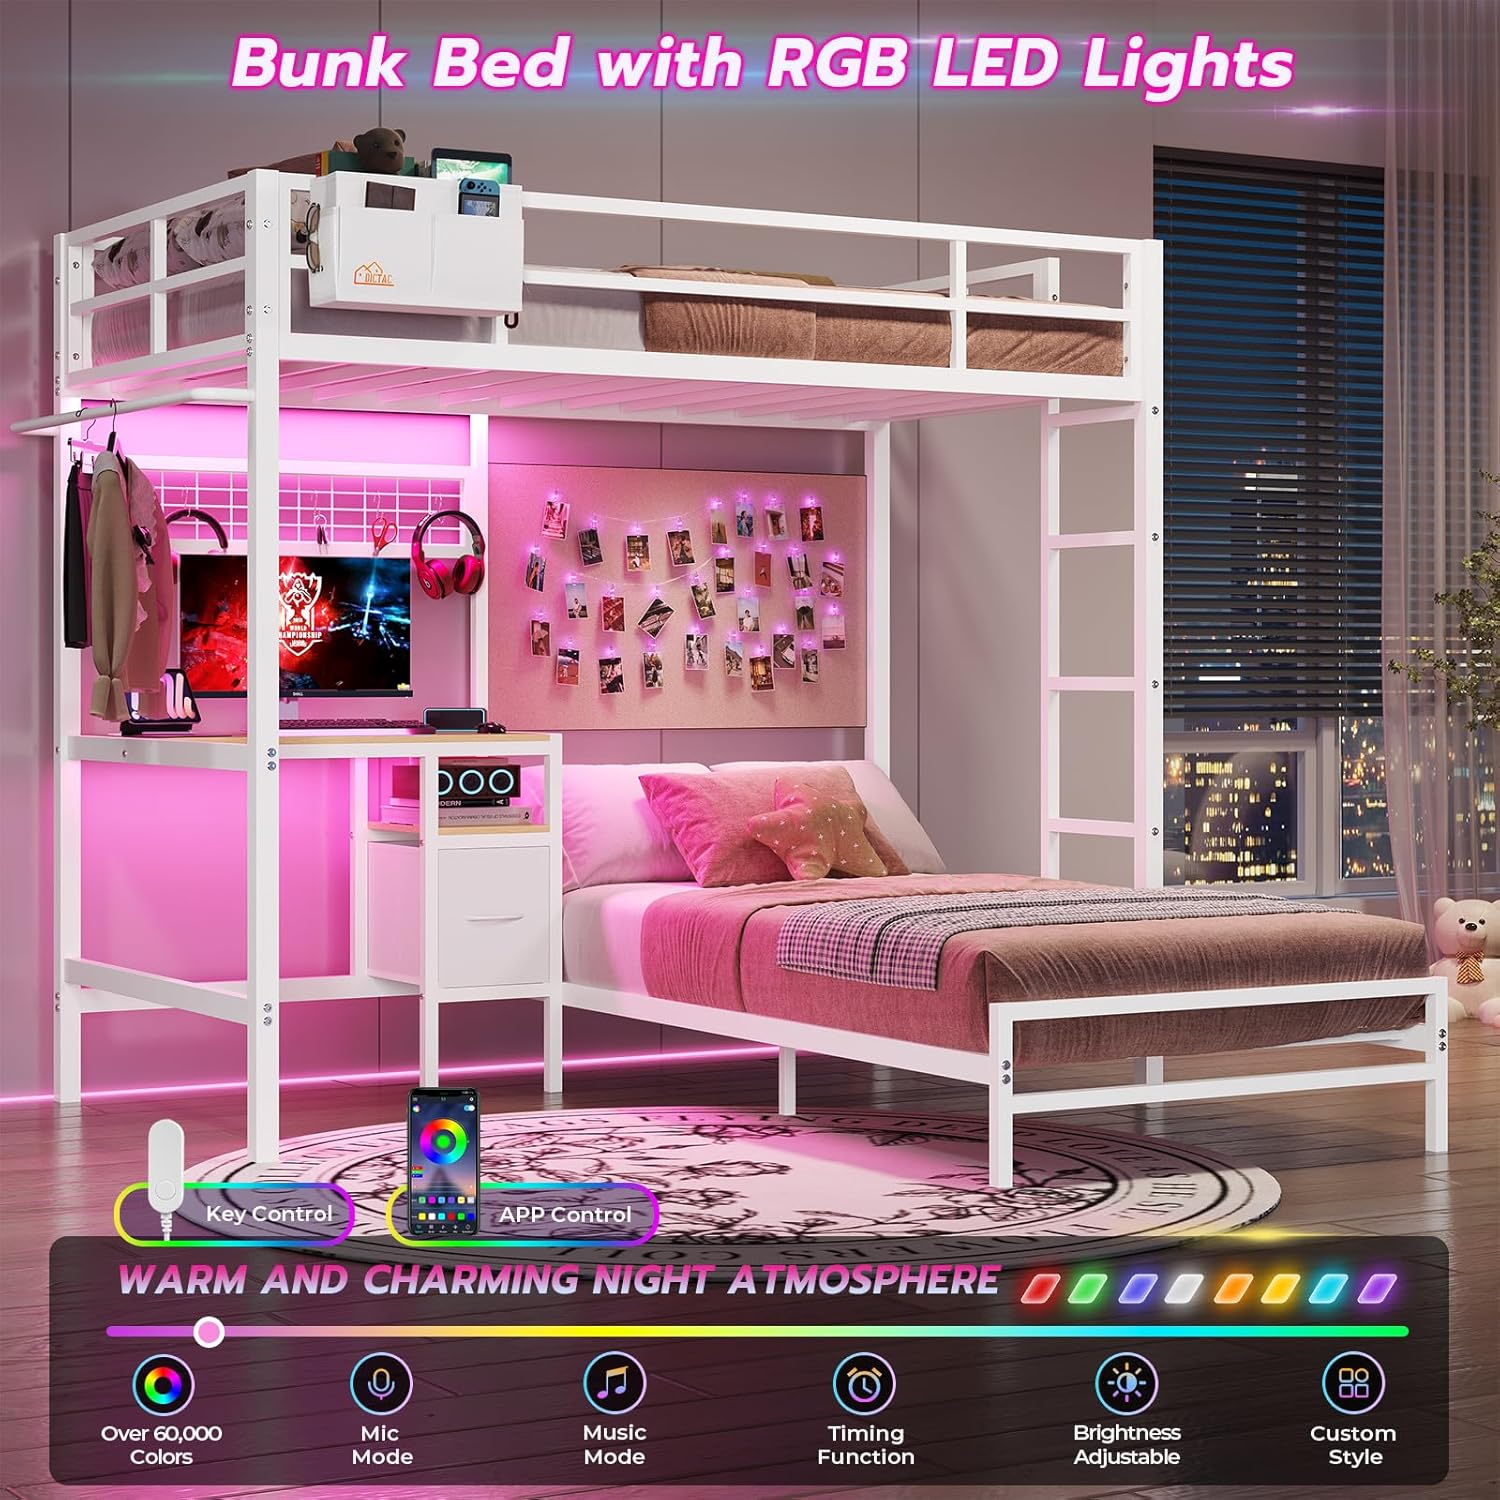
RGB LED Lights:

- The LED lights offer over 60,000 colors and various modes.
- Control Methods: The lights can be controlled via a line controller or a dedicated smartphone application.
- App Control: Download the specified app (refer to the LED light kit instructions for app name). The app allows customization of brightness, dynamic modes, music sync mode, microphone mode, and timing functions.
- Line Controller: Use the inline controller to adjust basic settings such as color and brightness.
Storage Features:
- Open Shelf: Utilize the open shelf for books, decor, or frequently accessed items.
- Fabric Drawer: The fabric drawer can serve as a nightstand for the lower bunk, providing enclosed storage.
- Bedside Caddy: The removable bedside caddy with hooks can be hung on the upper bunk for convenient storage of small personal items like phones, glasses, or headphones.
- Metal Decorative Mesh: Use the included 6 hooks to hang items on the metal mesh, or personalize it as a photo wall.
- Hanging Rail: The rail on the left side of the loft bed is suitable for hanging clothes or scarves.
Maintenance
- Cleaning: Wipe down metal surfaces with a soft, damp cloth. Avoid abrasive cleaners or harsh chemicals that could damage the powder-coated finish.
- Hardware Check: Periodically check all bolts and screws to ensure they remain tight. Retighten as necessary to maintain structural integrity and prevent noise.
- LED Lights: If LED lights malfunction, check connections. Refer to the LED light kit's specific instructions for troubleshooting or replacement.
- Fabric Components: The fabric drawer and bedside caddy can be spot cleaned with a mild detergent and water. Allow to air dry completely.
Troubleshooting
| Problem | Possible Cause | Solution |
|---|---|---|
| Parts do not align during assembly. | Incorrect orientation of parts; manufacturing tolerance issues. | Review the assembly diagrams carefully, ensuring each part is oriented correctly (e.g., holes facing the right direction). Loosen all connections, adjust alignment, then retighten. If issues persist, contact customer service. |
| Screws strip easily. | Overtightening; use of incorrect tools; soft hardware. | Use hand tools or a power drill on a very low torque setting. Tighten until snug, but do not force. If a screw strips, use a spare if available, or contact customer service for replacements. |
| Bed is wobbly or noisy. | Loose connections; uneven floor; slats not properly secured. | Ensure all bolts and screws are fully tightened. Verify the buckle design for slats is correctly engaged. Check if the anti-tipping device is securely fastened to the wall. Place furniture pads under legs if the floor is uneven. |
| LED lights not working. | Loose power connection; faulty controller; damaged strip. | Check that the LED strip is properly connected to the controller and the power adapter is plugged into a working outlet. Ensure the controller is functioning. If issues persist, contact customer service. |
| Charging station not providing power. | Power cord not plugged in; circuit breaker tripped; faulty unit. | Verify the charging station's power cord is securely plugged into a live wall outlet. Check your home's circuit breaker. Test with another device. If still no power, contact customer service. |
Specifications
| Feature | Detail |
|---|---|
| Model Number | LB-07 |
| Bed Size | Twin Over Twin Size |
| Product Dimensions | 78"L x 76.77"W x 72.24"H |
| Material | Heavy-duty Metal Frame (Powder Coated) |
| Weight Limit (Each Bunk) | 400 lbs |
| Item Weight | 105.6 pounds (48 kg) |
| Recommended Mattress Thickness (Upper Bunk) | 4"-6" |
| Recommended Mattress Thickness (Lower Bunk) | 6"-12" |
| Charging Station | 2 AC Outlets (125V/12A), 2 USB Ports (5V/2.1A), 5.2-Foot Power Cord |
| LED Lights | RGB (Over 60,000 colors), App & Line Controller, Music Sync, Timing Function |
| Storage Features | 1 Open Shelf, 1 Fabric Drawer, 1 Removable Bedside Caddy (2 hooks), Metal Decorative Mesh (6 hooks), Hanging Rail |
| Assembly Required | Yes |
Warranty and Support
DICTAC provides a limited warranty for this product. For specific warranty details, please refer to the documentation included with your purchase or contact DICTAC customer service.
If your loft bed arrives damaged, scratched, or with missing parts, or if you encounter any other issues, please contact DICTAC customer service for assistance. Provide your model number (LB-07) and purchase details when contacting support.
Contact Information: Please visit the official DICTAC store on Amazon or refer to your purchase receipt for direct customer service contact methods.