1. Product Overview
The XWXLIJV 600W Monocrystalline Solar Panel Kit is a high-efficiency portable power solution designed for various applications including RVs, marine vessels, boats, and other outdoor systems. It features monocrystalline cells for high conversion rates and includes a 100A charge controller for efficient power management.
Key Features:
- High-efficiency monocrystalline solar cells for optimal power conversion.
- Lightweight and portable design for easy transport and installation.
- Includes a 100A charge controller compatible with 12V and 24V systems.
- Suitable for charging automobile batteries, powering marine systems, and various outdoor applications.
2. Package Contents
Verify that all components listed below are included in your package:
- 1 x 600W Solar Panel
- 1 x 100A Charge Controller
- 1 x Connecting Wire
- 4 x Suction Cups
- 1 x Car Charging Cable
- 1 x Output Clip (Battery Clip)

Image: All components of the XWXLIJV 600W Solar Panel Kit, including the solar panel, charge controller, connecting wires, suction cups, car charging cable, and battery clips.

Image: A closer view of the 600W solar panel and the 100A charge controller, highlighting their design and connections.
3. Setup Instructions
Follow these steps to set up your XWXLIJV 600W Solar Panel Kit:
- Unpack Components: Carefully remove all items from the packaging and inspect them for any damage.
- Position the Solar Panel: Place the solar panel in a location that receives direct sunlight. Ensure there are no obstructions blocking the sun. The included suction cups can be used to secure the panel to a smooth surface, such as a vehicle window or roof.
- Connect the Charge Controller:
- First, connect the battery to the charge controller using the output clip (battery clip) or appropriate wiring. Ensure correct polarity (positive to positive, negative to negative).
- Next, connect the solar panel to the charge controller using the connecting wire.
- Finally, connect your load (e.g., car charging cable) to the charge controller.
Important: Always connect the battery to the charge controller first, then the solar panel, and finally the load. Disconnect in the reverse order: load, then solar panel, then battery.

Image: The solar panel positioned on the ground next to a van, demonstrating a typical setup for charging a vehicle battery.

Image: A detailed view of the 100A charge controller, showing its display and control buttons for managing power flow.
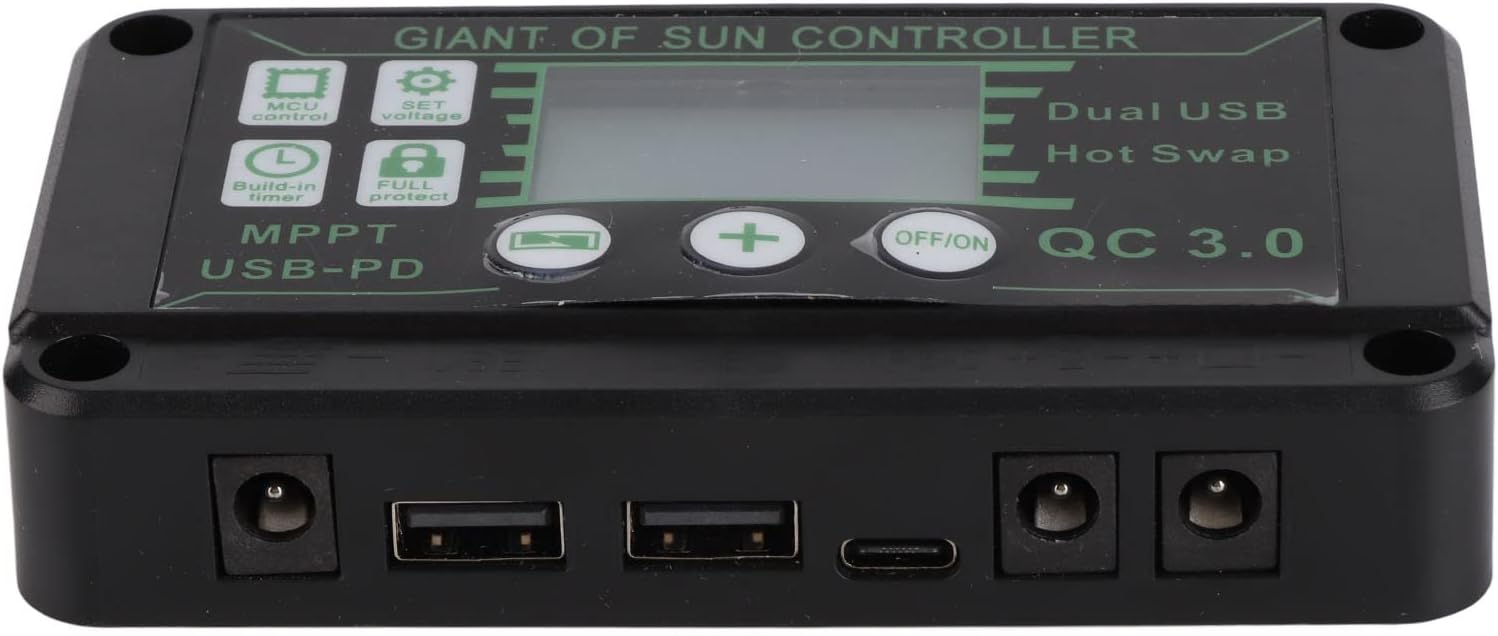
Image: The various input and output ports on the 100A charge controller, including USB and DC connections.
4. Operating Instructions
Once the solar panel and charge controller are connected, the system will begin to operate automatically when exposed to sunlight. The charge controller manages the charging process to protect your battery from overcharging and over-discharging.
- Monitoring: The charge controller's display provides information on battery voltage, charging current, and load status. Refer to the controller's specific manual for detailed display interpretations and settings.
- USB Output: The charge controller includes USB ports (Dual USB, QC 3.0, USB-PD) for charging compatible devices directly.
- DC Output: Use the DC output ports for connecting other 12V/24V devices.
Note: This solar panel kit does not have a power storage function. It generates electricity when exposed to sunlight and charges a connected battery or powers devices directly.
5. Maintenance
Regular maintenance ensures optimal performance and longevity of your solar panel kit:
- Clean the Solar Panel: Periodically clean the surface of the solar panel with a soft, damp cloth to remove dust, dirt, and debris. A clean panel ensures maximum sunlight absorption.
- Inspect Connections: Regularly check all electrical connections for tightness and corrosion. Loose or corroded connections can reduce efficiency and pose safety risks.
- Controller Environment: Ensure the charge controller is kept in a dry, well-ventilated area, away from direct sunlight and moisture.
- Battery Health: Monitor the health of your connected battery according to its manufacturer's guidelines.
6. Troubleshooting
If you encounter issues with your solar panel kit, refer to the following common problems and solutions:
| Problem | Possible Cause | Solution |
|---|---|---|
| No power output from solar panel |
|
|
| Battery not charging |
|
|
| Devices not receiving power from controller |
|
|
If the problem persists after attempting these solutions, please contact customer support.
7. Product Specifications
| Feature | Detail |
|---|---|
| Solar Panel Power | 600W |
| Controller Voltage | 12V / 24V (Auto-sensing) |
| Controller Current | 100A |
| Solar Cell Type | Monocrystalline |
| Material | Monocrystalline |
| Item Weight | 50 Grams (Note: This weight seems unusually low for a 600W panel kit and might refer to a single component or be an error in source data. Please verify actual product weight.) |
| Model Number | XWXLIJV |
| Brand | XWXLIJV |
8. Warranty and Support
This product comes with a 100% satisfaction guarantee. If you have any questions or concerns regarding your purchase, please contact our customer service team. We are committed to providing a professional and detailed response within 24 hours.
For support, please refer to the contact information provided with your purchase or on the official XWXLIJV website.