ELECOIN GS811-A
ELECOIN GS811-A 2-in-1 Carbon Monoxide and Smoke Detector User Manual
Model: GS811-A
1. Introduction
The ELECOIN GS811-A is a battery-operated 2-in-1 detector designed to provide early warning of both smoke and carbon monoxide (CO) presence in your home or other suitable environments. This device features dual sensors for comprehensive protection, an 85dB alarm, and an LCD display for real-time CO concentration readings. It is intended for residential use and offers a crucial layer of safety against these invisible threats.

Image 1.1: Two ELECOIN GS811-A 2-in-1 Carbon Monoxide and Smoke Detectors, showing the LCD display and test button.
2. Important Safety Information
Please read and understand all instructions before installing and operating this detector. Failure to follow these instructions may result in property damage, injury, or death.
- This device is designed to detect smoke and carbon monoxide. It is not designed to detect fire, heat, or other gases.
- This detector is not a substitute for proper fire safety practices, local fire codes, or professional fire/CO detection systems.
- Do not paint the detector. Paint can clog the sensing chambers and prevent the unit from operating correctly.
- Regularly test the detector as described in the 'Operating Instructions' section.
- Never ignore any alarm. Investigate the cause immediately.
- Carbon monoxide is an odorless, colorless, and tasteless gas that can be fatal. This detector is intended to assist in the prevention of accidental carbon monoxide poisoning.

Image 2.1: Infographic illustrating common symptoms of carbon monoxide exposure, such as headaches, nausea, breathlessness, collapse, dizziness, and loss of consciousness.
3. Package Contents
Verify that all items are present and undamaged upon opening the package:
- 2 x ELECOIN GS811-A 2-in-1 Carbon Monoxide and Smoke Detectors
- 6 x AA Batteries (3 per unit, included)
- 4 x Expansion Screws (2 per unit)
- 4 x Anchor Plugs (2 per unit)
- 1 x User Manual
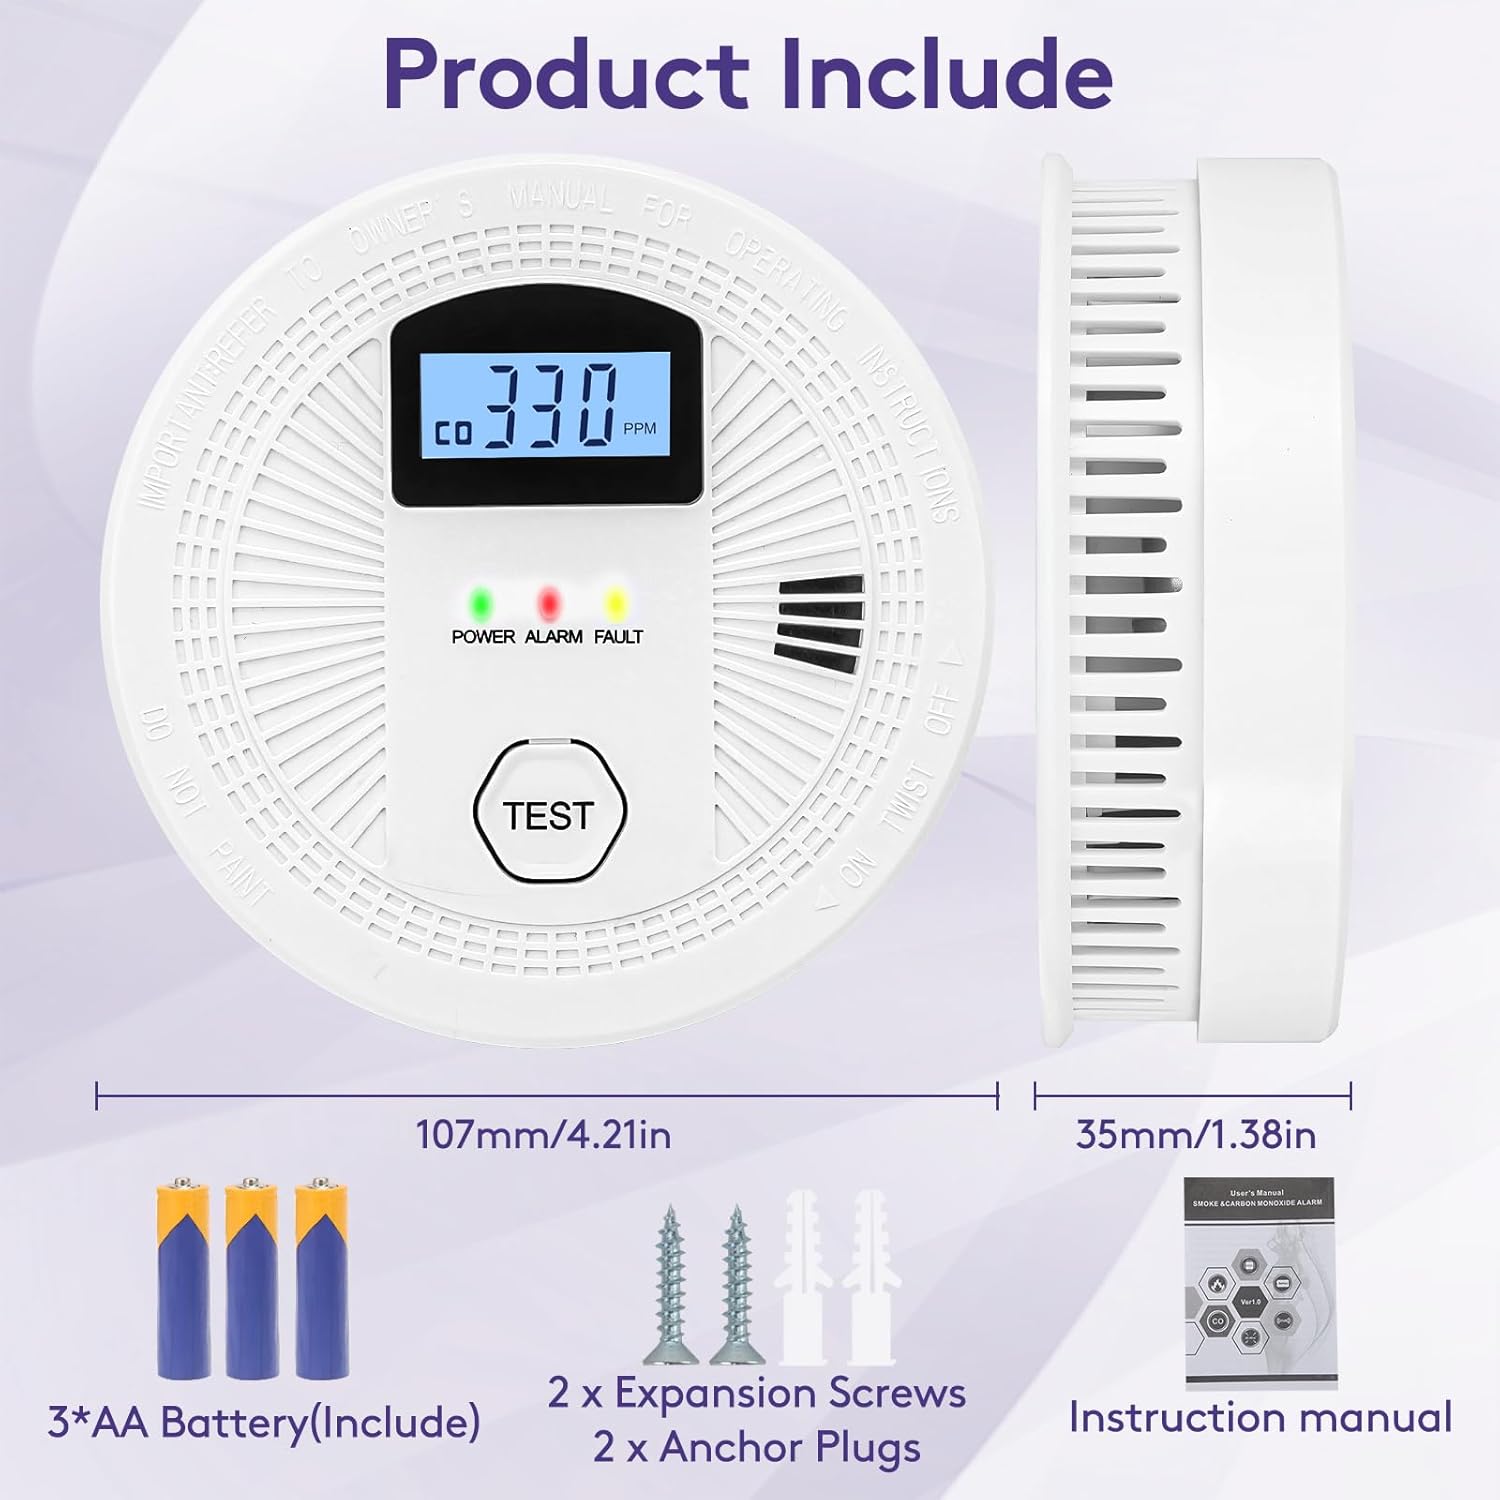
Image 3.1: Visual representation of the package contents, including the detector, 3 AA batteries, 2 expansion screws, 2 anchor plugs, and the instruction manual.
4. Setup and Installation
4.1 Battery Installation
- Twist the back cover of the detector counter-clockwise to open the battery compartment.
- Insert 3 AA batteries into the compartment, ensuring correct polarity (+ and -).
- Close the battery compartment by aligning the cover and twisting clockwise until secure. The detector will perform a self-test upon successful battery installation.
4.2 Mounting the Detector
The detector can be mounted on a wall or ceiling using the provided screws and anchor plugs.
- Choose an appropriate location (refer to Section 4.3 for placement guidelines).
- Mark the positions for the two mounting holes on the wall or ceiling.
- Drill two holes at the marked positions. Insert the anchor plugs into the drilled holes.
- Secure the mounting bracket (part of the detector's back cover) to the wall/ceiling using the screws.
- Attach the detector to the mounted bracket by aligning and twisting clockwise until it clicks into place.
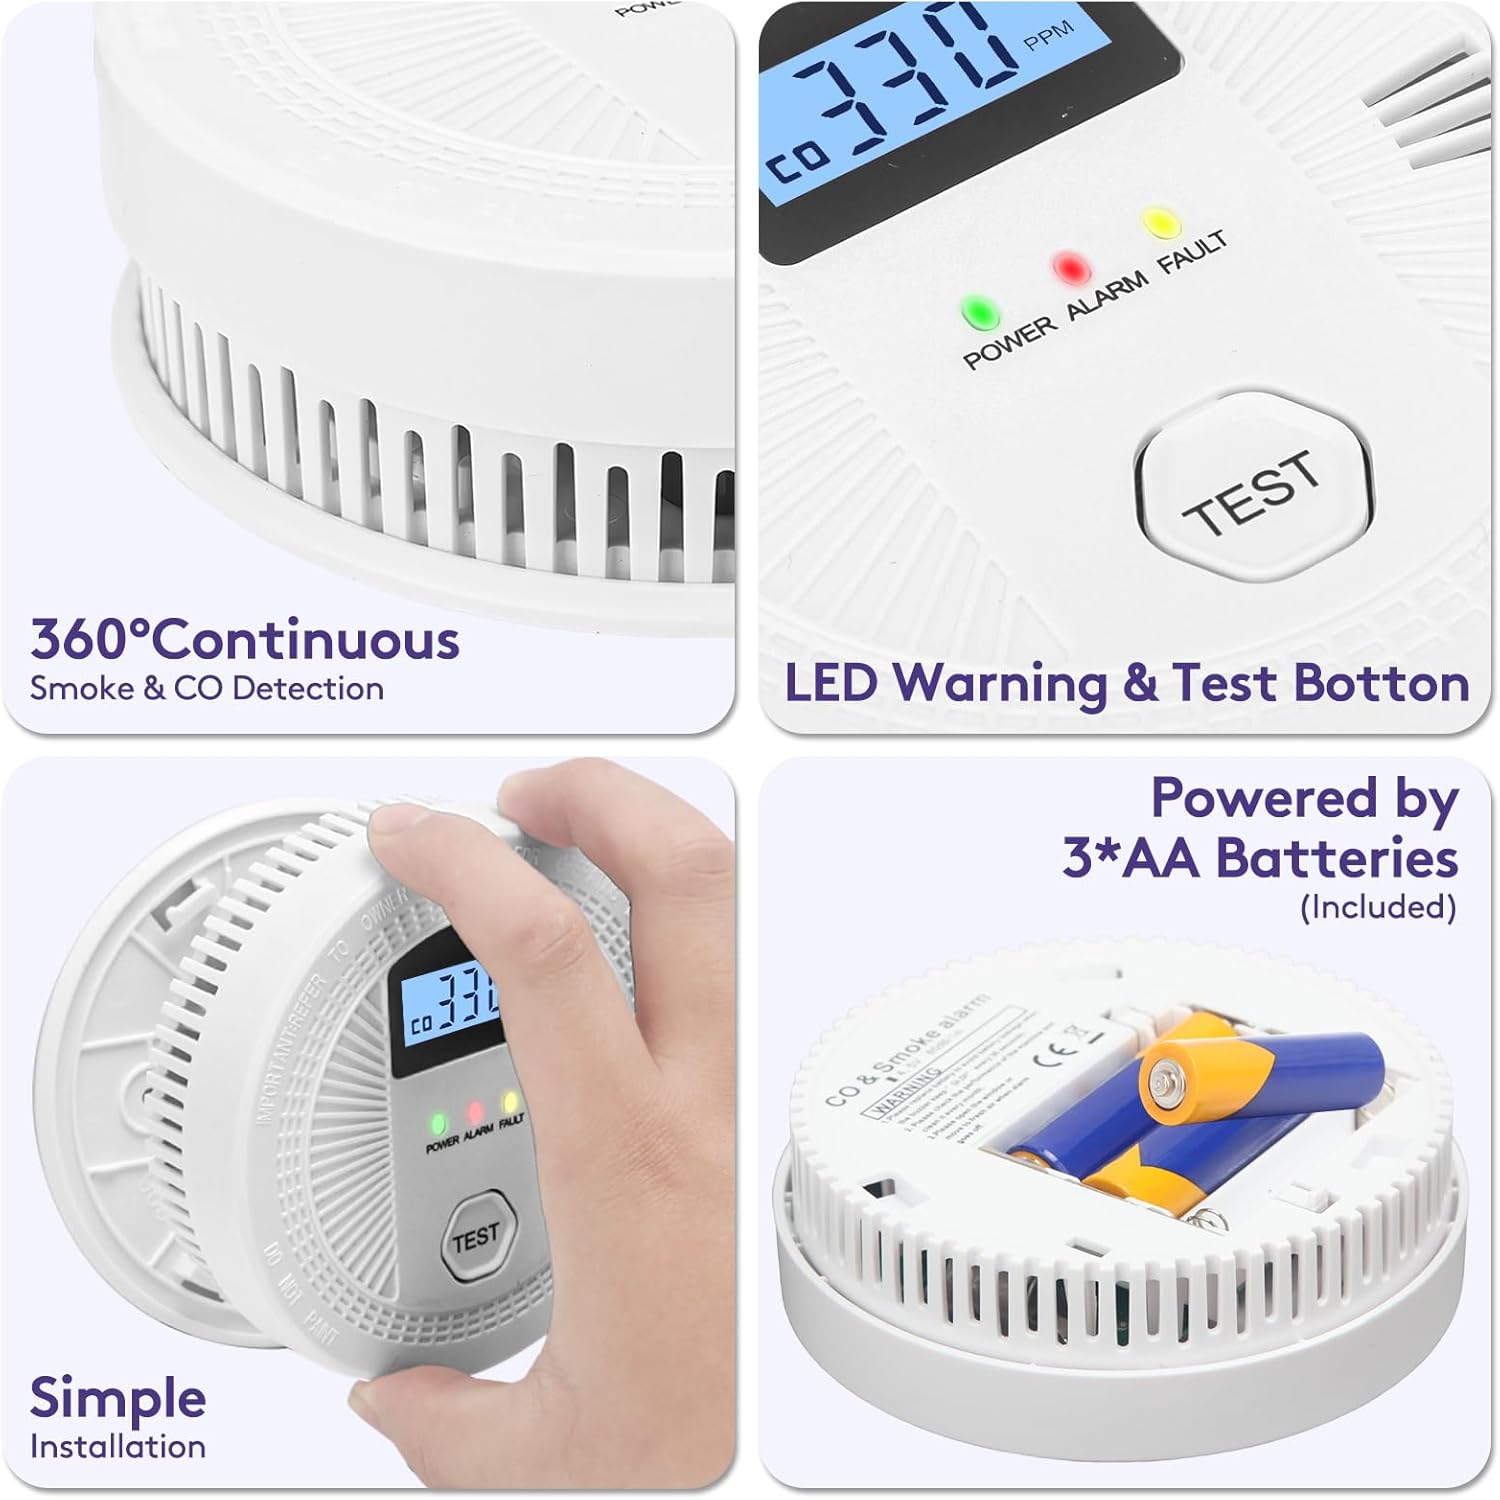
Image 4.1: Detailed view of the detector's battery compartment with AA batteries inserted, and an illustration of the simple twist-on installation method.
4.3 Detector Placement Guidelines
Proper placement is crucial for effective detection. Install detectors in:
- Every sleeping area and on every level of your home, including the basement.
- Near bedrooms, but not directly in front of heating/cooling vents.
- At least 15 feet (4.5 meters) from fuel-burning appliances.
- On the ceiling or high on a wall (at least 4 inches from the ceiling).
- Avoid dead air spaces, such as the peak of a vaulted ceiling or corners where walls and ceilings meet.

Image 4.2: A cross-section diagram of a house showing recommended locations for smoke alarms, carbon monoxide alarms, and fire extinguishers on different levels and in various rooms like bedrooms, living areas, and garages.
5. Operating Instructions
5.1 Initial Power-Up and Self-Test
After battery installation, the detector will automatically perform a self-test. The LCD display will show a brief sequence of numbers, and the LED indicators (Power, Alarm, Fault) will flash. A single beep confirms the unit is functioning correctly.
5.2 Test Button Functionality
Press the 'TEST' button located on the front of the detector to verify its operation. During the test, the alarm will sound loudly (85dB), and the red indicator light will flash. This confirms that the alarm and internal circuitry are working. Test the detector weekly.
5.3 LCD Display and LED Indicators
The large LCD display provides a clear and continuous indication of the current carbon monoxide concentration in parts per million (ppm). The display refreshes every 2 seconds. The standby indicator is softly lit at night to avoid disturbing sleep.
- Green LED (Power): Indicates normal operation.
- Red LED (Alarm): Flashes during an alarm condition (smoke or CO).
- Yellow LED (Fault): Indicates a fault or low battery condition.
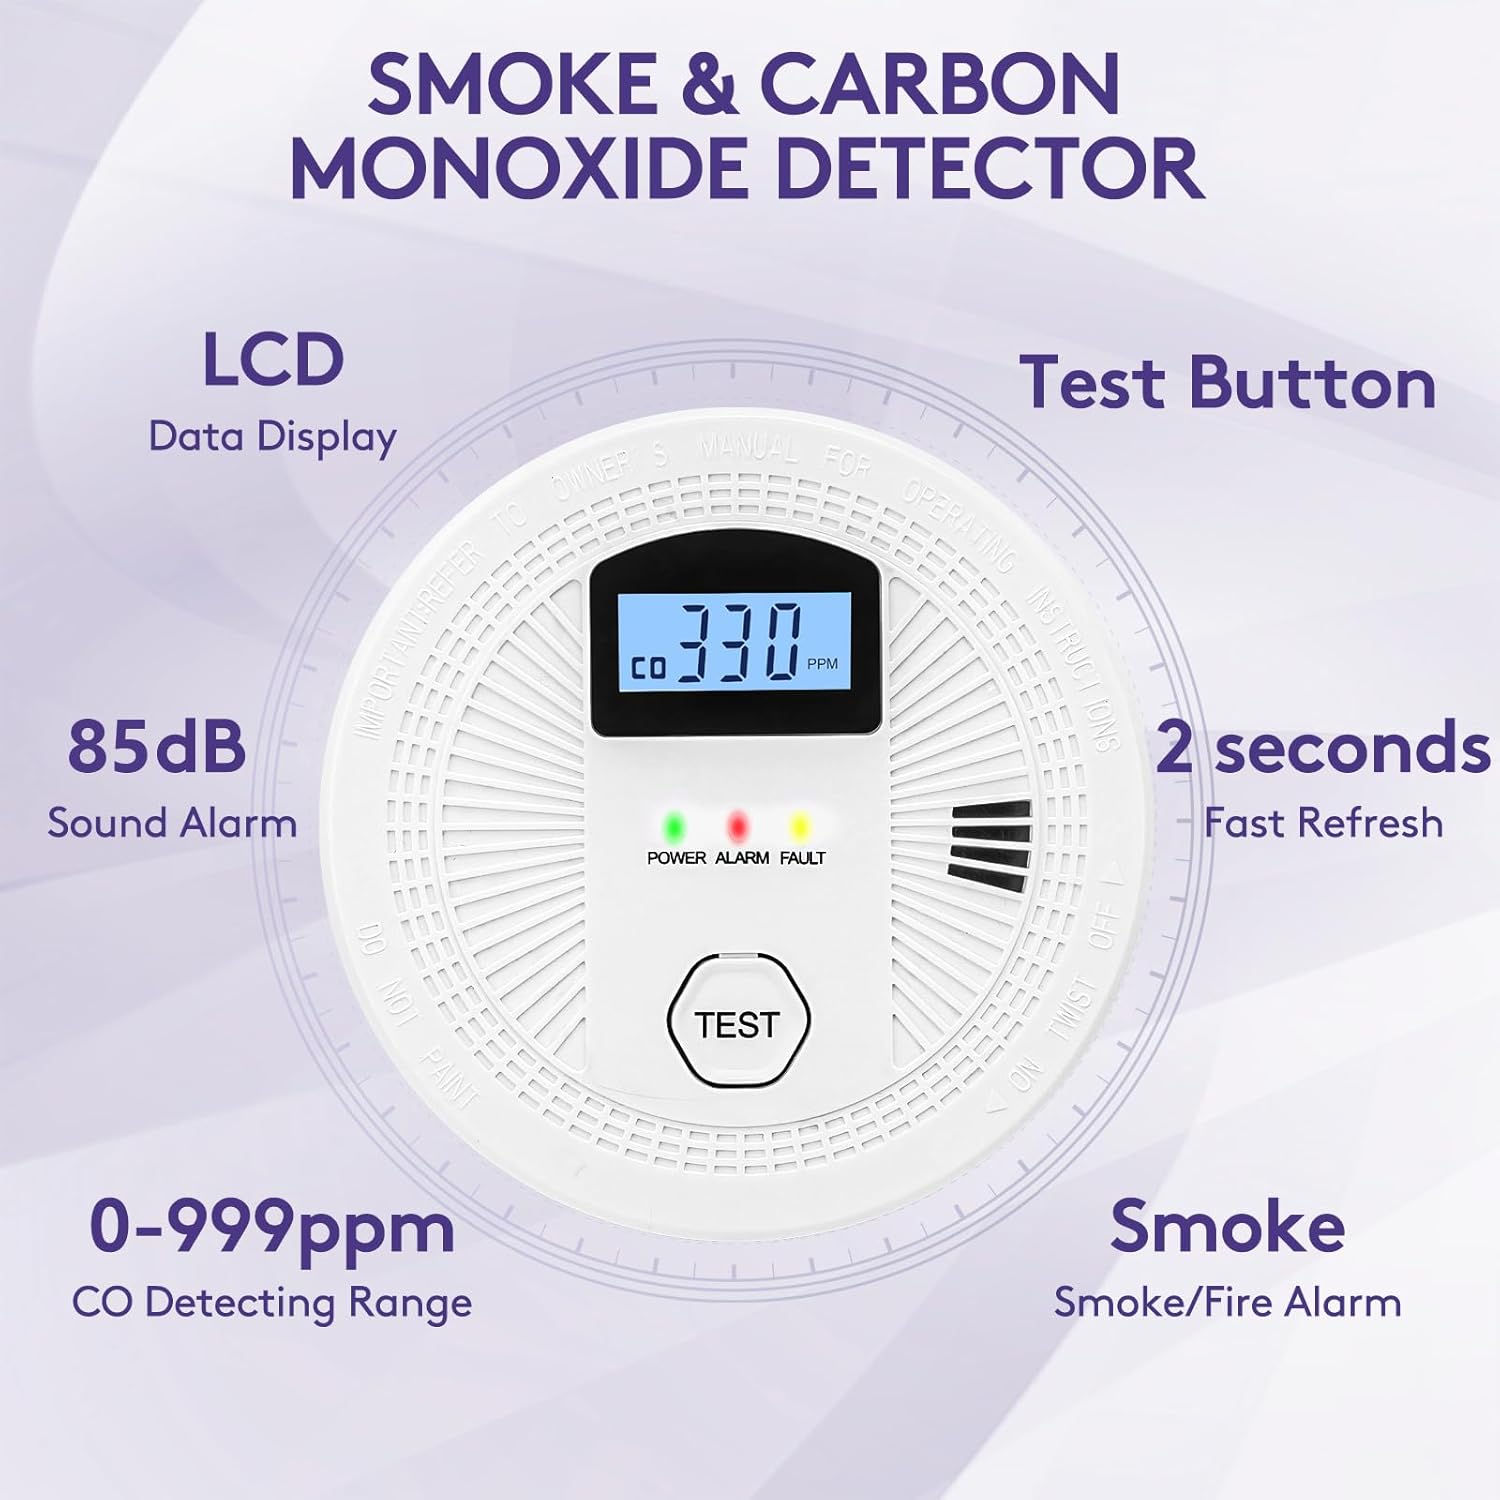
Image 5.1: Close-up of the detector highlighting its features: LCD Data Display, Test Button, 85dB Sound Alarm, 2 seconds Fast Refresh, 0-999ppm CO Detecting Range, and Smoke/Fire Alarm capability.

Image 5.2: The detector's clear LCD display showing a CO reading of '390 ppm', with children playing in the background, emphasizing home safety.
5.4 Alarm Conditions and Response
The detector will sound an 85dB alarm and flash the red indicator light under the following conditions:
- Smoke Detection: When smoke is detected.
- Carbon Monoxide Detection: When CO concentration reaches specific levels. For example, if the CO concentration reaches 71ppm, the alarm will sound. The higher the concentration of smoke or carbon monoxide, the shorter the time for the alarm to trigger (e.g., low to 2 minutes for high CO levels).
If the alarm sounds:
- Evacuate all occupants immediately.
- Do not re-enter the premises until the source of the alarm has been identified and resolved, and the area has been thoroughly ventilated.
- Contact emergency services if you suspect a fire or high CO levels.

Image 5.3: An infographic detailing CO concentration levels and their corresponding alarm response times: Safe (0 ppm, no alarm), Warning (70 ppm, alarm within 60-80 min), Warning (150 ppm, alarm within 4-15 min), and Dangerous (700 ppm, alarm within 2-6 min).
6. Maintenance
6.1 Battery Replacement
The detector will indicate a low battery condition with a specific chirp pattern and/or a yellow LED flash. Replace all three AA batteries immediately when this occurs. Refer to Section 4.1 for battery installation steps.
6.2 Cleaning the Detector
Dust and debris can interfere with the detector's performance. Clean the detector regularly, at least once a month:
- Gently vacuum the exterior of the detector using a soft brush attachment.
- Wipe the surface with a slightly damp cloth. Do not use cleaning sprays or solvents.
- Never paint the detector.
7. Troubleshooting
| Problem | Possible Cause | Solution |
|---|---|---|
| Detector chirps periodically | Low battery | Replace all 3 AA batteries. |
| Alarm sounds without apparent smoke or CO | False alarm (e.g., cooking fumes, steam, dust) or actual low-level CO/smoke | Ventilate the area. Press the test/silence button. If alarm persists, evacuate and investigate. Clean the detector. |
| Detector does not power on after battery installation | Incorrect battery polarity; dead batteries | Check battery orientation. Replace with new batteries. |
| Fault indicator (Yellow LED) is on | Internal fault | Perform a test. If fault persists, replace the unit. |
8. Specifications
| Feature | Detail |
|---|---|
| Brand | ELECOIN |
| Model | GS811-A |
| Detection Type | Smoke and Carbon Monoxide (2-in-1) |
| Power Source | 3 x AA Batteries (included) |
| Alarm Loudness | 85dB at 3 meters |
| CO Detecting Range | 0-999 ppm |
| Product Dimensions | 2"D x 2"W x 2"H (approx. 5.08 cm D x 5.08 cm W x 5.08 cm H) |
| Item Weight | 0.72 Pounds (approx. 326 grams) |
| Operating Temperature | Not specified (refer to product packaging for details) |
| Operating Humidity | Not specified (refer to product packaging for details) |
9. Warranty and Support
For specific warranty information, technical support, or to report any issues with your ELECOIN GS811-A detector, please refer to the contact details provided on the product packaging or visit the official ELECOIN website. Keep your purchase receipt as proof of purchase for warranty claims.
Ask a question about this manual
Ask about setup, troubleshooting, compatibility, parts, safety, or missing instructions. Manuals+ will review the question and use this page’s manual context to help answer it.