Brilluxa FJ3373 / Brilluxa7q56kcas4f-8Z
Digital Weather Station User Manual
Model: FJ3373 / Brilluxa7q56kcas4f-8Z
Brand: Brilluxa
1. Introduction
Thank you for purchasing the Brilluxa Digital Weather Station. This device is designed to provide accurate indoor and outdoor temperature and humidity readings, along with a weather forecast, moon phase, and standard clock functions. Please read this manual carefully before use to ensure proper operation and longevity of your device.
Key Features:
- Multifunction digital weather clock with weather forecast and moon phase.
- Perpetual Calendar up to Year 2099.
- Day of week in 7 user-selectable languages: English, German, Italian, French, Spanish, Netherlands, and Danish.
- Time in optional 12/24 hour format.
- Indoor and outdoor temperature and humidity display.
- Barometric pressure tendency display.
- Outdoor high/low temperature and frost alert.
- Indoor comfort level indicator (5 levels).
- Wireless outdoor sensor with 433.92MHz RF transmitting frequency and 60 meters transmission range (open area).
- RF Through the Wall Technology for reliable sensor communication.
Package Contents:
Please check the package contents to ensure all items are present:
- 1 x FanJu FJ3373 Weather Station (Main Unit)
- 1 x Outdoor Sensor
- 1 x USB Power Cord
- 1 x User Manual (English, German, French, Italian, Spanish)
Note: AA batteries are not included and must be purchased separately for both the main unit and the outdoor sensor.
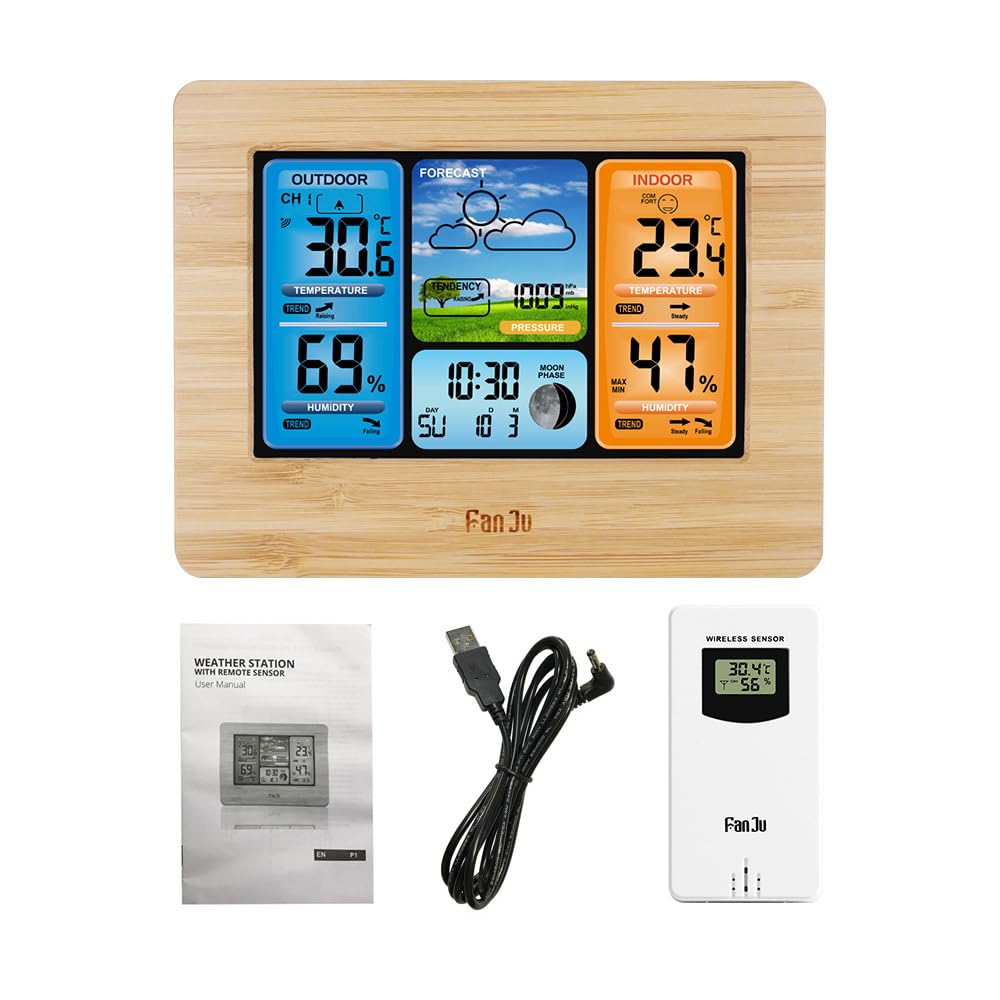
Image: Package contents of the Brilluxa Digital Weather Station. This image displays the main weather station unit, the wireless outdoor sensor, a USB power cable, and the multi-language user manual, illustrating what is included in the box.
2. Setup and Installation
2.1 Powering the Main Unit
- Battery Installation (Optional/Backup): Open the battery compartment on the back of the main unit. Insert 2 x LR6 AA batteries, observing the correct polarity (+/-).
- USB Power Connection (Recommended): Connect the provided USB power cord to the DC 5V port on the main unit and plug the other end into a compatible USB power adapter (not included) or a USB port. The display will light up.
Note: Using the USB power cord is recommended for continuous backlight and optimal performance. Batteries serve as a backup in case of power outage.
2.2 Powering the Outdoor Sensor
- Open the battery compartment on the back of the outdoor sensor.
- Insert 2 x LR6 AA batteries, observing the correct polarity (+/-).
- Close the battery compartment securely.
2.3 Sensor Placement
For accurate outdoor readings, place the wireless sensor in a sheltered location outdoors, away from direct sunlight and precipitation. Ensure it is within 60 meters (197 feet) of the main unit, avoiding large metal objects or thick walls that may interfere with the RF signal.

Image: The main weather station unit placed indoors, wirelessly connected to the outdoor sensor positioned outside. This illustrates the effective range and placement for optimal signal reception between the two units.
2.4 Automatic Sensor Pairing
Once both the main unit and the outdoor sensor are powered on, the main unit will automatically attempt to connect with the outdoor sensor. The outdoor temperature and humidity readings should appear on the main unit's display within a few minutes. If connection fails, refer to the Troubleshooting section.
3. Operating Instructions

Image: A detailed diagram of the Brilluxa weather station's display, highlighting and labeling various functions such as outdoor temperature, humidity, weather forecast, air pressure, indoor temperature, comfort display, indoor humidity, date, week indicator, and moon phase.
3.1 Button Functions
The main unit typically has several buttons on the back or top for setting and adjusting functions. Common buttons include:
- MODE/SET: Used to switch between display modes and enter setting mode.
- UP/+: Used to increase values or navigate menus.
- DOWN/-: Used to decrease values or navigate menus.
- ALERT: Used to set or check alarms/alerts.
- MEM/MAX/MIN: Used to view maximum/minimum temperature/humidity records.
- SNOOZE/LIGHT: Used to activate snooze function for alarm or adjust backlight brightness.
3.2 Setting Time and Date
- Press and hold the MODE/SET button for 3 seconds to enter time setting mode.
- The hour digit will flash. Use the UP/+ or DOWN/- buttons to adjust the hour.
- Press MODE/SET again to confirm and move to the next setting (minute, year, month, day, 12/24 hour format, language for day of week).
- Repeat the adjustment process for each setting.
- Press MODE/SET one last time to exit setting mode.
3.3 Setting Alarm
- Press the MODE/SET button repeatedly until the alarm time is displayed.
- Press and hold MODE/SET for 3 seconds. The alarm hour will flash.
- Use UP/+ or DOWN/- to adjust the alarm hour.
- Press MODE/SET to confirm and move to alarm minute. Adjust as needed.
- Press MODE/SET to exit.
- To activate/deactivate the alarm, press the UP/+ button while the alarm time is displayed. An alarm icon will appear/disappear.
3.4 Weather Forecast
The weather station analyzes barometric pressure changes to predict weather conditions for the next 12-24 hours. The display will show icons such as Sunny, Partly Cloudy, Cloudy, Rainy, or Snowy. This is a prediction and may not always match current outdoor conditions.
3.5 Temperature and Humidity Display
- The main unit displays indoor temperature and humidity.
- The outdoor sensor transmits outdoor temperature and humidity to the main unit.
- Press the UP/+ button to switch between Celsius (°C) and Fahrenheit (°F) temperature units.
3.6 MAX/MIN Records
Press the MEM/MAX/MIN button to view the maximum and minimum indoor/outdoor temperature and humidity recorded since the last reset. Press again to cycle through MAX, MIN, and current readings. To clear the records, press and hold the MEM/MAX/MIN button for 3 seconds while viewing the MAX/MIN values.
3.7 Comfort Level Indicator
The indoor comfort level is indicated by an icon on the display, based on indoor temperature and humidity. There are 5 levels, typically ranging from Dry to Wet, with an optimal "Comfort" level in between.
3.8 Backlight
When powered by the USB cable, the backlight is continuously on. Press the SNOOZE/LIGHT button to adjust backlight brightness levels. When powered by batteries only, the backlight will illuminate briefly when any button is pressed.
4. Maintenance
- Cleaning: Wipe the main unit and sensor with a soft, damp cloth. Do not use abrasive cleaners or solvents.
- Battery Replacement: Replace batteries in both the main unit and outdoor sensor when the low battery indicator appears on the display. Ensure correct polarity.
- Storage: If storing the device for an extended period, remove all batteries to prevent leakage.
5. Troubleshooting
| Problem | Possible Cause | Solution |
|---|---|---|
| No display on main unit. | Batteries are dead or incorrectly inserted; USB power not connected or faulty. | Check battery polarity and replace if necessary. Ensure USB power cord is securely connected and power source is active. |
| Outdoor readings not displayed or flashing. | Sensor out of range; sensor batteries dead; interference; sensor not paired. | Move sensor closer to the main unit. Replace sensor batteries. Relocate away from electronic devices. Re-pair the sensor (usually by removing batteries from both units, then reinserting sensor batteries first, then main unit batteries). |
| Inaccurate temperature/humidity readings. | Sensor exposed to direct sunlight/rain; poor ventilation; near heat/cold sources. | Relocate sensor to a sheltered, well-ventilated area. Ensure main unit is not near windows, vents, or appliances that affect temperature. |
| Weather forecast is incorrect. | Weather forecast is a prediction based on barometric pressure changes, not real-time. | This is normal. The forecast is for the next 12-24 hours and may not always align with current conditions. Allow time for the unit to learn local pressure patterns. |
6. Specifications
| Feature | Detail |
|---|---|
| Brand | Brilluxa (FanJu for model FJ3373) |
| Model | FJ3373 / Brilluxa7q56kcas4f-8Z |
| Main Material | Acrylonitrile Butadiene Styrene (ABS) |
| Screen Type | Positives LCD |
| Indoor Temperature Range | -10℃ ~ +50℃ (14℉ ~ 122℉) |
| Outdoor Temperature Range | -20℃ ~ +60℃ (-4℉ ~ 140℉) |
| Temperature Accuracy | 0.1℃ |
| Humidity Range | 20%RH ~ 95%RH |
| Humidity Accuracy | 1%RH |
| Barometric Pressure Range | 600hPa/mb ~ 1100hPa/mb |
| Barometric Pressure Accuracy | 1hPa/mb |
| Wireless Frequency | 433.92MHz RF |
| Transmission Range | 60 meters (197 feet) in open area |
| Power Supply (Main Unit) | 2 x LR6 AA batteries / DC 5V power adapter (USB Power Cord included) |
| Power Supply (Outdoor Sensor) | 2 x LR6 AA batteries |
| Weather Station Size | 16.7 * 12.9 * 3 cm (6.6 * 5.1 * 1.2 inch) |
| Outdoor Sensor Size | 9.6 * 5 * 3.4 cm (3.8 * 2 * 1.3 inch) |
| Item Weight | 460g / 16.2oz |

Image: Detailed dimensions of the Brilluxa weather station main unit (167mm x 129mm x 30mm) and a view of its back panel, showing the battery compartment and stand.
7. Warranty and Support
This product comes with a standard manufacturer's warranty. For specific warranty terms and conditions, please refer to the documentation included with your purchase or contact Brilluxa customer support directly.
If you encounter any issues or have questions regarding the operation or maintenance of your Digital Weather Station, please contact Brilluxa customer service for assistance. Contact information can typically be found on the product packaging or the official Brilluxa website.
Ask a question about this manual
Ask about setup, troubleshooting, compatibility, parts, safety, or missing instructions. Manuals+ will review the question and use this page’s manual context to help answer it.