DIYSecuritycameraworld R9-4G
User Manual for 4G LTE Cellular Security Camera
Brand: DIYSecuritycameraworld | Model: R9-4G
1. Introduction
This manual provides comprehensive instructions for the setup, operation, and maintenance of your DIYSecuritycameraworld 4G LTE Cellular Security Camera, Model R9-4G. This portable indoor camera is designed for surveillance in areas without Wi-Fi access, utilizing a 4G LTE network connection. It features 2K resolution, smart AI detection, night vision, and an extended standby battery life.

Figure 1.1: The 4G LTE Cellular Security Camera, demonstrating its compact size and remote viewing capability via a smartphone.
2. Package Contents
Please verify that all items listed below are included in your package. If any items are missing or damaged, please contact customer support.
- 1x 4G Mini Camera
- 1x Screws Bag (for mounting)
- 1x USB Cable (for charging)
- 1x Support (Mounting bracket)
- 1x User Guide (this manual)
- 1x SIM Card (pre-installed or included separately)
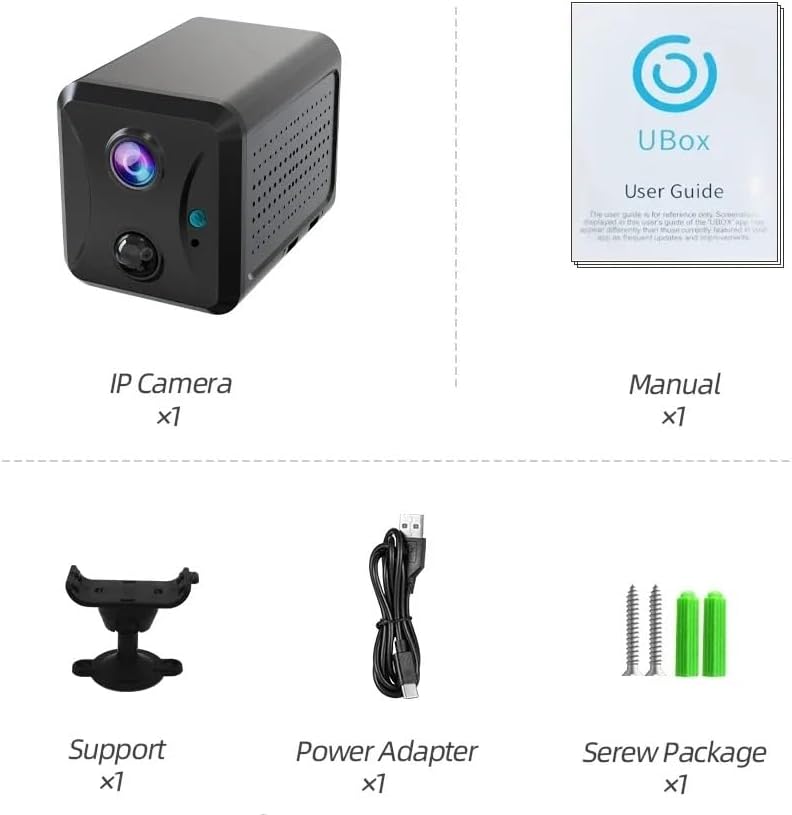
Figure 2.1: Illustration of the camera and its accompanying accessories included in the package. Note: The image labels "Power Adapter" but the product description lists "USB Cable". The USB cable is for charging, and a power adapter is typically not included.
3. Product Overview
Familiarize yourself with the various components and ports of your 4G LTE Cellular Security Camera.

Figure 3.1: Detailed diagram of the camera's front and rear, highlighting key features such as the lens, microphone, PIR sensor, light sensor, TF card slot, reset button, Type-C charging port, LED indicator, and On/Off button. A QR code for device pairing is also visible.
Component Descriptions:
- Lens: Captures video footage.
- MIC (Microphone): Records audio.
- PIR Sensor: Passive Infrared sensor for motion detection.
- Light Sensor: Detects ambient light levels for automatic night vision activation.
- TF Card Slot: Insert a MicroSD card (up to 128GB, not included) for local storage.
- Reset Button: Used to restore factory settings.
- Type-C Port: For charging the camera's internal battery.
- LED Indicator: Displays camera status (e.g., charging, recording, network status).
- On/Off Button: Powers the camera on or off.
- QR Code: Contains unique device identification for app pairing (e.g., XPAGZE6BSH2LFM3LDI5Q).
4. Setup
4.1 Charging the Camera
Before initial use, fully charge the camera. Connect the provided USB cable to the Type-C port on the camera and plug the other end into a USB power adapter (not included) or a computer USB port. The LED indicator will show charging status.
4.2 Inserting the SIM Card
Your camera operates on a 4G LTE network. A SIM card is included with your purchase. Carefully insert the SIM card into the designated SIM card slot. Ensure the SIM card is correctly oriented as per the diagram or markings on the camera.
Note: This camera does not support Wi-Fi connectivity. It relies solely on 4G LTE for remote access and data transmission.
4.3 Inserting a MicroSD Card (Optional)
For local video storage, insert a MicroSD card (TF card) into the TF card slot. The camera supports up to 128GB. Ensure the card is inserted correctly until it clicks into place.
4.4 App Installation and Device Pairing
To manage and view your camera remotely, download the "Ubox" app from your smartphone's app store (iOS App Store or Google Play Store). Follow these steps to pair your device:
- Power on the camera by pressing the On/Off button.
- Open the "Ubox" app on your smartphone.
- Register or log in to your account.
- Tap "Add Device" or the "+" icon.
- Scan the QR code located on the camera (refer to Figure 3.1).
- Follow the on-screen prompts in the app to complete the pairing process.
5. Operating Instructions
5.1 Live View and Remote Access
Once paired, you can access the live video feed from your camera anytime, anywhere, using the Ubox app, provided the camera has a 4G LTE signal. The app allows you to view real-time footage, listen through the microphone, and engage in two-way audio communication if supported.
5.2 PIR Motion Detection
The camera is equipped with a PIR (Passive Infrared) motion sensor that detects human movement. When motion is detected, the camera will:
- Immediately send an alert notification to your smartphone via the Ubox app.
- Begin recording video footage to the inserted MicroSD card or cloud storage (if subscribed).

Figure 5.1: The camera transitions from Sleep Mode (low power) to Work Mode upon detecting motion, initiating recording and alerts.

Figure 5.2: Example of a push notification received on a smartphone when the camera detects activity.
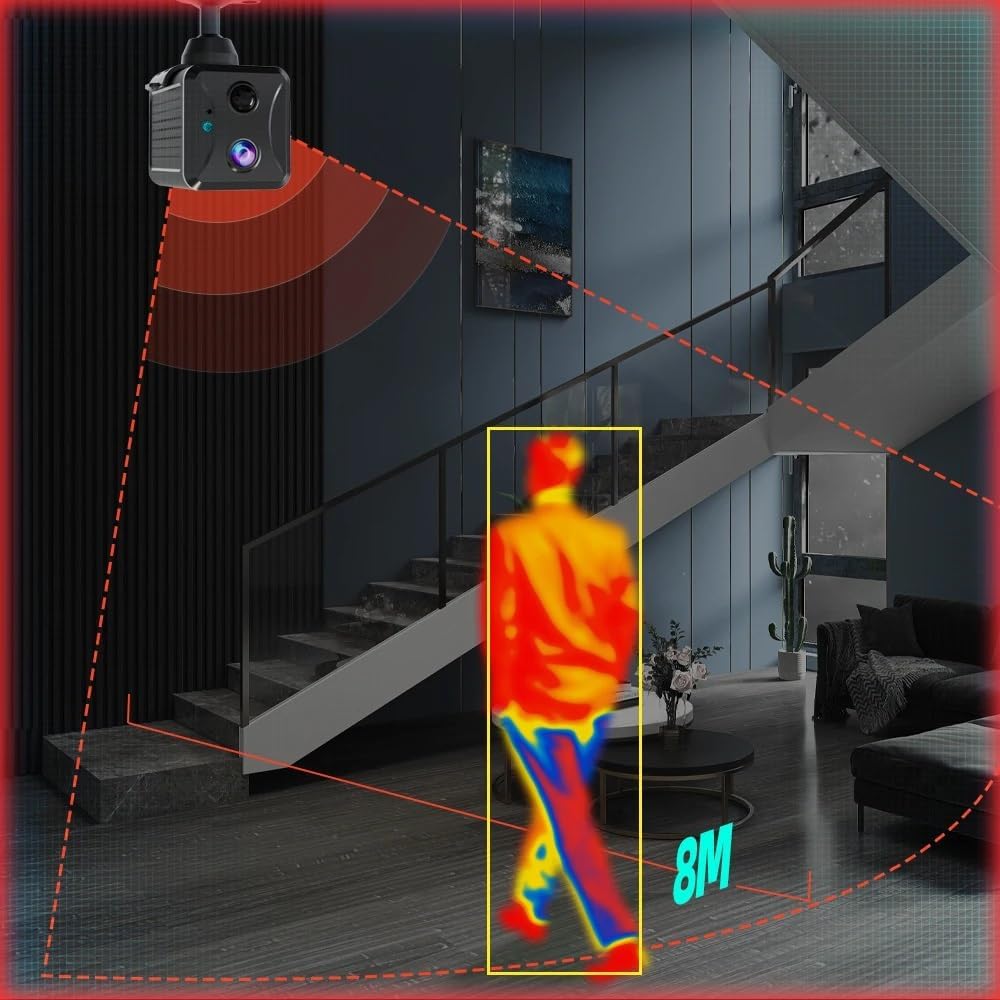
Figure 5.3: Illustration of the camera's PIR motion detection range, extending up to 8 meters.
5.3 Video Playback
Recorded videos can be accessed and played back through the Ubox app. You can review historical footage stored on the MicroSD card or in the cloud.
Note: Due to certain platform policies, recorded video may not include audio.
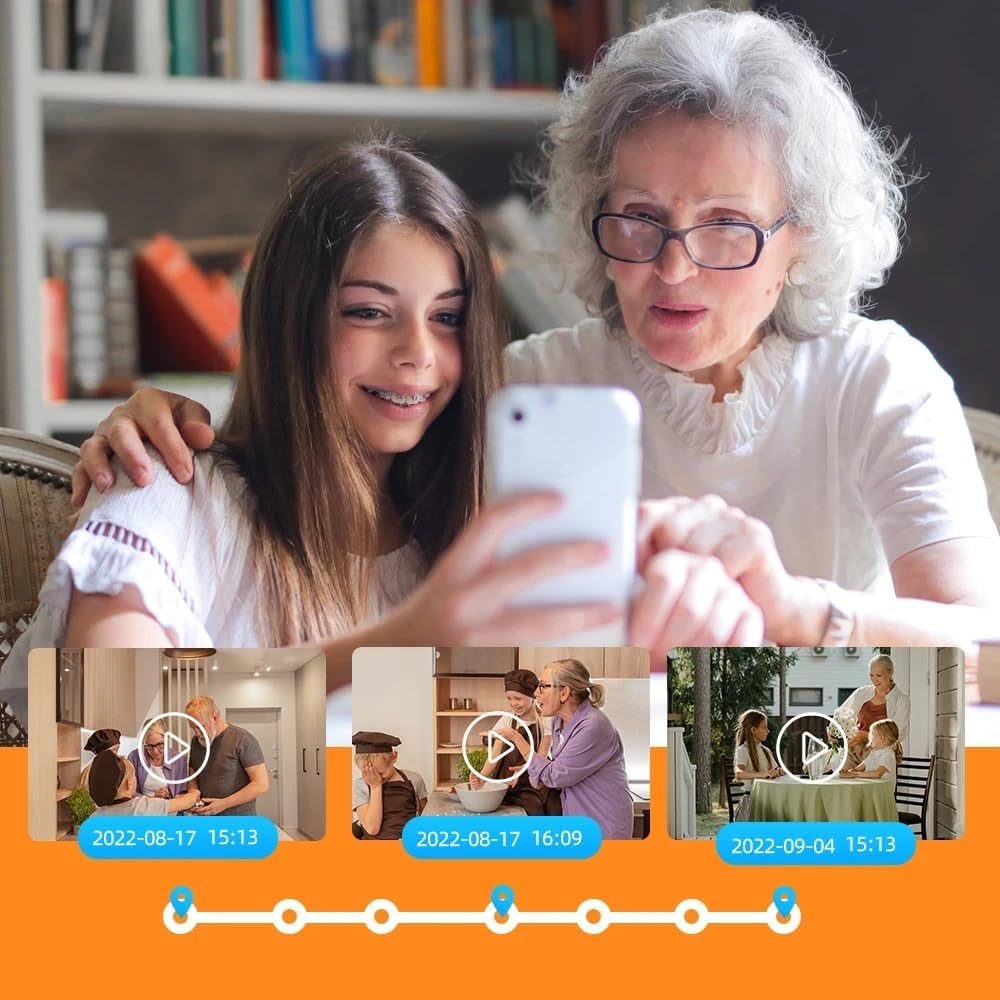
Figure 5.4: The Ubox app interface displaying a timeline of recorded video events, allowing users to easily navigate and review past footage.
5.4 Night Vision
The camera is equipped with infrared LEDs for night vision, allowing it to capture clear video in low-light or no-light conditions up to 10 meters. The light sensor automatically activates night vision when necessary.
6. Maintenance
6.1 Battery Management
The camera has a built-in 3800mAH lithium battery. To maximize battery life:
- Fully charge the camera before first use.
- Recharge the camera when the battery level is low, indicated by the LED.
- The camera is designed for low power consumption, offering up to 25 days of standby time or 10 hours of continuous recording on a full charge.
6.2 Cleaning
Wipe the camera lens and body with a soft, dry cloth. Do not use liquid cleaners or abrasive materials, as they may damage the camera.
6.3 Storage
If storing the camera for an extended period, ensure it is fully charged and then powered off. Store it in a cool, dry place away from direct sunlight and extreme temperatures.
7. Troubleshooting
| Problem | Possible Cause | Solution |
|---|---|---|
| Camera not powering on. | Low battery; Power button not pressed correctly. | Charge the camera fully. Press and hold the On/Off button for a few seconds. |
| No live view in app. | No 4G signal; SIM card issue; Camera offline. | Check 4G signal strength. Ensure SIM card is correctly inserted and active. Restart the camera. Check app connection. |
| No motion detection alerts. | PIR sensitivity too low; App notifications disabled; Camera in sleep mode. | Adjust PIR sensitivity in the Ubox app. Enable notifications for the Ubox app. Ensure camera is in Work Mode or set to detect motion. |
| Cannot record video. | No MicroSD card; MicroSD card full or corrupted; Cloud storage issue. | Insert a MicroSD card. Format or replace the MicroSD card. Check cloud storage subscription status. |
| Poor video quality. | Dirty lens; Low light conditions; Weak 4G signal. | Clean the camera lens. Ensure adequate lighting or check night vision activation. Improve 4G signal. |
8. Specifications
| Model Name | Battery Camera (R9-4G) |
| Indoor/Outdoor Usage | Indoor |
| Connectivity Protocol | Cellular (4G LTE) |
| Power Source | Battery Powered (3800mAH Lithium Ion) |
| Video Capture Resolution | 1080p |
| Night Vision Range | 10 Meters |
| Storage Support | Up to 128GB TF Card (MicroSD) & Cloud Storage |
| Dimensions (L x W x H) | 2.2 x 1.4 x 1.6 inches |
| Item Weight | 1 pound |
| Special Feature | Mini 4G Battery Camera, PIR Motion Detection, Two-way Audio |
| Compatible Devices | Smartphone (via Ubox App) |
| UPC | 780305857683 |
9. Warranty and Support
For warranty information, technical support, or any inquiries regarding your DIYSecuritycameraworld 4G LTE Cellular Security Camera, please refer to the contact information provided on the product packaging or the official DIYSecuritycameraworld website. Please retain your proof of purchase for warranty claims.
Ask a question about this manual
Ask about setup, troubleshooting, compatibility, parts, safety, or missing instructions. Manuals+ will review the question and use this page’s manual context to help answer it.