1. Introduction
This manual provides comprehensive instructions for the setup, operation, maintenance, and troubleshooting of your new Universal TV Remote Control. Designed for ease of use, this remote is compatible with a wide range of major TV brands, offering a convenient replacement for your original remote.
Please read this manual thoroughly before using the remote control to ensure optimal performance and longevity.

Figure 1: Universal TV Remote Control

Figure 2: Compatible with Major TV Brands
2. Setup Instructions
Before first use, insert two AAA batteries into the remote control. Ensure correct polarity (+/-) as indicated inside the battery compartment.
2.1. Brand Setting (Recommended Method)
This method is recommended for major TV brands that have a dedicated button on the remote control (e.g., Samsung, LG, Sony, TCL, Vizio, Hisense, Sanyo, Insignia, Philips, Panasonic, Sharp, Toshiba, Hitachi, JVC, Vestel, Seiki, RCA, Magnavox, Westinghouse, Haier).
- Identify the button on the remote control corresponding to your TV brand.
- Press and hold the corresponding brand button for approximately 3 seconds.
- The LED indicator on the remote will flash three times, indicating that the setting is complete.

Figure 3: Brand Setting Method
Useful Tip: Under the Initial Setting Mode, this remote can directly control many TV brands, including LG, SAMSUNG, PHILIPS, SONY, PANASONIC, SHARP and other TV brands listed on the remote control.
2.2. Code Setting Method
Use this method for TV brands that do not have a dedicated brand button on the remote, or if the Brand Setting method does not work.
- Press and hold the Mute button and the Power button simultaneously for a few seconds.
- Release both buttons when the LED indicator light illuminates.
- Refer to the provided code list in the physical manual (not included here) and enter the 3 or 4-digit code for your TV brand using the number buttons.
- If the code is correct, the LED will turn off, indicating successful setup. If the code is incorrect, the LED will remain lit, and you will need to re-enter the code.

Figure 4: Code Setting Method
Note: The new chip provides stronger power-off memory. Once set up, the TV brand memory will be maintained permanently, even after power off.
3. Operating Instructions
Once set up, your universal remote control functions similarly to your original TV remote. Below are some common button functions:

Figure 5: Other Button Functions
- Power Button: Turns the TV on or off.
- Input Button: Cycles through video input sources (HDMI, AV, etc.).
- CC (Closed Caption) Button: Toggles closed captions on or off.
- Smart Button: Accesses the Smart TV hub or home screen.
- NETFLIX Button: Direct access to the Netflix application.
- 3D Button: Activates or deactivates 3D mode (if supported by TV).
- Navigation Pad (Up, Down, Left, Right, OK): Used for menu navigation and selection.
- Menu Button: Opens the TV's main menu.
- Apps Button: Accesses the TV's application list.
- Vol +/- Buttons: Adjusts the volume level.
- Ch +/- Buttons: Changes the channel.
- Mute Button: Mutes or unmutes the TV audio.
- Number Buttons (0-9): Direct channel input.
- Exit Button: Exits current menu or application.
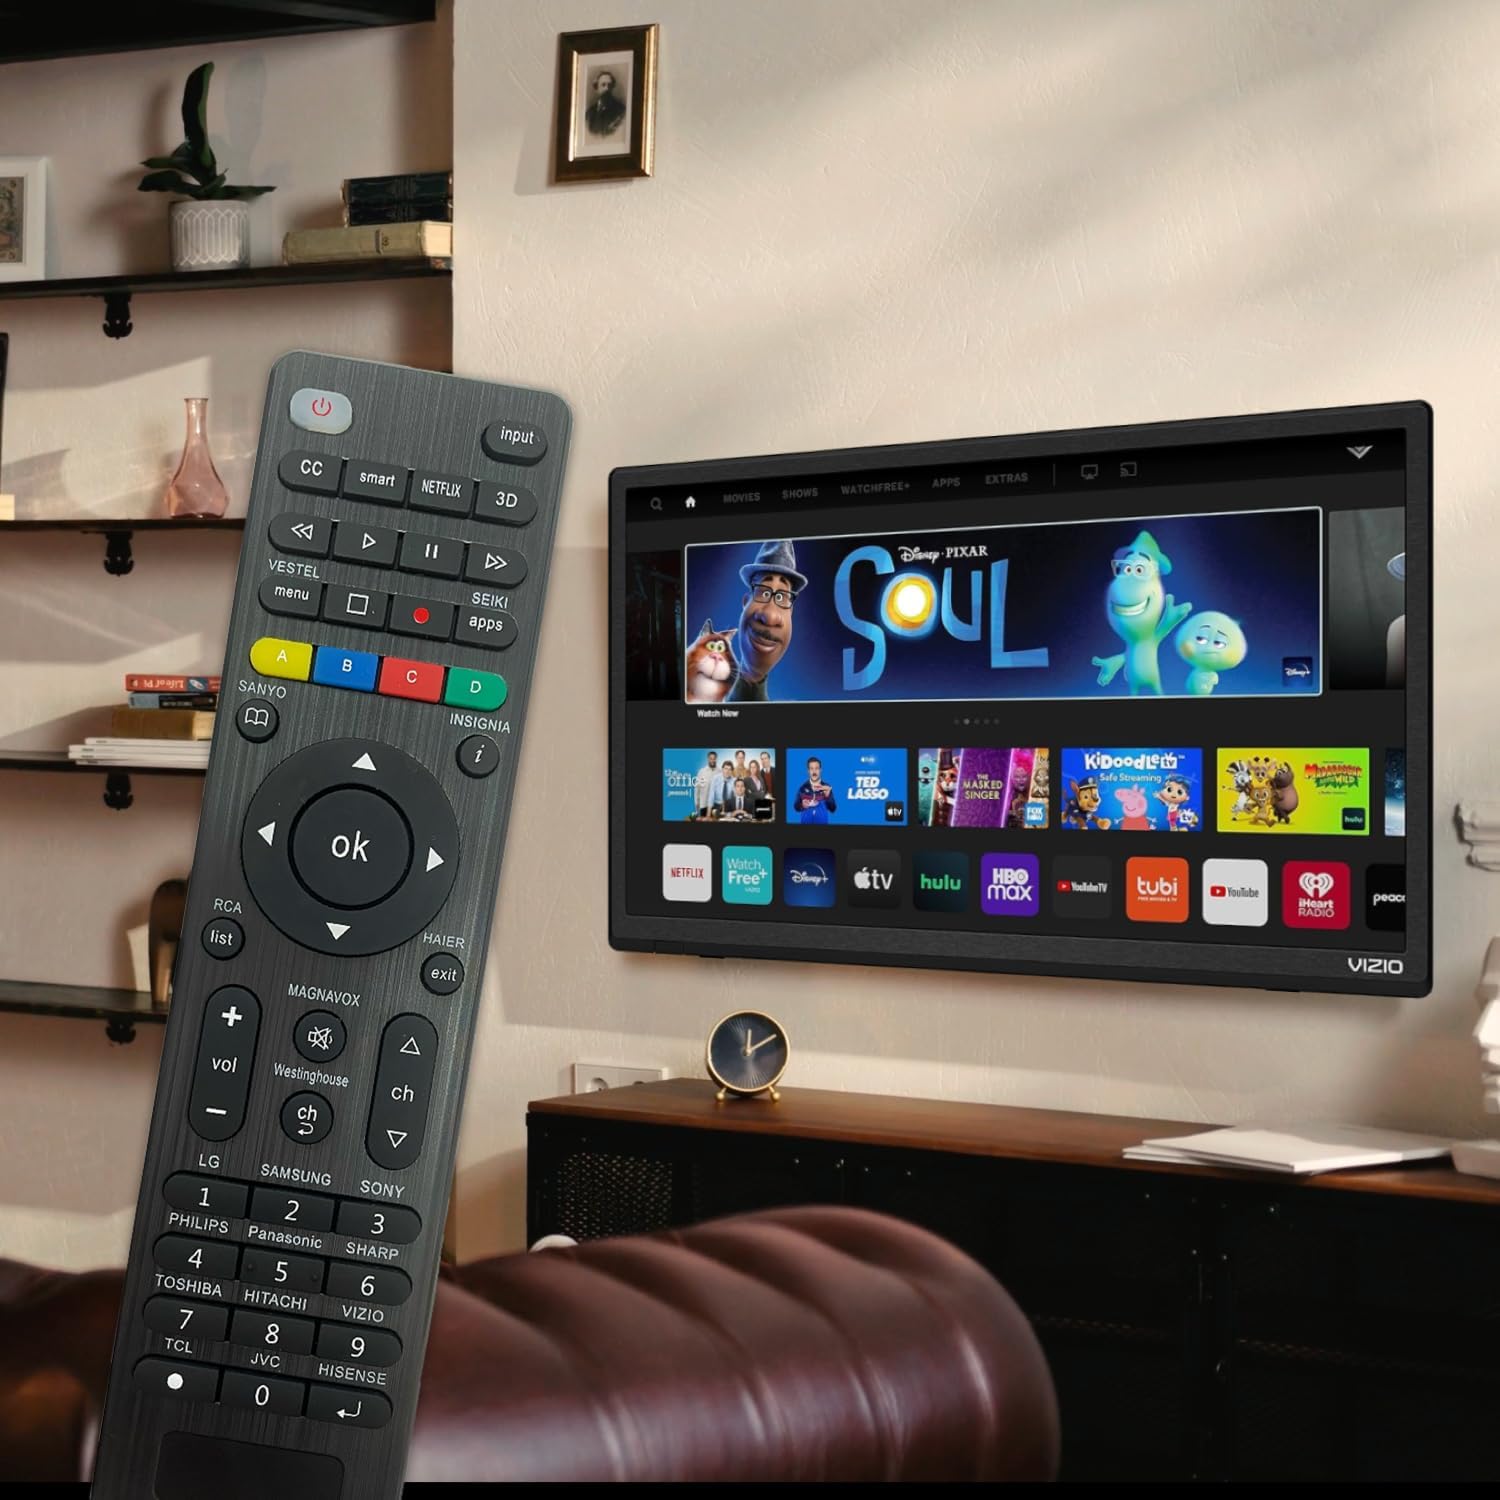
Figure 6: Remote in use with a Smart TV
4. Maintenance
- Cleaning: Use a soft, dry cloth to clean the remote control. Do not use liquid cleaners or abrasive materials, as they may damage the surface or internal components.
- Battery Replacement: Replace batteries when the remote's response becomes sluggish or the LED indicator does not light up. Always replace both batteries at the same time with new AAA batteries. Do not mix old and new batteries or different types of batteries.
- Storage: If the remote will not be used for an extended period, remove the batteries to prevent leakage and potential damage. Store the remote in a cool, dry place away from direct sunlight and extreme temperatures.
- Durability: The remote features upgraded material with a metal dome added to the control buttons for enhanced flexibility and extended life. Avoid dropping the remote or exposing it to excessive force.
5. Troubleshooting
| Problem | Possible Cause | Solution |
|---|---|---|
| Remote does not work. | Batteries are dead or inserted incorrectly. Remote is not paired with the TV. Obstruction between remote and TV. | Check and replace batteries, ensuring correct polarity. Re-attempt Brand Setting or Code Setting. Ensure clear line of sight to TV's IR receiver. |
| Some buttons do not work. | Incorrect code or partial pairing. TV does not support certain functions. | Try a different code from the manual's code list. Verify if your TV model supports the specific function. |
| Remote is slow to respond. | Low battery power. Interference. | Replace batteries. Ensure no strong light sources or other IR devices are interfering. |
| LED indicator keeps lighting up during code setting. | Incorrect code entered. | Re-enter the correct 3 or 4-digit code from the manual's code list. |
| Cannot find my TV brand button. | Brand not listed on dedicated buttons. | Use the Code Setting Method (Section 2.2) with the provided code list. |
If issues persist, please refer to the original product packaging for customer support contact information or visit the manufacturer's website.
6. Specifications
- Model Number: BVTVRemote-01
- Product Dimensions: 1.38 x 0.6 x 6.5 inches
- Item Weight: 2.39 ounces
- Batteries Required: 2 x AAA (not included)
- Color: Black
- Special Feature: Programmable, Power-off Memory
- Max Number of Supported Devices: 3 (typically for TV, DVD/Blu-ray Player, though primarily designed for TV)
- Compatible Devices: Television, DVD/Blu-ray Player (Universal compatibility with major TV brands)
- Manufacturer: BoostVision
- Country of Origin: China
7. Warranty and Support
For warranty information, please refer to the documentation included with your purchase or contact the seller directly. This product is typically covered by a standard manufacturer's warranty against defects in materials and workmanship.
For technical support or further assistance, please contact BoostVision customer service through their official website or the contact details provided on the product packaging.
Seller: BoostVision TV Remote
Amazon Product Page: https://www.amazon.com/dp/B0DHCZB2DT


