1. Introduction
This manual provides detailed instructions for the setup, operation, maintenance, and troubleshooting of your MJVV 4G GPS Smart Watch TB0009. This device is designed to offer communication, safety, and health monitoring features for elderly users, including real-time GPS tracking, two-way calling, video calls, SOS emergency alerts, and health monitoring functions.
Please read this manual thoroughly before using the watch to ensure proper functionality and safety.
2. Product Overview
2.1 Package Contents
Upon unpacking, please verify that all items listed below are present:
- MJVV 4G GPS Smart Watch TB0009
- Charging Cable (Magnetic)
- User Manual (This document)
2.2 Key Features
- 4G Connectivity: Supports Nano SIM card for global communication.
- Real-time GPS Tracking: Accurate location tracking via companion application.
- Two-way Communication: Supports phone calls and HD video calls.
- SOS Emergency Call: Dedicated button for immediate assistance.
- Geo-Fence: Set safe zones and receive alerts when the wearer enters or exits.
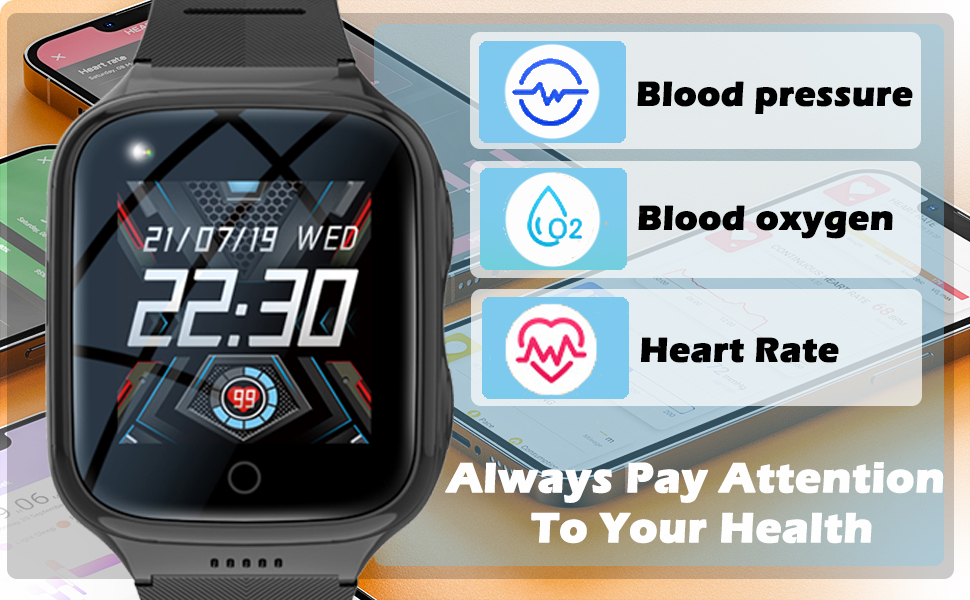
- Health Monitoring: Heart rate, blood pressure, blood oxygen, and temperature monitoring.
- Water Resistance: Designed for everyday splashes and light rain.
- Pedometer: Tracks daily steps.
- Voice Messaging: Send and receive short voice messages.
- Camera & Photo Album: Integrated camera for capturing images.
- Magnetic Charging: Convenient and secure charging method.

3. Setup Guide
3.1 SIM Card Installation
The MJVV 4G GPS Smart Watch requires a Nano SIM card with both call and network functions to enable its communication and tracking features. Please ensure the SIM card is active and has a data plan.
- Power off the watch completely.
- Locate the SIM card slot on the side of the watch.
- Carefully insert the Nano SIM card into the slot, ensuring correct orientation. Refer to the diagram if available on the watch itself or packaging.
- Close the SIM card tray securely.
- Power on the watch. The watch should display network signal strength once the SIM card is recognized.
3.2 Companion Application Download and Pairing
To utilize the full range of features, including GPS tracking and remote management, download the dedicated companion application on your smartphone (compatible with Android and iOS).
- Scan the QR code provided in the watch packaging or search for the application name (usually indicated on the watch screen during initial setup or in the packaging) in your smartphone's app store (Google Play Store for Android, Apple App Store for iOS).
- Install the application and create an account.
- In the application, select the option to add a new device.
- Scan the QR code displayed on the watch screen or enter the device ID manually to pair the watch with your account.
- Follow the on-screen prompts in the app to complete the pairing process and set up initial user information.
3.3 Initial Configuration
After pairing, configure essential settings through the companion application:
- SOS Numbers: Add up to three emergency contact numbers. These numbers will be called sequentially when the SOS button is pressed.
- Phone Book: Add contacts that the watch can call or receive calls from.
- Geo-Fence: Define safe areas on a map. You will receive alerts if the watch wearer enters or leaves these areas.
- Silent Mode: Set periods when the watch will not ring to avoid disturbance.
- Alarm Clock: Set reminders or wake-up times.
4. Operating Instructions
4.1 Basic Navigation
The watch features a full touch screen for navigation. Swipe left/right or up/down to access different functions and menus. Press the side button (usually the power button) to return to the home screen or wake the display.
4.2 Making and Receiving Calls
- Phone Calls: From the watch interface, navigate to the 'Phone Book' or 'Dial Pad' to initiate a call to a pre-saved contact or dial a number.
- Video Calls: Access the 'Video Call' function on the watch to initiate a video call with contacts who also have the companion app or compatible devices.
- Receiving Calls: When a call comes in, the watch will ring. Tap the green icon to answer or the red icon to decline.


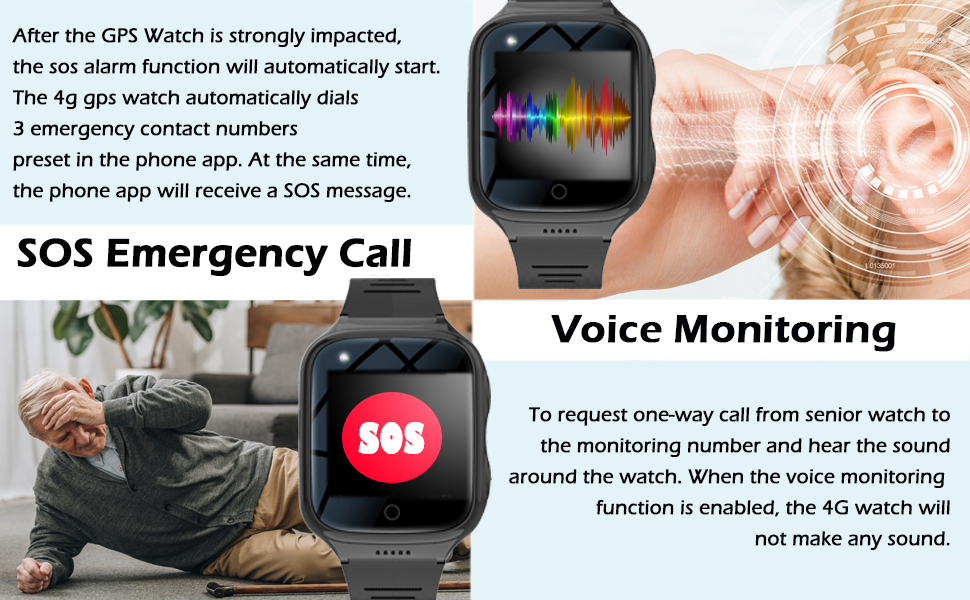
4.3 SOS Emergency Function
In an emergency, press and hold the dedicated SOS button on the watch. The watch will automatically dial the pre-set emergency contacts sequentially until one answers. An SOS message will also be sent to the companion application.
4.4 GPS Tracking and Geo-Fence
Monitor the wearer's location in real-time through the companion application. The 'Historical Route' feature allows you to view past locations for up to 90 days. Set up 'Geo-Fence' boundaries in the app to receive alerts when the watch wearer enters or exits designated safe areas.


4.5 Voice Messages
Record and send short voice messages to contacts through the watch interface. Received voice messages can be played back on the watch.
4.6 Health Monitoring
The watch is equipped with sensors to monitor heart rate, blood pressure, blood oxygen, and body temperature. Access these functions from the watch menu to take readings. Data can be viewed on the watch and in the companion application.
Note: Health monitoring data is for reference only and should not be used for medical diagnosis or treatment.

4.7 Pedometer
The built-in pedometer automatically tracks the wearer's daily steps. View step count and activity data on the watch or in the companion application.
4.8 Camera and Photo Album
Use the integrated camera to take photos. Photos are stored in the watch's photo album and can be viewed directly on the device.
4.9 Other Functions
- Alarm Clock: Set and manage alarms through the watch or the companion app.
- Silent Mode: Activate silent mode to prevent incoming calls or notifications from disturbing the wearer during specific times.

5. Maintenance
5.1 Charging
Connect the magnetic charging cable to the charging points on the back of the watch. Ensure the cable is securely attached. Connect the USB end of the cable to a standard USB power adapter (not included) or a computer USB port. A full charge typically takes a few hours.

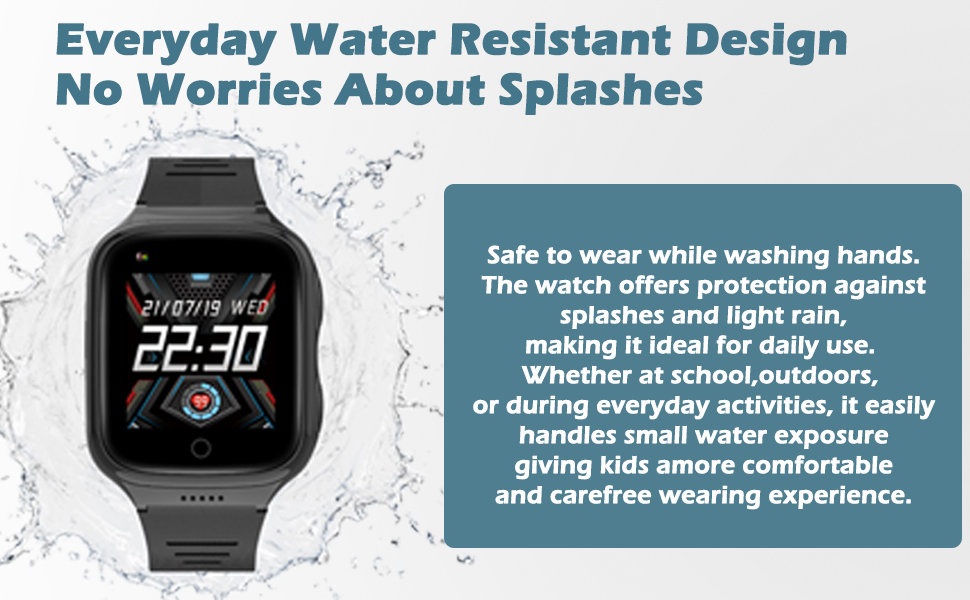
5.2 Water Resistance
The watch features an everyday water-resistant design, making it safe for washing hands or exposure to light rain. It is not suitable for swimming, showering, or submersion in water.
5.3 Cleaning
Wipe the watch and strap regularly with a soft, damp cloth. Avoid using harsh chemicals or abrasive materials that could damage the device.
6. Troubleshooting
| Problem | Possible Cause | Solution |
|---|---|---|
| Watch not powering on | Low battery; Power button not pressed long enough. | Charge the watch for at least 30 minutes. Press and hold the power button for 5-10 seconds. |
| No network signal / Cannot make calls | SIM card not installed correctly; SIM card not active or no data plan; Poor network coverage. | Reinstall SIM card. Ensure SIM card is active and has a data/call plan. Move to an area with better network coverage. |
| GPS tracking inaccurate or unavailable | Poor GPS signal (indoors, dense areas); Watch not connected to network. | Move to an open outdoor area. Ensure SIM card has active data. |
| Companion app cannot connect to watch | Watch not powered on; Watch not paired; Network issues. | Ensure watch is on and has network. Re-pair the watch if necessary. Check smartphone's internet connection. |
| Health monitoring readings seem incorrect | Watch not worn correctly; Movement during measurement. | Ensure watch is snug on the wrist. Remain still during measurements. Remember readings are for reference only. |
7. Specifications
- Model: TB0009
- Brand: MJVV
- Screen Size: 1.3 Inches (Standing screen display size: 2" / 4 cm diagonal)
- Operating System: Android, iOS compatible (for companion app)
- Connectivity: 4G (requires Nano SIM), Wi-Fi (802.11n), GPS
- Battery: 1 Lithium Ion battery (included), 800mAh
- Charging: Magnetic
- Water Resistance: Everyday water resistant (splashes, light rain)
- Item Weight: 6.7 ounces
- Package Dimensions: 6.34 x 3.5 x 1.73 inches
- Special Features: Geo-fence, Two-way phone call, HD Video Call, SOS Alarm Calling, Voice chat, Text message, GPS+WiFi+LBS Multiple tracker mode, Disturb Mode, Full Touch Screen, Real-time GPS tracking, Pedometer, History route.
8. Warranty and Support
For warranty information and technical support, please refer to the contact details provided with your purchase or visit the official MJVV website. Keep your purchase receipt as proof of purchase for warranty claims.
Important Note: The product requires a separate Nano SIM card and a monthly plan for full functionality, which is not included with the watch purchase.