1. Introduction
Thank you for choosing the Noxton 24 Inch Induction Cooktop. This manual provides essential information for the safe and efficient operation, installation, and maintenance of your new appliance. Please read it thoroughly before use and keep it for future reference.
2. Safety Information
Your safety and the safety of others are paramount. This cooktop is designed with several safety features, including a child safety lock, over-temperature protection, and a residual heat indicator. Always follow basic safety precautions when using electrical appliances.
- Electrical Connection: This is a high-power appliance (7200W, 220-240V) and does not come with a plug. It must be hardwired by a qualified electrician to ensure proper and safe installation.
- Cookware Compatibility: Only use magnetic, flat-bottomed pots and pans suitable for induction cooking. Test with a magnet before use.
- Child Safety Lock: Activate the child lock feature to prevent accidental operation, rendering all buttons inoperable.
- Over-Temperature Protection: The cooktop will automatically power off if the temperature escalates too high.
- Residual Heat Indicator: An indicator will alert you if a cooking zone is still hot after use.

3. Product Features
- 4 Burners with Flexible Zones: The two left heating zones can be combined into a large flexible zone, accommodating bigger or longer pans for versatile cooking. These zones can also be controlled separately.
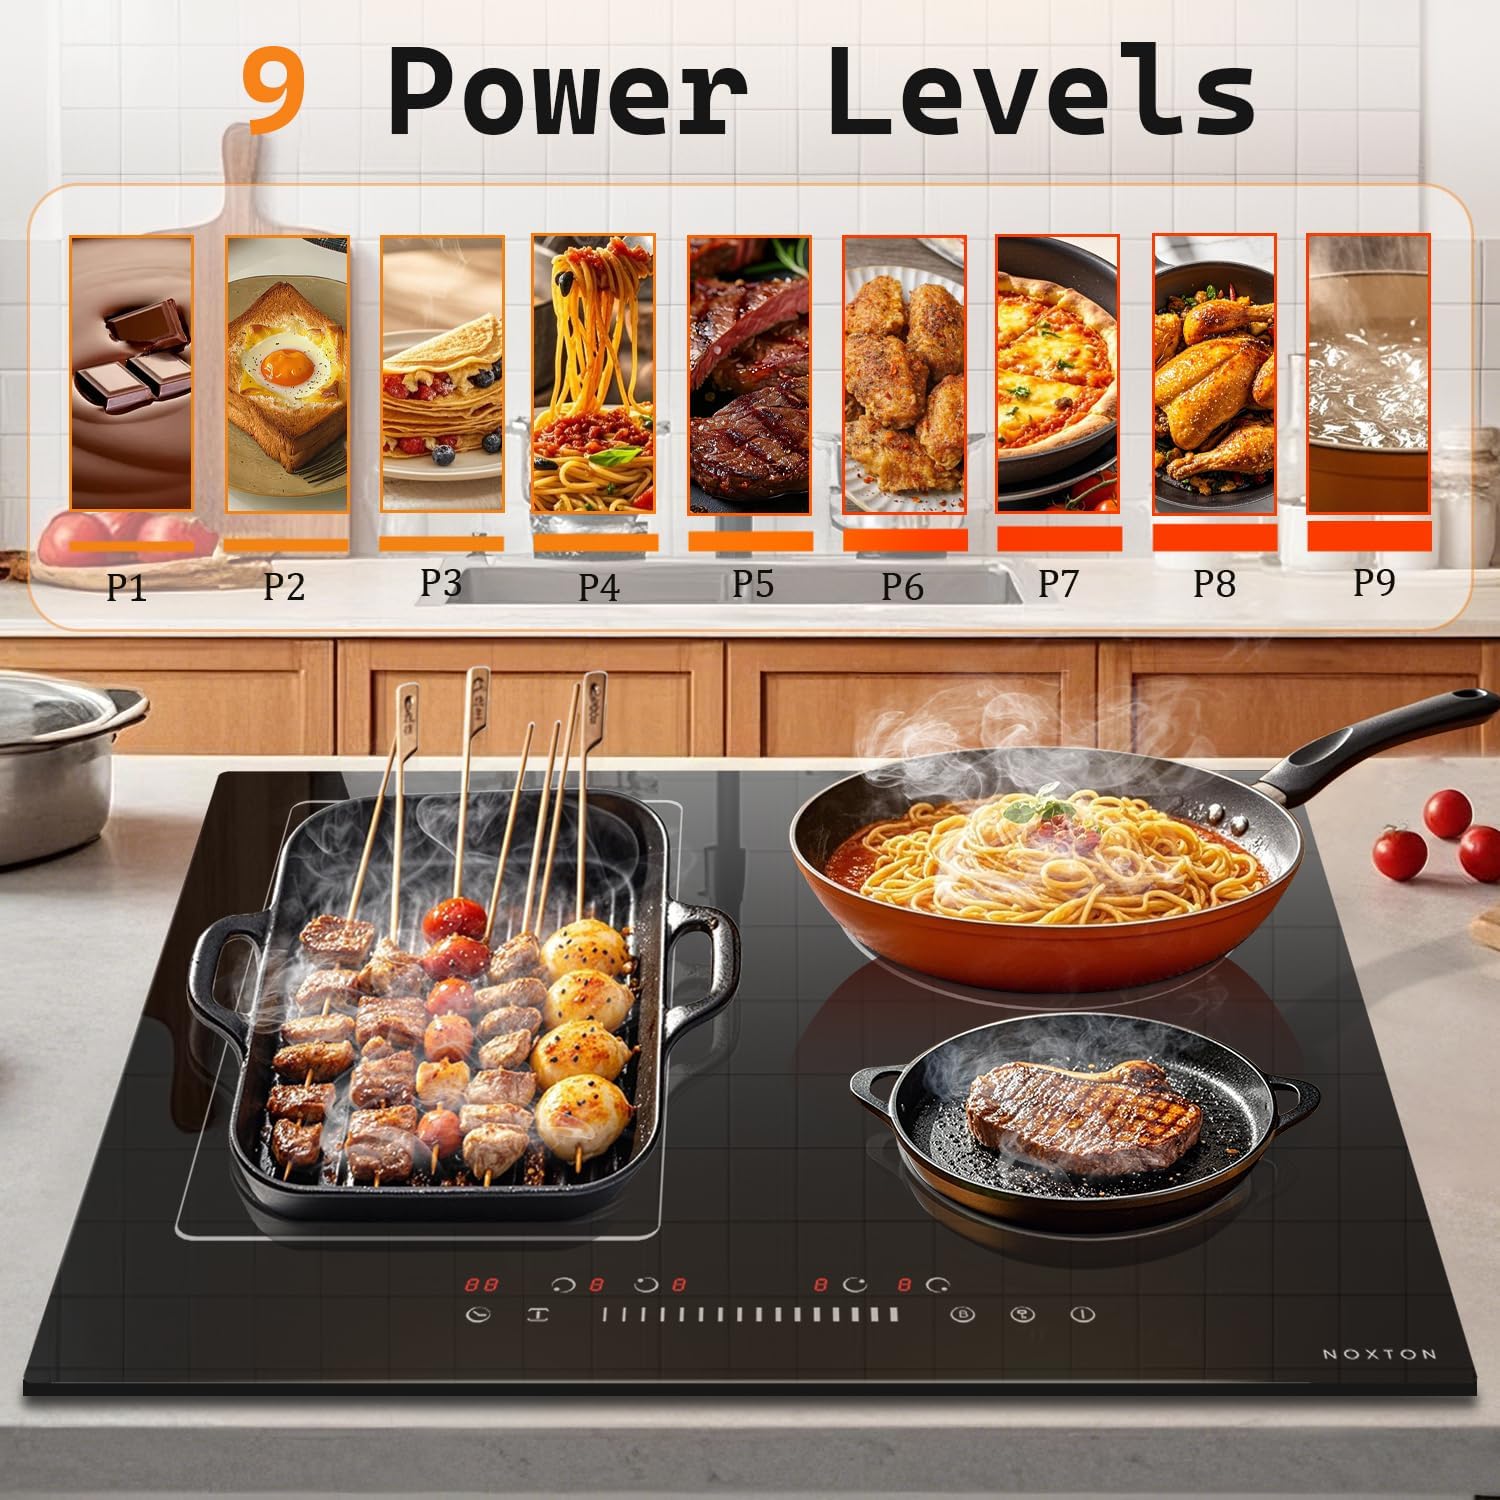
- High Power Output: 7200W total power with 9 adjustable power levels for precise heat control.
- Boost Function: Each burner can activate a Boost Key function, increasing power to a maximum of 2500W for 5 minutes for rapid heating.
- Sensor Touch and Drag Control: Digital touch controls allow for easy adjustment of power levels and timer settings by sliding your finger.
- Integrated Timer: A 99-minute timer function helps manage cooking times effectively.
- Safety Features: Includes Child Safety Lock, Over-Temperature Protection, and a Residual Heat Indicator.


4. Installation
The Noxton 24 Inch Induction Cooktop is designed for built-in installation and requires a 220-240V power source. Professional installation by a qualified electrician is mandatory due to the hardwired connection.
- Dimensions: Stovetop size: 23.23" x 20.47" (590mm x 520mm). Cut-out size: 22.05" x 19.3" x 2.20" (560mm x 490mm x 56mm).
- Electrical Wiring: The appliance must be connected to a dedicated 220-240V circuit. Refer to the wiring diagram provided in the packaging for correct connections.


Video 1: How to Wire. This video demonstrates the wiring process for an induction cooktop, showing how to connect the power cables to a circuit breaker. (Source: SoKuSyuDe, Seller)
5. Compatible Cookware
Induction cooktops require specific types of cookware. Ensure your pots and pans are made of magnetic materials and have flat bottoms for optimal performance.
- Compatible Materials: Cast iron, stainless steel (with a magnetic base), enameled cast iron, and iron woks.
- Incompatible Materials: Aluminum, ceramic, copper, and glass cookware are generally not suitable unless specifically designed for induction.
- Testing: To check compatibility, place a magnet on the bottom of your cookware. If it sticks firmly, the cookware is suitable for induction.


6. Operating Instructions
The Noxton Induction Cooktop offers precise control and various functions to enhance your cooking experience.
- Power On/Off: Press the power button to turn the cooktop on or off.
- Selecting a Burner: Touch the desired burner control to activate it.
- Adjusting Power Levels: Use the digital sensor touch slider or '+' and '-' buttons to select from 9 power levels (P1-P9) for different cooking needs like boiling, simmering, or frying.
- Boost Function: Press the 'B' key to activate the Power Boost function for rapid heating on a selected burner (up to 2500W for 5 minutes).
- Flex Zone: The two left burners can be combined to form a larger cooking area for oversized cookware.
- Timer Function: Set the timer for up to 99 minutes. The cooktop can be programmed to turn off automatically after the set time.
- Child Safety Lock: Press and hold the child lock button to prevent accidental changes to settings or activation.


7. Maintenance and Cleaning
Maintaining your Noxton Induction Cooktop is simple due to its smooth glass ceramic surface.
- Daily Cleaning: Wipe the surface with a soft cloth and mild detergent after each use. Ensure the cooktop is cool before cleaning.
- Stubborn Stains: For tougher stains, use a ceramic cooktop cleaner and a non-abrasive pad. A scraper may be used for burnt-on residue.
- Avoid Abrasives: Do not use abrasive cleaners, scouring pads, or harsh chemicals, as these can scratch or damage the glass surface.


8. Troubleshooting
If you encounter issues with your cooktop, refer to the following common troubleshooting tips. For persistent problems, contact customer support.
- Cooktop Not Turning On: Ensure the cooktop is properly connected to the power supply and the circuit breaker is not tripped. Check if the child safety lock is activated.
- No Heat from Burner: Verify that compatible cookware is being used and is correctly centered on the cooking zone.
- Error Codes: Consult the full user manual for a list of specific error codes and their solutions.
- Unusual Noises: A slight humming or buzzing sound is normal during induction cooking, especially at higher power settings, due to the electromagnetic field.
9. Specifications
| Brand | NOXTON |
| Model Number | NTI-B47221-F1 |
| Product Dimensions | 19.3 x 22.05 x 2.2 inches (590mm x 520mm x 56mm) |
| Cut-out Dimensions | 22.05" x 19.3" x 2.20" (560mm x 490mm x 56mm) |
| Item Weight | 22.5 pounds |
| Heating Elements | 4 |
| Power Source | Electric |
| Voltage | 220-240V |
| Wattage | 7200W |
| Heater Surface Material | Glass Ceramic |
| Color | Black |
| Special Features | 99 Mins Timer, Boost Function, Built-in Install, Child Safety Lock, Flex Zone |
10. Warranty and Support
For warranty information, product support, or service inquiries, please refer to the documentation included with your purchase or contact Noxton customer service directly. Keep your purchase receipt as proof of purchase.