Introduction
This manual provides detailed instructions for the safe and effective use of your FPBIGCHA HD-MG21 Miter Gauge. Please read this manual thoroughly before assembly, operation, or maintenance. Keep this manual for future reference.
Product Overview
The FPBIGCHA HD-MG21 Miter Gauge is designed to provide precise angle adjustments for cutting operations on table saws and router tables. It features an extended fence and a protractor-style miter head for accurate and repeatable cuts.
Key Features:
- Precision Angle Adjustment: The miter head allows for angle settings from 0 to 70 degrees.
- Extended Fence: An 850mm fence provides support for larger workpieces.
- Flip Stop: Integrated flip stop for consistent, repetitive cuts.
- Dual Scale: Metric and imperial scales for versatile measurements.
- Durable Construction: Made from heavy-gauge aluminum and steel for longevity.
- Adjustable Fit: Designed for an ideal fit within standard miter slots.
Components

Figure 1: Main components of the HD-MG21 Miter Gauge, showing the miter head assembly and the extended fence.
The HD-MG21 Miter Gauge consists of two primary parts: the miter head assembly and the extended fence. The miter head assembly includes the protractor, angle locking mechanism, and the bar that slides into the miter slot. The extended fence attaches to the miter head and features measurement scales and a flip stop.
Safety Information
Always follow general workshop safety practices when using this miter gauge with power tools. Failure to do so may result in serious injury or damage to the product.
- Always wear appropriate personal protective equipment (PPE), including safety glasses, hearing protection, and dust masks.
- Ensure the miter gauge is securely installed in the miter slot before operation.
- Keep hands clear of the cutting path of the saw blade or router bit.
- Never force the workpiece through the cut.
- Disconnect power tools from the power source before making any adjustments or maintenance.
- Keep the work area clean and well-lit.
- Do not operate the miter gauge if any parts are damaged or missing.
Setup
Unpacking and Inspection
Carefully remove all components from the packaging. Inspect all parts for any signs of damage during shipping. If any parts are damaged or missing, do not proceed with assembly or operation. Contact customer support immediately.
Assembly Instructions
- Attach the Extended Fence to the Miter Head: Align the mounting holes on the extended fence with the corresponding attachment points on the miter head assembly. Secure the fence using the provided fasteners. Ensure all connections are tight.
- Adjusting for Miter Slot Fit: The miter gauge bar is designed to fit snugly into standard miter slots. If necessary, use the adjustment screws on the side of the miter bar to expand or contract it slightly for an ideal, wobble-free fit.
- Setting Perpendicularity: The miter gauge face can be set perpendicular to the table surface. Use the adjustment screw located on the miter head to fine-tune this setting.

Figure 2: The miter gauge fully assembled with the extended fence attached.
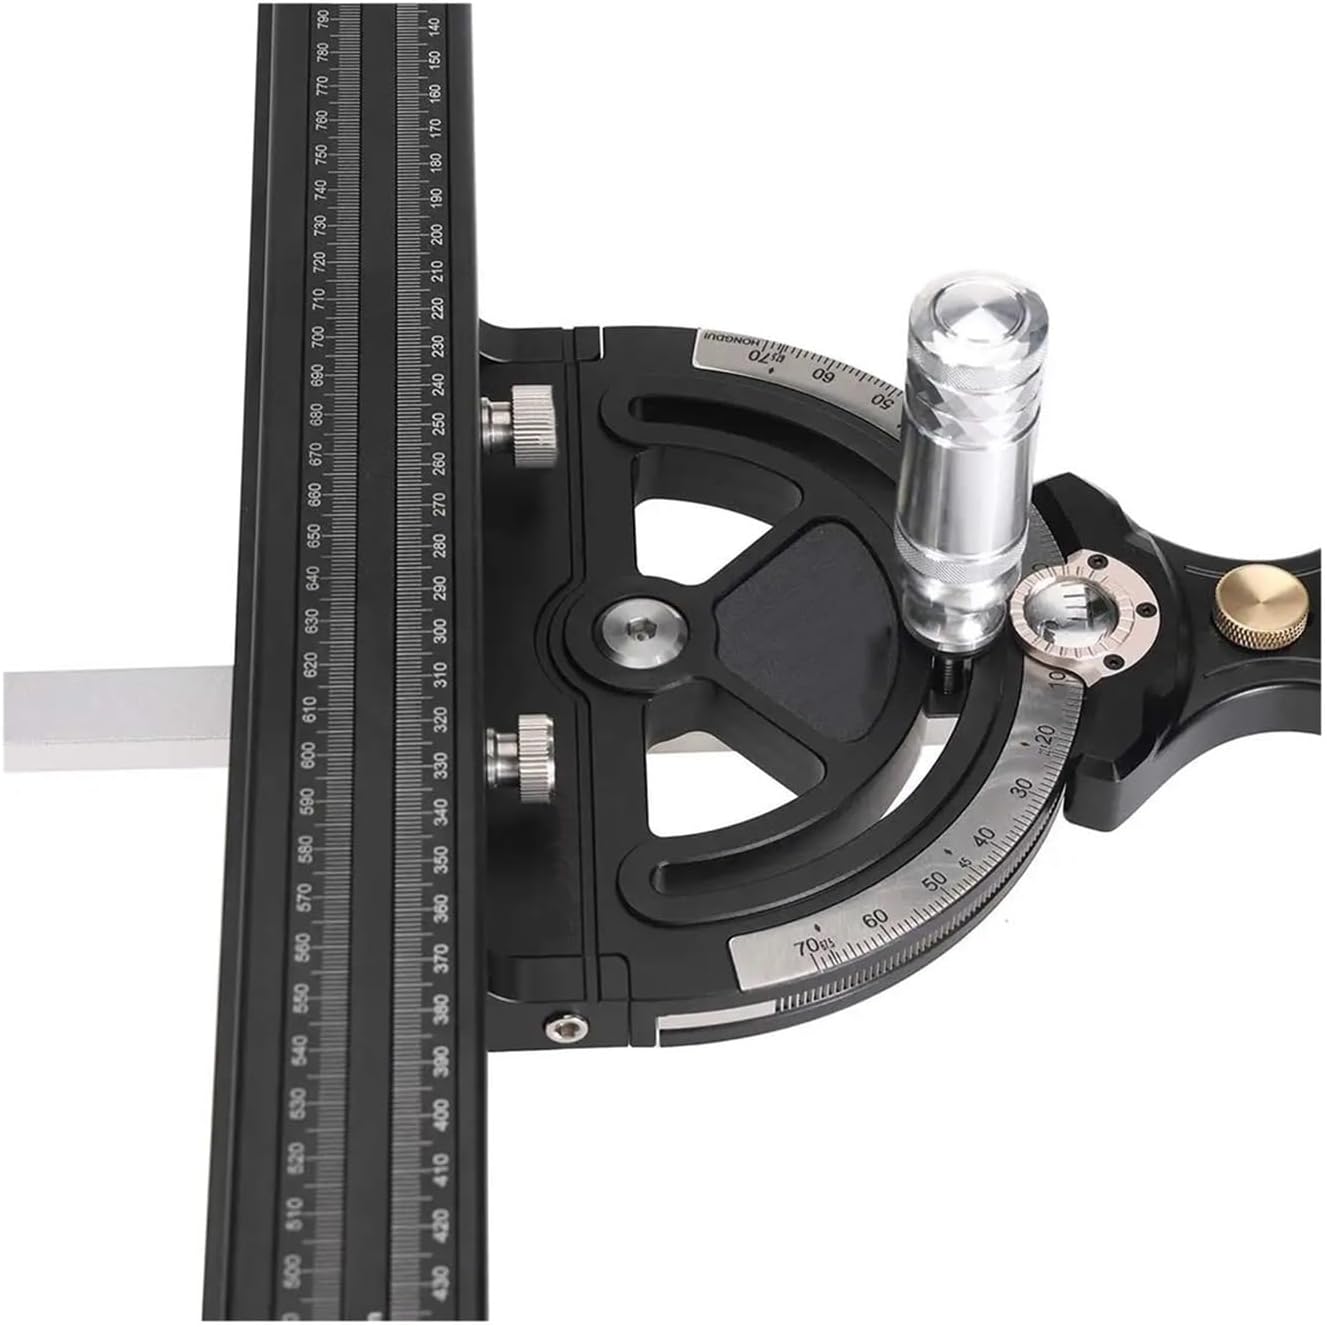
Figure 3: Detail of the angle scale and locking mechanism on the miter gauge head.
Operating Instructions
Setting the Angle
- Loosen the locking knob on the miter head assembly.
- Rotate the miter head to the desired angle, indicated by the protractor scale (0-70 degrees). The spring-loaded pin can assist in quickly setting common angles.
- Once the desired angle is set, tighten the locking knob firmly to secure the miter head in position.
Using the Extended Fence and Flip Stop
- Slide the miter gauge into the miter slot of your table saw or router table.
- Position the workpiece against the extended fence.
- For repetitive cuts, adjust the flip stop to the desired length measurement on the fence's scale (metric or imperial). Lock the flip stop in place.
- Ensure the workpiece is held firmly against the fence and the table surface before making a cut.

Figure 4: The extended fence showing the dual measurement scales and the adjustable flip stop.
Maintenance
- Cleaning: After each use, wipe down the miter gauge with a clean, dry cloth to remove sawdust and debris. Avoid using harsh chemicals that could damage the finish or scales.
- Lubrication: Periodically apply a light coat of dry lubricant to the miter bar to ensure smooth sliding in the miter slot.
- Inspection: Regularly inspect all fasteners and moving parts for tightness and wear. Tighten any loose screws. Replace any worn or damaged components immediately.
- Storage: Store the miter gauge in a clean, dry environment to prevent rust and corrosion.
Troubleshooting
Issue: Miter gauge wobbles in the miter slot.
Solution: Adjust the expansion screws on the side of the miter bar. Loosen the screws slightly to expand the bar for a tighter fit, or tighten them to contract it if it's too snug. Test the fit until it slides smoothly without excessive play.
Issue: Angle cuts are not accurate.
Solution:
- Ensure the locking knob for the angle setting is tightened securely after adjustment.
- Verify that the miter gauge face is perpendicular to the table surface. Adjust using the dedicated screw if necessary.
- Check your saw blade or router bit for squareness and proper alignment.
- Ensure the workpiece is held firmly against the fence and the table during the cut.
Issue: Flip stop does not hold position.
Solution: Check the locking mechanism of the flip stop. Ensure it is tightened properly. If the mechanism is worn, contact customer support for replacement parts.
Specifications
| Feature | Specification |
|---|---|
| Model Number | HD-MG21 |
| Material | Aluminum, Steel |
| Angle Range | 0-70 degrees |
| Fence Length | 850 mm |
| Scales | Metric and Imperial |
| Item Weight | 11.02 pounds (approx. 5 kg) |
| Package Dimensions | 1.18 x 0.79 x 0.39 inches |
| Manufacturer | FPBIGCHA |

Figure 5: Technical drawing illustrating key dimensions of the extended fence component.
Warranty and Support
For warranty information or technical support, please refer to the contact details provided with your purchase or visit the official FPBIGCHA website. Keep your purchase receipt as proof of purchase for warranty claims.