1. Introduction
This manual provides detailed instructions for the installation, operation, maintenance, and troubleshooting of your new ICECASA Commercial Ice Maker Machine. Please read this manual thoroughly before operating the appliance to ensure safe and efficient use. Keep this manual for future reference.
2. Safety Information
WARNING: To reduce the risk of fire, electric shock, or injury, observe the following basic precautions:
- Ensure the unit is properly grounded.
- Do not operate the machine with a damaged cord or plug.
- Do not allow children to operate or play near the ice maker.
- Disconnect power before cleaning or performing any maintenance.
- Use only potable water for ice production.
- Maintain proper ventilation around the unit.
3. Product Overview
The ICECASA Commercial Ice Maker Machine is designed for high-volume ice production in commercial environments. It features a robust stainless steel construction and an intelligent digital control panel.
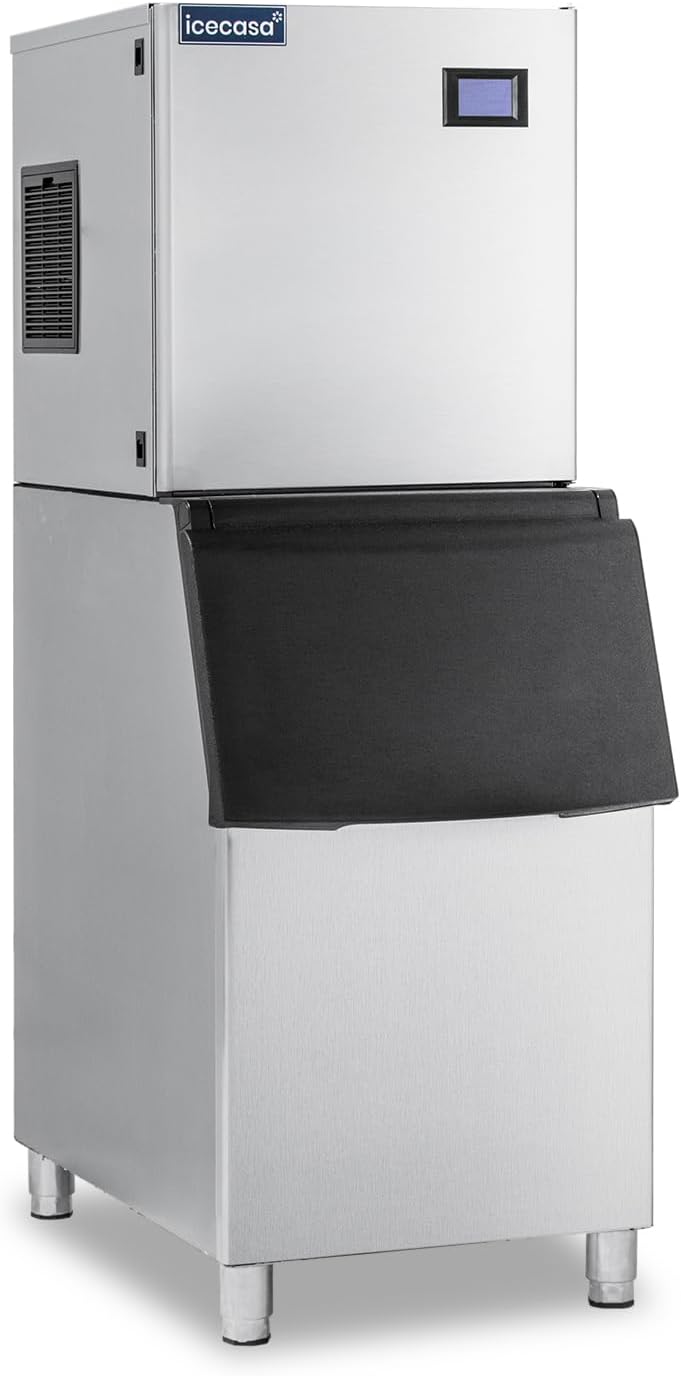
Figure 3.1: Front view of the ICECASA Commercial Ice Maker Machine.

Figure 3.2: Dimensions and included accessories such as ice scoop, adjustable feet, inlet hose with filter, filter wrench, and water dividing pipe.
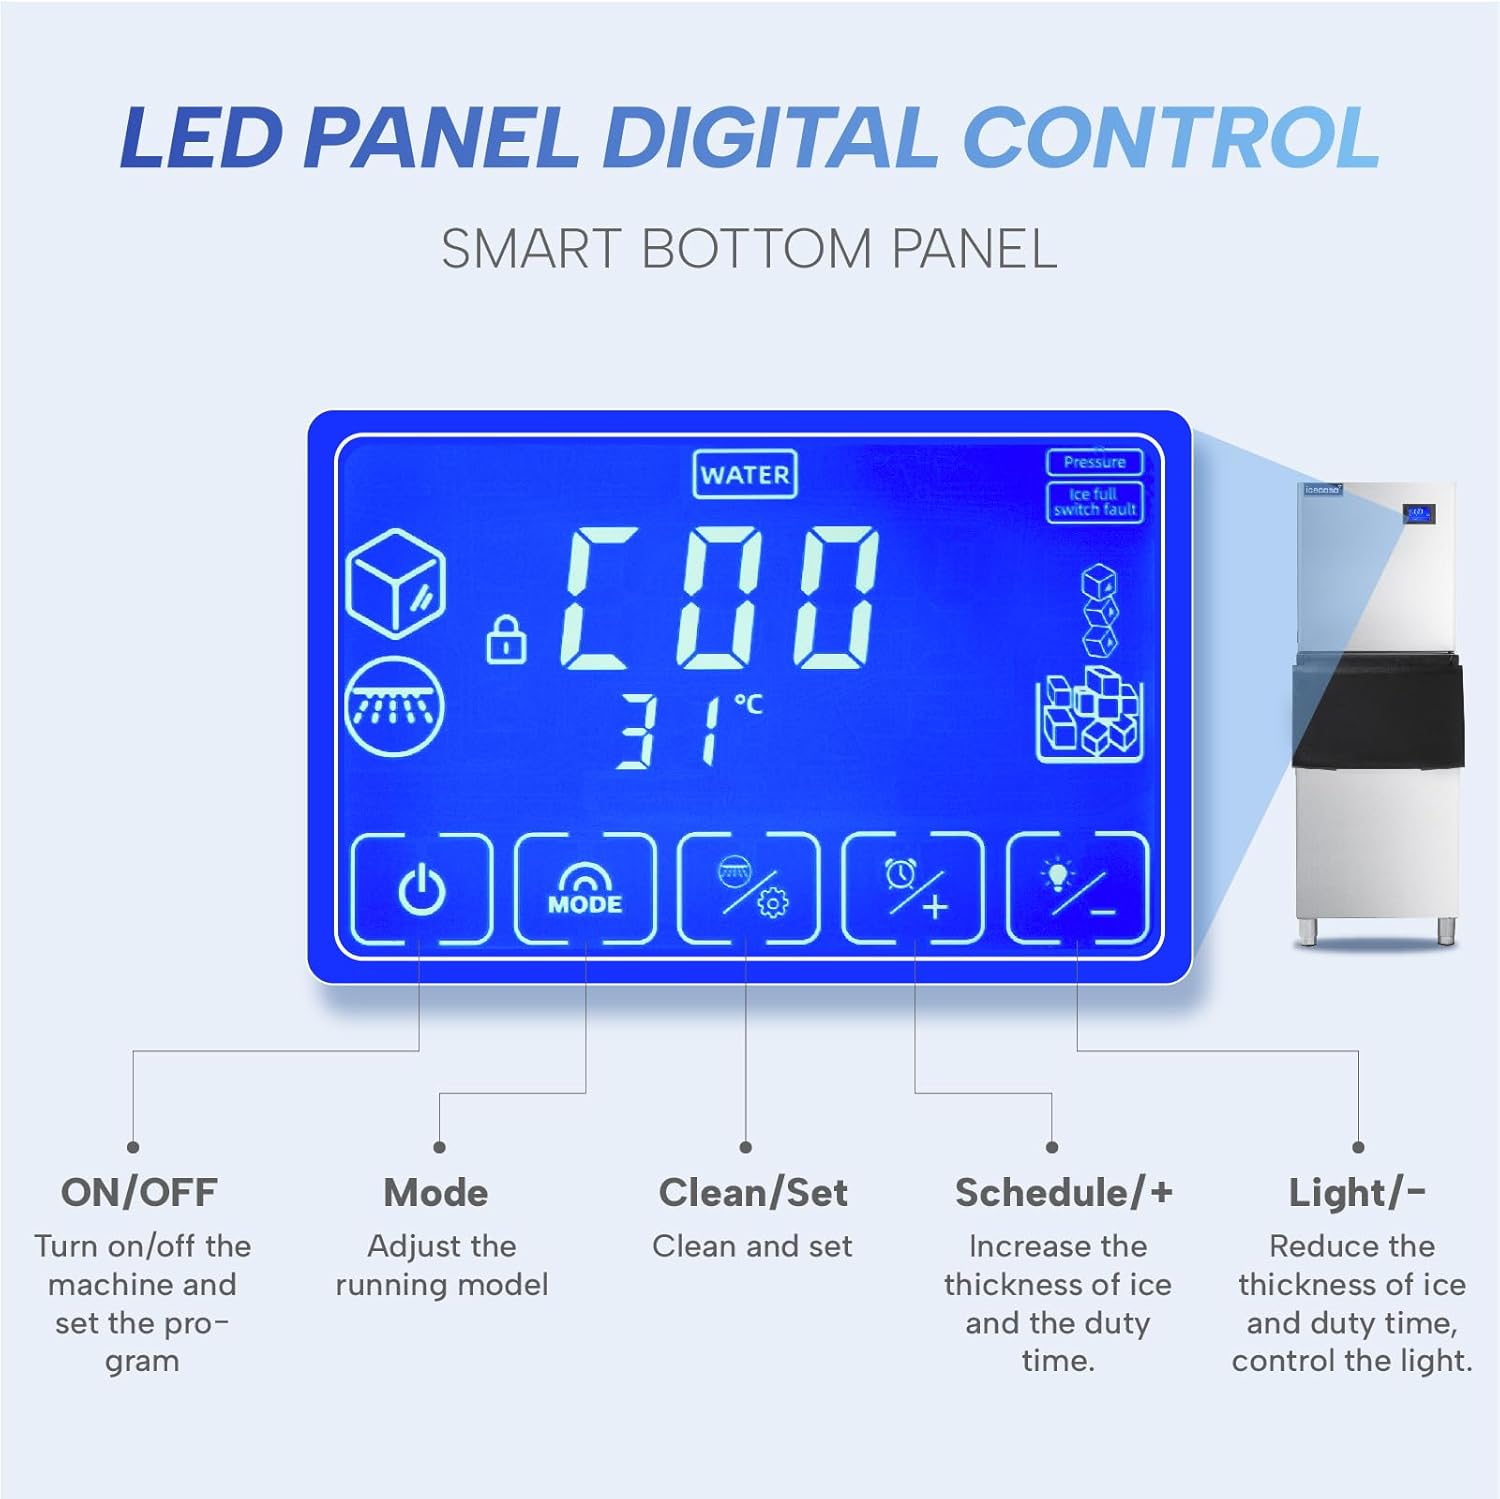
Figure 3.3: Close-up of the LED digital control panel, showing ON/OFF, Mode, Clean/Set, Schedule/+, and Light/- buttons.
Key Features:
- High Ice Production: Produces up to 350 pounds of ice per 24 hours.
- Large Storage Capacity: Integrated bin stores up to 220 pounds of ice.
- Digital Control Panel: LCD display for easy adjustment of ice-making time and thickness.
- Intelligent Voice Failure System: Provides alerts and statements for operational issues.
- Durable Construction: Made from stainless steel with a polyethylene interior.
- Adjustable Ice Thickness: Allows for customization of ice cube size.
- Self-Cleaning Function: Simplifies maintenance and ensures hygiene.
4. Setup and Installation
Proper installation is crucial for the performance and longevity of your ice maker. It is recommended that installation be performed by a qualified technician.
4.1 Unpacking
- Carefully remove the ice maker from its packaging.
- Inspect the unit for any shipping damage. Report any damage immediately to your supplier.
- Remove all packing materials, tapes, and protective films from the unit.
- Ensure all included accessories (ice scoop, adjustable feet, inlet hose with filter, filter wrench, water dividing pipe) are present.
4.2 Location Requirements
- Place the ice maker on a flat, stable surface capable of supporting its weight (approximately 202 lbs).
- Ensure adequate clearance around the unit for proper ventilation (minimum 6 inches on sides and rear).
- Avoid direct sunlight or heat sources.
- The ambient temperature should be between 50°F (10°C) and 90°F (32°C).
- Ensure access to a grounded electrical outlet (115V/60Hz).
- Locate near a potable water supply with adequate pressure and a drain for wastewater.
4.3 Water Connection

Figure 4.1: Diagram showing the automatic water inlet and outlet with the integrated filter system.
- Connect the provided inlet hose with filter to a potable water supply.
- Connect the other end of the inlet hose to the water inlet port on the ice maker.
- Connect the drain hose to the unit's drain outlet and route it to a suitable floor drain or standpipe. Ensure proper slope for drainage.
- Turn on the water supply and check for leaks.
4.4 Electrical Connection
- Plug the power cord into a dedicated, grounded 115V/60Hz electrical outlet.
- Do not use extension cords or adapter plugs.
5. Operating Instructions
5.1 Initial Startup
- After connecting water and power, press the ON/OFF button on the digital control panel to turn on the machine.
- The machine will initiate a self-check and begin the ice-making cycle.
- The first few batches of ice may be smaller or irregular. Discard these initial batches.
5.2 Digital Control Panel Functions
- ON/OFF: Powers the unit on or off.
- Mode: Selects different operating modes (e.g., ice making, cleaning).
- Clean/Set: Initiates the cleaning cycle or confirms settings.
- Schedule/+: Increases ice thickness or sets a timer for operation.
- Light/-: Decreases ice thickness or controls the internal light.
5.3 Adjusting Ice Thickness
Use the Schedule/+ and Light/- buttons to adjust the thickness of the ice cubes. Thicker ice takes longer to produce. The standard ice cube size is approximately 0.9"x0.9"x0.9".
5.4 Ice Production Cycle
The ice maker produces ice in cycles, typically lasting 15-20 minutes, depending on the selected ice thickness and ambient conditions. Ice is automatically dropped into the storage bin once formed.

Figure 5.1: Illustration of ice storage capacity (220 lbs) and ice output cycle (15-20 minutes).
6. Maintenance
Regular maintenance ensures optimal performance and extends the lifespan of your ice maker.
6.1 Daily Maintenance
- Wipe down the exterior with a soft, damp cloth.
- Ensure the ice scoop is clean and stored hygienically.
6.2 Weekly Maintenance
- Clean the ice storage bin with a mild detergent and warm water. Rinse thoroughly.
- Check the water filter for visible debris. Replace if necessary.
6.3 Monthly Maintenance (or as needed)
- Self-Cleaning Cycle: Use the Clean/Set button to initiate the automatic self-cleaning cycle. Follow the instructions on the display.
- Clean the condenser coils. Disconnect power, then use a soft brush or vacuum cleaner to remove dust and lint from the condenser fins.
- Inspect water lines and drain lines for blockages or leaks.
6.4 Long-Term Storage
- Turn off the unit and disconnect power.
- Drain all water from the system.
- Clean the interior and exterior thoroughly.
- Store in a dry, well-ventilated area.
7. Troubleshooting
Before contacting customer service, please refer to the following common issues and their solutions.
| Problem | Possible Cause | Solution |
|---|---|---|
| No ice production | No power; Water supply off; Clogged water filter; High ambient temperature | Check power connection; Turn on water supply; Replace water filter; Ensure proper ventilation |
| Ice is too thin/thick | Incorrect thickness setting | Adjust ice thickness using the control panel |
| Machine is noisy | Unit not level; Loose components; Dirty condenser | Adjust leveling feet; Check for loose parts; Clean condenser coils |
| Water leakage | Loose water connections; Clogged drain line | Tighten connections; Clear drain line |
| Error code on display | Specific system malfunction | Refer to the intelligent voice failure system for details or contact support |
8. Specifications

Figure 8.1: Technical data overview including model, output, bin capacity, and dimensions.
| Attribute | Value |
|---|---|
| Brand | ICECASA |
| Model Name | ICE-350P |
| Ice Production Capacity | 350 lbs / 24 hours |
| Ice Storage Capacity | 220 lbs |
| Product Dimensions (D x W x H) | 23.2" x 22.3" x 63.9" |
| Item Weight | 202 pounds |
| Material | Stainless Steel |
| Refrigerant | R404a |
| Voltage | 115V/60Hz |
| Power | 740W |
| Condenser Unit | Air Cooling |
| Ice Cube Size | 0.9" x 0.9" x 0.9" (adjustable thickness) |
| Ice Output Cycle | 15-20 Minutes |
| Included Components | Ice machine, ice scoop, adjustable feet, inlet hose with filter, filter wrench, water dividing pipe |
9. Warranty and Support
ICECASA is committed to providing excellent after-sales service.
9.1 Warranty Information
- Product Service Life: Up to ten years.
- Free On-Site Maintenance Service: Two years.
- Free Compressor Maintenance Service: Six years.

Figure 9.1: Overview of ICECASA's after-sales service, including 24-hour response and onsite technician service.
9.2 Customer Support
If you have any questions, suggestions, or require technical assistance, please do not hesitate to contact ICECASA customer support. We aim to reply within 12 hours.
For the most up-to-date contact information, please visit the official ICECASA website or refer to your purchase documentation.


