1. Introduction
This manual provides essential information for the safe and efficient operation, maintenance, and troubleshooting of your SUNMAX RT15+ Commercial Compact Floor Scrubber Dryer Machine. Please read this manual thoroughly before operating the machine to ensure proper usage and to maximize its lifespan.
The SUNMAX RT15+ is designed for efficient cleaning of various hard floor surfaces in commercial and industrial environments.
2. Safety Information
Always adhere to the following safety guidelines to prevent injury and damage to the machine:
- Read all instructions before use.
- Ensure the machine is turned off and unplugged before performing any maintenance or cleaning.
- Do not operate the machine in hazardous environments or near flammable liquids.
- Keep hands, feet, and loose clothing away from moving parts.
- Use only recommended cleaning solutions and parts.
- Store the machine in a dry, secure location.
- This machine is intended for commercial use by trained personnel.
3. Product Overview and Components
Familiarize yourself with the main components of your SUNMAX RT15+ scrubber dryer.

Figure 3.1: Overview of the SUNMAX RT15+ Scrubber Dryer and Included Components.
This image displays the complete SUNMAX RT15+ unit along with its key accessories: the main scrubber body, the detachable solution and sewage tanks, the ergonomic handle with control panel, the cleaning brush, the squeegee assembly, the lithium battery, and the battery charger. These components are essential for the machine's operation and maintenance.

Figure 3.2: Key Features and Dimensions of the RT15+ Scrubber Dryer.
This image provides a labeled diagram of the RT15+ machine, pointing out its main functional parts. It shows the 3-gallon solution tank and 4-gallon sewage tank, both detachable for easy filling and emptying. The image also highlights the 14-inch brush cleaning width and 17.8-inch squeegee width, along with the handle and the integrated display screen/operation panel for user control.

Figure 3.3: Control Panel Detail.
This image shows a detailed view of the machine's control panel, located on the handle. It features a display screen for real-time status updates, a key ignition for power, and buttons to control the brush, vacuum, and water flow functions. This panel allows operators to monitor and adjust the machine's settings during operation.
4. Setup
4.1 Unpacking and Assembly
- Carefully remove all components from the packaging.
- Attach the handle assembly to the main unit, ensuring all connections are secure.
- Install the brush or pad driver onto the brush deck. Refer to Figure 4.1 for brush installation.
- Attach the squeegee assembly to the rear of the machine.

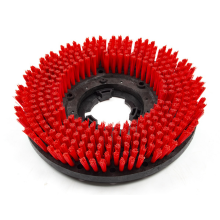
Figure 4.1: Included Brushes and Pad Driver.
This image shows the heavy-duty disc brush plate and the pad driver with burnishing pads, which are included components for the RT15+. These are interchangeable and attach to the machine's brush deck for different cleaning tasks.
4.2 Battery Charging
The RT15+ is equipped with a 24V/52Ah maintenance-free lithium battery. Fully charge the battery before first use.
- Connect the charger to the battery pack.
- Plug the charger into a standard electrical outlet.
- Charging typically takes 3.5 hours for a full charge. The charger will indicate when charging is complete.
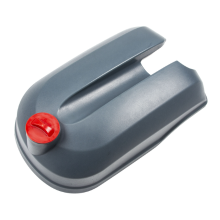
Figure 4.2: Battery and Charger.
This image displays the 24V/52Ah lithium battery pack and its corresponding charger. The battery provides power for up to 2.5 hours of continuous operation, and the charger is used to replenish its power, taking approximately 3.5 hours for a full charge.
4.3 Filling Tanks
- Solution Tank: Fill the 3-gallon solution tank with clean water and an appropriate, low-foaming cleaning solution. Do not overfill.
- Sewage Tank: Ensure the 4-gallon sewage tank is empty before starting operation.
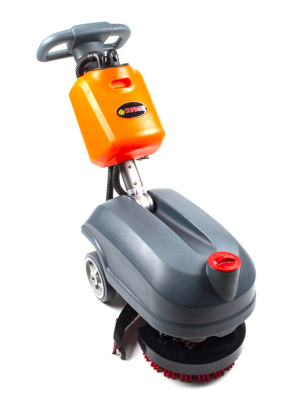
Figure 4.3: Detachable Sewage Tank.
This image shows the detachable orange sewage tank, which has a 4-gallon capacity. This tank collects the dirty water and cleaning solution after scrubbing, and its detachable design facilitates easy emptying and cleaning.
5. Operating Instructions
5.1 Starting the Machine
- Insert the key into the ignition on the control panel and turn it to the ON position.
- The LCD screen will illuminate, displaying battery status, water levels, and operational modes.
5.2 Cleaning Operation
- Press the brush button to engage the cleaning brush.
- Press the water button to dispense cleaning solution onto the floor.
- Press the vacuum button to activate the squeegee and suction, collecting dirty water.
- Push the machine forward at a steady pace, allowing the brush to scrub and the squeegee to dry the floor.
- Adjust the handle height for comfortable operation using the adjustable handle feature.

Figure 5.1: Suitable Floor Types for RT15+ Operation.
This image illustrates the versatility of the SUNMAX RT15+ scrubber dryer, showcasing its applicability on a wide range of hard floor surfaces. These include tile, concrete, vinyl, marble, terrazzo, linoleum, rubber, laminate, epoxy, and sealed hardwood floors, making it suitable for diverse commercial environments.
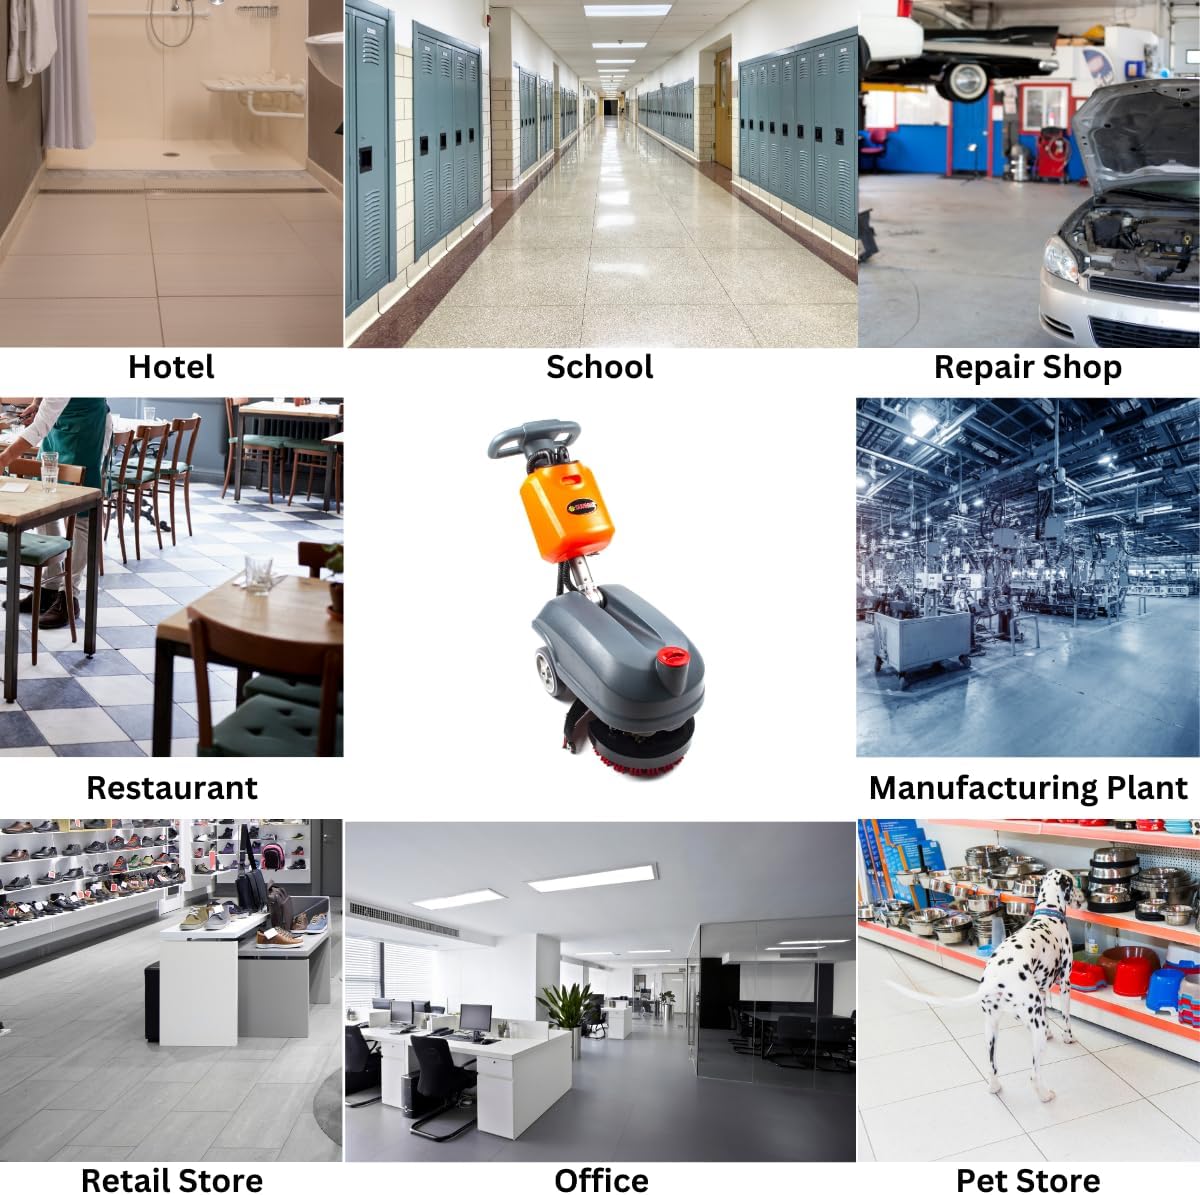
Figure 5.2: Commercial Applications of the RT15+ Scrubber Dryer.
This image demonstrates the broad utility of the RT15+ scrubber dryer across various commercial settings. Examples include hotels, schools, repair shops, restaurants, manufacturing plants, retail stores, offices, and pet stores, highlighting its adaptability for different cleaning needs.
5.3 Stopping the Machine
- Release the brush, water, and vacuum buttons.
- Turn the key to the OFF position and remove it.
6. Maintenance
6.1 After Each Use
- Empty and rinse the sewage tank thoroughly.
- Rinse the solution tank if cleaning solution was used.
- Clean the squeegee blades and check for wear. Replace if necessary.
- Remove and clean the brush or pad driver.
- Wipe down the exterior of the machine with a damp cloth.
6.2 Battery Care
- Recharge the battery after each use to prolong its lifespan.
- Do not allow the battery to fully discharge frequently.
- Store the machine with a charged battery in a cool, dry place.
6.3 Long-Term Storage
- Ensure both tanks are empty and clean.
- Fully charge the battery.
- Store the machine in an upright position in a dry, temperature-controlled environment.
7. Troubleshooting
| Problem | Possible Cause | Solution |
|---|---|---|
| Machine does not turn on. | Battery discharged; Key not inserted/turned; Loose battery connection. | Charge battery; Insert and turn key; Check battery connections. |
| Brush not rotating. | Brush button not pressed; Obstruction in brush; Motor issue. | Press brush button; Remove obstruction; Contact support. |
| No water dispensing. | Solution tank empty; Water button not pressed; Clogged nozzle. | Fill solution tank; Press water button; Clean nozzle. |
| Poor water recovery (floor remains wet). | Sewage tank full; Squeegee blades worn/damaged; Vacuum motor issue; Suction hose clogged. | Empty sewage tank; Replace squeegee blades; Check suction hose for clogs; Contact support. |
8. Specifications
| Feature | Detail |
|---|---|
| Brand | SUNMAX |
| Model | RT15+ |
| Cleaning Width | 14 inches |
| Squeegee Width | 17.8 inches |
| Working Efficiency | Up to 14,500 sqft/h |
| Solution Tank Capacity | 3 gallons |
| Sewage Tank Capacity | 4 gallons |
| Battery Type | 24V/52Ah Maintenance-free Lithium Battery |
| Run Time | Up to 2.5 hours |
| Charging Time | 3.5 hours |
| Brush Motor Power | 0.6 HP (500W) |
| Brush Speed | 180 RPM |
| Working Noise | 65 dB |
| Net Weight | 122 pounds |
| Dimensions (L x W x H) | 27.5" L x 18" W x 41.3" H |
| Housing Material | Rotationally molded polyethylene |
| UPC | 810165520189 |

Figure 8.1: RT15+ Dimensions.
This image provides a clear front view of the SUNMAX RT15+ scrubber dryer with its key dimensions indicated. The machine measures 27.5 inches in length, 18 inches in width, and 41.3 inches in height, illustrating its compact design for maneuverability.
9. Warranty and Support
For warranty information, please refer to the documentation included with your purchase or contact SUNMAX customer service directly. SUNMAX provides customer support for product inquiries, technical assistance, and parts replacement.
Customer Support: For assistance, please visit the official SUNMAX website or contact their customer service department. Refer to your purchase receipt for specific contact details.
The manufacturer, SUNMAX, is committed to providing quality products and support. If you experience any issues, please reach out to them for prompt assistance.


