Introduction
Welcome to the SSIMDER Plastic Welding Torch instruction manual. This guide provides essential information for the safe and effective operation, maintenance, and troubleshooting of your plastic welding torch, designed for seamless compatibility with the SSIMDER ARC-120M Welder. Please read this manual thoroughly before using the product.
Safety Information
Always prioritize safety when operating welding equipment. Failure to follow safety guidelines can result in serious injury or damage to property.
- Eye Protection: Always wear appropriate eye protection, such as welding goggles or a helmet, to shield against sparks and intense light.
- Hand Protection: Wear heat-resistant gloves to protect your hands from heat and potential burns.
- Ventilation: Ensure adequate ventilation in your workspace to disperse fumes.
- Electrical Safety: Never operate the welder or torch with wet hands or in damp conditions. Ensure all electrical connections are secure and undamaged.
- Heat Hazards: The torch prongs and staples become extremely hot during operation. Avoid touching them directly. Allow components to cool before handling.
- Flammable Materials: Keep flammable materials away from the work area.
- Children and Bystanders: Keep children and unauthorized persons away from the operating area.
Product Overview
The SSIMDER Plastic Welding Torch is an accessory designed to extend the functionality of your SSIMDER ARC-120M Welder by enabling plastic repair capabilities. It features rapid heating and is suitable for various plastic materials, providing a strong and durable repair solution.

Figure 1: The SSIMDER Plastic Welding Torch, a handheld device with a red activation button and two metal prongs for hot stapling, connected via a cable to a standard welding connector.
Package Contents
Verify that all items are present in your package:
- Plastic Welding Gun for ARC-120M
Setup
Connecting the Plastic Welding Torch
Follow these steps to properly connect the plastic welding torch to your SSIMDER ARC-120M Welder:
- Power Off: Ensure the SSIMDER ARC-120M Welder is powered off and unplugged from the main power supply.
- Locate Socket: Identify the dedicated "Hot Staple" socket on the front panel of the ARC-120M welder.
- Align Connector: Align the multi-pin connector of the plastic welding torch cable with the "Hot Staple" socket.
- Secure Connection: Insert the connector firmly into the socket and twist it clockwise to secure the connection.
- Verify: Double-check that all connections are tight and secure before proceeding.

Figure 2: The SSIMDER ARC-120M welder with the plastic welding torch securely connected to the designated 'Hot Staple' socket on the front panel.
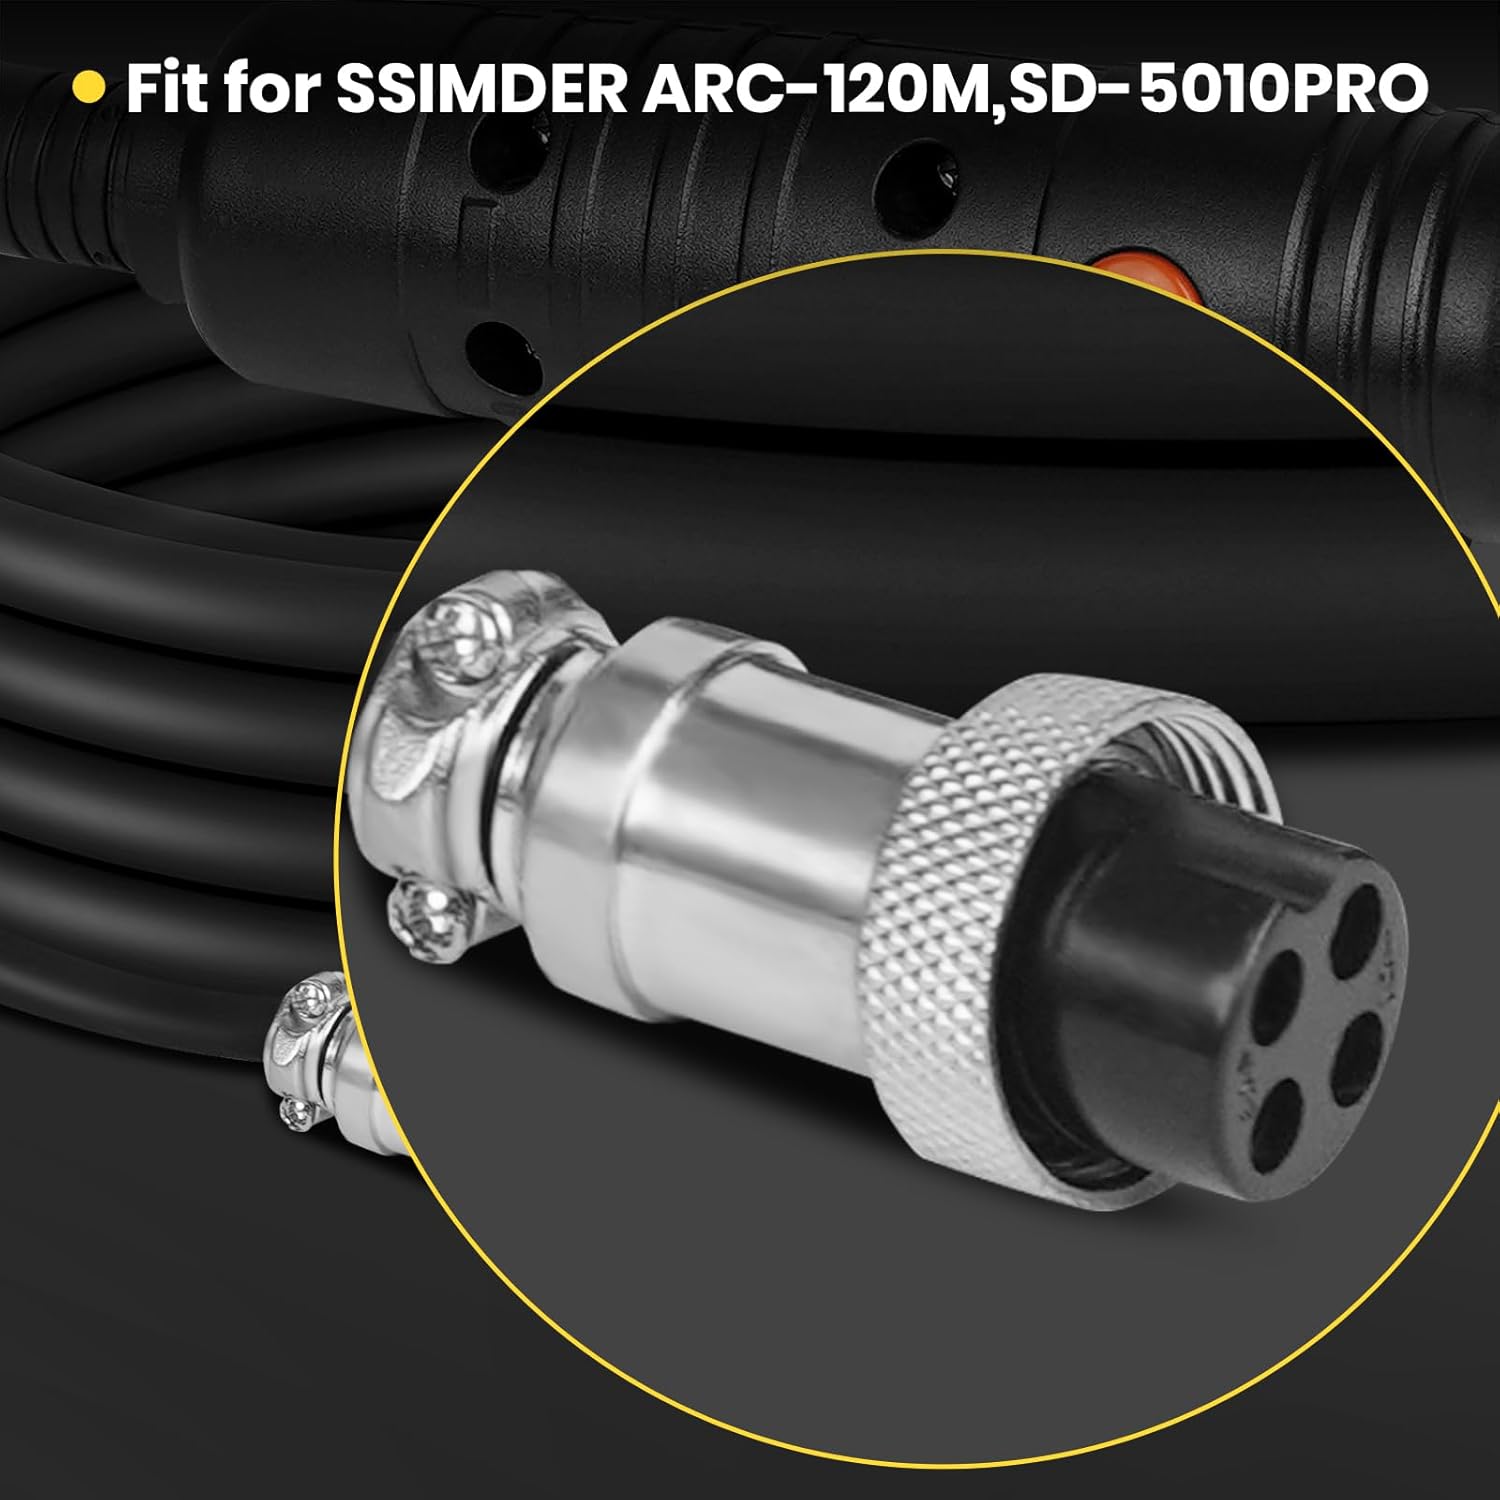
Figure 3: A detailed view of the multi-pin connector on the plastic welding torch cable, designed for compatibility with the SSIMDER ARC-120M and SD-5010PRO welders.
Operating Instructions
Plastic Welding (Hot Stapling)
The plastic welding torch utilizes hot stapler technology for repairing various plastic items. This method creates a strong, reinforced bond across cracks or breaks.
- Preparation: Clean the plastic surface to be repaired. Ensure the area is free of dirt, grease, or debris for optimal adhesion.
- Power On: Plug in and power on the SSIMDER ARC-120M Welder.
- Insert Staple: Select the appropriate hot staple for your repair and insert it into the two metal prongs of the plastic welding torch.
- Heat Up: Press and hold the red activation button on the torch. The torch will heat the staple rapidly, typically within 3 seconds. Observe the staple glowing red.
- Apply Staple: Once heated, carefully press the staple into the cracked or broken plastic. The heat will melt the plastic around the staple, allowing it to embed and create a strong, fused bond.
- Cool Down: Release the activation button and hold the staple in place for a few seconds to allow the plastic to cool and solidify around it.
- Remove Torch: Gently remove the torch, leaving the staple embedded in the plastic.
- Trim Excess: Use a pair of pliers or cutters to trim any excess staple material that protrudes from the plastic surface.
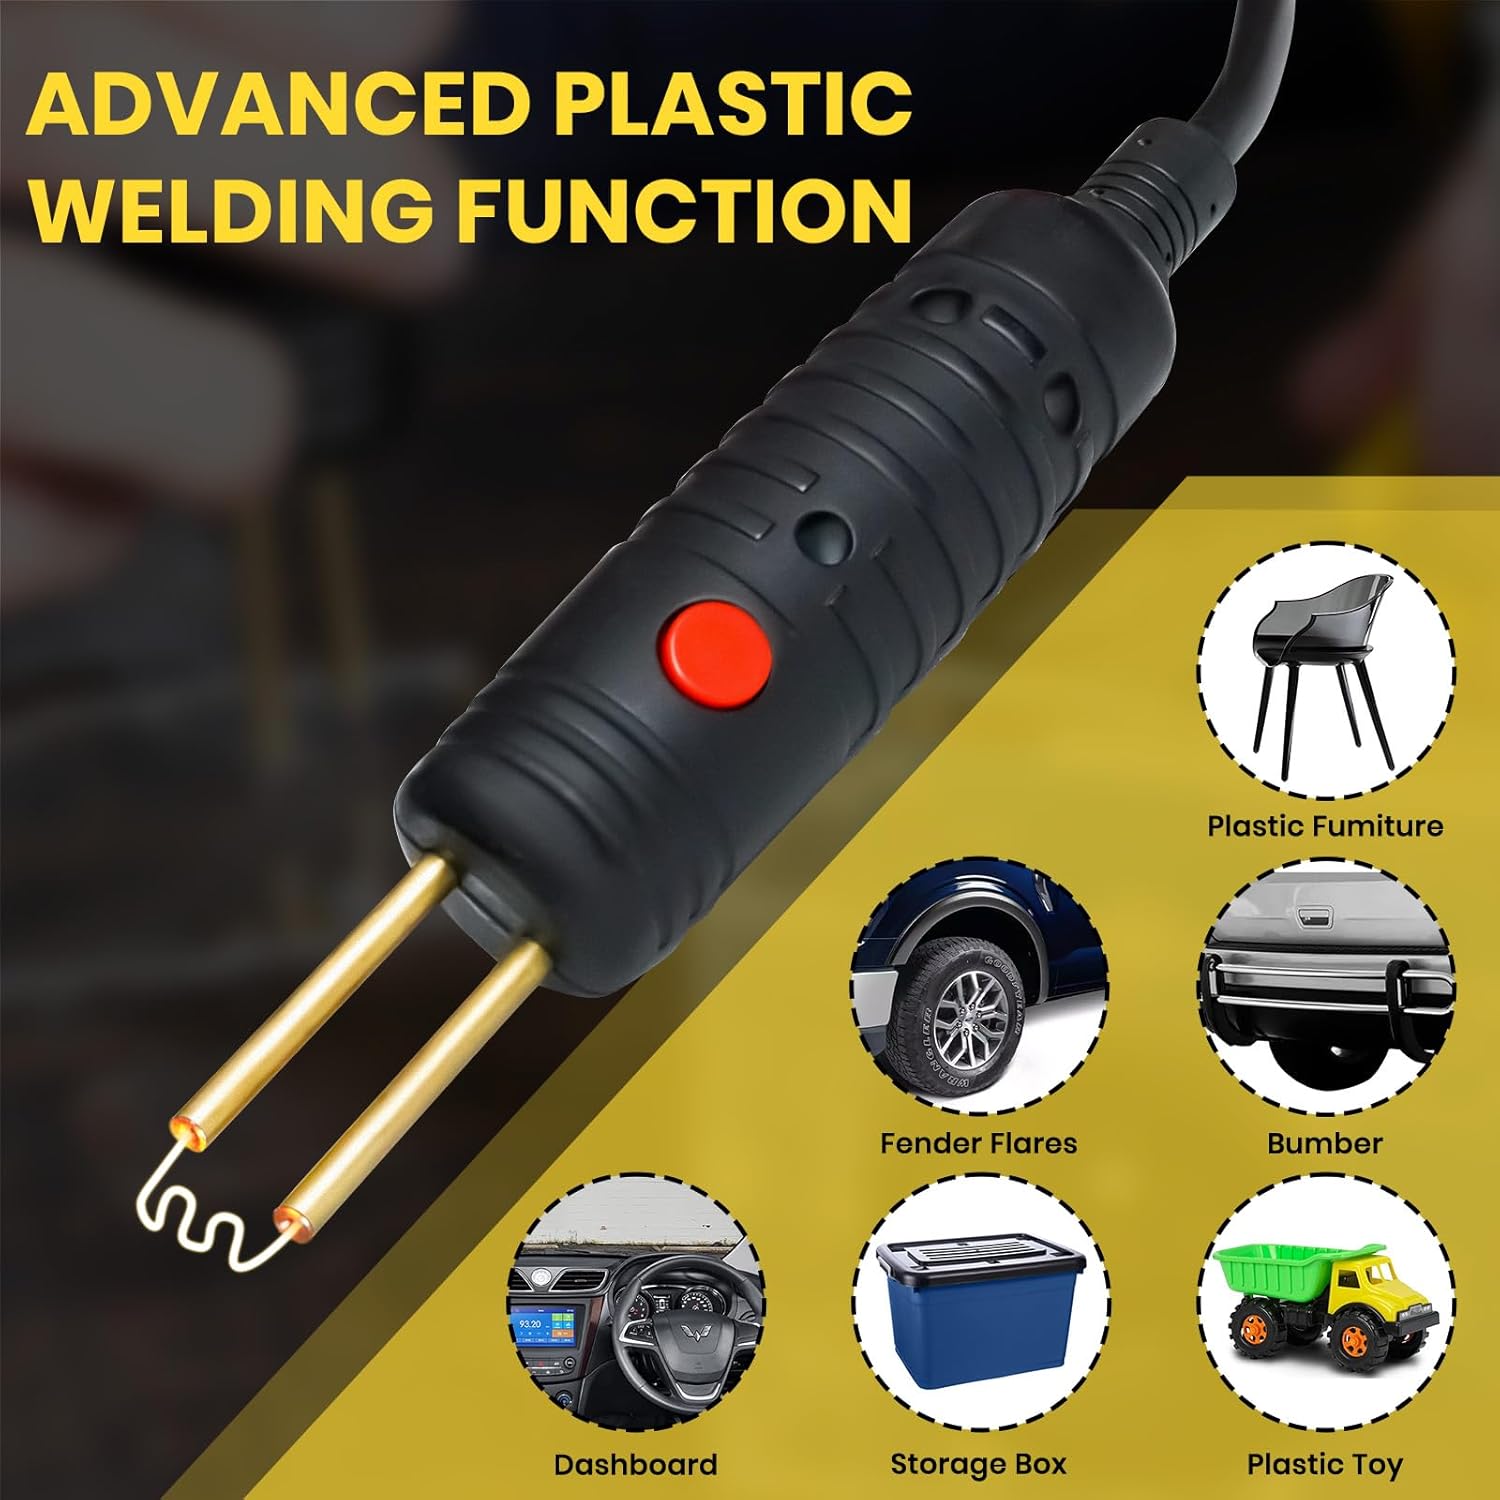
Figure 4: A user demonstrating the plastic welding torch, pressing a heated staple into a broken plastic piece to create a strong repair.
Video 1: This video demonstrates the SSIMDER plastic welder's capabilities, including the process of plastic welding using the hot stapler function.
General Applications
The plastic welding torch is versatile and suitable for repairing a wide range of plastic components. Common applications include:
- Automotive parts (e.g., bumpers, fender flares, dashboards)
- Plastic furniture
- Storage boxes and containers
- Plastic toys and household items

Figure 5: An illustrative image highlighting the wide range of applications for the plastic welding torch, from automotive parts to household items.
Stick Welding (ARC-120M Function)
While this manual focuses on the plastic welding torch, the SSIMDER ARC-120M Welder also supports stick welding. For detailed instructions on stick welding, please refer to the ARC-120M's primary instruction manual. The following video provides a brief overview of the ARC-120M's stick welding capabilities.
Video 2: This video provides a demonstration of the SSIMDER ARC-120M's stick welding function, showcasing its performance for various metal joining tasks.
Maintenance
Proper maintenance ensures the longevity and optimal performance of your plastic welding torch.
- Cleaning: After each use, ensure the torch is unplugged and cooled. Carefully clean the metal prongs to remove any melted plastic residue. A soft brush or cloth can be used.
- Storage: Store the plastic welding torch in a dry, clean, and safe environment, away from direct sunlight and extreme temperatures.
- Inspection: Periodically inspect the torch cable, connector, and prongs for any signs of wear, cuts, or damage. If any damage is observed, discontinue use immediately and contact customer support for assistance.
Troubleshooting
If you encounter issues with your plastic welding torch, refer to the following troubleshooting guide:
Torch Not Heating
- Check Welder Power: Ensure the SSIMDER ARC-120M Welder is powered on and functioning correctly.
- Secure Connection: Verify that the plastic welding torch connector is securely plugged into the "Hot Staple" socket on the ARC-120M.
- Activation Button: Confirm that the red activation button on the torch is being pressed firmly and continuously during the heating process.
Weak Plastic Weld
- Surface Preparation: Ensure the plastic surface is thoroughly cleaned and free of contaminants before applying the staple.
- Heating Time: Allow sufficient time (approximately 3 seconds) for the staple to heat up to the optimal temperature before pressing it into the plastic.
- Staple Selection: Use the appropriate size and type of hot staple for the specific plastic material and repair type.
Specifications
| Feature | Detail |
|---|---|
| Manufacturer | S SIMDER |
| Item Weight | 12.3 ounces |
| Package Dimensions | 7.68 x 3.7 x 2.91 inches |
| Item Model Number | Plastic Gun for 120M |
| Power Source | DC |
| Included Components | Plastic Welding Gun for ARC-120M |
Warranty and Support
For detailed warranty information, product registration, or technical support, please visit the official S SIMDER website or contact their customer service department. Retain your purchase receipt as proof of purchase for any warranty claims.
Website: S SIMDER Official Store