1. Introduction
The Hugmazing Cordless Electric Lunch Box is a portable, self-heating food warmer designed for convenience. This manual provides essential information for the safe and efficient use of your device, including setup, operation, maintenance, and troubleshooting.
2. Important Safety Instructions
- Do not immerse the main heating base in water or any other liquid. This can cause electric shock or damage to the unit.
- Use only the original power adapter provided with the lunch box for charging.
- Keep the device out of reach of children.
- Do not attempt to heat raw food directly in the lunch box. It is designed for warming pre-cooked meals.
- Ensure the lid of the stainless steel container is properly sealed to prevent leaks during transport and heating.
- Do not block the ventilation openings during operation.
- Unplug the device when not in use and before cleaning.
- If the power cord is damaged, it must be replaced by the manufacturer or a qualified service agent to avoid hazards.
3. Package Contents
Please check the package contents upon receipt to ensure all items are present:
- 1 x Cordless Electric Lunch Box (Main Unit)
- 1 x 1100ML Stainless Steel Container with Lid
- 1 x Insulated Carry Bag
- 1 x Power Adapter
- 1 x Spoon & Fork Set
- 1 x User Manual

Image: The Hugmazing Cordless Electric Lunch Box main unit shown with its insulated carry bag.

Image: A detailed view of all included components: the cordless electric lunch box, 1100ML stainless steel container, power cord, user manual, spoon, fork, and 9L carry bag.
4. Product Overview
4.1 Components
- Main Unit: Contains the heating element, battery, and control panel.
- Stainless Steel Container: 1100ML capacity for food, removable and dishwasher-safe.
- Lid: Seals the stainless steel container to prevent spills.
- Hidden Handle: Integrated into the main unit for easy portability.
- Charging Port: Located on the side of the main unit.
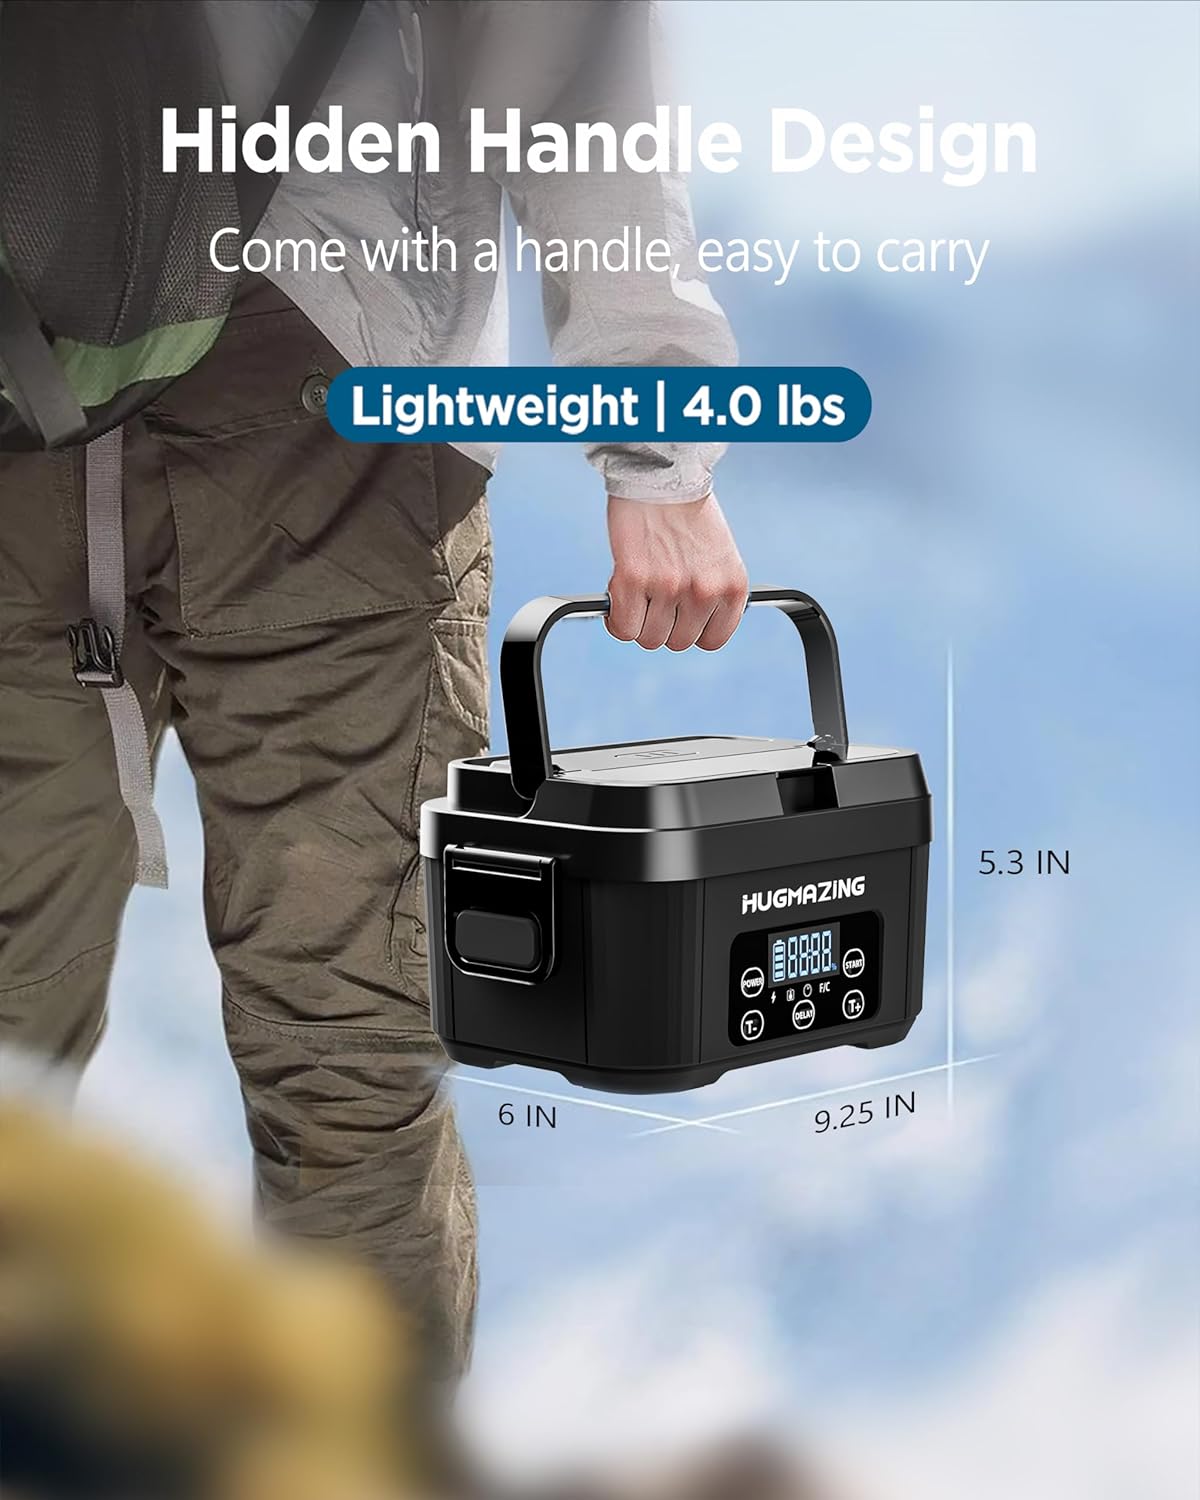
Image: The Hugmazing lunch box showcasing its hidden handle design, extended for carrying. The unit weighs 4.0 lbs and has dimensions of approximately 9.25 inches long, 6 inches wide, and 5.3 inches high.
4.2 Control Panel
The control panel features an LED display and several buttons for operation:
- POWER Button: Turns the unit on or off.
- START Button: Initiates immediate heating or confirms scheduled heating settings.
- DELAY Button: Used to set a countdown timer for scheduled heating.
- T+ Button: Increases the timer duration or adjusts other settings.
- T- Button: Decreases the timer duration or adjusts other settings.
- F/C Button: (If present) Toggles temperature display between Fahrenheit and Celsius.
- LED Display: Shows battery level, heating status, and timer settings.

Image: Close-up of the Hugmazing lunch box control panel, illustrating the functions of the POWER, START, DELAY, T+, and T- buttons, along with the digital display showing battery and time information.

Image: A diagram detailing the 'Easy to Operate' functions of the Hugmazing lunch box control panel, including the Power, Start, Delay, T+, and T- buttons.
5. Setup
5.1 Initial Cleaning
- Before first use, wash the stainless steel container and its lid with warm soapy water. Rinse thoroughly and dry.
- Wipe the exterior of the main unit with a damp cloth. Do not submerge the main unit in water.
5.2 Initial Charging
- Connect the provided power adapter to the charging port on the side of the lunch box.
- Plug the adapter into a standard wall outlet.
- The LED display will indicate charging status. A full charge takes approximately 3.5 hours.
- Ensure the unit is fully charged before its first use to maximize battery life.
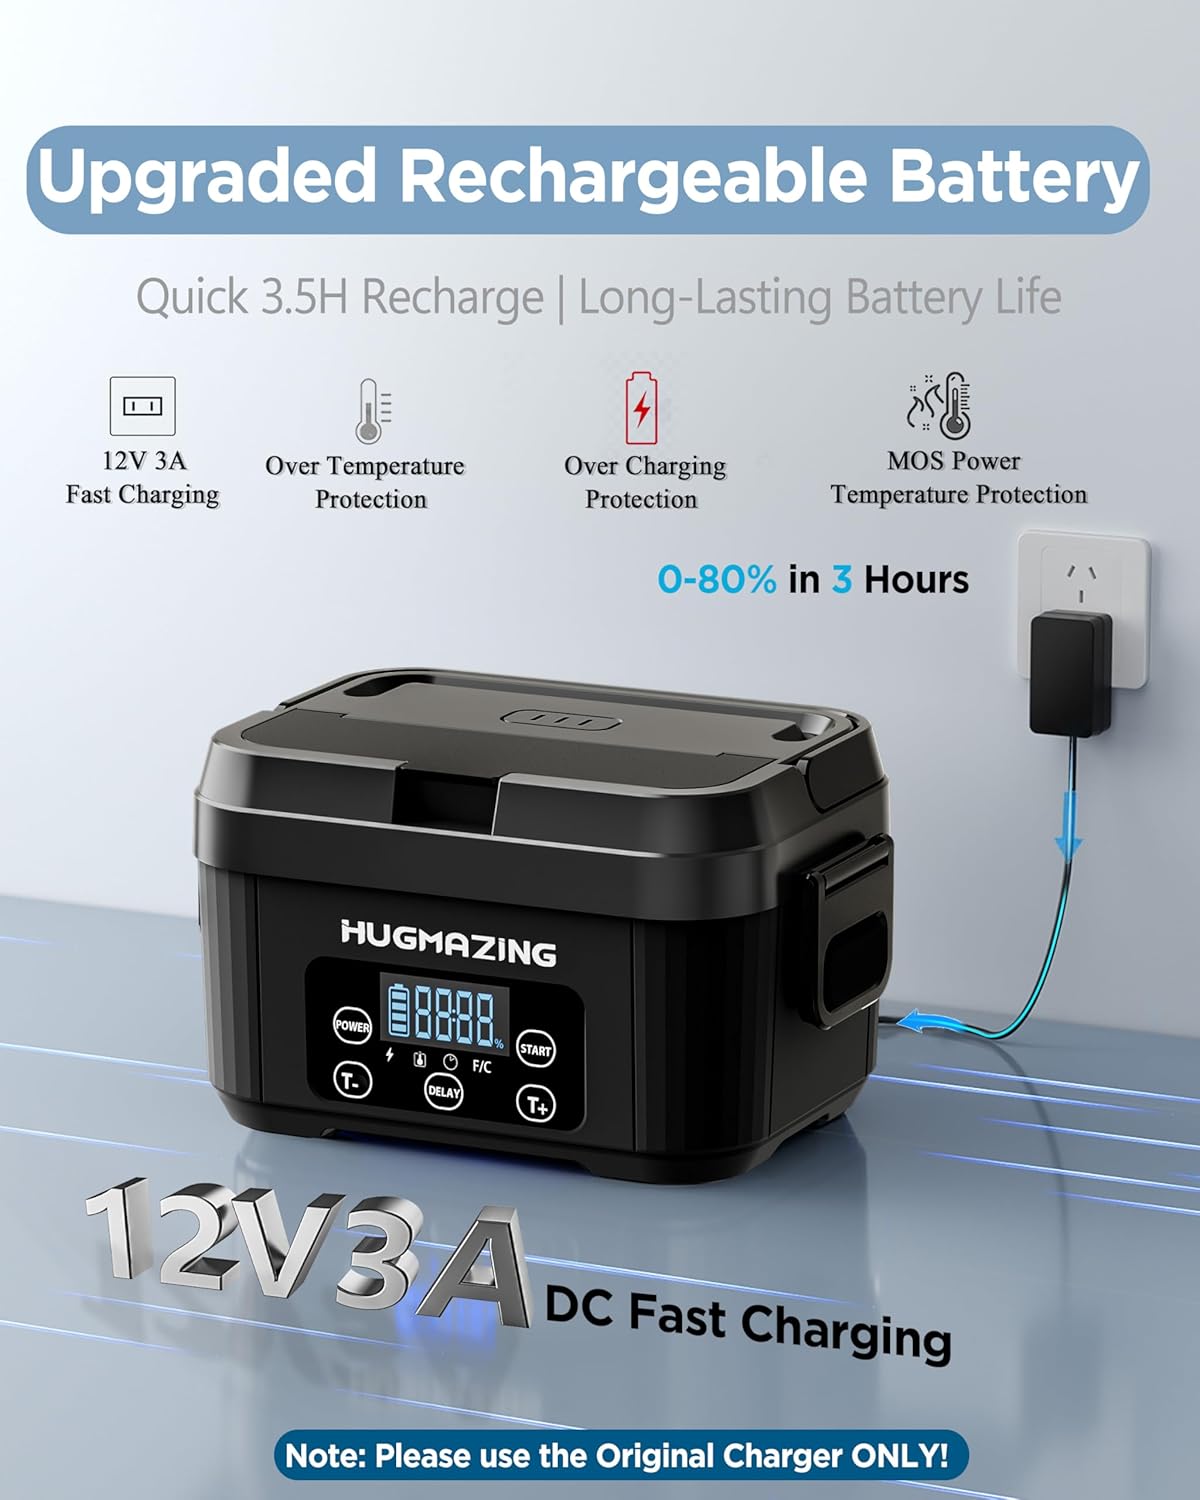
Image: The Hugmazing lunch box connected to its 12V 3A DC fast charging power adapter, illustrating the charging process and highlighting features like over-temperature and over-charging protection.
6. Operating Instructions
6.1 Basic Heating
- Place your pre-cooked food into the stainless steel container.
- Securely close the lid on the stainless steel container.
- Insert the lidded container into the main unit of the lunch box.
- Close the main unit's outer lid.
- Press the POWER button to turn on the device. The display will illuminate.
- Press the START button to begin the heating cycle immediately. The display will show the heating indicator.
- Heating typically takes 20-30 minutes, depending on the food type and initial temperature.
- Once heated, open the lid carefully to release steam and enjoy your meal.
- To stop heating at any time, press the POWER button.

Image: Visual guide demonstrating how to turn on the unit with the 'POWER' button and initiate immediate heating with the 'START' button.
6.2 Scheduled Heating (Delay Function)
The scheduled heating function allows you to set a delay for when the heating process should begin, ensuring your meal is warm when you are ready to eat.
- Prepare your food in the stainless steel container and place it inside the main unit, ensuring all lids are closed.
- Press the POWER button to turn on the device.
- Press the DELAY button. The display will show a flashing time.
- Use the T+ or T- buttons to adjust the desired delay time. The delay can be set for up to 8 hours.
- Press the START button to confirm the scheduled heating. The display will show the countdown, and the unit will begin heating automatically once the delay time expires.
- The unit will heat your food, and it will be ready at your scheduled mealtime.
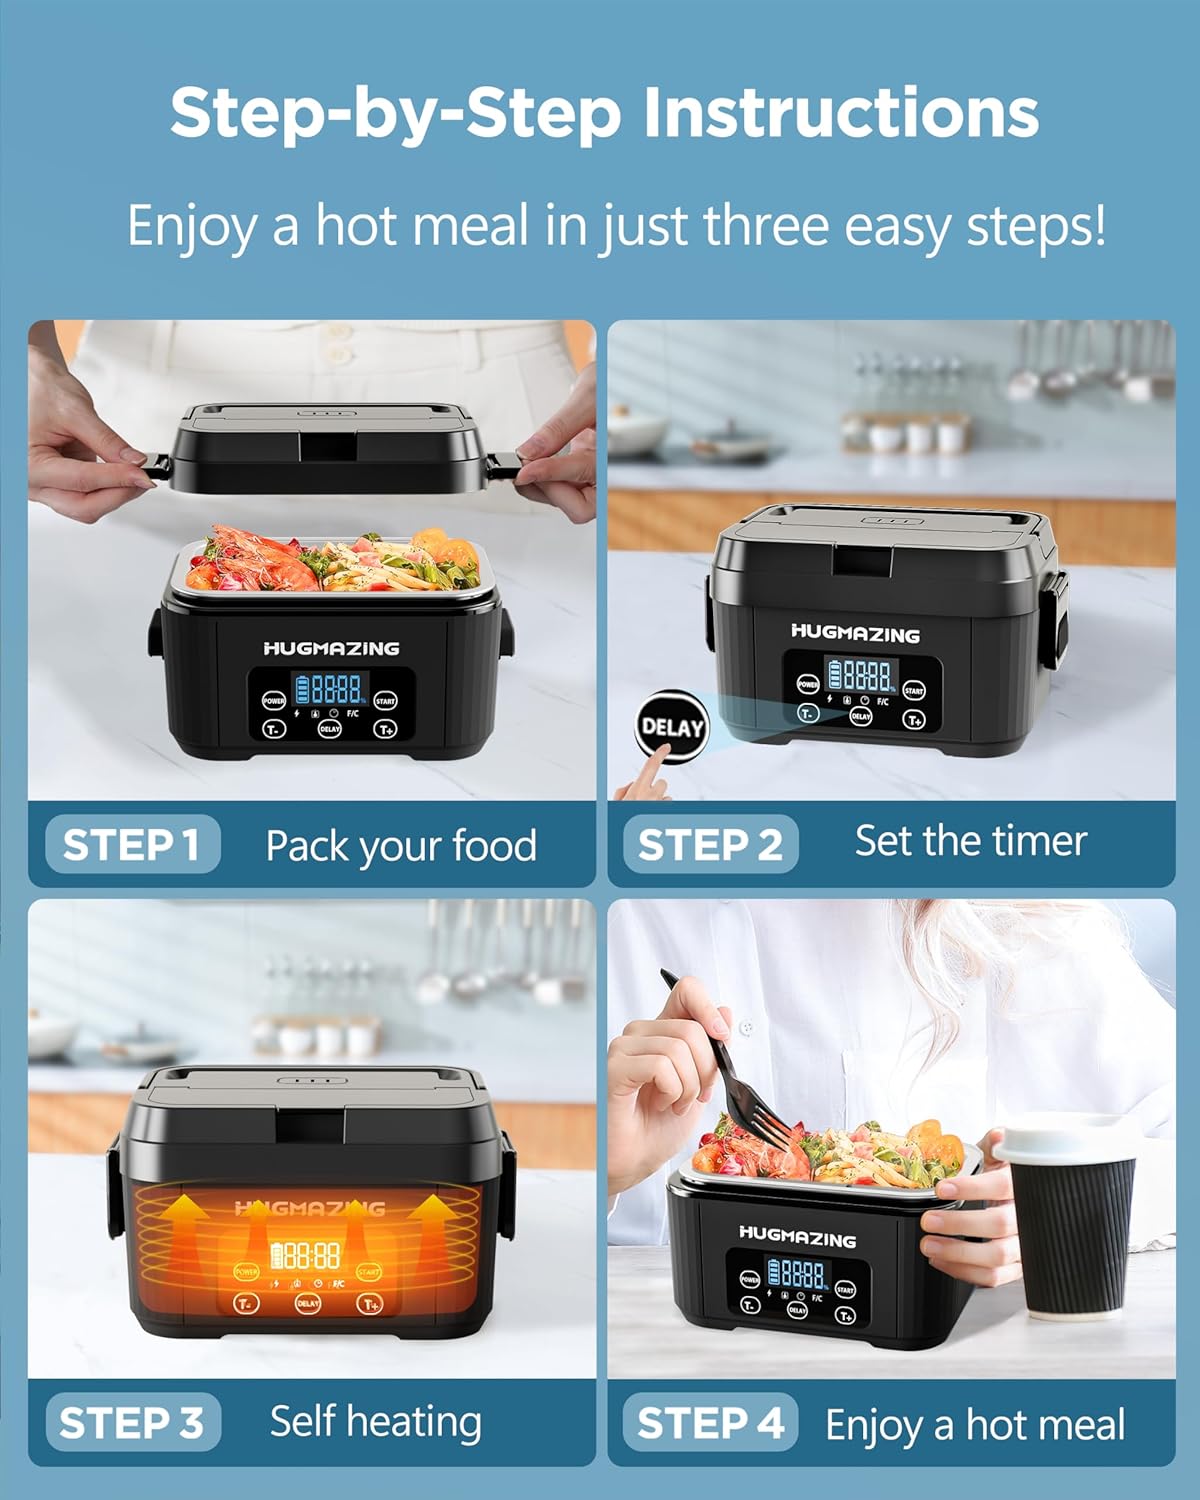
Image: A four-step visual guide showing how to pack food, set the timer using the DELAY button, initiate self-heating, and finally enjoy a hot meal.

Image: A diagram illustrating the scheduled heating function, showing how to set a delay time (e.g., 3 hours) between the current time and mealtime for automatic heating.

Image: A five-step visual guide for using the scheduled heating function: Power on, press DELAY, adjust timer with T+/T-, press START to confirm, and then enjoy the meal.
7. Maintenance and Cleaning
7.1 Stainless Steel Container and Lid
The stainless steel container and its lid are designed for easy cleaning:
- These components are dishwasher-safe.
- Alternatively, wash them by hand with warm soapy water and a soft sponge.
- Rinse thoroughly and ensure they are completely dry before storing or reusing.

Image: A woman placing the stainless steel container into a dishwasher, highlighting its dishwasher-safe feature for easy cleaning.

Image: A man removing the removable stainless steel container from a refrigerator, demonstrating its use for meal prep and storage.
7.2 Main Unit
- Never immerse the main heating base in water.
- Wipe the exterior of the main unit with a soft, damp cloth. For stubborn stains, use a mild detergent, then wipe with a clean damp cloth.
- Ensure the main unit is completely dry before storing or charging.
7.3 Carry Bag
- The insulated carry bag can be spot cleaned with a damp cloth and mild soap.
- Allow it to air dry completely. Do not machine wash or tumble dry.
8. Troubleshooting
| Problem | Possible Cause | Solution |
|---|---|---|
| Unit does not turn on. | Battery is depleted. | Charge the lunch box fully using the provided power adapter. |
| Food is not heating. | Unit not powered on or heating cycle not initiated. Container not properly seated. | Press the POWER button, then the START button. Ensure the stainless steel container is correctly placed inside the main unit. |
| Food heats too slowly. | Food is very cold or in large portions. | Allow adequate time for heating (typically 20-30 minutes). For best results, food should not be frozen. |
| Food leaks from the container. | Container lid not properly sealed. | Ensure the lid of the stainless steel container is securely fastened before placing it in the main unit. |
| Display shows an error code. | Internal malfunction. | Turn off the unit, wait a few minutes, and turn it back on. If the error persists, contact customer support. |
9. Specifications
| Feature | Specification |
|---|---|
| Model Number | HG-CHARGE |
| Capacity | 1100 ML |
| Material | Food-grade PP plastic, Stainless Steel |
| Product Dimensions | 9.25"L x 6.4"W x 5.28"H |
| Item Weight | 4.44 pounds |
| Battery Type | 1 Lithium Polymer (included) |
| Charging Time | Approx. 3.5 hours (0-80% in 3 hours) |
| Heating Time per Charge | Up to 90 minutes |
| UPC | 198715859935 |
| Included Components | Lunch box, 1100ML SS container with lid, Bag, Power Adapter, Spoon & Fork |

Image: The dimensions of the 9L large capacity carry bag, measuring approximately 10.01 inches wide, 7.48 inches deep, and 8.46 inches high.

Image: Information regarding the long-lasting and safe battery, indicating 3000+ cycles, a 10-year lifespan, and 5 years of service.
10. Warranty and Support
Hugmazing is committed to providing quality products and customer satisfaction.
- Warranty: This product comes with a 12-month extended warranty from the date of purchase.
- Money-Back Guarantee: Enjoy a 30-day money-back guarantee.
- Customer Support: Lifetime customer support is available for any questions or issues you may encounter. We aim for a 24-hour quick reply to all inquiries.
For warranty claims, technical assistance, or any other support needs, please contact Hugmazing customer service through the retailer's platform or the official Hugmazing website.

Image: Icons representing Hugmazing's customer support features: 24-hour quick reply, 30-day back guarantee, 12-month extended warranty, and lifetime customer support.