Introduction
Thank you for choosing the edx Electric Adjustable Height Desk. This manual provides essential information for the safe assembly, operation, and maintenance of your new desk. Please read these instructions carefully before use and retain them for future reference.
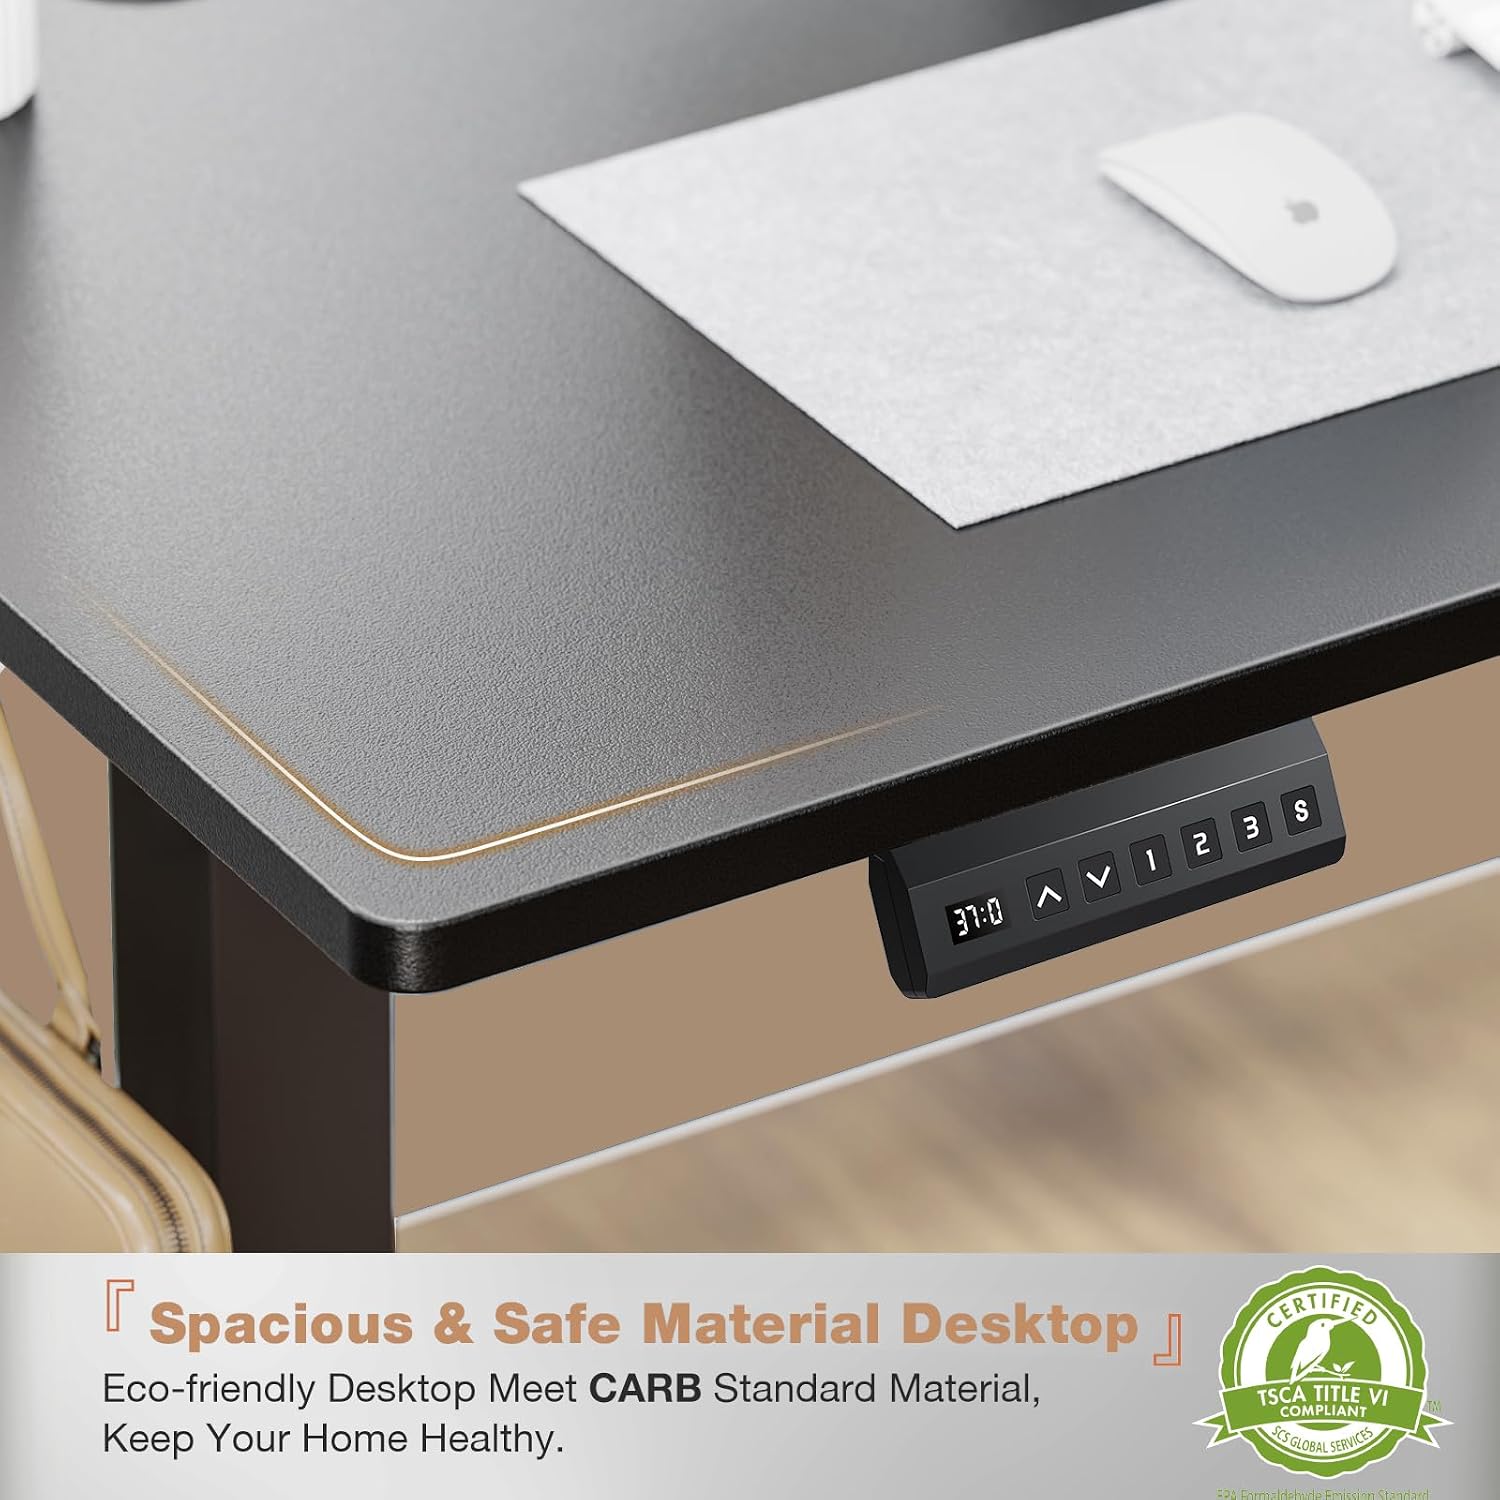
Figure 1: Spacious and Safe Desktop. This image highlights the desk's eco-friendly desktop material, which meets CARB standards, ensuring a healthy environment.
Safety Information
- Ensure all components are present and undamaged before assembly.
- Do not exceed the maximum weight capacity of 176 lbs (80 kg).
- Keep children and pets away from the desk during operation to prevent injury.
- Ensure there are no obstructions above or below the desk when adjusting height.
- Only use the provided power adapter.
- Do not disassemble or modify the motor or control unit. Contact support for service.
Package Contents
Verify that all parts are included in your package:
- Desk tabletop (55.1"D x 23.6"W)
- Desk frame (T-shaped metal base)
- Control panel with LED display
- Power adapter and cable
- Headphone hook (2 units)
- Assembly tools
- Instruction manual (this document)
Setup and Assembly
Assembly is required. Please follow the steps below carefully. All necessary tools are included.
- Unpack Components: Carefully remove all parts from the packaging and lay them out on a clean, soft surface to prevent scratches.
- Attach Legs to Tabletop: Secure the T-shaped metal legs to the underside of the tabletop using the provided screws. Ensure they are firmly tightened.
- Install Control Panel: Mount the control panel to the designated area on the underside of the tabletop, typically on the front edge.
- Connect Cables: Connect the motor cables from the legs to the control unit, and then connect the power adapter to the control unit. Route cables neatly using the integrated cable management holes.
- Attach Accessories: Install the headphone hooks on either side of the desk as desired.
- Initial Power-Up: Plug the power adapter into a wall outlet. The desk should be ready for operation.

Figure 2: Product Dimensions. This image illustrates the overall dimensions of the desk, including a tabletop size of approximately 55.12 inches by 23.62 inches. It also indicates a weight capacity of 154 lbs, though the product specifications state 176 lbs.
Operating Instructions
Control Panel Overview

Figure 3: Multi-Function Control Panel. This image details the control panel, highlighting the LED display (1), Up & Down buttons (2) for height adjustment, Memory Height buttons (3) labeled 1, 2, 3, and the 'S' button (4) for saving and setting presets.
- LED Display (1): Shows the current desk height in inches.
- Up/Down Buttons (2): Press and hold the Up arrow to raise the desk, and the Down arrow to lower the desk. Release the button to stop at the desired height.
- Memory Presets (3 - 1, 2, 3): The desk features three programmable height settings.
- 'S' Button (4): Used to save and set memory presets.
Setting Memory Presets
- Adjust the desk to your desired height using the Up/Down buttons.
- Press the 'S' button. The LED display will show "S-".
- Within 3 seconds, press one of the memory buttons (1, 2, or 3). The display will show "S-1", "S-2", or "S-3" to confirm the height has been saved.
Using Memory Presets
Once presets are saved, simply press the corresponding memory button (1, 2, or 3) to automatically move the desk to the saved height. Press any button to stop the movement.
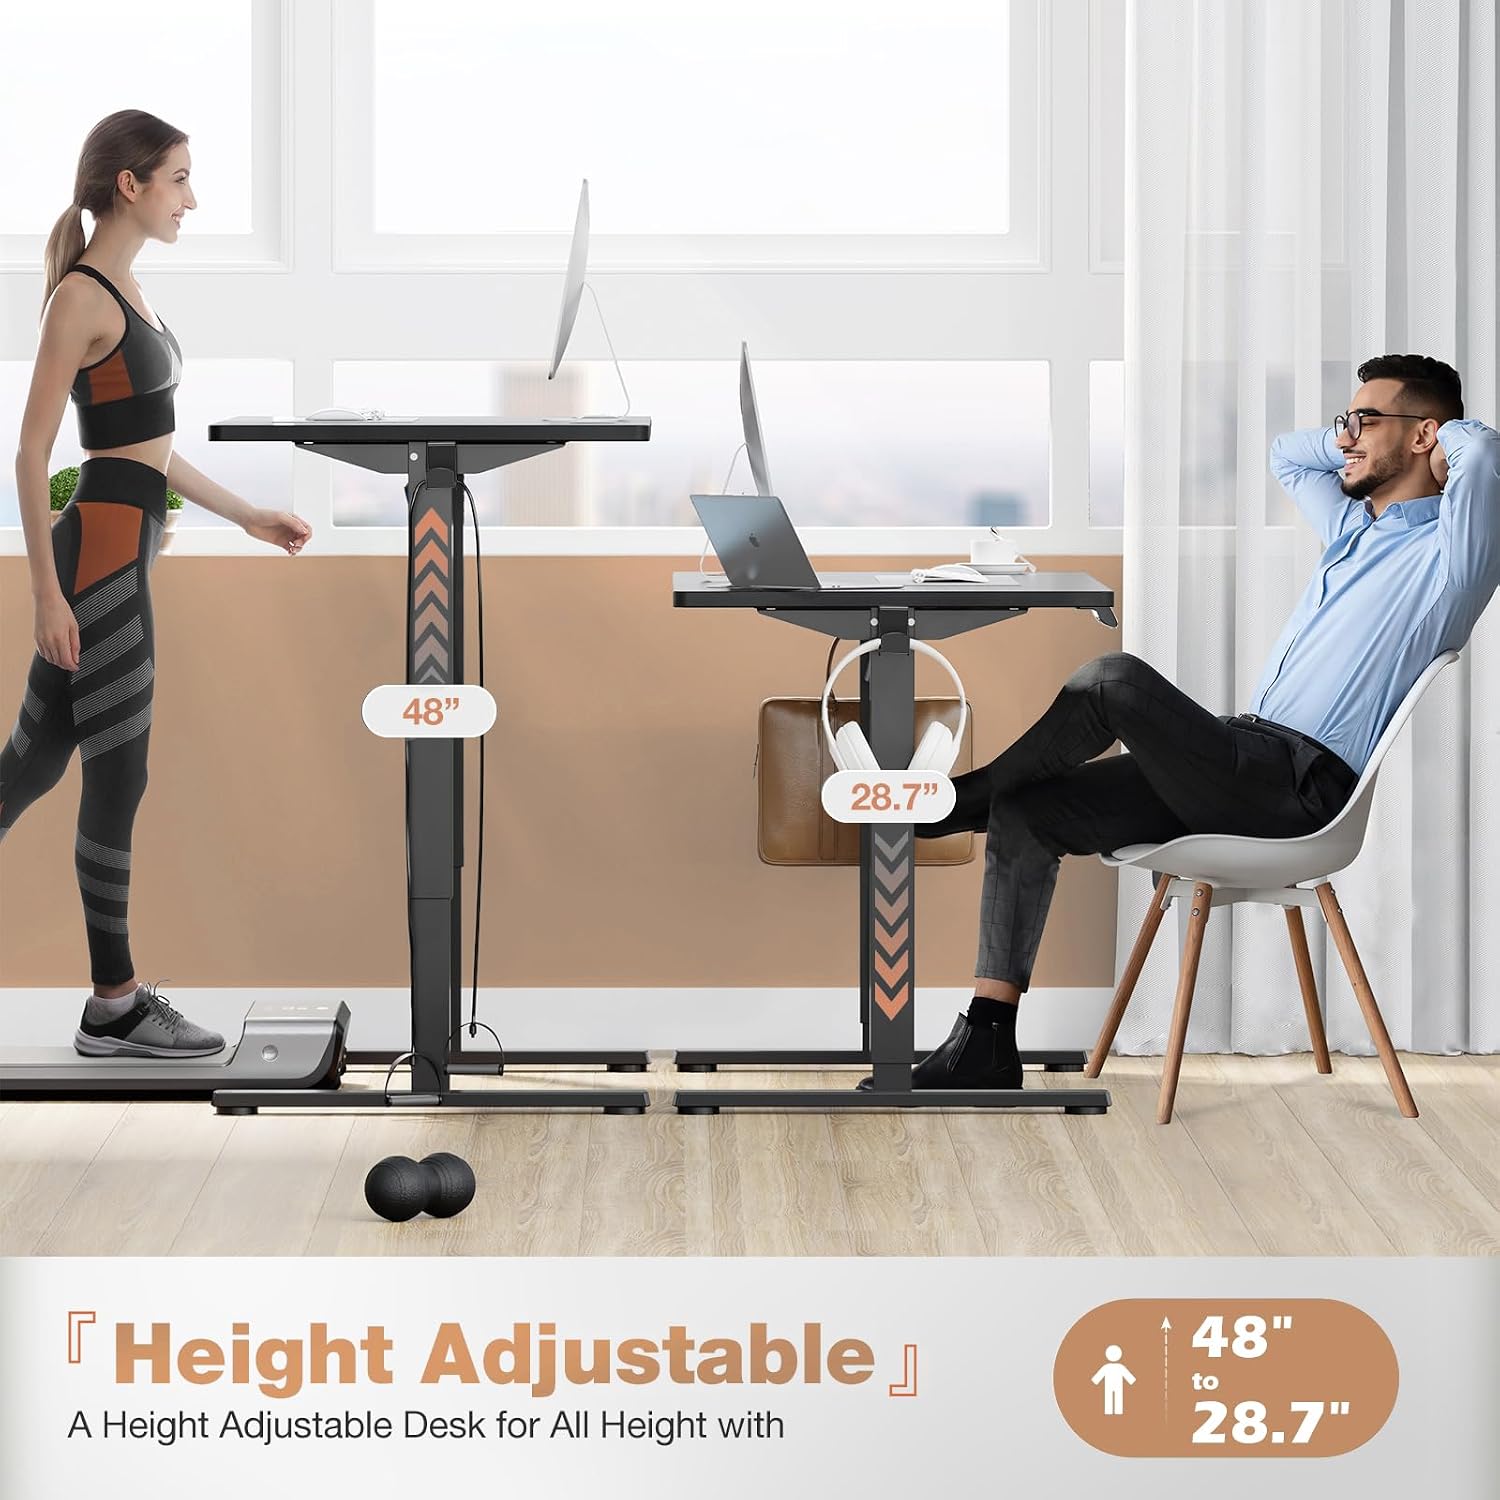
Figure 4: Height Adjustable Range. This image illustrates the desk's height adjustment capabilities, showing it can be set from a minimum of 28.7 inches to a maximum of 48 inches, accommodating both sitting and standing positions.

Figure 5: Quiet Operation. This image demonstrates the desk's quiet operation, with a noise level of approximately 55dB, suitable for various environments.
Maintenance
- Cleaning: Wipe the desk surface and frame with a soft, damp cloth. Avoid abrasive cleaners or harsh chemicals.
- Cable Management: Periodically check that all cables are securely connected and not pinched or tangled.
- Fasteners: Occasionally check and tighten any loose screws or bolts to ensure stability.
- Motor Care: The motor is designed for maintenance-free operation. Do not lubricate or attempt to open the motor housing.
Troubleshooting
| Problem | Possible Cause | Solution |
|---|---|---|
| Desk does not move. | Power cable disconnected; Overload; Motor error. | Check power connections. Reduce weight on desk. Unplug and replug power after 10 seconds. |
| Desk moves unevenly or makes unusual noise. | Loose fasteners; Obstruction; Damaged component. | Check and tighten all screws. Ensure no obstructions. Contact support if problem persists. |
| LED display shows an error code. | System malfunction. | Refer to specific error code in a more detailed manual (if available) or contact customer support. Try power cycling the desk. |
| Memory presets not saving or recalling correctly. | Incorrect procedure; Temporary glitch. | Review "Setting Memory Presets" section. Try power cycling the desk and re-setting presets. |
Specifications
| Brand | edx |
| Model | B0DGXWBBJC |
| Desk Design | Standing Desk |
| Product Dimensions (D x W x H) | 55.1" x 23.6" x 46.4" (Overall) |
| Adjustable Height Range | 28.7" to 48" |
| Color | Black |
| Top Material Type | Wood (Engineered Wood finish) |
| Base Material | Metal |
| Maximum Weight Capacity | 176 lbs (80 kg) |
| Noise Level (Operation) | Less than 55 dB |
| Special Features | LED Display, 3 Memory Presets, Headphone Hooks, Cable Management Holes |
| Assembly Required | Yes (Tools Included) |
Warranty and Support
edx provides a limited warranty for this product. For specific warranty terms, please refer to the warranty card included with your purchase or visit the official edx website. If you encounter any issues or require assistance, please contact edx customer support:
- Customer Service: Refer to your purchase documentation for contact details.
- Online Support: Visit the edx Store on Amazon for FAQs and additional resources.
Please have your model number (B0DGXWBBJC) and purchase date ready when contacting support.


