1. Introduction
This instruction manual provides essential information for the proper installation, operation, and maintenance of your Generic Wireless Rearview Reverse Camera. Please read this manual thoroughly before installation and use to ensure optimal performance and safety. This camera is designed to enhance visibility when reversing, providing a clear view of the area behind your vehicle.
2. Product Overview
2.1 Components
The package typically includes the following components:
- Rearview Camera Unit
- Wireless Transmitter Module
- Wireless Receiver Module
- Power Cables and Video Cables (RCA connectors)
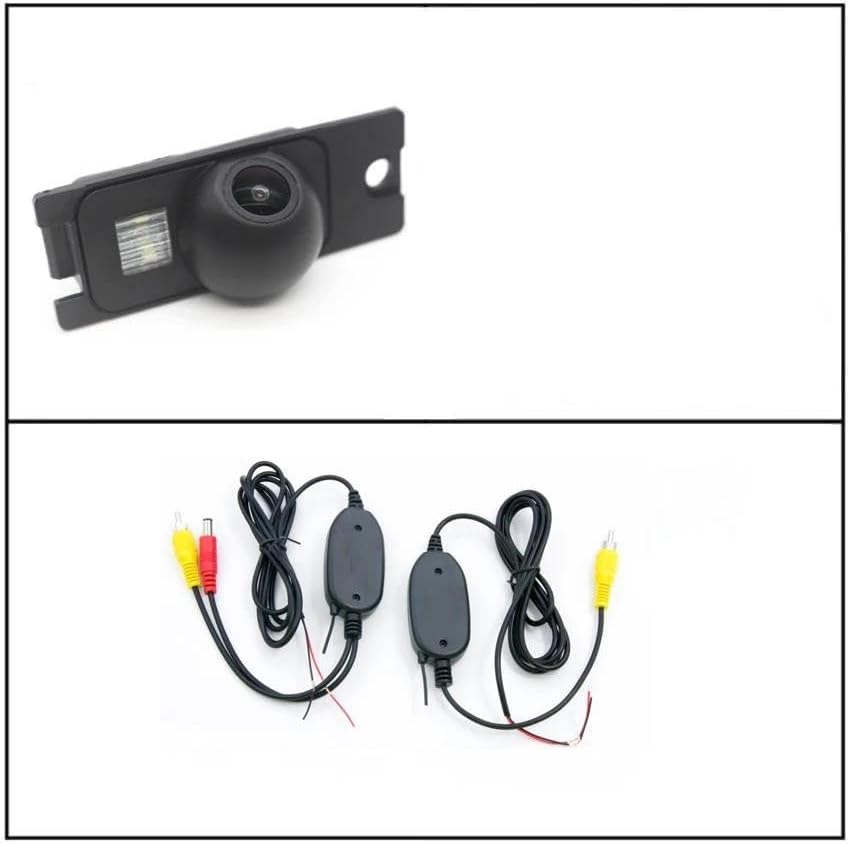
Image 1: Rearview camera unit with integrated LED light and the wireless transmitter/receiver modules with associated cables.
2.2 Features
- High-Quality Construction: Made from ABS plastic with fully sealed glue filling, ensuring IP67 waterproof rating against water, fog, or mist.
- Enhanced Visibility: High visual sensitivity provides clear day and night vision, reducing blind spots when reversing.
- Adjustable Viewing Angle: The camera can be adjusted to achieve the optimal viewing angle after mounting.
- Lossless Installation: Designed for plug-and-play installation without requiring complex programming.
- Wireless Connectivity: Utilizes wireless technology for video signal transmission, simplifying installation.
- HD Color Imaging: Provides clear, high-definition color images with automatic white balance.
- Integrated Parking Lines: Features a ruler display on the screen to assist with parking guidance.
- Durable Wiring: Special wire design offers stability, anti-interference, and anti-aging properties.
3. Compatibility
This rearview reverse camera is compatible with the following Volvo models:
- Volvo S60 (2001-2009)
- Volvo S60R (2001-2009)
- Volvo S60L (2001-2009)
Before purchasing and installing, please verify your vehicle's model, year, and the appearance, plug, and size details of the product to ensure proper fitment.
4. Safety Information
- Always disconnect the vehicle's battery before performing any electrical work.
- Ensure all wiring is properly insulated and secured to prevent short circuits or damage.
- Do not obstruct the driver's view or interfere with vehicle safety systems during installation.
- The rearview camera is an aid for reversing and does not replace the driver's responsibility to check surroundings manually.
- Consult a professional if you are unsure about any installation steps.
5. Setup and Installation
The camera is designed for easy, plug-and-play installation. Follow these general steps:
- Prepare the Vehicle: Ensure the vehicle is turned off and the parking brake is engaged. Disconnect the negative terminal of the vehicle's battery.
- Mount the Camera: Identify the appropriate mounting location, typically near the license plate light or trunk handle. The camera is designed to integrate seamlessly without interfering with the license plate. Secure the camera unit in place.

Image 2: The rearview camera unit showing its approximate dimensions (7.5cm width, 3cm height) for fitment reference.
- Connect Power to Camera and Transmitter: Connect the camera's power cable to the vehicle's reverse light circuit. This ensures the camera powers on automatically when the vehicle is put into reverse. Connect the wireless transmitter module to the camera's video output and power input.
- Install Receiver Module: Route the wireless receiver module to the location of your display unit (e.g., car stereo, dedicated monitor). Connect the receiver's power cable to a suitable 12V power source, often the same reverse light circuit or an accessory power source that activates with the vehicle.
- Connect Video Output: Connect the video output of the wireless receiver module to the video input of your display unit (typically an RCA input).
- Cable Management: Carefully route and secure all cables to prevent pinching, abrasion, or interference. The special wire is designed for hidden laying.
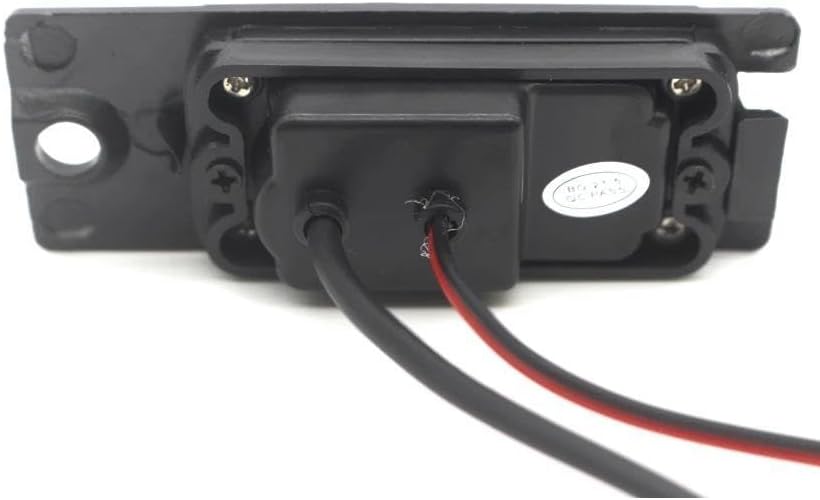
Image 3: Rear view of the camera unit showing the power and video cable connections.
- Test the System: Reconnect the vehicle's battery. Put the vehicle into reverse (with the engine off and parking brake engaged for safety) and check if the camera image appears on your display. Adjust the camera's angle for optimal viewing.

Image 4: Examples of the rearview camera display on a car's screen after successful installation, showing parking guidelines.
6. Operating Instructions
Once installed, the rearview camera operates automatically:
- Automatic Activation: When the vehicle is shifted into reverse gear, the camera will automatically power on, and its image will be displayed on your connected monitor or car stereo screen.
- Parking Guidelines: The camera display includes integrated parking guidelines (ruler) to assist you in judging distances and maneuvering safely.
- Adjusting View: If needed, the physical angle of the camera can be slightly adjusted to fine-tune the viewing area.
7. Maintenance
To ensure the longevity and optimal performance of your rearview camera, follow these maintenance guidelines:
- Cleaning the Lens: Periodically clean the camera lens with a soft, damp cloth to remove dirt, dust, or water spots. Avoid abrasive cleaners that could scratch the lens.
- Check Connections: Occasionally inspect all wiring connections to ensure they are secure and free from corrosion or damage.
- Waterproof Design: The IP67 waterproof rating protects against water ingress, but avoid directing high-pressure water jets directly at the camera for extended periods.
8. Troubleshooting
If you encounter issues with your rearview camera, refer to the following common problems and solutions:
| Problem | Possible Cause | Solution |
|---|---|---|
| No image on display when reversing |
|
|
| Image is distorted or flickering |
|
|
| Image is dark or unclear |
|
|
If troubleshooting steps do not resolve the issue, please contact customer support.
9. Specifications
- Model Number: 4953189186255
- Color: Camera with Wireless
- White Balance: Auto
- Operation Temperature: -10℃ to +50℃ (Relative Humidity 95% Max)
- Storage Temperature: -20℃ to +60℃ (Relative Humidity 95% Max)
- Waterproof Rating: IP67
- Material: ABS Plastic
- Manufacturer: Windtalker
10. Warranty Information
Warranty details for this product are typically provided with your purchase documentation. Please refer to the specific terms and conditions outlined at the time of purchase for information regarding warranty coverage, duration, and claims process.
11. Support
For any questions, technical assistance, or support regarding your Generic Wireless Rearview Reverse Camera, please do not hesitate to contact the seller or manufacturer. We aim to respond to all inquiries within 24 hours.