Introduction
This manual provides instructions for the installation, operation, and maintenance of the WELLFOR Dual Heads Shower Faucet System, Model 88059. This system features a dual-head design with a 7-spray function, a 3-way diverter, and a pressure-balanced brass valve for controlled water flow and temperature.
Safety Information
Please read all instructions carefully before installation and use. Failure to follow these instructions may result in property damage or personal injury. Keep this manual for future reference.
- Ensure all local plumbing and building codes are met during installation.
- Turn off the main water supply before beginning any installation or maintenance.
- Use appropriate tools and safety equipment.
- If you are unsure about any part of the installation, consult a qualified professional plumber.
- Note: This product is not available for sale in California due to CEC requirements.
Package Contents
Verify that all components are present and undamaged before proceeding with installation. The package includes the following items:

Image: Overview of all components included in the WELLFOR Dual Heads Shower Faucet System package, including the main shower head, handheld shower, hose, valve trim kit, and tub spout.
- Dual Shower Head Assembly
- Handheld Shower
- 59-inch Stainless Steel Hose
- Pressure-balanced Brass Valve Body
- Valve Trim Kit (Handles and Escutcheons)
- Metal Tub Spout
- Mounting Hardware and Accessories
Product Dimensions
Refer to the dimensional drawing for precise measurements of the shower system components.

Image: Detailed dimensional drawing illustrating the measurements of the shower heads, hose length, valve body, and tub spout in inches.
Installation
Installation of this shower system requires plumbing knowledge and tools. Professional installation is highly recommended to ensure proper function and to comply with all applicable codes.
- Prepare the Installation Area: Ensure the wall is prepared for a wall-mount installation. Turn off the main water supply.
- Install the Brass Valve Body: Secure the pressure-balanced brass valve body within the wall according to standard plumbing practices. Ensure it is level and properly secured.
- Connect Water Lines: Connect the hot and cold water supply lines to the designated inlets on the valve body.
- Install Tub Spout: Attach the metal tub spout to its designated outlet. Ensure a watertight seal.
- Install Shower Arm and Dual Shower Head: Mount the shower arm to the wall outlet and attach the dual shower head assembly.
- Install Handheld Shower and Hose: Connect the 59-inch stainless steel hose to the handheld shower and the diverter outlet. Secure the handheld shower holder to the wall.
- Install Valve Trim Kit: Once the rough-in plumbing is complete, install the valve trim kit, including the handles and escutcheons, over the valve body.
- Test for Leaks: Turn on the main water supply and carefully check all connections for leaks.
Operating Instructions
The WELLFOR Dual Heads Shower Faucet System offers versatile control over your showering experience.
Valve Trim Kit Operation

Image: The valve trim kit showing three handles. The left handle controls hot water, the right handle controls cold water, and the central handle acts as a diverter.
- The left handle controls the hot water flow and temperature.
- The right handle controls the cold water flow and temperature.
- The central handle functions as a diverter to switch between shower modes.
3-Way Diverter Function

Image: The 3-way diverter allows seamless switching between the main shower head, the handheld shower, or both simultaneously.
Use the central handle on the valve trim kit to switch the water flow between the main shower head, the handheld shower, or to activate both simultaneously. Rotate the handle to select your desired output.
7-Spray Function Shower Heads

Image: A visual representation of the seven different spray patterns available on both the main and handheld shower heads, including various stream types.
Both the main shower head and the handheld shower feature 7 distinct spray functions. To change the spray pattern, rotate the dial on the face of the shower head. Select from various settings to customize your shower experience.
Metal Tub Spout
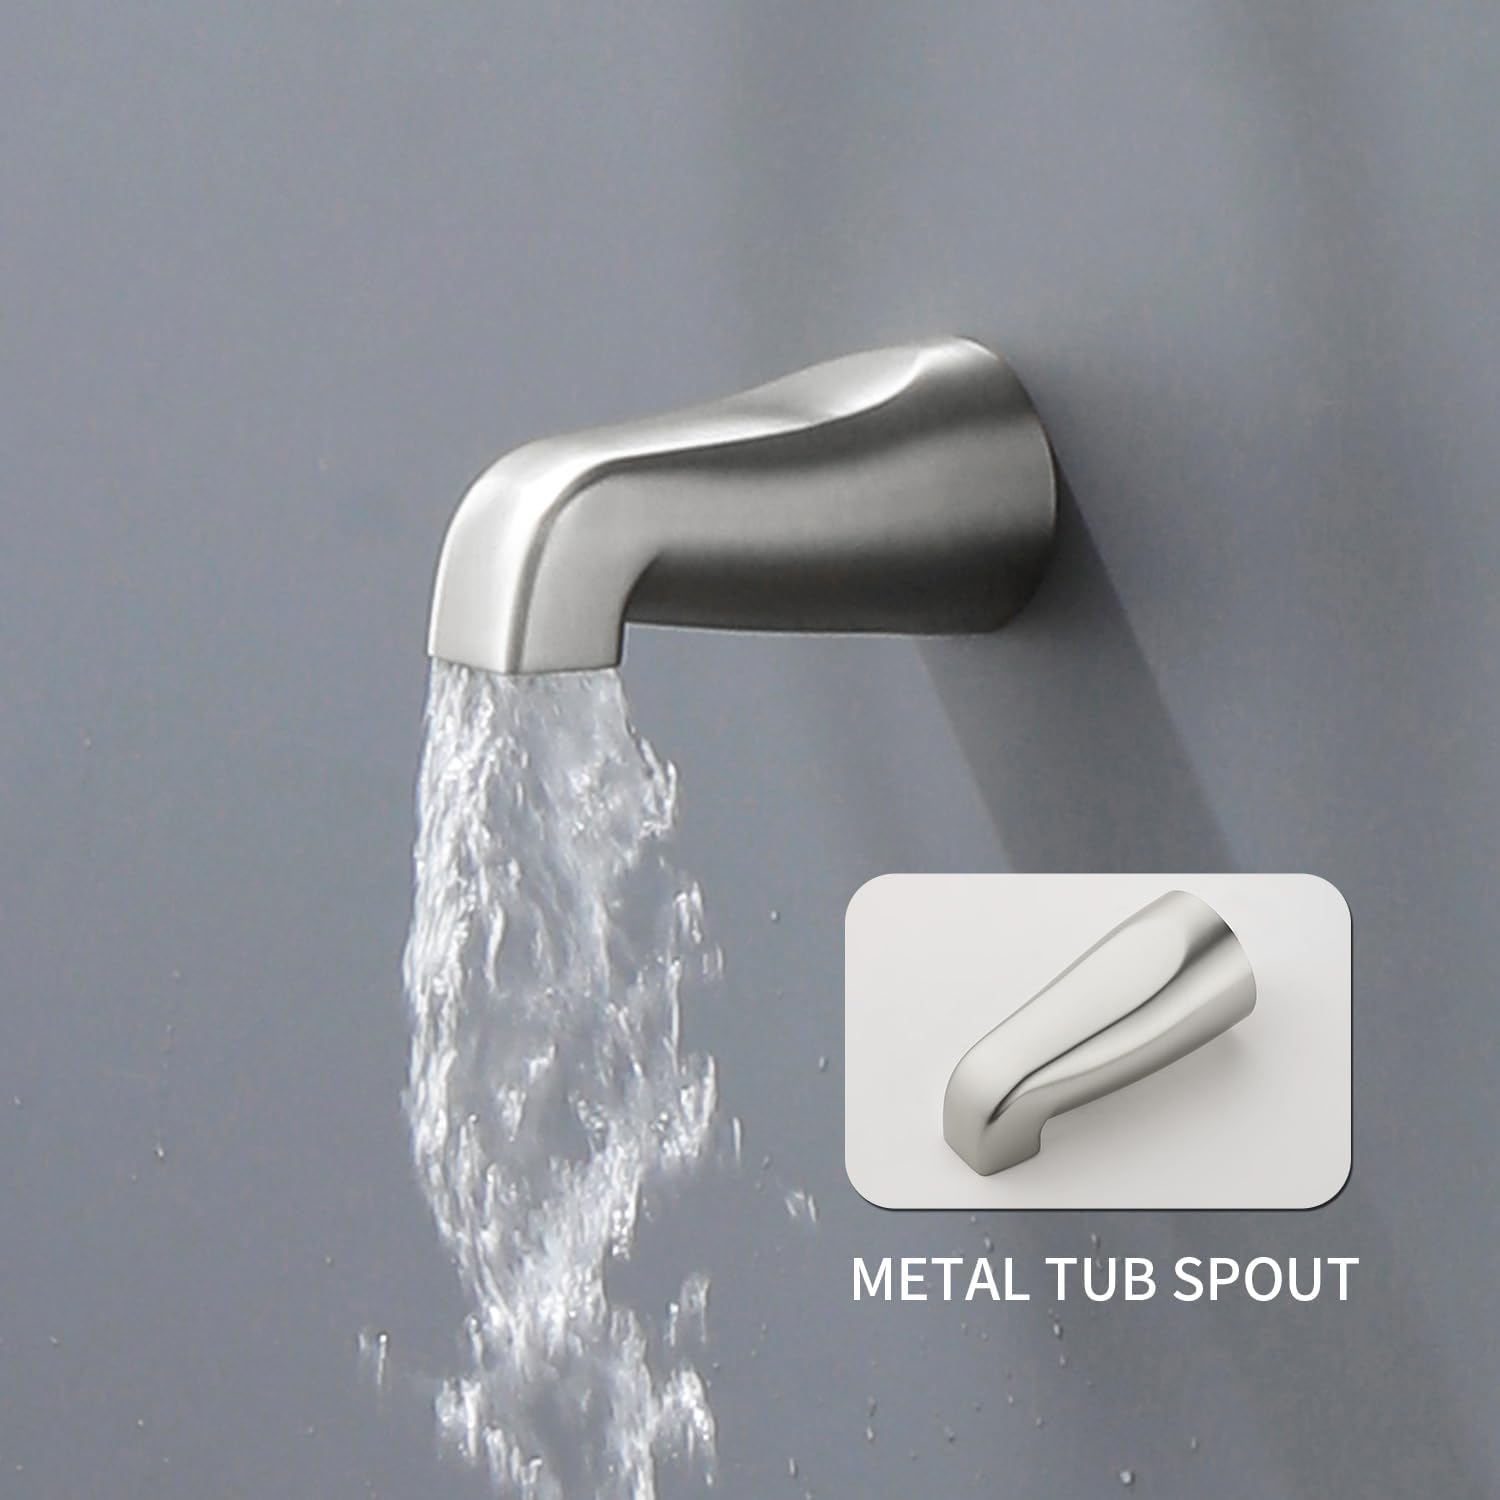
Image: The metal tub spout, designed for filling bathtubs, shown with water flowing.
The integrated metal tub spout provides a dedicated water outlet for filling a bathtub. Its operation is typically controlled by the main valve, diverting water from the shower heads to the spout.
Maintenance
Regular cleaning and maintenance will help preserve the finish and functionality of your WELLFOR shower system.
- Cleaning the Finish: Clean the brushed nickel finish with a soft, damp cloth. Avoid abrasive cleaners, harsh chemicals, or scouring pads, as these can damage the finish.
- Cleaning Shower Head Nozzles: If mineral deposits build up on the shower head nozzles, gently rub them with your finger or a soft brush to dislodge the deposits. For stubborn buildup, a solution of equal parts white vinegar and water can be used, applied with a soft cloth.
- Hose Maintenance: Periodically check the stainless steel hose for kinks or damage. Ensure it is not excessively stretched or twisted during use.
- Leak Checks: Regularly inspect all connections for any signs of leaks. Tighten connections as needed, but do not overtighten.
Troubleshooting
If you encounter issues with your shower system, refer to the following common problems and solutions:
- Low Water Pressure: Check if the main water supply is fully open. Inspect shower heads for mineral buildup that might be obstructing flow. Ensure no kinks in the hose.
- Leaking Connections: Turn off water supply. Inspect all threaded connections. Disassemble, clean threads, apply new plumber's tape or sealant, and reassemble, tightening securely but not excessively.
- Diverter Not Switching Properly: Ensure the diverter handle is fully rotated to the desired position. If issues persist, the diverter cartridge may need inspection by a professional.
- Temperature Fluctuations: The pressure-balanced valve is designed to prevent sudden temperature changes. If fluctuations occur, it may indicate an issue with the hot or cold water supply pressure or the valve cartridge. Consult a professional plumber.
For problems not listed here or if solutions do not resolve the issue, please contact WELLFOR customer support.
Specifications
| Brand | WELLFOR |
| Model Number | 88059 |
| Color | Brushed Nickel |
| Material | Stainless Steel (Handles, Hose), Brass (Valve Body), ABS (Shower Heads) |
| Finish Type | Brushed |
| Number of Handles | 3 |
| Mounting Type | Wall Mount |
| Item Weight | 7 Pounds |
| Product Dimensions | 4.72 x 4.72 x 59 inches (overall) |
| Hose Length | 59 inches |
| UPC | 769047274590 |
Warranty and Support
WELLFOR products are manufactured to high-quality standards. For specific warranty information, please refer to the documentation included with your purchase or visit the official WELLFOR website. If you require technical assistance, replacement parts, or have any questions regarding your shower system, please contact WELLFOR customer support directly.
Contact Information: Please refer to the WELLFOR official website or your purchase receipt for the most current customer support contact details.


