SK B0DGX8R2JP
SK 3/8-inch Drive Digital Torque Wrench User Manual
Model: B0DGX8R2JP
1. Introduction
This manual provides detailed instructions for the safe and effective use of your SK 3/8-inch Drive Digital Torque Wrench. This precision tool is designed for accurate torque application, featuring a digital display, multiple measurement units, and visual/audible notifications. Please read this manual thoroughly before operation and retain it for future reference.

Figure 1: SK 3/8-inch Drive Digital Torque Wrench and its protective case.
2. Safety Information
Always observe the following safety precautions to prevent injury or damage to the tool and workpiece:
- Wear appropriate personal protective equipment, such as safety glasses.
- Ensure the workpiece is securely fastened before applying torque.
- Do not exceed the maximum torque capacity of the wrench (135 N-m / 99.5 ft-lb).
- Avoid dropping the wrench or subjecting it to severe impacts, as this can affect its accuracy.
- Keep the wrench clean and dry. Do not expose it to excessive moisture or corrosive substances.
- Store the wrench in its protective case when not in use.
- Do not attempt to disassemble or modify the wrench. Refer servicing to qualified personnel.
3. Product Overview and Features
The SK Digital Torque Wrench combines precision engineering with user-friendly features for reliable torque application.
- High Accuracy: Achieves +/-2% accuracy for clockwise (CW) and +/-3% for counter-clockwise (CCW) torque from 20% to 100% of its maximum range.
- Digital Display & Units: Clear LED display shows torque values. Supports four units of measure: N-m, ft-lb, in-lb, and kg-cm.
- Visual & Audible Notifications: Green LED lights illuminate at 90% of the target torque, and red LED lights with an audible buzzer activate at 100% of the target torque.
- Ergonomic Design: Features an anti-slip handle for comfortable and secure grip during operation.
- Advanced Functions: Includes 5-minute auto-sleep for battery conservation, data storage, calibration options, and preset torque levels.
- 36-Tooth Ratchet: Provides a 10-degree ratcheting arc for efficient use in confined spaces.
- Directional Switch: Allows for easy tightening or loosening of fasteners with one-handed operation.
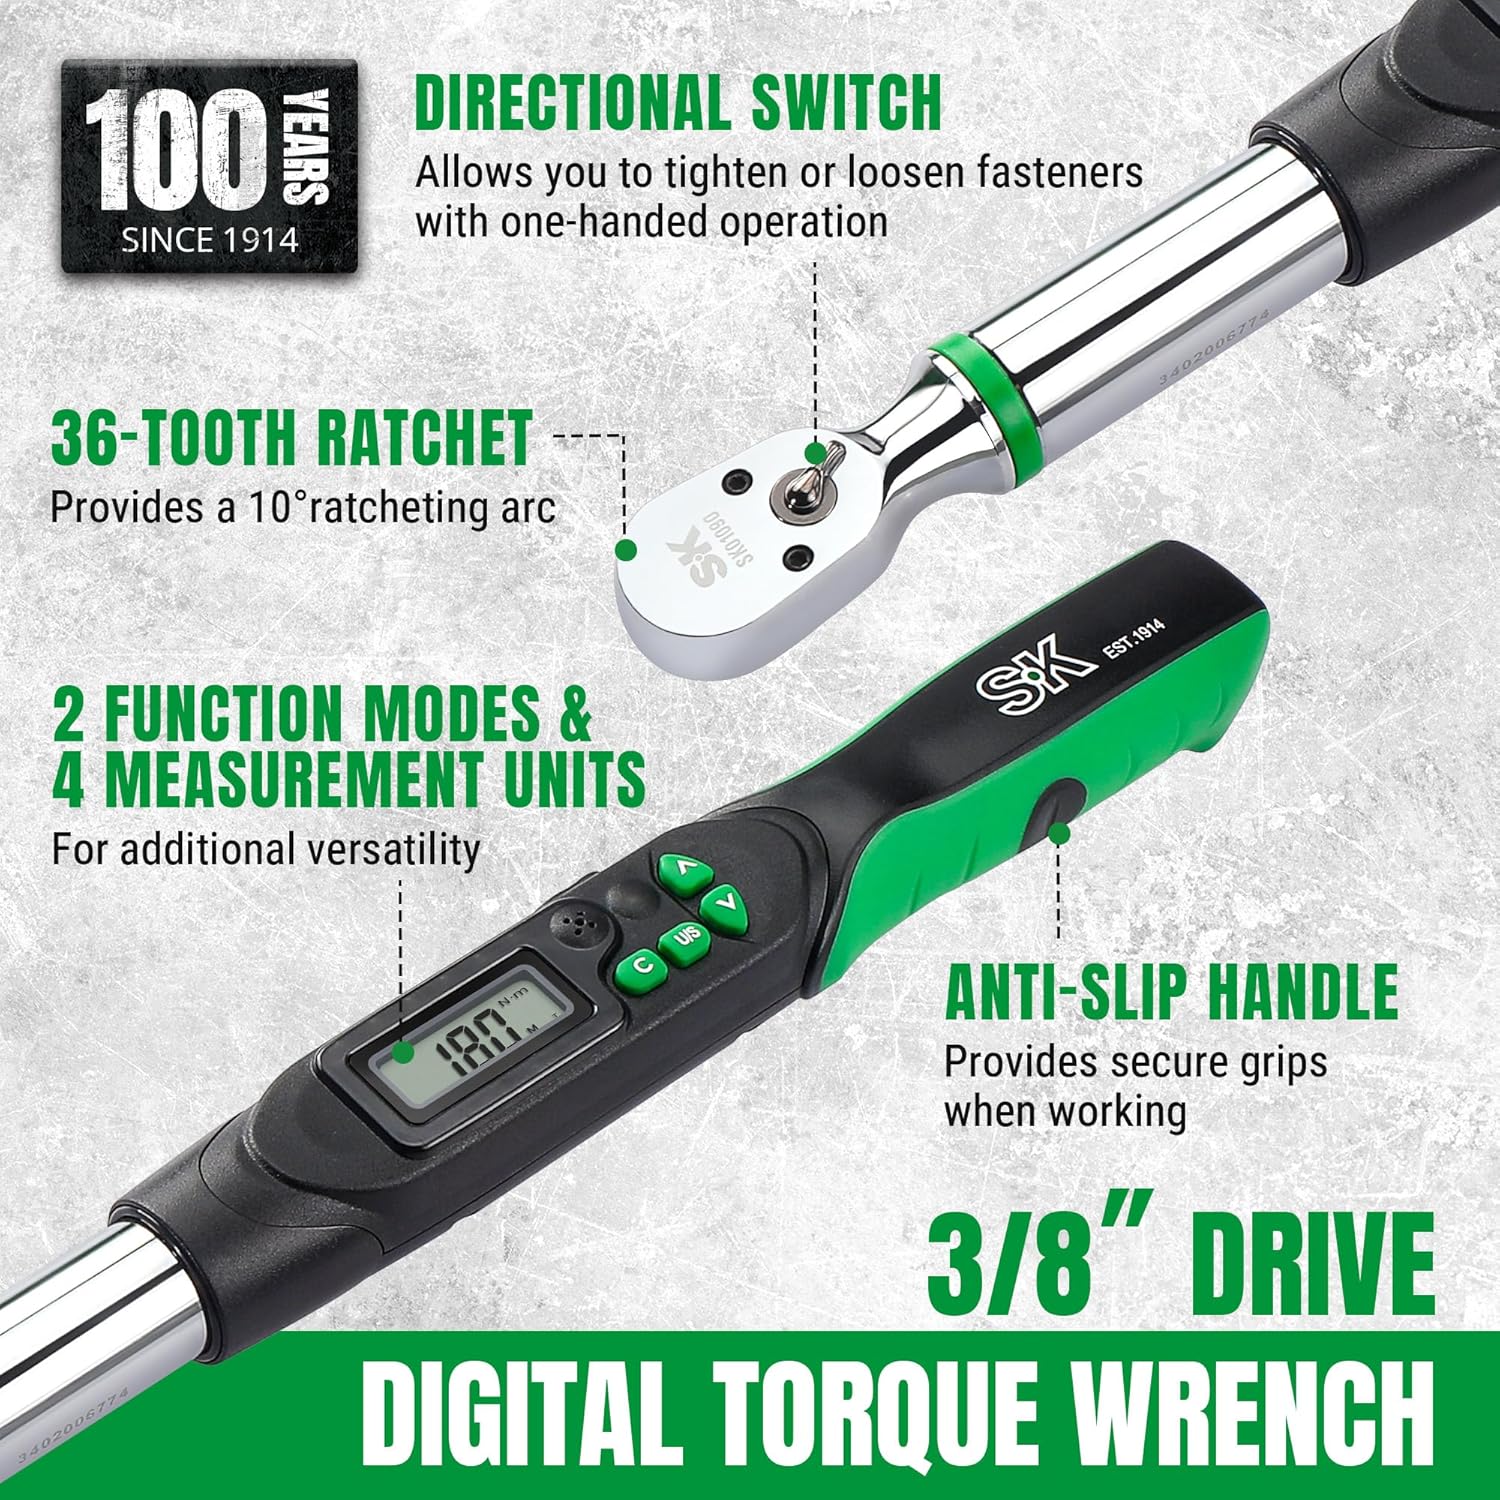
Figure 2: Key features of the SK Digital Torque Wrench.
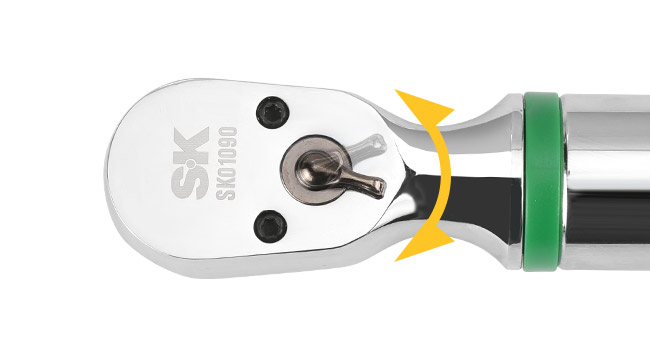
Figure 3: Directional switch for tightening and loosening.
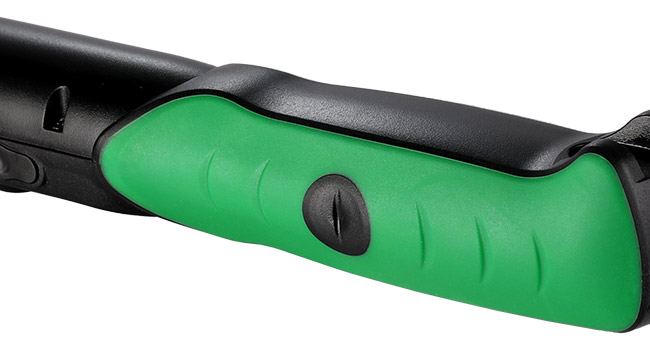
Figure 4: Anti-slip handle for enhanced grip.
4. Setup
4.1 Battery Installation
The wrench requires two AA batteries for operation. Follow these steps for proper installation:
- Step 1: Remove the battery cap located at the end of the handle by rotating it counter-clockwise.
- Step 2: Insert two R6/AA batteries into the compartment, ensuring the positive (+) and negative (-) polarities match the indicators inside the compartment.
- Step 3: Replace the battery cap by rotating it clockwise until it is tightly secured.
Caution: Reversing battery polarity may result in leakage or damage to the device.
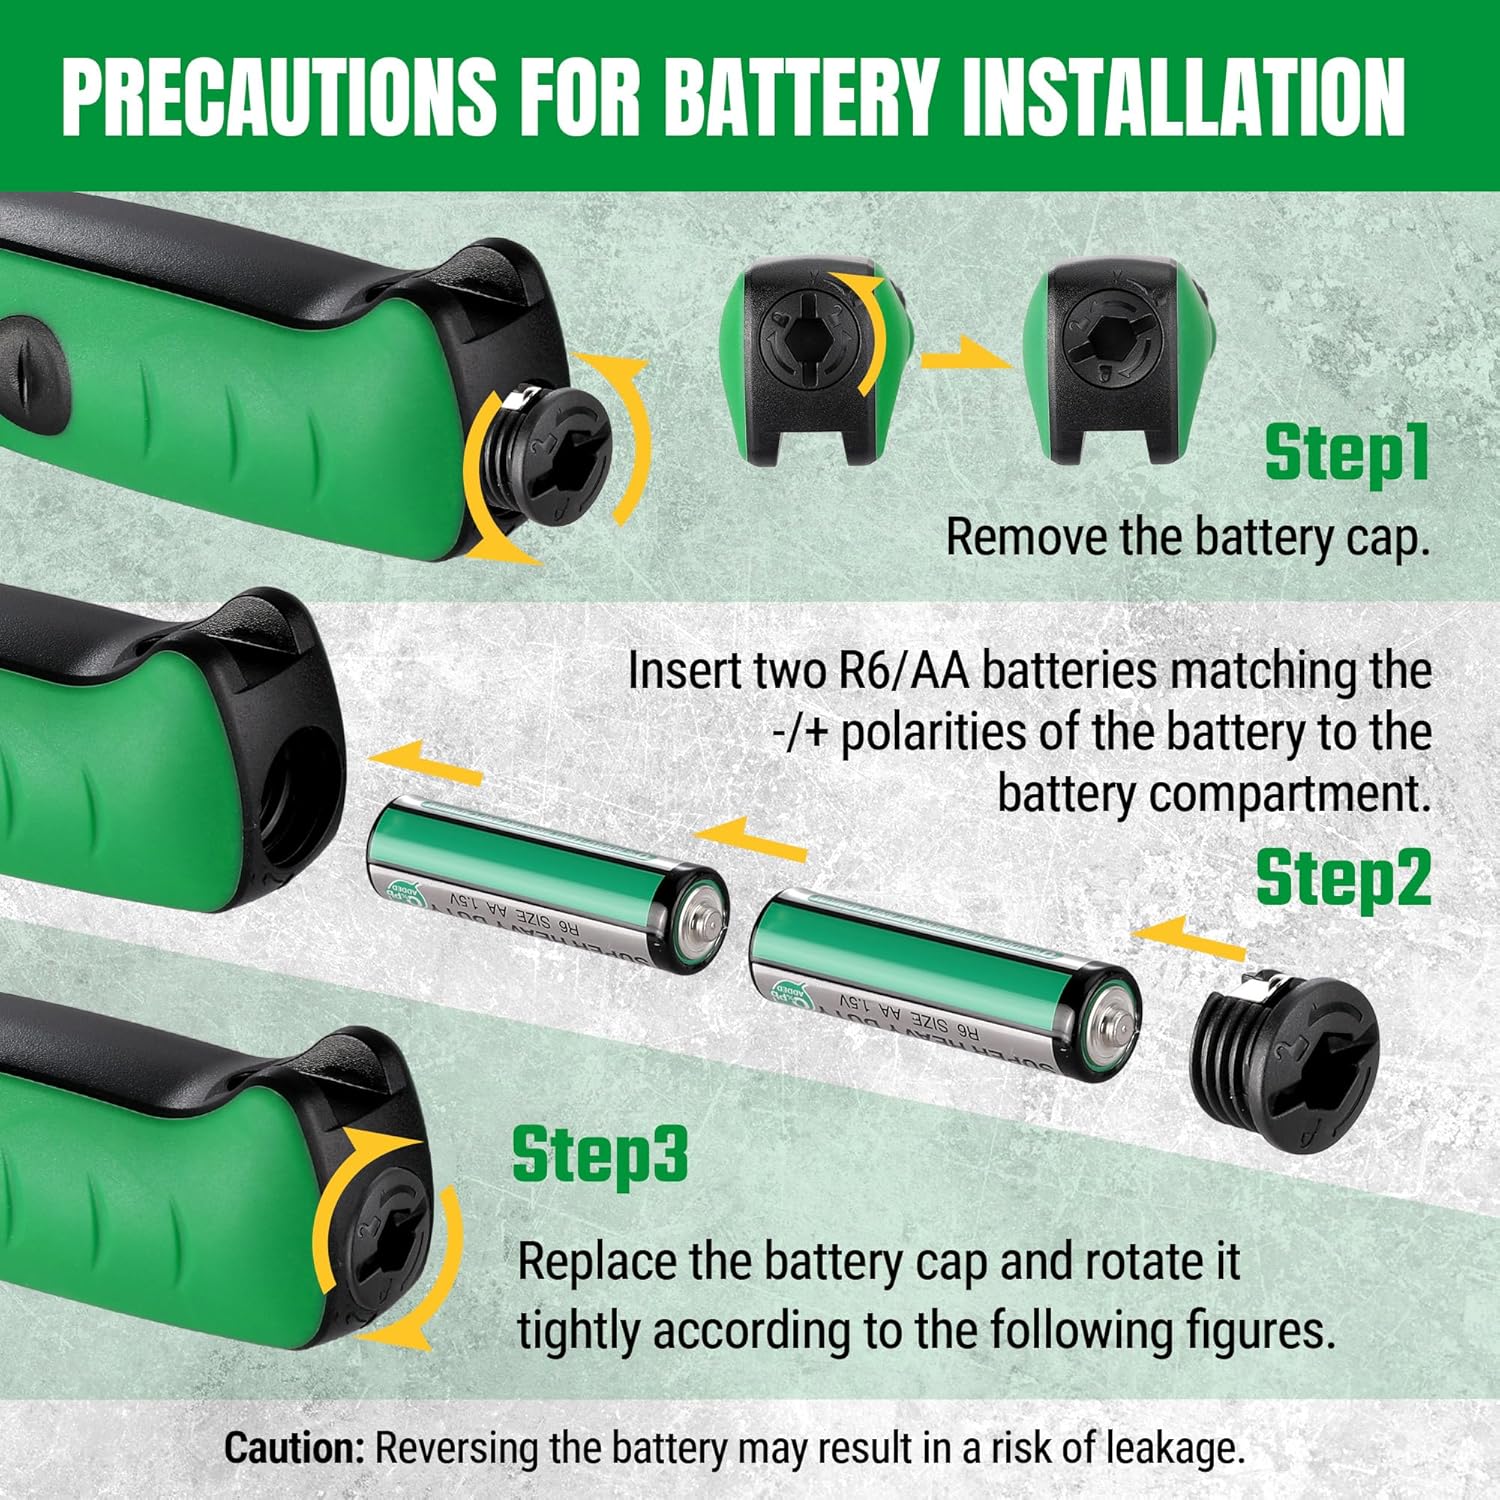
Figure 5: Battery installation guide.
5. Operating Instructions
5.1 Power On/Off
Press the power button (usually marked 'C' or 'ON/OFF') to turn the wrench on. The display will illuminate. The wrench will automatically enter auto-sleep mode after 5 minutes of inactivity to conserve battery life.
5.2 Setting Torque Value
Use the Up (∧) and Down (∨) arrow buttons to adjust the desired target torque value on the digital display.
5.3 Changing Measurement Units
Press the 'U/S' button to cycle through the available measurement units: Newton-meters (N-m), foot-pounds (ft-lb), inch-pounds (in-lb), and kilogram-centimeters (kg-cm).
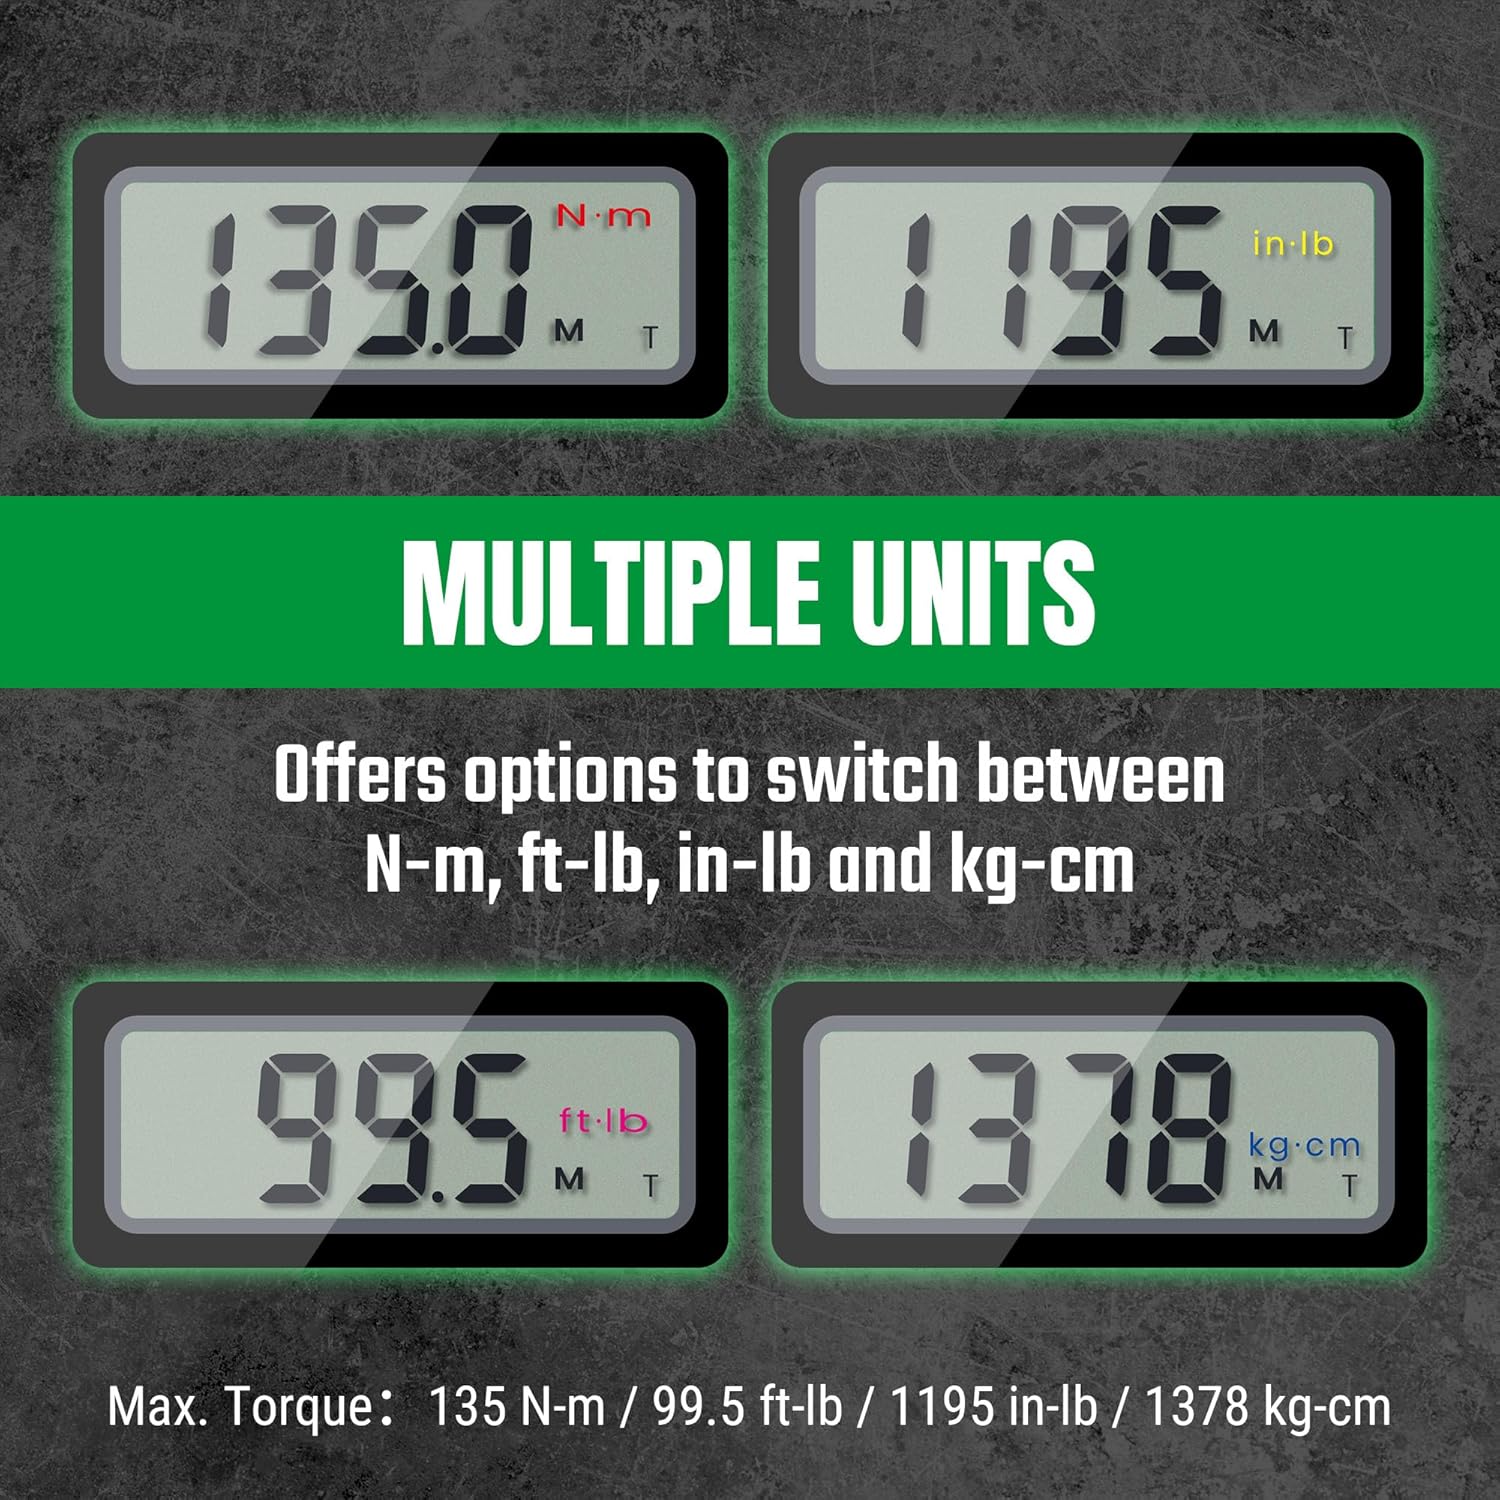
Figure 6: Multiple measurement units displayed.
5.4 Operating Modes: Track Mode and Peak Hold Mode
The wrench typically offers two operating modes:
- Track Mode: Displays the current torque value being applied in real-time.
- Peak Hold Mode: Captures and displays the maximum torque value reached during an application.
Refer to the wrench's display or specific button (if available) to switch between these modes. The image below illustrates the difference in operation.

Figure 7: Comparison of Track Mode and Peak Hold Mode.
5.5 Applying Torque and Notifications
Once the desired torque value is set:
- Attach the appropriate socket or attachment to the 3/8-inch drive.
- Place the wrench onto the fastener.
- Apply steady, smooth force to the handle. Observe the digital display for the current torque value.
- As you approach the target torque, green LED lights will illuminate at approximately 90% of the set value.
- When 100% of the target torque is reached, red LED lights will flash, and an audible buzzer will sound. Stop applying force immediately.
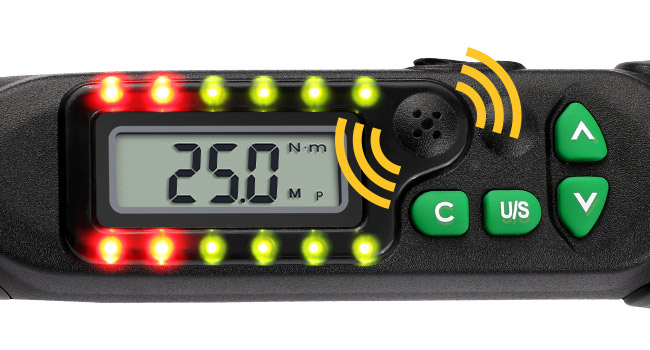
Figure 8: LED and audible notifications during torque application.

Figure 9: Digital torque wrench in use.
6. Maintenance
- Cleaning: Wipe the wrench with a clean, dry cloth after each use. Do not use abrasive cleaners or solvents.
- Storage: Store the wrench in its provided protective case in a dry, temperature-controlled environment. Remove batteries if storing for extended periods to prevent leakage.
- Calibration: Digital torque wrenches require periodic calibration to maintain accuracy. Refer to the manufacturer's guidelines or a certified calibration service for recommended intervals.
7. Troubleshooting
| Problem | Possible Cause | Solution |
|---|---|---|
| Wrench does not power on. | Dead or incorrectly installed batteries. | Check battery polarity. Replace with new AA batteries. |
| Inaccurate torque readings. | Wrench needs calibration; improper technique; damaged tool. | Ensure smooth, steady force. Have the wrench professionally calibrated. Inspect for damage. |
| Display is dim or flickering. | Low battery power. | Replace batteries. |
| No audible or visual notification at target torque. | Notification feature disabled (if applicable); internal fault. | Check settings for notification options. If issue persists, contact support. |
8. Specifications
| Feature | Detail |
|---|---|
| Model | B0DGX8R2JP |
| Drive Size | 3/8 inch |
| Torque Measuring Range | 6.8 N-m to 135 N-m |
| Maximum Torque | 135 N-m / 99.5 ft-lb / 1195 in-lb / 1378 kg-cm |
| Torque Accuracy | +/-2% Clockwise (CW), +/-3% Counter-Clockwise (CCW) |
| Units of Measure | N-m, ft-lb, in-lb, kg-cm |
| Display Type | LED Digital |
| Power Source | 2 x AA Batteries (included) |
| Auto-Sleep Function | Yes, after 5 minutes of inactivity |
| Material | Alloy Steel |
| Item Weight | 3.39 pounds |
| Package Dimensions | 19.5 x 5.5 x 3 inches |

Figure 10: Summary of key specifications.
9. Warranty and Support
9.1 Warranty Information
For detailed warranty information regarding your SK Digital Torque Wrench, please refer to the official SK Tools website or the warranty card included with your product. Warranty terms and conditions may vary.
9.2 Customer Support
If you encounter any issues or have questions not covered in this manual, please contact SK Tools customer support. Contact information can typically be found on the manufacturer's website or product packaging.
Ask a question about this manual
Ask about setup, troubleshooting, compatibility, parts, safety, or missing instructions. Manuals+ will review the question and use this page’s manual context to help answer it.