GODOX AD200 Pro II
Godox AD200 Pro II Flash Strobe User Manual
Model: AD200 Pro II
Introduction
The Godox AD200 Pro II is a powerful and portable pocket flash strobe designed for professional photographers. It features 200Ws output, 5800K bi-color temperature, TTL, and HSS capabilities, making it suitable for various lighting scenarios. This manual provides detailed instructions for setting up, operating, and maintaining your AD200 Pro II to ensure optimal performance and longevity.
Safety Information
Please read all safety precautions carefully before using the Godox AD200 Pro II. Improper use can result in electric shock, fire, or other hazards.
- Do not disassemble or modify the unit.
- Keep the unit dry and do not expose it to water or high humidity.
- Avoid direct eye exposure to the flash.
- Use only the specified battery and charger.
- Ensure proper ventilation during operation to prevent overheating.
What's in the Box
Verify that all components are present upon unboxing:
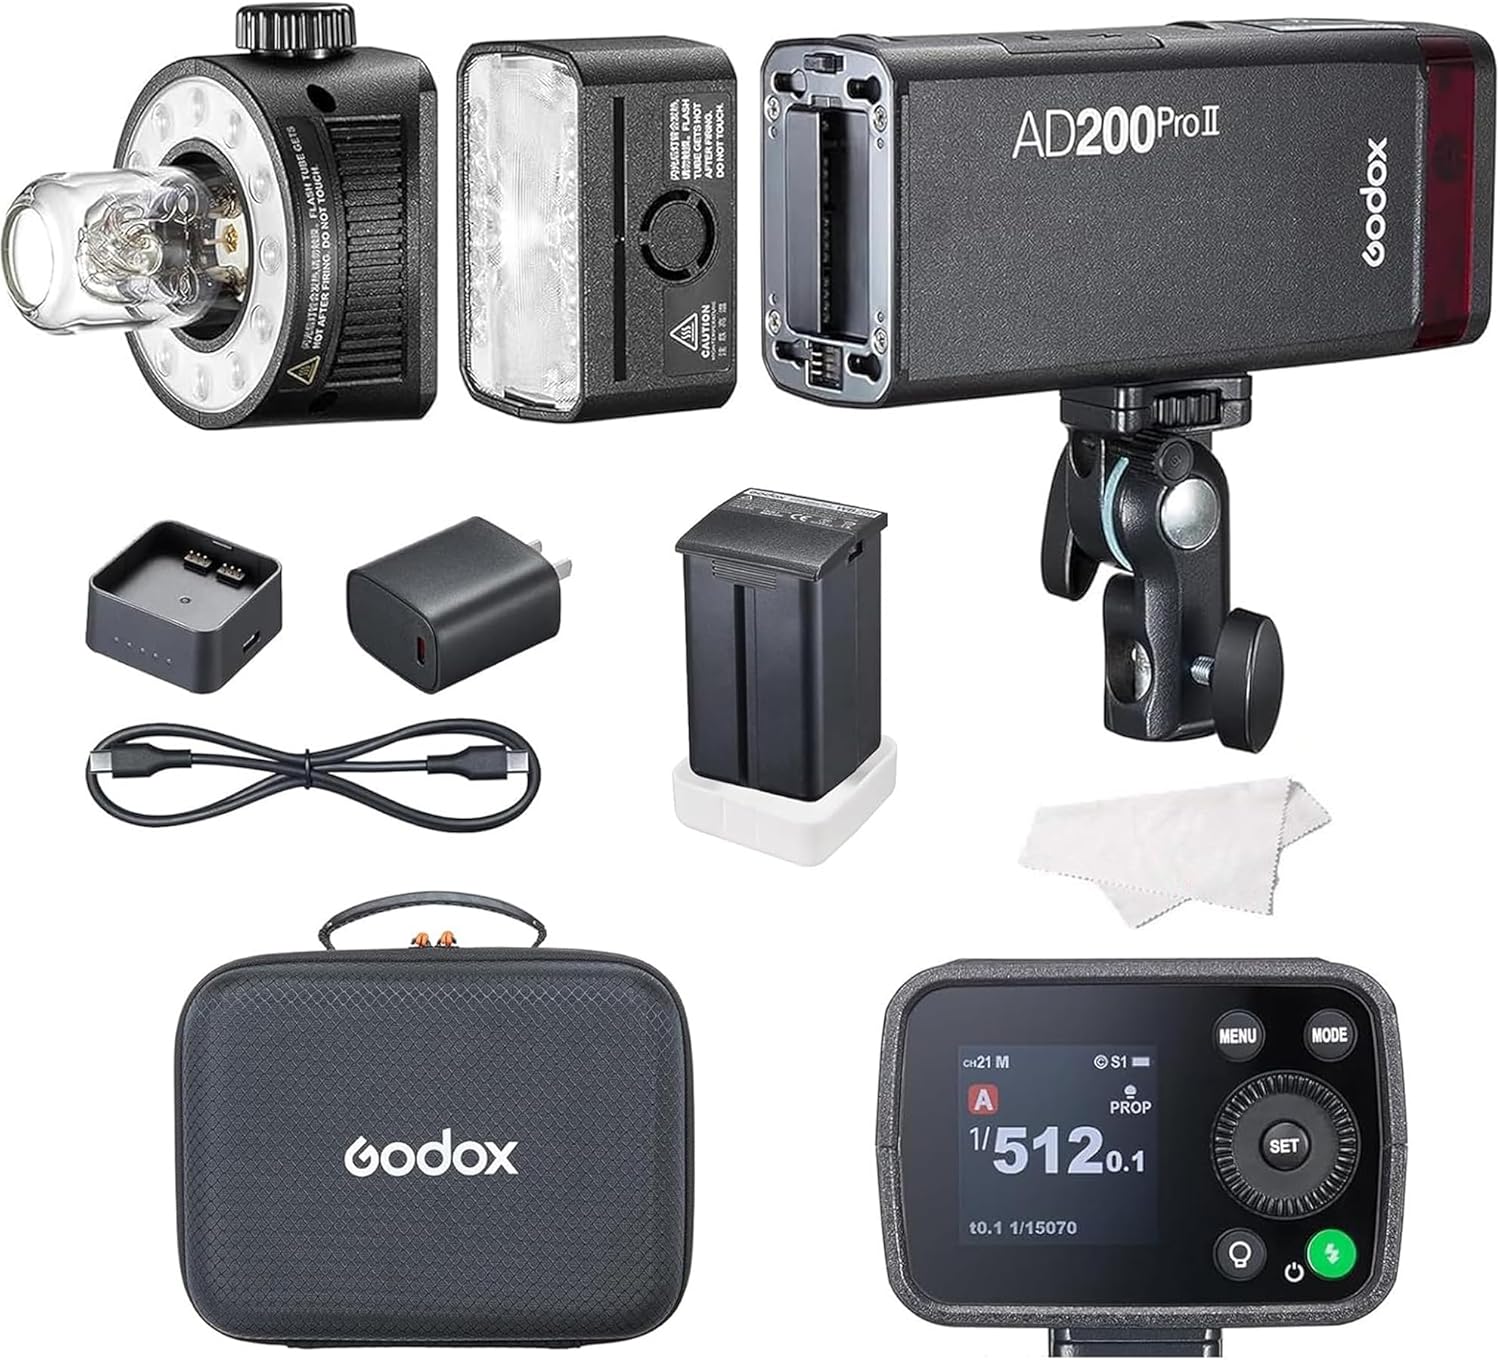
Image: Godox AD200 Pro II with various components.

Image: Detailed diagram of the AD200 Pro II kit contents.
- Flash Body x1
- Speedlite Flash Head H200l x1
- Bare Bulb Flash Head H200Jll x1
- Battery x1
- PD Adapter x1
- USB Cable x1
- Battery Protection Cover x1
- Holder AD-E2 x1
- Charging Case x1
- Instruction Manual x1
Product Overview
The Godox AD200 Pro II is a compact yet powerful flash unit. It features a modular design allowing for interchangeable flash heads.
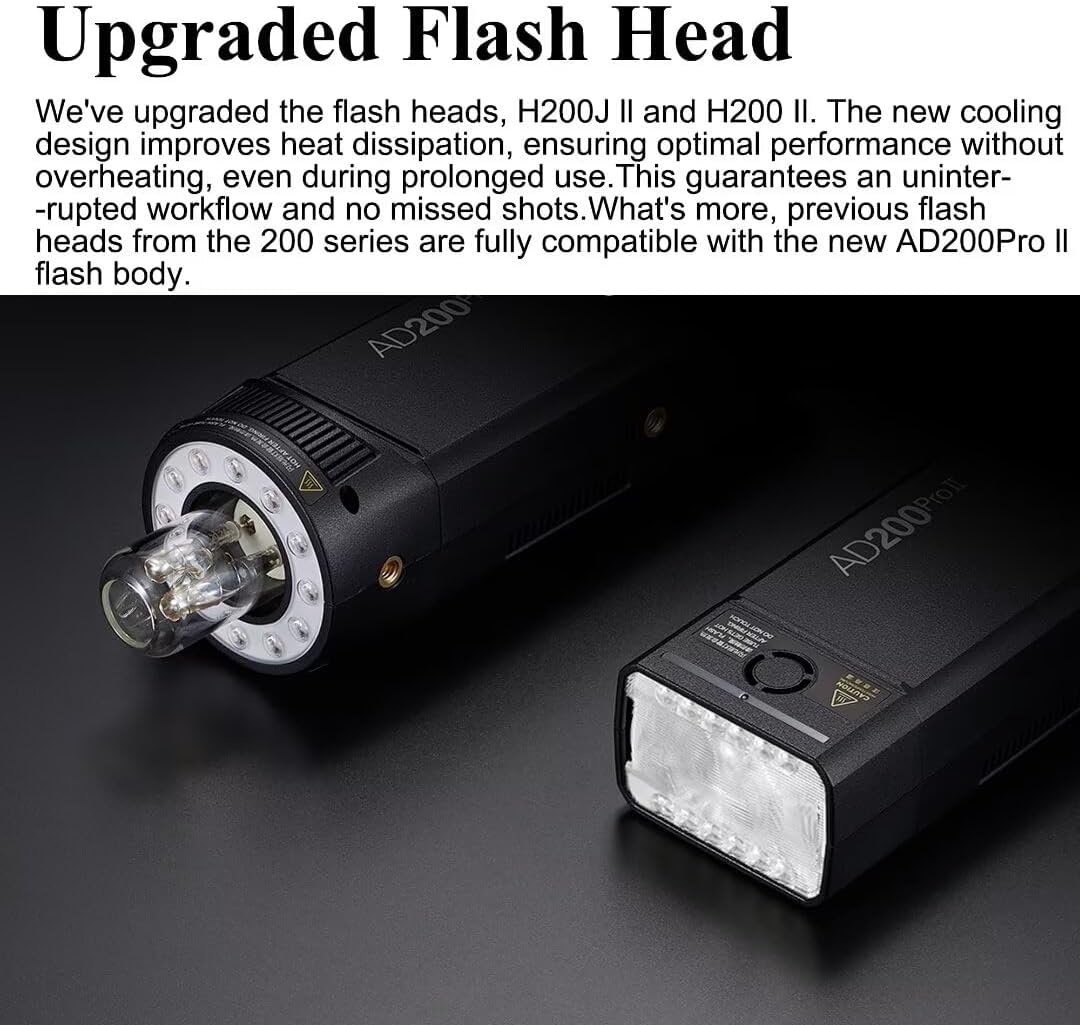
Image: Upgraded Flash Heads (H200J II and H200 II) with improved cooling design.

Image: Bi-Color Versatile Modeling Lamp with adjustable brightness and color temperature.
The unit features a bright TFT screen for clear display of settings, even in harsh sunlight. It also includes a group color indicator for easy identification in multi-light setups.

Image: The TFT screen showing precise output control settings.

Image: Group Color Indicator on multiple AD200 Pro II units and the X3 trigger.
Setup
1. Battery Installation
Insert the provided Lithium Ion battery into the battery compartment of the flash body. Ensure it clicks securely into place. The battery can be charged via the included PD adapter and USB cable.
2. Attaching Flash Head
Choose between the Speedlite Flash Head (H200l) or the Bare Bulb Flash Head (H200Jll). Align the head with the mounting slot on the flash body and slide it in until it locks. Ensure it is firmly attached before use.
3. Mounting to Stand
Attach the Holder AD-E2 to the flash body. This holder allows you to mount the AD200 Pro II onto a light stand. Secure the unit firmly to prevent accidental falls.
Operating
Power On/Off
Press and hold the power button to turn the unit on or off. The TFT screen will illuminate upon power-on.
Screen Interface (TFT Screen)
The improved TFT screen provides a clear and intuitive interface for adjusting settings. Navigate through menus using the control dial and buttons.
Image: The bright TFT screen for easy setting adjustments.
Wireless Sync with X3 (One-Tap Pairing)
The AD200 Pro II supports one-tap wireless sync with the Godox X3 trigger. Simply tap the wireless sync button on the X3 trigger and the AD200 Pro II sync icon to effortlessly pair your devices. This feature streamlines your workflow, allowing you to focus more on creativity and less on setup.
Video: Demonstrates the one-tap wireless sync feature between the Godox AD200 Pro II and the X3 trigger.

Image: Visual representation of the X3 One Tap Pairing process.
Group Color Indicator
Managing multiple lights is simplified with the group color indicator feature. Each group is assigned a distinct color on both the AD200 Pro II and the X3 display, making it easy to identify and control specific groups, even in complex multi-light setups or long-distance shooting scenarios.
Image: Multiple AD200 Pro II units displaying different group colors, controlled by an X3 trigger.
Power Output Control
The AD200 Pro II offers precise flash power output control, adjustable from 1/512 to full power (1/1) with 0.1 increments. This level of precision allows photographers to fine-tune their lighting for exact results.
Bi-Color Versatile Modeling Lamp
The two upgraded flash heads feature a brighter modeling lamp with adjustable brightness and color temperature, delivering up to 1400 lux at 1 meter. The bi-color design simulates effects like candlelight and sunsets. In pro mode, the lamp's brightness matches the flash output. The H200J II offers up to 5.5 hours of continuous modeling light, while the H200 II provides up to 6 hours.
Image: Adjusting the modeling lamp's brightness and color temperature.
Consistent Color Temperature Mode
The AD200 Pro II features a stable color temperature mode, maintaining a variance within ±100K across the entire power range. This is ideal for color-critical shooting, where consistent color accuracy is crucial. Photographers can adjust power levels without worrying about color shifts, minimizing the need for post-processing.

Image: Example of consistent color temperature output from the flash.
Sync Modes (HSS, TTL, First-Curtain, Rear-Curtain)
The AD200 Pro II supports various sync modes for versatile shooting:
- HSS (High-Speed Sync): Allows flash synchronization at shutter speeds up to 1/8000s, enabling wider apertures in bright conditions.
- TTL (Through-The-Lens): Automatically adjusts flash output for correct exposure.
- First-Curtain Sync: Flash fires at the beginning of the exposure.
- Rear-Curtain Sync: Flash fires at the end of the exposure, useful for creating motion blur effects with a sharp trailing image.
Maintenance
To ensure the longevity and optimal performance of your Godox AD200 Pro II, follow these maintenance guidelines:
- Cleaning: Use a soft, dry cloth to clean the flash body and heads. For stubborn dirt, a slightly damp cloth can be used, followed by immediate drying. Do not use harsh chemicals or abrasive cleaners.
- Storage: When not in use, store the unit in its protective carry bag in a cool, dry place away from direct sunlight and extreme temperatures.
- Battery Care: Fully charge the battery before long-term storage and recharge it every 3-6 months to maintain battery health.
- Flash Head Handling: Handle flash heads with care, especially the bare bulb, to avoid damage.
Troubleshooting
| Problem | Possible Cause | Solution |
|---|---|---|
| Flash not firing | Low battery; Incorrect sync settings; Flash head not properly attached. | Charge battery; Check wireless sync settings on both flash and trigger; Re-attach flash head securely. |
| Inconsistent flash output | Overheating; Battery issues; Interference. | Allow unit to cool down; Ensure battery is fully charged and healthy; Check for other wireless devices causing interference. |
| Screen not displaying | Unit is off; Battery drained; Screen damage. | Power on the unit; Charge battery; Contact customer support if screen is damaged. |
Specifications

Image: Physical dimensions of the AD200 Pro II.

Image: Feature comparison between AD200 Pro II and AD200 Pro.
| Feature | Detail |
|---|---|
| Product Dimensions | 8.54 x 2.83 x 2.05 inches |
| Item Weight | 2 pounds |
| Item Model Number | Godox AD200 Pro II |
| Batteries | 1 Lithium Ion battery required |
| Battery Life | Approx. 500 full power flashes |
| Compatible Mountings | Canon, Sony, Nikon, Fuji (with Godox Flash trigger) |
| Flash Sync Speed | Up to 1/8000s (HSS) |
| Power Output | 200Ws, adjustable from 1/512 to 1/1 in 0.1 increments |
| Color Temperature | 5800K ±100K |
Warranty and Support
For warranty information and technical support, please refer to the official Godox website or contact your local distributor. Keep your purchase receipt as proof of purchase for warranty claims.
Visit the official GODOX Store for more products and support.