1. Introduction
This manual provides essential instructions for the safe and efficient installation, operation, and maintenance of the ZHRCLY CML Solenoid Valve, model WH43-G02-C9-A110. Please read this manual thoroughly before use and retain it for future reference. Proper understanding and adherence to these instructions are crucial for optimal performance and longevity of the product.
2. Safety Information
Always observe the following safety precautions to prevent injury or damage to the equipment:
- Electrical Hazard: Ensure power is disconnected before performing any installation, maintenance, or troubleshooting. Only qualified personnel should handle electrical connections.
- Pressure Hazard: Depressurize fluid lines before working on the valve. Sudden release of pressure can cause injury.
- Chemical Compatibility: Verify that the valve materials are compatible with the fluid being controlled to prevent corrosion or failure.
- Proper Tools: Use appropriate tools for installation and maintenance to avoid damaging the valve.
- Environmental Conditions: Do not expose the valve to conditions beyond its specified operating limits (temperature, pressure, humidity).
3. Product Overview
The ZHRCLY CML Solenoid Valve, model WH43-G02-C9-A110, is an essential component designed for precise control of fluid flow in various industrial and hydraulic systems. This valve operates by converting electrical signals into mechanical action, allowing for automated or remote control of fluid pathways. It is a general accessory compatible with CML solenoid valve systems.
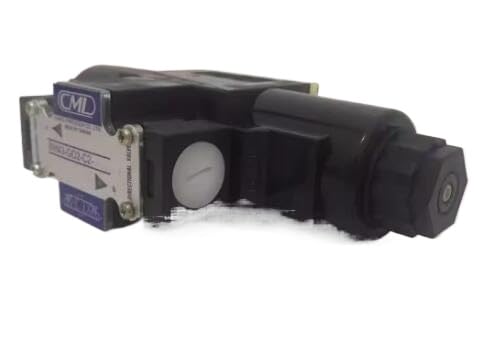
This image shows the general appearance of the ZHRCLY CML Solenoid Valve. Note the electrical connection points and fluid ports, which are crucial for proper installation and operation.
Key Components:
- Valve Body: The main housing that contains the fluid passages and internal components.
- Solenoid Coil: The electromagnetic component that, when energized, actuates the valve.
- Plunger/Armature: The movable part inside the coil that opens or closes the valve orifice.
- Seals: Gaskets and O-rings that prevent fluid leakage.
4. Setup and Installation
Follow these steps for proper installation of the solenoid valve:
- Unpacking and Inspection: Carefully remove the valve from its packaging. Inspect the valve for any signs of shipping damage, such as dents, cracks, or loose components. Do not install a damaged valve.
- Mounting: Securely mount the valve in the desired position. Ensure the mounting surface is stable and capable of supporting the valve's weight and any associated piping. The valve can typically be mounted in any orientation, but refer to system-specific requirements.
- Plumbing Connections: Connect the fluid lines to the valve's inlet and outlet ports. Ensure the flow direction matches any arrows indicated on the valve body. Use appropriate thread sealants (e.g., PTFE tape or pipe dope) on threaded connections to prevent leaks. Tighten connections to the manufacturer's recommended torque specifications, avoiding overtightening.
- Electrical Connections: Ensure the power supply is OFF before making any electrical connections. Connect the solenoid coil to the appropriate power source. The model number WH43-G02-C9-A110 indicates a 110V AC coil. Verify that the supply voltage matches the coil voltage. All wiring must comply with local electrical codes and standards. Use properly sized wires and ensure connections are secure and insulated.
- Initial System Test: After installation, slowly introduce fluid pressure into the system. Carefully check all connections for leaks. Then, apply the specified voltage to the solenoid coil to actuate the valve. Observe its operation to ensure it opens and closes correctly. Repeat this several times to confirm reliable function.
5. Operating Instructions
The WH43-G02-C9-A110 solenoid valve is designed for straightforward operation:
- Actuation: To actuate the valve (change its state, e.g., open or close), apply the rated voltage (110V AC) to the solenoid coil terminals. The electromagnetic field generated will move the plunger, thereby controlling the fluid flow.
- De-actuation: To return the valve to its default state (e.g., closed or open, depending on the valve's design), remove the voltage from the solenoid coil. A spring typically returns the plunger to its original position.
- Continuous Operation: Ensure the valve operates within its specified duty cycle to prevent overheating of the coil.
- Flow Direction: Always ensure that the fluid flows in the direction indicated by any arrows on the valve body. Incorrect flow direction can impair performance or damage the valve.
6. Maintenance
Regular maintenance ensures the longevity and reliable operation of your solenoid valve.
- Periodic Inspection: Regularly inspect the valve for external damage, corrosion, and signs of leakage around connections or the valve body. Check electrical connections for tightness and integrity.
- Cleaning: Keep the exterior of the valve clean. Use a soft cloth and a mild detergent if necessary. Avoid using abrasive cleaners, solvents, or harsh chemicals that could damage the valve's finish or internal components.
- Internal Component Check: If the valve's performance degrades (e.g., slow response, incomplete actuation), it may indicate wear on internal seals or accumulation of debris. Disconnect power and depressurize the system before attempting to disassemble the valve. This procedure should ideally be performed by a qualified technician.
- Seal Replacement: Worn or damaged seals are a common cause of leaks. Replace seals with genuine ZHRCLY replacement parts to ensure compatibility and proper function.
- Power Disconnection: Always disconnect the electrical power supply to the solenoid and depressurize the fluid system before performing any maintenance or repair work.
7. Troubleshooting
Refer to the table below for common issues and their potential solutions:
| Problem | Possible Cause | Solution |
|---|---|---|
| Valve does not actuate when energized. |
|
|
| Valve leaks externally. |
|
|
| Reduced or no fluid flow. |
|
|
| Solenoid coil overheats. |
|
|
8. Specifications
Technical specifications for the ZHRCLY CML Solenoid Valve WH43-G02-C9-A110:
- Brand: ZHRCLY
- Model Number: WH43-G02-C9-A110
- Manufacturer: Original factory
- Item Weight: 1 pounds
- Product Dimensions (L x W x H): 1 x 1 x 1 inches
- Batteries Required: No
- ASIN: B0DGTL99GH
- Date First Available: September 12, 2024
9. Warranty and Support
For warranty information, technical assistance, or to inquire about replacement parts, please contact the original factory or your authorized ZHRCLY distributor. Keep your purchase receipt and product model number (WH43-G02-C9-A110) readily available when seeking support, as this information will be required for verification.
For further assistance, you may also refer to the product page on Amazon: Amazon Product Page