Introduction
This manual provides essential information for the safe operation, maintenance, and troubleshooting of your PowerSmart 21-Inch Single-Stage 212cc Gas Snow Blower. Please read it thoroughly before operating the machine to ensure proper use and to prevent injury or damage.

Figure 1: PowerSmart 21-Inch Single-Stage Gas Snow Blower, front-side view.
Important Safety Information
Operating this snow blower requires adherence to safety precautions. Failure to follow these instructions may result in serious injury or property damage.
- Always operate the snow blower in a well-ventilated outdoor area to avoid carbon monoxide poisoning.
- Keep hands, feet, and clothing away from all moving parts, especially the auger and discharge chute.
- Wear appropriate personal protective equipment, including safety glasses or goggles, hearing protection, and sturdy, non-slip footwear.
- Never allow children or untrained individuals to operate the snow blower.
- Before performing any maintenance, clearing clogs, or making adjustments, ensure the engine is off and the safety key is removed.
- Do not operate the machine on steep slopes.
- Be aware of your surroundings and avoid throwing snow towards people, animals, or property.
Setup and Initial Preparation
1. Assembly
Your PowerSmart snow blower requires minimal assembly. Refer to the detailed assembly instructions provided in the separate owner's manual for step-by-step guidance. Ensure all fasteners are securely tightened before operation.
2. Adding Engine Oil
The engine is shipped without oil. It is crucial to add the correct type and amount of engine oil before the first use. Consult the engine manual for specific oil recommendations (e.g., 5W-30 for cold weather) and fill levels. The oil dipstick is located near the engine.

Figure 2: Engine components including oil fill and spark plug.
3. Adding Fuel
Fill the fuel tank with fresh, unleaded gasoline. Do not mix oil with gasoline. Use a fuel stabilizer if storing the machine for extended periods.
4. Inserting the Safety Key
Locate the red safety key and insert it into its slot on the control panel. The engine will not start or run without the key fully inserted.
Operating Instructions
1. Starting the Engine
- Ensure the safety key is inserted.
- Move the choke lever to the "FULL CHOKE" position (typically to the left).
- Press the primer bulb 3-5 times (or as recommended in the engine manual).
- Grasp the recoil start handle firmly and pull it quickly until the engine starts.
- Once the engine starts, gradually move the choke lever to the "RUN" position as the engine warms up.
- Alternatively, for models with electric start, plug in an extension cord and press the electric start button.
Video 1: Demonstration of the single-stage gas snow blower in operation, highlighting its features and ease of use.
2. Snow Clearing
The PowerSmart 21-inch single-stage snow blower is designed for clearing light, fluffy snow up to 8 inches deep. It features a 21-inch clearing width and a 12.5-inch intake height.

Figure 3: Visual representation of the snow blower's 21-inch clearing width, 8-inch snow depth capacity, and 35-foot throwing distance.
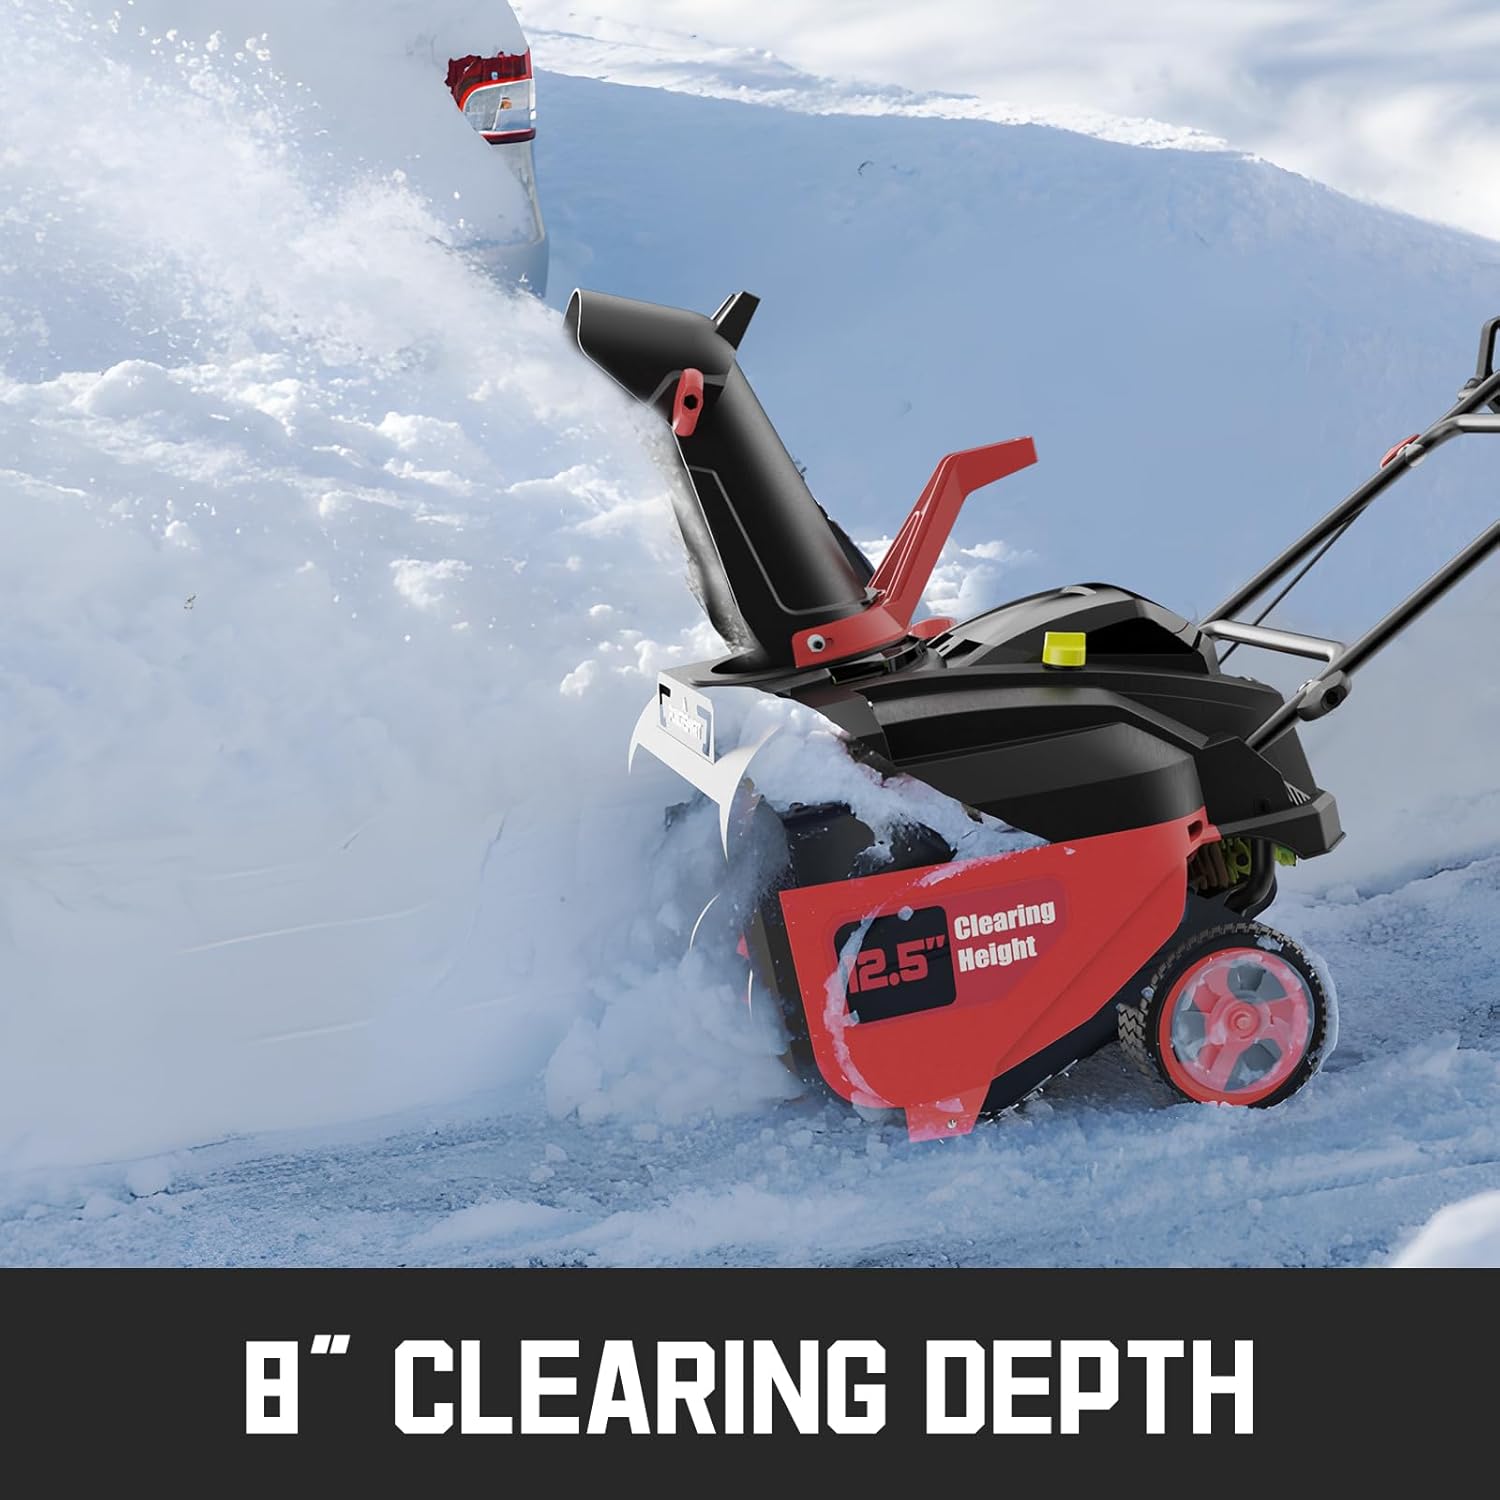
Figure 4: The snow blower effectively clearing snow up to 8 inches deep from a paved surface.
3. Chute Control
Use the grip handle to easily rotate the discharge chute 180 degrees from left to right, directing the snow precisely where you want it. The chute's angle can also be adjusted to control the throwing height.

Figure 5: A user operating the snow blower, showcasing its ability to throw snow up to 35 feet away.
4. Auger System
The machine is equipped with a reinforced 9-inch rubber auger that efficiently picks up and throws snow while minimizing clogging. This design is particularly effective on paved surfaces.

Figure 6: Detailed view of the durable 4-paddle rubber auger, designed for efficient snow removal.
Maintenance
Regular maintenance ensures optimal performance and extends the lifespan of your snow blower. Always turn off the engine and remove the safety key before performing any maintenance.
1. Engine Oil
- Check the oil level before each use.
- Change the engine oil after the first 5 hours of operation, then every 25 hours or annually, whichever comes first.
- Refer to the engine manual for oil type and capacity.
2. Spark Plug
Inspect the spark plug annually or every 50 hours. Clean or replace it as needed to ensure reliable starting and efficient engine operation.
3. Shear Pins
Shear pins are designed to break if the auger encounters an obstruction, protecting the engine and gearbox from damage. Always keep spare shear pins on hand and replace them immediately if they break. Refer to the owner's manual for replacement procedures.
4. Clearing Clogs
If the discharge chute becomes clogged, turn off the engine and remove the safety key. Use the provided chute cleaner tool to safely remove any snow or ice. Never use your hands.
5. Storage
For seasonal storage, drain the fuel tank or add a fuel stabilizer. Clean the machine thoroughly and store it in a dry, protected area. The compact design allows for easy storage.

Figure 7: The snow blower's compact design facilitates convenient storage in a garage or shed.
Troubleshooting
This section addresses common issues you might encounter with your snow blower. For more complex problems, consult a qualified service technician.
| Problem | Possible Cause | Solution |
|---|---|---|
| Engine will not start | No fuel, old fuel, choke not set, safety key not inserted, fouled spark plug. | Add fresh fuel, set choke, insert safety key, clean/replace spark plug. |
| Auger not spinning | Clogged chute, broken shear pin, drive belt issue. | Clear chute with tool, replace shear pin, inspect/replace drive belt. |
| Snow not throwing far enough | Wet/heavy snow, clogged chute, incorrect chute angle. | Clear chute, adjust chute angle, reduce forward speed. |
| Chute is stiff to adjust | Ice buildup, lack of lubrication. | Remove ice, apply silicone lubricant to moving parts. |
Specifications
- Brand: PowerSmart
- Model: B0DGPVKZRP
- Power Source: Gasoline-Powered
- Engine Type: 212cc 4-Cycle OHV Engine
- Clearing Width: 21 Inches
- Intake Height: 12.5 Inches
- Ideal Snow Depth: Up to 8 Inches
- Throwing Distance: Up to 35 Feet
- Auger Type: Reinforced Rubber Auger (9-inch)
- Product Dimensions: 48"D x 20.8"W x 36.6"H
- Item Weight: 80.4 Pounds
- Manufacturer: Amerisun Inc.
Warranty and Support
For warranty information, replacement parts, or technical support, please contact Amerisun Inc., the manufacturer of PowerSmart products. Refer to your product registration card or the official PowerSmart website for the most current contact details and warranty terms.
PowerSmart has over 500 certified repair centers in the U.S. and provides full replacement parts through its IL headquarters. For any issues, please contact them directly.
You can also visit the PowerSmart Store on Amazon for additional product information and support resources.


