Introduction
This manual provides detailed instructions for the installation, operation, and maintenance of your Toolsempire 48" x 40" Window Awning Door Canopy. Designed to offer practical protection and enhance your outdoor space, this canopy effectively shields your home from sun, rain, and snow. Please read this manual thoroughly before installation and use to ensure proper setup and long-lasting performance.
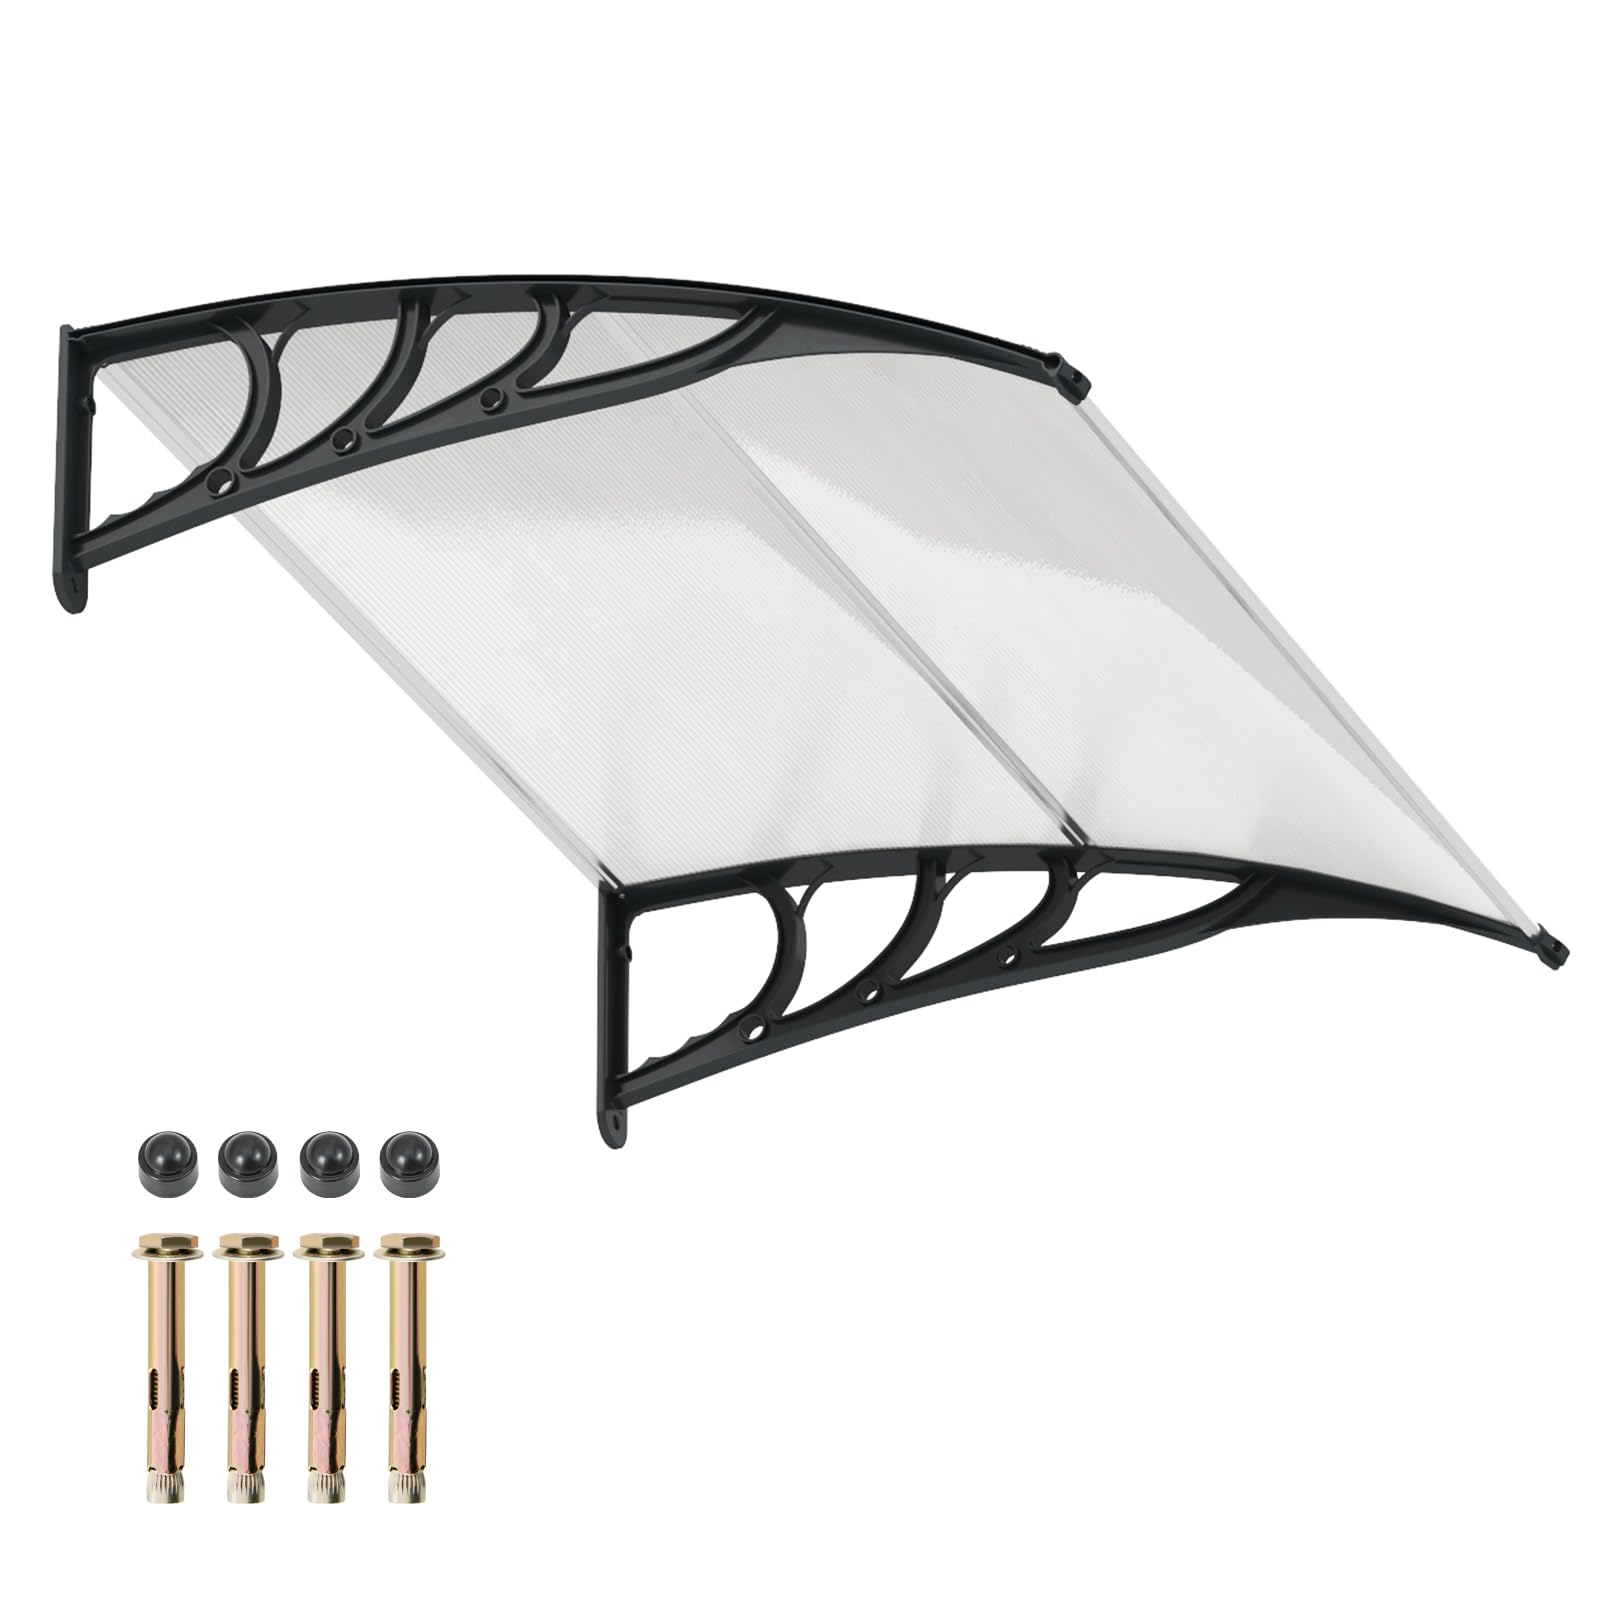
Image: The Toolsempire 48" x 40" Window Awning Door Canopy providing shelter over a doorway.
Safety Information
Important: Exceeding the snow load capacity of 44 lbs or improper installation may result in safety hazards. Always ensure the canopy is securely mounted according to the instructions provided. Regularly inspect all parts and connections, and tighten if loose, to maintain stability and safety.
Package Contents
Verify that all components are present before beginning installation:
- 2 x Polycarbonate (PC) Sheets
- 2 x Brackets (ABS)
- 3 x Fixing Bars (Aluminum)
- 4 x Expansion Bolt Sets (for various wall types)
- 1 x User’s Manual (this document)

Image: Visual representation of all included parts and their quantities.
Specifications
- Overall Dimensions: 48" (Width) x 40" (Depth) x 11" (Height)
- Net Weight: 6.5 lbs
- Weight Capacity (Snow Load): 44 lbs
- Material: Polycarbonate (PC), Aluminum, Acrylonitrile Butadiene Styrene (ABS)
- Color: Black (for this model)
- UV Protection: UPF50+ anti-ultraviolet layers
- Required Assembly: Yes
- Operation Mode: Manual
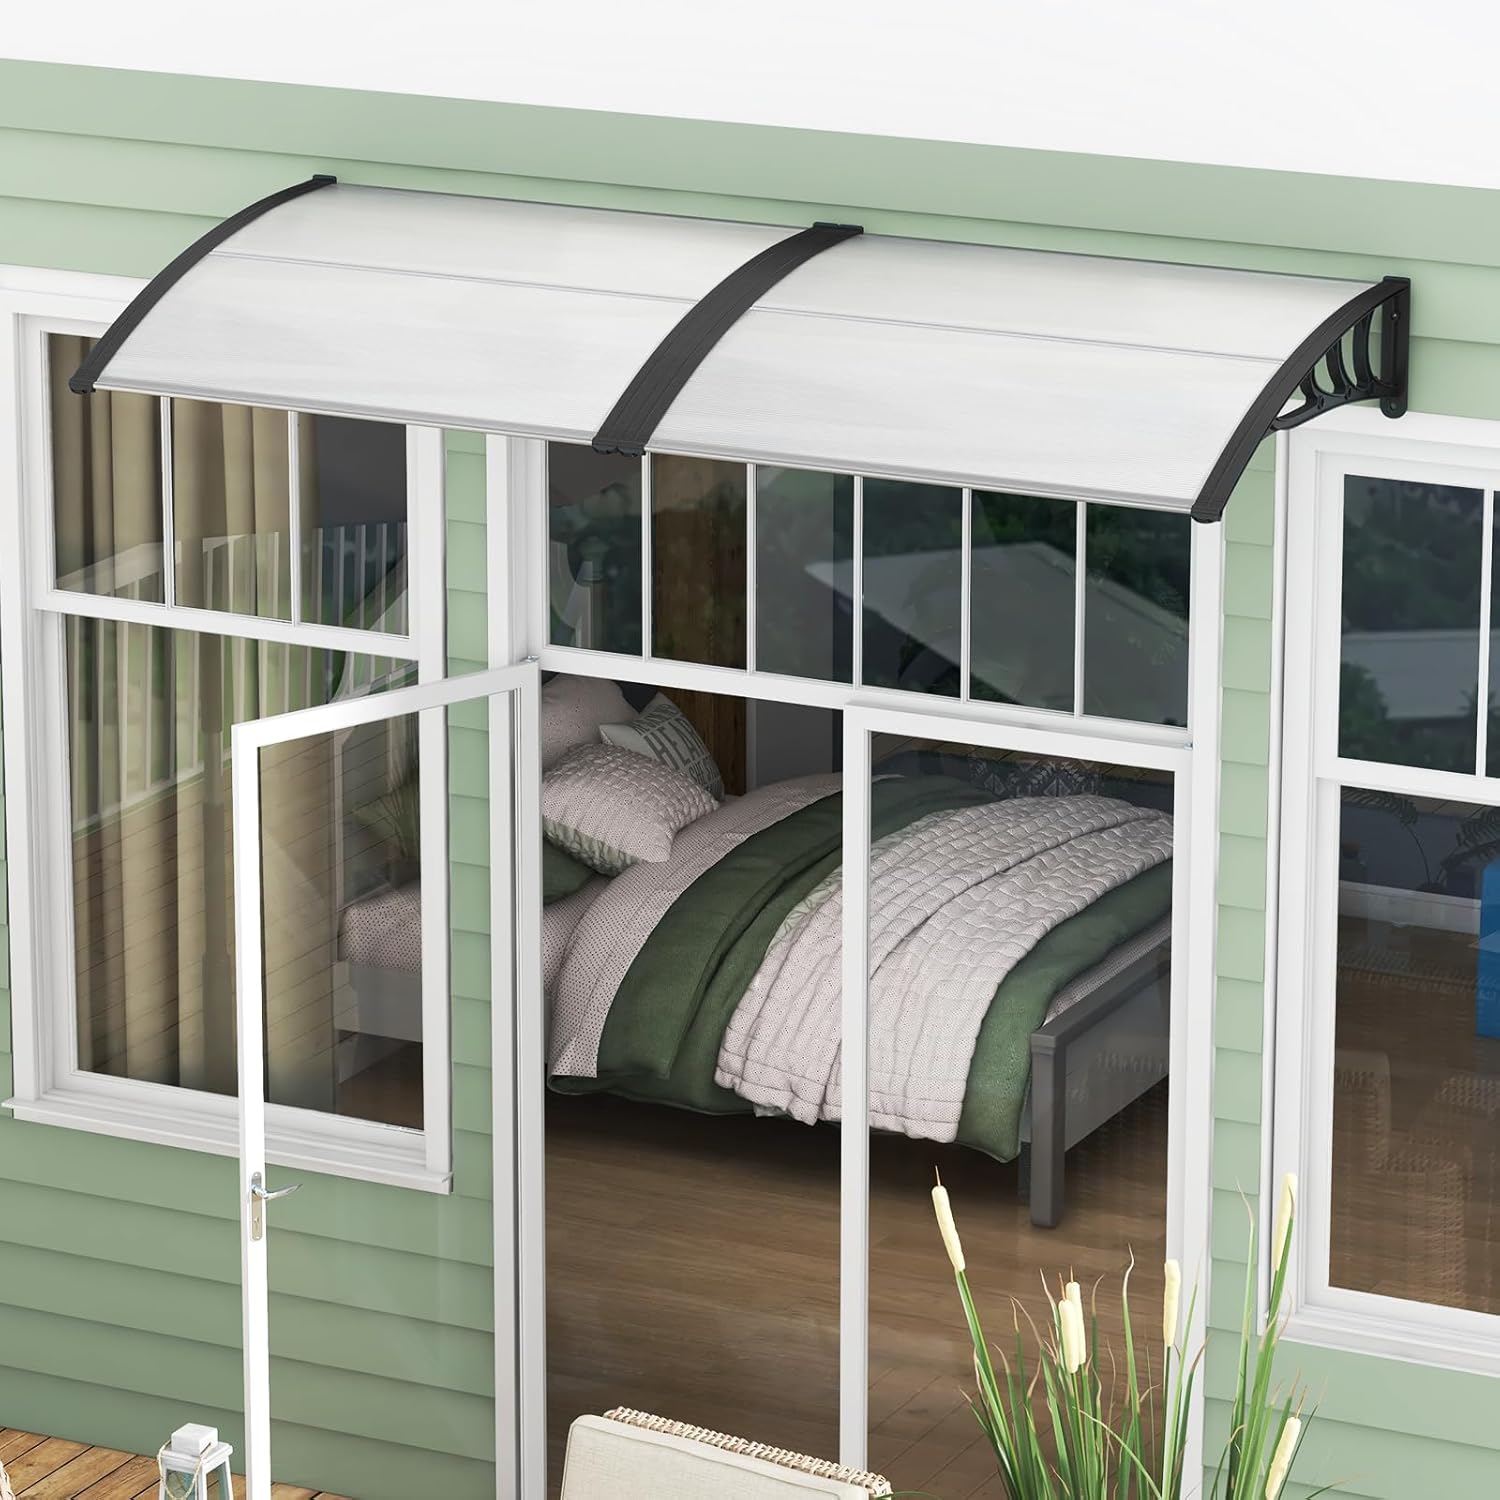
Image: The canopy's dimensions and design features.
Installation Guide
Before installation, measure your window or door to ensure the 48" x 40" canopy is the appropriate size. The installation process is designed to be straightforward, but it is recommended to have two to three people for easier assembly and mounting.
Step 1: Prepare the Polycarbonate Sheets
Carefully peel off the protective plastic film from both sides of the polycarbonate sheets. This film prevents scratches and dirt during shipping and handling.

Image: The polycarbonate sheet, demonstrating its material and thickness.
Step 2: Assemble the Canopy Structure
- Connect the two PC sheets using the aluminum fixing bars. Ensure they slide securely into the channels.
- Attach the two ABS brackets to the assembled PC sheets and fixing bars. The brackets provide structural support and the curved shape for drainage.

Image: Step-by-step illustration of connecting the polycarbonate sheets and attaching the brackets.
Step 3: Mount the Canopy to the Wall
The canopy includes 4 sets of expansion bolt kits suitable for various wall types, including cement, wooden, brick, and stone walls. Select the appropriate bolts for your wall material.
- Position the assembled canopy against the wall at the desired height. Mark the drilling points through the bracket holes.
- Drill pilot holes at the marked locations. For brick or concrete, use an 8mm drill bit first, then a 10mm bit to avoid oversized holes.
- Insert the expansion bolts into the drilled holes.
- Securely fasten the canopy to the wall using the provided screws and tools. Ensure all connections are tight and stable.

Image: Examples of different wall types compatible with the canopy's mounting hardware.
Operating Features
The Toolsempire Window Awning Door Canopy is designed for optimal performance in various weather conditions:
- Sun Protection: The PC sheets feature anti-ultraviolet layers, offering UPF50+ sun protection. This helps to block harmful UV rays while allowing diffused light to pass through.
- Rain and Snow Protection: The curved design of the canopy facilitates efficient drainage of rainwater and prevents snow accumulation, supporting up to 44 lbs of snow load. This design ensures that water is directed away from your door or window, keeping the entrance dry and protecting the underlying structure from moisture damage.
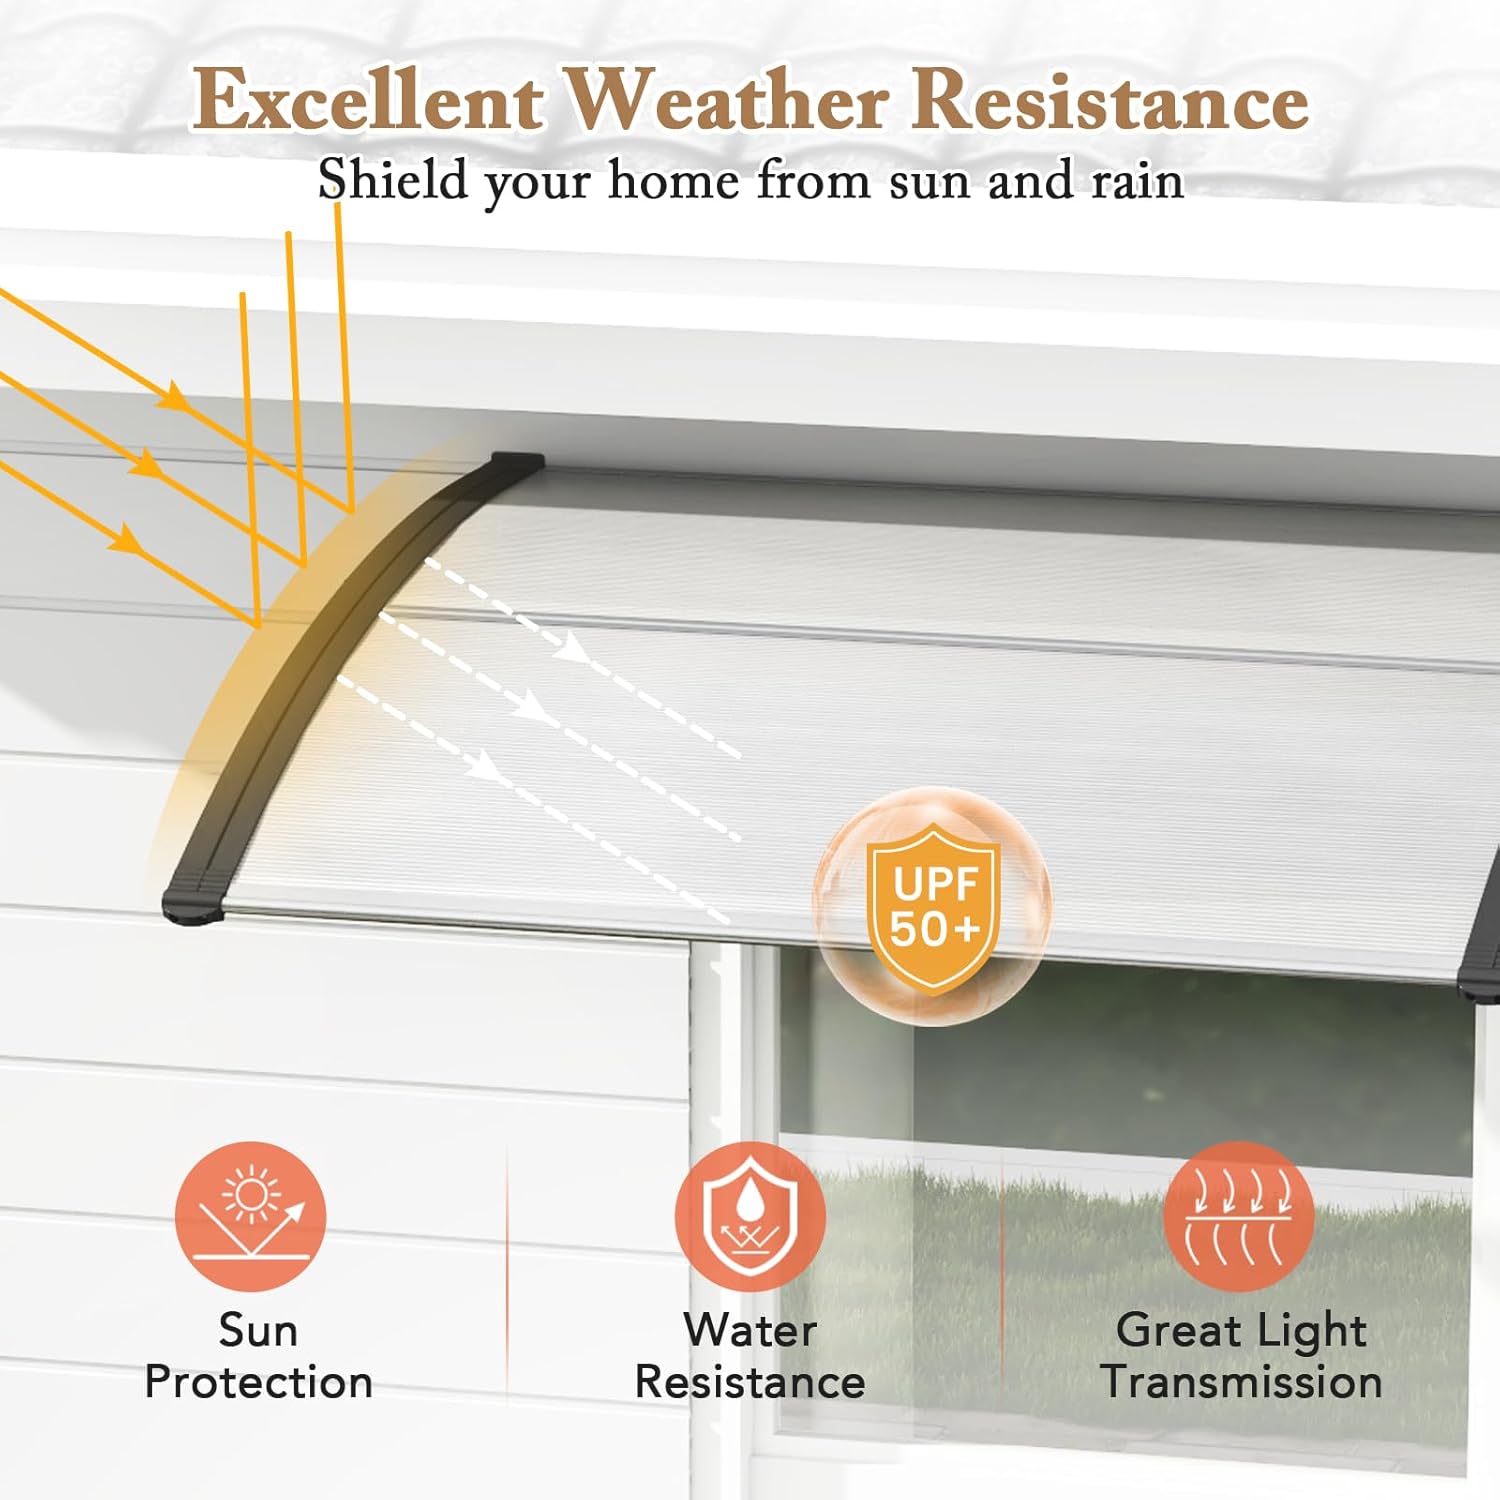
Image: Diagram highlighting the canopy's protective features against sun and rain.
During rainfall, water will flow along the curved surface of the canopy and be channeled to the sides, preventing drips directly in front of your door. This effective drainage system ensures your entryway remains clear and dry.
Maintenance
To ensure the longevity and continued performance of your canopy, regular maintenance is recommended:
- Cleaning: Periodically clean the polycarbonate sheets with a soft cloth and mild soapy water. Avoid abrasive cleaners or harsh chemicals that could damage the material.
- Inspection: Regularly inspect all mounting bolts, brackets, and fixing bars for any signs of loosening or damage. Tighten any loose bolts immediately to maintain structural integrity.
- Snow Removal: While the canopy is designed to handle snow, heavy accumulation should be gently removed to prevent exceeding the 44 lbs weight capacity, especially during prolonged heavy snowfall.
Troubleshooting
- Difficulty Assembling Sheets: If the polycarbonate sheets are difficult to slide into the fixing bar channels, ensure they are aligned correctly. Sometimes, a slight adjustment or gentle pressure can help them fit. Avoid forcing the sheets, which could cause damage.
- Water Leakage: If you observe water leaking from the canopy, check all connections and ensure the fixing bars are properly seated and sealed. Verify that the installation on the wall is level to allow for proper water runoff into the integrated gutter system.
- Canopy Instability: If the canopy feels unstable after installation, re-check all expansion bolts and ensure they are fully tightened into the appropriate wall material. Confirm that the wall surface is sound and capable of supporting the canopy's weight and potential snow load.