1. Introduction
Thank you for choosing the LANDNOR 60,000mg/h Ozone Generator. This manual provides essential information for the safe and effective operation, maintenance, and troubleshooting of your device. Please read it thoroughly before use and retain it for future reference.
This ozone generator is designed for powerful odor elimination in various environments, including homes, basements, vehicles, and commercial spaces, by producing ozone (O₃) to neutralize odors at their source.
2. Safety Information
WARNING: Ozone is a powerful oxidant. Direct exposure to high concentrations of ozone can be harmful to humans and animals. Always follow these safety guidelines.
- Use Only in Unoccupied Spaces: Ensure no people, pets, or plants are present in the area during ozone treatment.
- Ventilation is Crucial: After treatment, allow at least 30 minutes for the ozone to dissipate and convert back to oxygen before re-entering the treated space. Open windows and doors to ventilate the area thoroughly.
- Proper Placement: Place the unit on a stable, elevated surface to ensure optimal air circulation. Do not block air intake or output vents.
- Electrical Safety: Do not operate the unit with wet hands or in damp environments. Ensure the power cord is securely connected and undamaged.
- Children and Pets: Keep the device out of reach of children and pets.
- Flammable Materials: Do not use near flammable liquids, gases, or materials.

Image: The ozone generator is effective for removing odors in enclosed spaces like vehicles, but proper safety precautions must be observed.
3. Product Overview
The LANDNOR AIR-001 Ozone Generator is a compact yet powerful device designed for efficient odor elimination. It features a durable metal casing, a high-output ceramic ozone plate, and a robust fan for effective ozone distribution.

Image: Front view of the LANDNOR Ozone Generator, showing the control panel and carrying handle.
Key Components:
- Time Switch Dial: Used to set the operation duration (0-120 minutes) or 'HOLD' for continuous operation.
- Work Indicator Light: Illuminates when the unit is operating.
- Ozone Output Port: Where ozone is released into the environment.
- Power Switch: On/Off toggle for the unit.
- Removable Fan: Facilitates air intake and ozone distribution, designed for easy cleaning.

Image: Detailed view of the control panel, showing the timer dial and ozone output area.
Included in the Box:
- LANDNOR 60,000mg/h Ozone Generator (Model AIR-001)
- Power Cable
- Instruction Manual (this document)
- Door Hanger Notice (for safety during operation)

Image: The complete package includes the ozone generator unit, power cable, instruction manual, and a safety door hanger.
4. Setup
Before operating your ozone generator, ensure the area is prepared according to safety guidelines.
- Placement: Position the ozone generator in the center of the room or area to be treated, on a stable, elevated surface (e.g., a table or chair). Ensure there is clear space around the unit for proper air circulation.
- Power Connection: Plug the power cable into the unit's power inlet, then into a standard electrical outlet (AC 110V-120V/60Hz).
- Area Preparation: Remove all people, pets, and plants from the treatment area. Close all windows and doors to contain the ozone.

Image: The ozone generator positioned on a table in a room, ready for operation.
5. Operating Instructions
Follow these steps for effective and safe odor removal:
- Clean the Room: Before ozone treatment, remove the source of the odors if possible (e.g., clean up spills, remove trash). Close all windows and doors. Ensure no people or pets are in the room.
- Set the Timer: Turn the 'Time Switch' dial to the desired treatment duration (0-120 minutes) based on the room size and odor intensity. For continuous operation, select 'HOLD'. If unsure, start with 15 minutes and adjust as needed for future treatments.
- Leave the Area: Once the timer is set, immediately leave the room and ensure it remains unoccupied. Place the provided 'No Entry' door hanger on the door as a warning.
- Ventilate: After the set time has elapsed and the unit has switched off, wait at least 30 minutes before re-entering the treated space. Open windows and doors to ventilate the area thoroughly for another 30 minutes to an hour to allow residual ozone to dissipate.

Image: A visual guide to the four-step ozone treatment process.
Recommended Operating Times:
The following table provides general guidelines for treatment duration based on room size. Adjust as necessary for severe odors or specific conditions.
| Area (Square Feet) | Recommended Time |
|---|---|
| 100 sq ft | 7 minutes |
| 200 sq ft | 15 minutes |
| 300 sq ft | 30 minutes |
| 400 sq ft | 45 minutes |
| 500 sq ft | 60 minutes |
| 1000 sq ft and above | 'HOLD' mode (monitor carefully) |

Image: A visual representation of recommended operating times for different room sizes.
6. Maintenance
Regular maintenance ensures optimal performance and longevity of your ozone generator.
Cleaning the Ozone Plate and Fan:
Over time, dust and debris can accumulate on the ozone plate and fan, reducing efficiency. It is recommended to clean these components periodically, depending on usage and environment.
- Disconnect Power: Always unplug the unit from the power outlet before performing any maintenance.
- Access Components: The fan cover and ozone plate are typically accessible by removing a few screws. Refer to the unit's design for specific access points.
- Clean Ozone Plate: Carefully remove the ceramic ozone plate. Use a dry cloth or a soft brush to gently wipe away any dust or residue. Do not use water or liquid cleaners.
- Clean Fan: Use a vacuum cleaner or a soft brush to remove dust from the fan blades and protective grille.
- Reassemble: Once clean, carefully reassemble the components, ensuring they are securely in place.
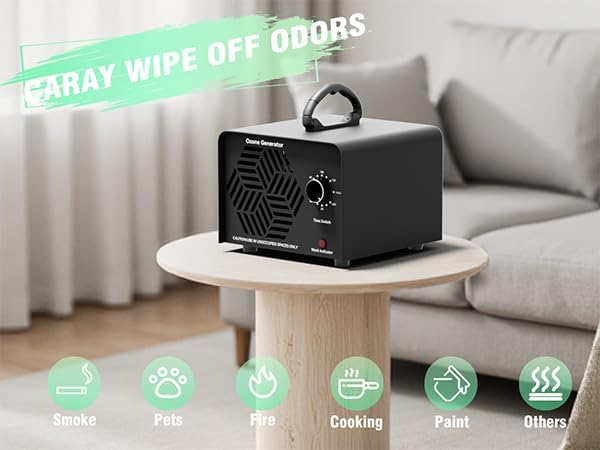
Image: The removable fan design allows for easy cleaning to maintain air flow.
7. Troubleshooting
If you encounter issues with your LANDNOR Ozone Generator, refer to the following common problems and solutions:
- Unit Does Not Turn On:
- Ensure the power cable is securely plugged into both the unit and the electrical outlet.
- Check if the power switch is in the 'ON' position.
- Verify the electrical outlet is functional by plugging in another device.
- Inspect the power cord for any visible damage.
- Weak Ozone Output / No Odor Reduction:
- The ozone plate may be dirty. Refer to the Maintenance section for cleaning instructions.
- Ensure the fan is operating correctly and not obstructed.
- The treatment time might be insufficient for the room size or odor intensity. Increase the duration or use 'HOLD' mode with caution.
- Ensure the room is properly sealed during treatment (windows and doors closed).
- Unusual Noise:
- Check if the unit is placed on a stable, flat surface.
- Inspect the fan for any obstructions or loose parts.
8. Specifications
Technical details for the LANDNOR AIR-001 Ozone Generator:
| Specification | Detail |
|---|---|
| Model Number | AIR-001 |
| Ozone Production | 60,000 mg/h |
| Power Supply | AC 110V-120V/60Hz |
| Power Consumption | 120W |
| Air Flow Volume | 110 CFM |
| Noise Level | <36 dB |
| Unit Weight | 4.85 lbs (2.2 kg) |
| Product Dimensions | 4.3"D x 5.6"W x 6.2"H |
| Timer Settings | 0-120 minutes or 'HOLD' mode |
| Coverage Area | Up to 6,000 sq ft |
| Service Life | Over 6,000 hours |
| Certification | FCC Certified |
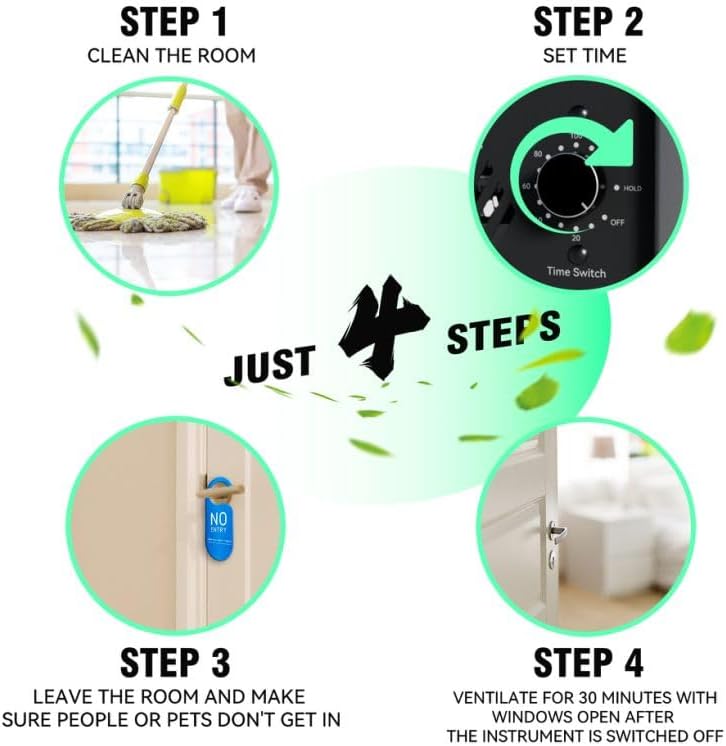
Image: Detailed technical specifications of the LANDNOR Ozone Generator.
9. Warranty and Support
LANDNOR provides a one-year extended warranty for this commercial ozone generator. This warranty covers defects in materials and workmanship under normal use.
For any questions, technical assistance, or warranty claims, please contact LANDNOR customer service. Please refer to your purchase documentation for specific contact details or visit the official LANDNOR website.