1. Product Overview
The SRN-1673S is a 16-channel Network Video Recorder (NVR) designed for surveillance systems, supporting up to 8MP resolution cameras. It features a built-in Power over Ethernet (PoE/PoE+) network switch, allowing direct power supply to connected cameras and simplifying installation. The NVR comes with a preinstalled 2TB Hard Disk Drive (HDD) for video storage and supports additional storage expansion up to 24TB across four front-accessible SATA ports. Video output to a monitor is available via HDMI and VGA ports. The system utilizes H.264 and MJPEG codecs for efficient video compression. Remote viewing is supported through a web browser or the iPOLiS mobile application.

Figure 1: Front and side view of the SRN-1673S NVR unit. This image shows the overall chassis design and ventilation on the side.
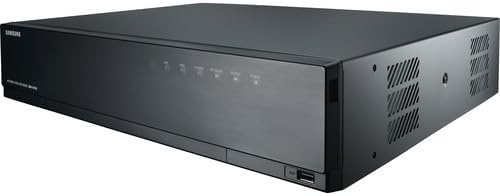
Figure 2: Front view of the SRN-1673S NVR, highlighting the front panel controls and a visible USB port for peripheral connections.
2. Setup and Installation
2.1 Unboxing
Carefully unpack the NVR and all accessories from the box. Verify that all components are present. The package typically includes:
- SRN-1673S NVR Unit
- Power Adapter/Cable
- Mouse
- Quick Start Guide (refer to this manual for detailed instructions)
2.2 Physical Connections
- Connect Cameras: Connect your IP cameras to the PoE ports on the rear of the NVR using Ethernet cables. The NVR's built-in PoE switch will provide power and data connectivity.
- Connect Monitor: Connect a monitor to the NVR's HDMI or VGA output port.
- Connect Network: Connect the NVR to your local network (router/switch) using an Ethernet cable for remote access and internet connectivity.
- Connect Power: Connect the power adapter to the NVR and then to a power outlet. The NVR will power on automatically.
- Connect Mouse: Connect the included USB mouse to a USB port on the NVR for local control.
2.3 Initial Configuration
Upon first boot, the NVR will guide you through an initial setup wizard. Follow the on-screen prompts to:
- Set up an administrator password.
- Configure network settings (DHCP is usually default, or set a static IP).
- Scan and add connected cameras.
- Set date and time.
- Format the preinstalled 2TB HDD if prompted (this will erase any existing data).
3. Operating the NVR
3.1 Live View
After initial setup, the NVR will display the live video feeds from connected cameras on the monitor. You can switch between single-camera view, multi-camera grid views, and customize display layouts.
3.2 Recording
The NVR supports various recording modes:
- Continuous Recording: Records 24/7.
- Motion Detection Recording: Records only when motion is detected by the camera.
- Scheduled Recording: Records according to a predefined schedule.
- Event Recording: Records based on specific events (e.g., alarm input).
Configure recording settings for each camera via the NVR's menu interface. The preinstalled 2TB HDD will store recordings based on these settings.
3.3 Playback
To review recorded footage:
- Access the Playback menu from the NVR interface.
- Select the desired camera(s) and date/time range.
- Use the timeline to navigate through recordings.
- Playback controls (play, pause, fast forward, rewind) are available.
3.4 Remote Access
The NVR can be accessed remotely via a web browser or the iPOLiS mobile app.
- Web Browser: Enter the NVR's IP address into a web browser on a computer connected to the same network. Follow instructions to install any necessary plugins.
- iPOLiS Mobile App: Download the iPOLiS app from your device's app store. Add the NVR using its IP address or QR code (if supported) for live viewing and playback on your mobile device.
Up to 3 simultaneous users can access the NVR remotely.
4. Maintenance
4.1 Hard Drive Management
Regularly check the status of the hard drive(s) through the NVR's system settings. If a drive fails or needs replacement, ensure the NVR is powered off before servicing. New HDDs may need to be formatted by the NVR before use.
4.2 Firmware Updates
Periodically check the manufacturer's website for firmware updates. Firmware updates can improve performance, add new features, and address security vulnerabilities. Follow the provided instructions carefully when performing an update to avoid system damage.
4.3 Cleaning
Keep the NVR unit clean and free from dust. Use a soft, dry cloth to wipe the exterior. Ensure ventilation openings are not blocked to prevent overheating.
5. Troubleshooting
- No Video Output:
Check: Ensure the monitor is properly connected to the HDMI/VGA port and powered on. Verify the correct input source is selected on the monitor. - Cameras Not Displaying:
Check: Ensure cameras are properly connected to the NVR's PoE ports. Verify cameras are powered on (indicated by LED on camera or NVR port). Check camera IP addresses and ensure they are within the NVR's network range. Re-scan for cameras in the NVR's camera management settings. - No Recording:
Check: Verify the 2TB HDD is installed and formatted. Check recording schedules and settings for each camera. Ensure the HDD is not full; if so, configure overwrite settings or add more storage. - Remote Access Issues:
Check: Ensure the NVR is connected to the internet. Verify network settings (IP address, gateway, DNS). Check port forwarding settings on your router if accessing from outside the local network. Ensure the iPOLiS app or web browser plugin is up to date. - System Freezing/Lagging:
Check: Ensure the NVR has adequate ventilation. Reduce the resolution or frame rate of cameras if the NVR's bandwidth capacity (80 Mb/s) is being exceeded. Check for firmware updates.
6. Specifications
| Feature | Description |
|---|---|
| Model | SRN-1673S |
| Number of Channels | 16 |
| Max Resolution | 8MP (Megapixels) |
| Bandwidth | 80 Mb/s (for camera video transmission) |
| Preinstalled HDD | 2TB (2000 GB) |
| Max HDD Capacity | Up to 24TB (4 x 6TB SATA HDDs) |
| Video Compression | H.264, MJPEG |
| Video Outputs | HDMI, VGA |
| PoE Ports | 16 (Plug-and-Play) |
| Audio | Input/Output |
| Remote Viewing | Web Browser, iPOLiS Mobile App |
| Simultaneous Users | Up to 3 |
7. Warranty and Support
For warranty information, please refer to the documentation provided with your purchase or visit the manufacturer's official website. Warranty terms and conditions may vary.
For technical support, troubleshooting assistance, or further inquiries, please contact your vendor or the manufacturer's customer support channels. Ensure you have your product model number (SRN-1673S) and any relevant purchase details ready when seeking support.


